READYMADE HOME FURNITURE
Easy Building Projects Made from Off-the-Shelf Items


Brimming with creative inspiration, how-to projects, and useful information to enrich your everyday life, Quarto Knows is a favorite destination for those pursuing their interests and passions. Visit our site and dig deeper with our books into your area of interest: Quarto Creates, Quarto Cooks, Quarto Homes, Quarto Lives, Quarto Drives, Quarto Explores, Quarto Gifts, or Quarto Kids.
© 2018 Quarto Publishing Group USA Inc.
10987654321
Digital edition published in 2018 eISBN: 978-0-7603-6163-4
The techniques shown in this book are general techniques for various applications. In some instances, additional techniques not shown in this book may be required. Always follow manufacturers’ instructions included with products, since deviating from the directions may void warranties. The projects in this book vary widely as to skill levels required: some may not be appropriate for all do-it-yourselfers, and some may require professional help.
Consult your local building department for information on building permits, codes, and other laws as they apply to your project.
CONTENTS
| Chapter/Project | Page |
|---|---|
| Introduction | 6 |
| The Hardware Store Primer | 8 |
| Creative Reinventions | 28 |
| Utility Organizer | 30 |
| Trim-and-Rope Mat | 36 |
| Copper Pipe Pot Rack | 40 |
| Countertop Wine Rack | 44 |
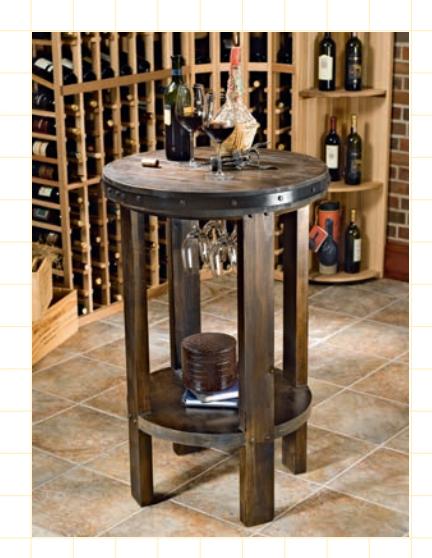
| Tasting Table | 48 |
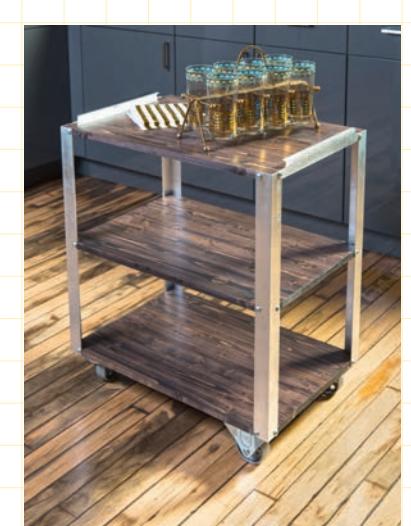
| Rolling Bar Cart | 54 |
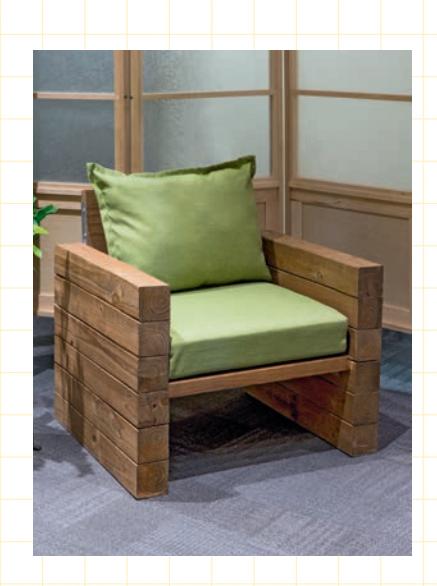
| Chunky Club Chair | 60 |
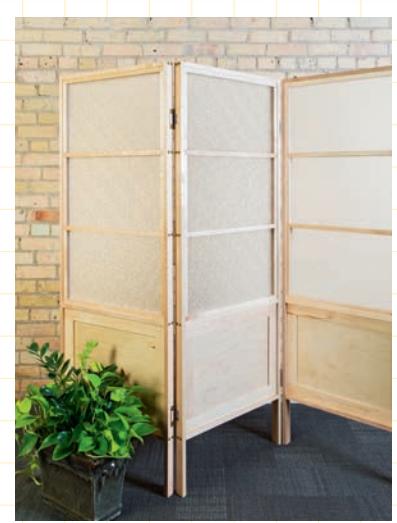
| Maple Molding Room Divider | 64 |
| Aluminum Sheet Lamp | 70 |
| Bedroom or Entryway Bench | 76 |
| Living Wall | 82 |
| Plant Stand | 86 |
| Five-Gallon Planter | 90 |
| Message Center | 94 |
| Birdhouse | 98 |
| Built-Ins from Stock Cabinetry | |
| Bed Surround | 106 |
| Closet Home Office | 110 |
| Custom Laundry Center | 114 |
| Compact Laundry Center | 120 |
| Hobby Center | 124 |
| Media Bar | 130 |
| Towel Tower | 134 |
| Crown Molding Shelf | 138 |
| Metric Conversion Chart | |
| Index | 143 |


Introduction
Why the endless fascination with hardware stores and home centers? Why are home craftsmen and craftswomen, and even the least experienced DIYer among us, drawn to the local hardware store as if in a trance? It doesn’t seem to matter if it’s a mom-and-pop operation crammed between the ice cream shop and pharmacy downtown, or the big box home center that has its own exit off the interstate. The allure is there regardless and even when you don’t actually need anything. But what is that allure? Just what is it about hardware stores?
The answer can be summed up into one word: possibilities.
Those possibilities come in two flavors—piece-by-piece and complete packages. A hardware store is actually a little like a well-stocked supermarket: you can buy all the ingredients you need to create something really wonderful that is completely yours, or you can buy an already completed creation. The “already completed” purchases, such as tool chests, lighting fixtures, and screen door kits, are certainly interesting and useful, but they are just one part of this book.
In fact, this book is about all the bits and pieces that can be put together in new and ingenious ways to create home furnishings and accents that are at once useful, fun, unique, and economical. That includes both fully complete structures like prefab cabinetry and materials that can serve as one component in a greater structure, such as vinyl or wood crown molding. This book is about recipes that make the most of all those bits and pieces you might find on a scavenger hunt in a home center and hardware store aisles.
And although the projects in the pages that follow may use home center staples in ways that they were never intended to be used, those projects don’t include arcane materials. Everything incorporated here can be found at any well-stocked hardware store. We’ve been careful not to include special-order items, or those that come in sizes not commonly stocked. The focus here is on fun, not frustration.
The emphasis is also on creativity. As you read through these projects and pick one or two (or more) to tackle in your own workshop, keep in mind that these are explicitly designed to be adaptable. You can change measurements to fit your own home spaces and needs, swap out different materials as appropriate and available, and finish your creations in a way that suits your own sense of style. Never fear to customize any of these. Of course, you can always craft them just as intended. The designs have been developed to suit a wide range of interior styles and looks. Although it’s the nature of hardware projects to look more industrial than traditional, all the projects are meant to be subtle enough that you don’t have be a fan of steampunk to appreciate the looks.
These projects are also designed with the novice in mind. None require specialized expertise or tools, and they can all be built with just a modicum of attention to detail, patience, and elbow grease—resources every homeowner has at his or her disposal.

Every aisle in a hardware store offers the promise of some new, ingenious creation just waiting to be designed and built.
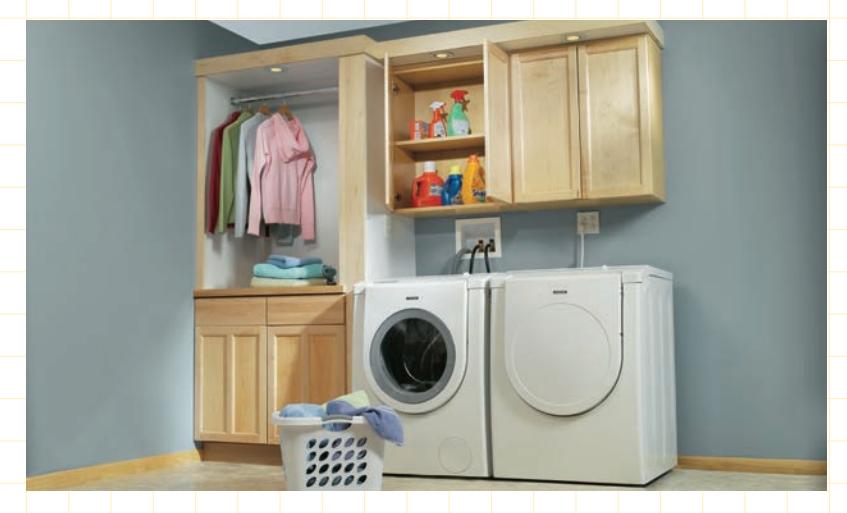
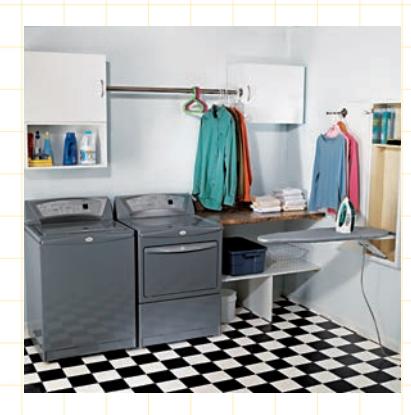
Beyond the design styles, the lineup of projects has been developed to include something for every room in the house. It doesn’t matter if you’re looking for a new workspace in the corner of a guest bedroom, a totally organized all-in-one structure for your out-of-control laundry room, or even a sturdy arm chair that can do your living room proud and find a home on the patio as well—you’ll find all that in the pages that follow. Oh, and much, much more.
So pick a creation that meets your needs and preferences, and then use it as an excuse for yet another trip to your local, oh-so-appealing hardware store (or a lost Saturday afternoon in that home center down the way). Fun and home improvement satisfaction in equal measure await you in those aisles.
The Hardware Store Primer
Mixing and matching home center or hardware store materials in interesting and useful projects requires an understanding of the basics in each aisle, all those materials that could go into making any project successful. It also means knowing what tools are best for the job at hand and how best to use them. The projects featured in this book require a balance of creatively combining dissimilar materials with tried-and-true construction methods that will ensure the integrity and longevity of anything you build.
The best materials for these types of projects are durable, resistant to wear and abuse, and easy to modify. Although there are obvious candidates that pop out at you in any tour of a home center—wood shelving, cabinetry, common fasteners, brackets—it’s wise to keep your eye and your mind open to more unusual choices that can fill the bill. You’ll probably be surprised at where your imagination leads you. For instance, PEX pipe could be used to craft a funky and eye-catching spiral tomato cage for the garden, or as a decorative accent on a larger project. Go down every aisle in the hardware store with fresh eyes and no preconceptions and you’ll be surprised how many possibilities become apparent.
No matter what materials might go into what you’re building, they have to be put together in a way that makes structural sense. When it comes
to creating stable, lasting, and safe projects for the home, proper fastening is key. That’s why we start here with the hardware that holds other pieces together.
FASTENERS
There are many, many ways to fasten one part of a project to another, and any decent hardware store will stock most all of them. Picking the best fastener and fastening method is crucial to the security and integrity of whatever you build. The method you choose will be dictated by whether you’re joining like materials, or completely different bits and pieces, the inherent stresses in the design, the use for which the project is intended, and other factors.
Nails and screws. Nails are easy to use, hold fairly well, and are available in a vast number of sizes, types, and styles to suit a wide range of applications. However, screws are more precise, provide greater longevity, and are easier to remove without damaging project materials. That’s why although finishing nails are still the best choice for many basic wood-to-wood joints where appearance is very important, screws will inevitably be the better option for the type of projects featured in this book. The challenge is selecting exactly the screw that will do the job best; there are an awful lot of types from which to choose.
Screw Types
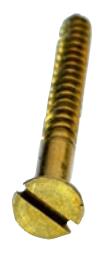
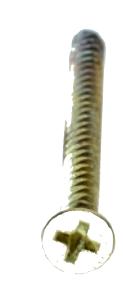
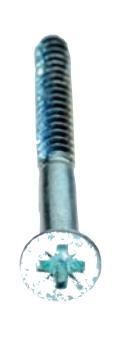
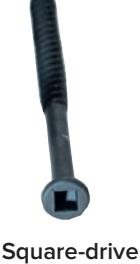
screw head”)
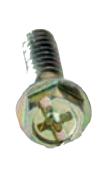
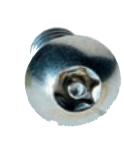
Slotted Phillips Pozidriv® (Robertson) Hex-drive Torx
Drywall screws are an all-purpose, popular go-to option for many home craftsmen working on their own creations. Problem is, they strip easily and can be hard to drive into certain materials and situations—not to mention their tendency to snap when driven into dry lumber. It seems like there has to be a better all-purpose fastener.
These days, there is. Even small hardware stores now stock wonderful modern screw alternatives. Known generically under their brand names such as Spax and GRK, these fasteners feature innovative designs that have redefined what multi-application screws can be. Most feature Torx-drive or Pozidrive heads, styles that are far less likely to strip than Phillips or standard slothead screw designs. These screws are specially designed with threads that alleviate the need for pilot holes and, in some cases, for countersinking. Torx heads have a distinctive star-drive head, while Pozidrive features a sturdier version of the Phillips head; both are incredibly strong gripping.
Regardless of the type of screw you choose, size matters. As a general rule of thumb, any screw should penetrate at least half the thickness of the material serving as the base. Screws are also organized by thickness or gauge. Gauges range from #2 to #16: #8 is the most common and the most useful in the type of general construction used in the projects here. However, #12 is a good choice if you’re using especially thick or heavy material, and finer work may call for #6. The screws are categorized by length within the gauges.
Nuts and bolts
As long as both sides of the material being fastened are accessible, a nut and bolt can be a super-solid, permanent way of joining even very dissimilar materials. However, bolts are generally more awkward to work with than screws. There are different styles of bolts with different head shapes, but most are clunky and apparent, which can make them a poor choice for applications where looks matter (unless
Machine Bolts
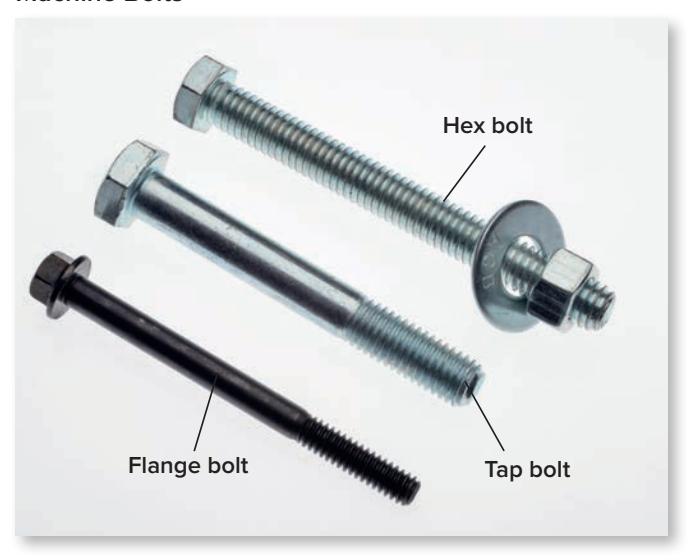
you’re going for an industrial vibe). The projects in this book rarely use these types of fasteners.
Glues and adhesives
For such a simple concept—a liquid that dries to bond two material surfaces together—there is an incredible diversity of adhesives available inside even the most modest hardware store. In most structural situations, adhesive or glues are not used alone; the holding strength just isn’t as great as a physical connection such as a screw. Most adhesives are also inefficient or completely incapable of bonding dissimilar materials. That said, they have their place in some projects.
Wood glue is a handy option for wood-to-wood bonding. You’ll find three grades of wood glue: Type 1 that is applicable for interior and some mild exterior uses (some level of water resistance); Type 2, for exterior applications; and Type 3, which is meant for interior use only. As the name implies, wood glues are not very good at bonding wood with plastics or metal. For that, you’ll need a more versatile adhesive.
Cyanoacrylate is a class of multi-purpose glues that works on many different materials
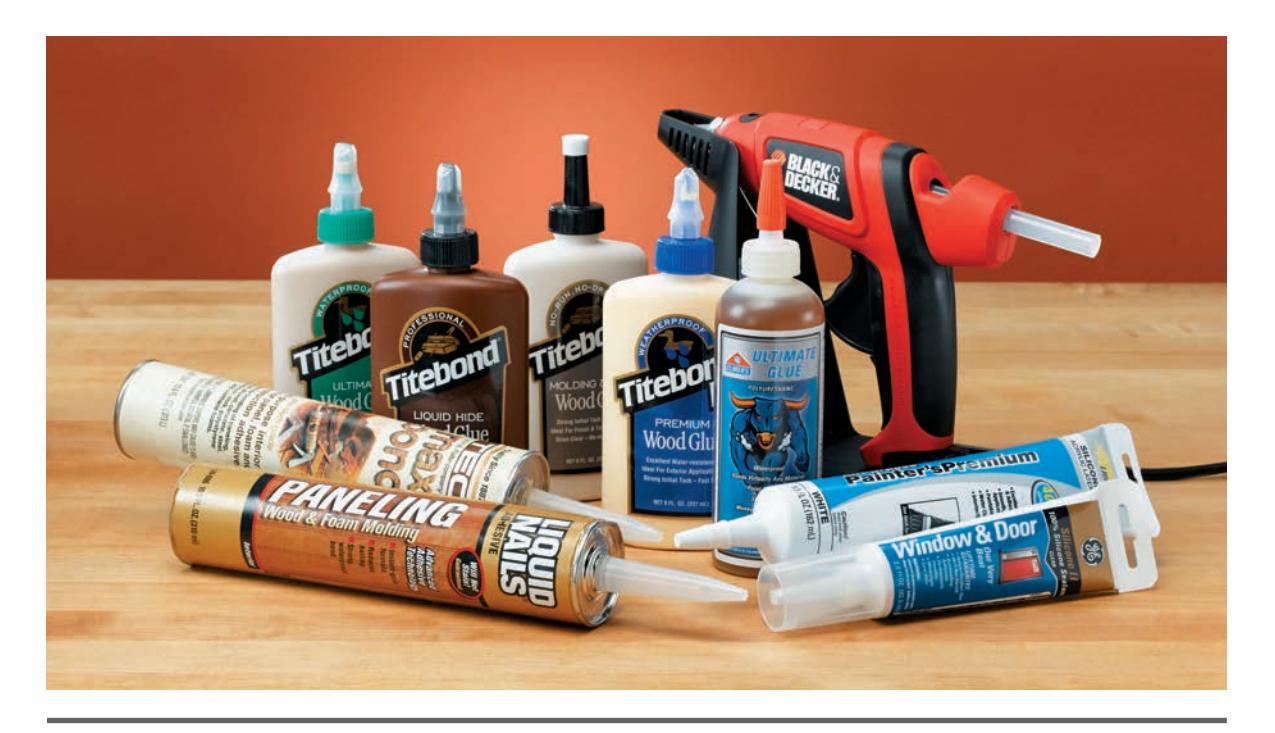
Some of the adhesives useful in home carpentry include carpenter’s wood glue, exterior carpenter’s glue, liquid hide glue, polyurethane glue, panel adhesive, latex caulk, silicone caulk, and a hot glue gun with glue sticks.
(although the holding strength varies, depending on the material being bonded). The most common of these is known generically as super glue. Cyanoacrylates can be effective over small surface areas, but are not regularly used in projects such as the ones in this book. That’s because they are tricky to work with; they set quickly and are difficult to clean up or remove once they dry and cure. They also have a minimal shelf life—about one year unopened.
Epoxies are some of the most useful adhesives. Most are two-part formulas that require speed and precision to use, but provide superior holding strength. Some can be used as gap fillers, and epoxies can be good choices for bonding dissimilar materials.
Polyurethane glues are interesting modern choices for eclectic projects. Initially hyped as the ultimate construction glue, polyurethane products may not totally live up to the hyperbole, but they do offer a lot of advantages. They are usually used in wood-to-wood mating, are sandable and stainable, and have impressive holding strength. They can also be used to fill gaps.
Construction adhesive is a general-purpose product meant to hold varying materials together, such as sticking vinyl molding to wood board. You’ll find subtypes like panel adhesive, meant for what the name denotes. These aren’t, however, the best choice for pure strength and long-term holding power when it comes to projects like furniture. Any type of construction adhesive is more often used as in tandem with another method of fastening, such as screwing or nailing.
Certain guidelines apply regardless of the adhesive you’re using. Unless you’re completely familiar with the glue or adhesive, always test it first on scraps of the materials you’ll be bonding. Be clear on the proper cleanup method for the adhesive, and read and follow all safety recommendations. Before you use an adhesive,
make sure the surface is clean of dirt, grease, or any debris such as sawdust. Any adhesive bond is reliant on full and unimpeded contact with connecting surfaces.
Zip ties
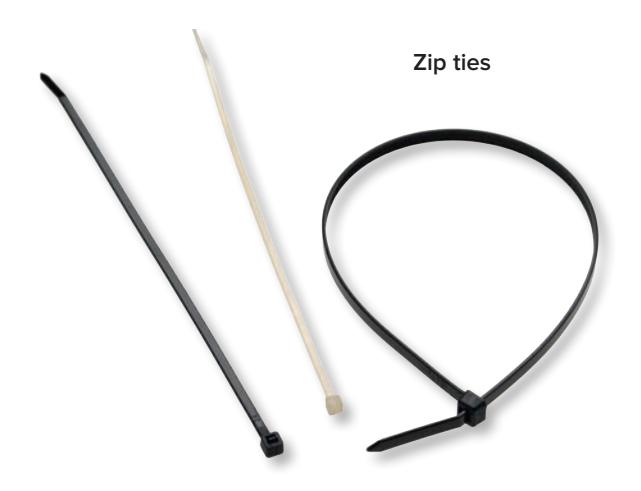
These are handy, if somewhat unattractive, fasteners best used for materials of unusual shapes that need to be secured together (like pipes crossing in an X or a T). Zip ties come in a full range of lengths and, even though they are incredibly strong, it’s easy to cut them with a sturdy pair of scissors. They are simple to use, don’t degrade, and they will tolerate shifting and various stresses and strains over time. They are not, however, as useful or convenient for bonding one surface directly to another as other options.
Joining Specific Materials
Every material is most easily bonded with similar materials. But there are chemical and physical ways to join dissimilar surface materials.
Plastic
Plastic-to-plastic bonds are often made with adhesives because there are so many bonding agents to choose from. The table below lists the best.
Keep in mind that unlike wood, plastic is not one type of material—there are actually many different plastics. This complicates bonding any given plastic surface. For instance, PVC pipes are fastened to other PVC pipes with cement, but the correct cement must be used; there are different types for PVC, CPVC, ABS, and different schedules of plastic pipes (and, unfortunately, the tins they come in all look the same). That’s why it is especially important to put on the reading glasses when shopping for adhesives for plastic, and closely follow the recommendations and instructions on the label.
| A SHORT AND QUICK PRIMER TO PLASTIC ADHESIVES | ||
|---|---|---|
| ADHESIVE: | IDEAL USE: | DRAWBACK: |
| Epoxy | Strong permanent bond; anywhere user control over hardening is desired; holds in wet conditions | Messy and requires precision |
| Cyanoacrylate | Stationary parts; low torsional resistance | Outdoor use; bond will weaken under repeated extreme temperature swings |
| Acrylic Adhesive | Exceptional bonding strength similar to epoxy | Fast acting, little room for error |
| Solvent Cement | Only on plastic-to-plastic mating; permanent, unbreakable bond | Have to match proper solvent to type of plastic; will not work with other materials |
| Urethane | Wherever flexible bond is desired; great for mating plastic to other materials | Weaker than other adhesives, never hard; can be a challenge to cure correctly |
Metal
Walk down any hardware store aisle and you’ll come across many different types of metal. Expanded metal sheet. Sheet metal joist hangers. Iron L brackets. Diamond plate. All of these can be handy in reinforcing a project. Joining one to another can be done quickly and permanently by high-temperature welding. But let’s face it: welding is dangerous, complicated, technical, and won’t work for certain dissimilar metals. Not to mention, most people don’t have a welding rig parked in the corner of their garage. That’s why none of the projects in this book mention welding.
In the vast majority of cases, the easiest way to attach metal to any material—including another metal surface—is physical fastening. That means screwing or bolting the pieces together. You’ll find more on metal-drilling bits on page 17.
Wood
Joining wood to wood is one of the most common steps in home DIY projects. Wood is naturally an accommodating material: cheap and easy to modify. Wood can be laminated to other wood with wood glue, a combination of glue and fasteners, or fasteners alone. Although they can be very handy in situations where the wood will not be subjected to extreme torsional forces or rough handling, wood glues are not among the stronger adhesives and many are not even waterproof.
Rubber
Rubber components can be tricky. Rubber washers and pads can be used in projects to counteract potential vibrations—in which case, the rubber will be screwed or bolted to other materials and surfaces. Where the rubber surface is meant to be both structural and decorative, gluing the rubber down may be preferable. Choose an adhesive based on the material to which you’re attaching the rubber. In general, use a silicone-based adhesive when joining rubber to metal; use a contact or spray adhesive when joining rubber to plastic or wood.
Fabric
Some projects involve adding fabric panels to a frame or other structure. Fabric can be a wonderful way to personalize a project or add an unexpected look. You’ll find some fabrics that will tolerate exposure to the elements, so you can even use them on outdoor projects. There are several ways to secure any fabric in place. Grommet kits are widely available at home centers and hardware stores, are inexpensive, and often include everything you need—the tools as well as the grommets. The kits are simple to use. They involve punching holes along one edge of a fabric panel or sheet, and then reinforcing the holes with metal grommets. The panel or sheet can then be hung or attached to a frame with paracord, twine, cable, or specialized hangers. There is also a quicker, less formal way to attach fabric to a tubular frame. Snap clamps are simple plastic sections that clamp over pipe or thick dowels, and can be used to hold fabric in place.
Specialized materials
Adding stone surfaces or oddly shaped pieces to a project usually requires a creative approach. That’s where many of the small bits and pieces to be found in the aisles of a home center come into play. For instance, flat, slotted angle irons can be used as support brackets in tandem with bolts and wing nuts to hold a piece of a project in place. It all comes down to adapting a creative solution to any challenge that presents itself.
SECURING PROJECTS TO A WALL, FLOOR, OR OTHER SURFACE
Some projects are designed to be attached to walls, floors, or both. An example is the Utility Organizer on page 30, which would be unwieldy and take up much more floor space if not wall mounted. Other projects should be anchored to the floor or wall to keep them from moving, or make them appear built in, as is the case with the Media Bar on page 130 and the Hobby Center on page 124.
The most stable wall attachment requires finding a stud. Accurately locating studs is an incredibly useful home improvement skill, especially in this modern age of wall-mounted flat-screen TVs and floating shelves that rely on solid connections for their integrity.
To find a stud, you can do the basic “knock” test, by rapping on the wall and listening for the hollow echo of the cavities in between studs.
THE TOOL AISLE: STUD FINDER SHOPPING GUIDE
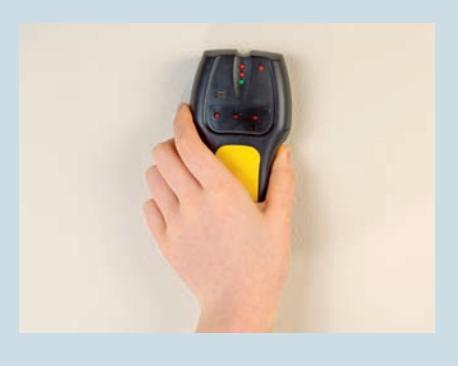
A stud finder is a handy addition to any homeowner’s toolbox, one that requires virtually no skill to use. Prices range from a few dollars to upward of $65. Extra cost buys more reliability, accuracy, digital versus analog performance, and added features.
- Detection. What your stud finder can detect is a product of how much it costs. Buy a bargain stud finder and you’ll only be able to detect wooden studs (and sometimes not even those, reliably). Spend more and you not only increase the accuracy of the stud finder, you may also be able to find the center of the stud. The most expensive and full-featured units offer reliable detection of unshielded wiring and pipes—as well as determining if pipes are copper or iron. If you’re going to be using the stud finder a lot, the ability to detect underlying plumbing and wiring (and avoid any attendant mishaps) is well worth the additional cost.
{alt=”Various types of stud finders with different features and price points”}
- Level. The three types of level offered relate to the price point of the tool and are the following (from lowest to highest priced): basic bubble level, electronic level, laser level.
- Screen. The most basic stud finders have no readout other than magnetic pointers that indicate you’re over a nail and a bubble level. More sophisticated options in the middle of the price range will have a series of LED lights that light up or go out the closer or further you get from the center of the stud. Models at the high end have LED screens that approximate what is beneath the wall surface—including differentiating between studs, wires, and pipes.
- Calibration. Mid-level and high-priced stud finders must be calibrated. This is a process through which the stud finder determines wall thickness and it sets the tool up for success. If your stud finder has a calibration feature, follow the manufacturer’s instructions exactly to ensure that the stud finder operates as accurately as possible.
- Extras. The more you spend, the more comfortable the stud finder will be to use. Special grips allow the finder to be held and slid along the wall more easily. Use your judgment as to whether that matters to you. Some stud finders include a “marking” slot or channel, which makes marking the location of screws or hangers especially accurate and easy. Some higher-end units include audible signals that reinforce the visual readout. Generally speaking, these don’t add much to the actual accuracy and usefulness of the tool.
However, that is an imperfect method that leads to mistakes more often than not. You can also look closely at baseboard or crown molding, to detect marks where the finish nails were puttied over.
That, too, is a rather unreliable method. That’s why the best way to locate studs is to head over to the tool department of your local hardware store and start shopping for a stud finder.
Any stud finder is easy to use (although you should always follow the manufacturer’s instructions). Turn the unit on unless it is a basic, non-powered model. Calibrate the stud finder if it has a calibration function, then simply move it slowly side to side on the wall until it registers a stud. Mark the location and move onto the next stud as necessary.
Selecting and Using Anchors
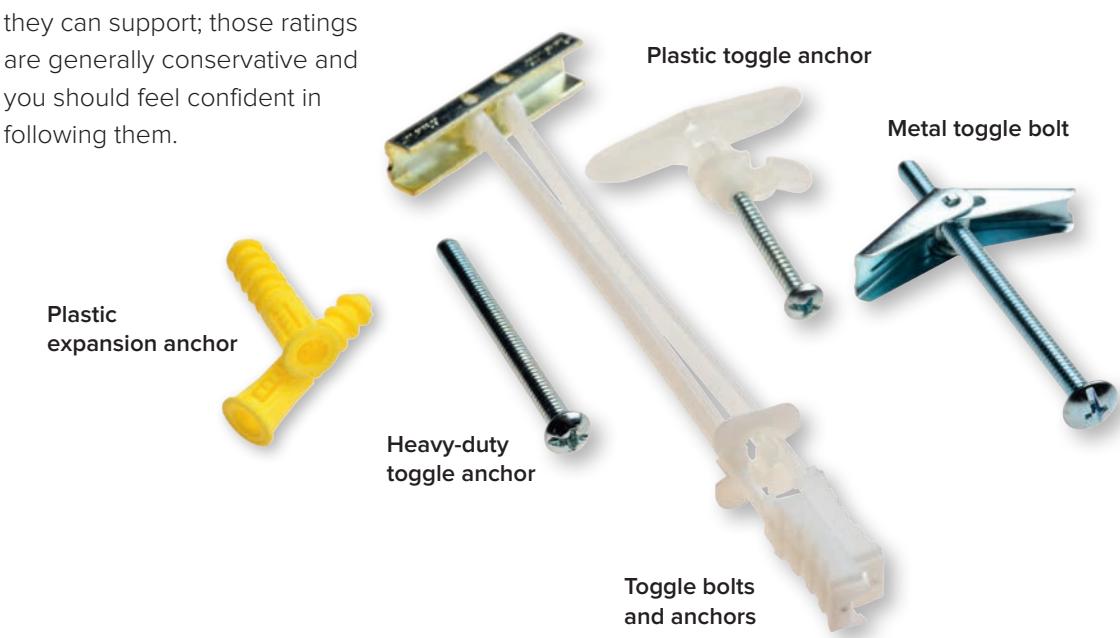
Sometimes, fastening to a stud just isn’t possible. In those cases, you’ll turn to the super useful hardware store staple: the wall anchor. There are many different kinds, all of which can be grouped into two basic categories: Expansion anchors and hollow cavity anchors. Expansion anchors rely on friction to hold them in place and are—depending on the type of anchor and wall—somewhat less secure, reliably holding less weight. Anchors of all types are rated for the weight
Plastic expansion. These are the simplest, cheapest, and weakest anchors. They should be used only for lightweight hanging, such as pictures. A hole, slightly smaller than the thickest diameter of the anchor, is drilled into the wall and the plastic anchor is pushed or tapped into the hole. When a screw is driven into the anchor, it expands the plastic sides, helping them grip the wallboard.
Threaded. These look like screws, with oversized threads and long tips. You’ll find both metal and plastic threaded anchors, but do yourself a favor and avoid the plastic (actually, nylon) versions, which tend to collapse or deform under pressure and can be difficult to remove. To install a threaded anchor, drill a small pilot hole, and then screw the anchor into the wall surface as you would a screw. Threaded anchors are stronger than expansion types and are easier to remove.
Toggles and winged. Both of these use “legs” that open once the anchor is put through wallboard or any wall surface with a cavity behind it. In the case of toggles, the anchor is pushed through a pre-drilled hole and then the legs are spread as the bolt is removed from the anchor. Winged anchors don’t have a resident bolt. Instead, they are pushed through a hole and, when
{alt=”Different types of wall anchors including plastic expansion, threaded, toggles, winged, and molly bolts”}
a screw is driven into the anchor, wings at the base spread to hold the anchor in place. These types of anchors offer a great deal of holding power but are extremely difficult to remove.
Molly bolts. The strongest of anchors, the molly bolt is tapped into a predrilled hole. Once the teeth on the molly have taken hold, the bolt is backed out expanding the legs of the molly behind the wall surface and holding the anchor tightly in place. Some mollys are meant to be tapped through a small guide hole (they have a pointed tip), while others are meant to be driven through a full-sized hole.
Perfect Drilling
On the surface, drilling looks like one of the easiest techniques in the workshop. But there are a lot of ways basic drilling can go wrong. The key is to use the right bit, securely hold the piece being drilled, and drill pilot holes in most cases.
Pilot holes help guide fasteners and, in the case of joining two pieces of wood, pilot holes can protect against splitting or splintering, and may even stop small screw breakage. Predrilling also prevents small, unseen cracks that can lead to joint failure down the road. As a general rule of thumb, a pilot hole should be about equal to the fastener’s minor diameter. In the case of a screw.
PILOT HOLE DIMENSIONS FOR COMMON SCREW SIZES
| #6 | 3/32” |
|---|---|
| #8 | 7⁄64” |
| #10 | 1/8” |
| #12 | 5/32” |
that means the diameter of the shaft without the threads. For nails, it means 1/64 inch less than the diameter of the nail.
As you work on different projects or adapt the designs to create your own, you may need to drill holes to join pieces at unusual angles, to hide fasteners, or make parts of the design adjustable. Jigs and templates can help you do all those things, and basic types of both can be found in most hardware stores. In particular, pocket hole jigs (commonly known by the brand name Kreg) can be a wonderful hardware-store find. Inexpensive and easy to use, these allow you to make a hole and drive a screw through the face and edge of one board at a 45-degree angle, into the face of another board or member of another material (joining perpendicular surfaces). Pin templates are also useful, allowing you to quickly and accurately drill a grid of holes to, for instance, allow a shelf inside a bookcase to be adjusted with dowels or pins.
- A Twist bit (coated)
- B Spur-point bit
- C Brad-point bit
- D Masonry bit
- E Spade bit
- F Ceramic tile bit
- G Twist bit (brass)
- H Twist bit (high-speed steel)
- I Spade bit (metric)
- J Step bit
- K Countersink bit
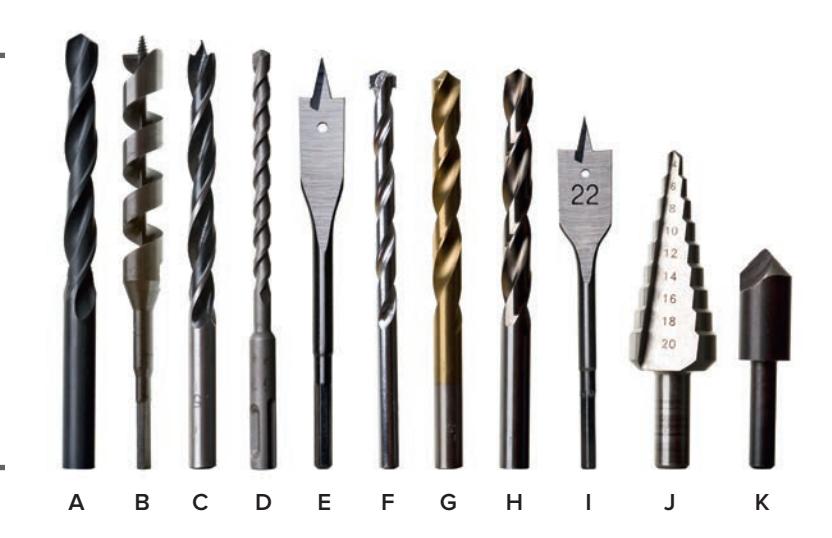
{alt=”Eleven different types of drill bits, including twist, spur-point, brad-point, masonry, spade, ceramic tile, step, and countersink bits.”}
THE TOOL AISLE: POWER DRILL SHOPPING GUIDE
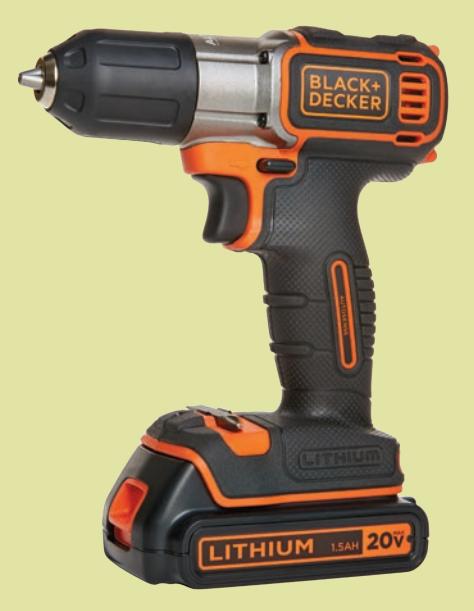
Although you can still buy a corded electric power drill, most shoppers opt for a cordless power drill that offers greater convenience and every bit as much power as corded models. Drill technology has advanced quite a bit over the years, and manufacturers now pack a lot of power in a lightweight package, crafting tools that are comfortable to use and get the job done with little fuss or muss. Here are the top factors to keep in mind when considering a new drill.
Choosing the Right Drill
- Size. The first consideration in picking a drill that will meet your DIY needs is size. Power drills come in ½”, ¾”—and, far more rarely, ¼”—sizes. The size simply determines how big a drill bit the drill can accommodate. The 3/8” drill is the most common size for general home use, although you won’t go wrong with a ½” drill.
- Power. You’ll find cordless drills ranging from 6 volts up to monster units boasting 36 volts. Drills rated from 12 to 16 volts are the most common for use by homeowners.
- Batteries. You’ll want to select a drill with batteries rated for the longest charge and quickest charging time, while still being within your budget. Of course, this isn’t a worry if you’re opting for an old-school corded model.
- Speed. The speed of the drill is rated in rpms, and the faster any drill is, the quicker and more efficiently it will drill. But, of course, that also means the quicker it will drain the battery. Home-use drills rated between 500 and 1,500 rpms are the most common. Choose one based on the type of drilling you anticipate doing; small odd jobs call for a lower rating, but if you’re an avid craftsperson who tackles complex projects, go high speed.
- Weight. Seem like a non-factor? Wait until you spend the better part of an afternoon drilling joint holes and cabinet peg holes. A heavy drill can wear your arm out and be unpleasant to use. On the same note, check out any drill before you buy it, to ensure the grip suits your hand and the balance seems comfortable to you. Drills last a long, long time and an uncomfortable one will make home projects a lot less pleasant.
Given how far cordless drill technology has come, there are certain must-haves you should seriously consider when shopping for a cordless unit.
- Autoshift feature. This handy option automatically sets the speed and torque that is best for the drilling being done, saving battery life, frustration, and poor results.
- Comprehensive drill package. In addition to the drill, it’s wise to buy one that comes packaged with charger, extra battery, a full set of bits, and a rugged drill carrying case that will hold up to bouncing around in the back of a pickup or the occasional drop onto a garage floor.
- Lithium-ion batteries. These are head and shoulders above any other battery for cordless drill use.
Useful Bits
If you’re tackling projects like the ones in this book, you will inevitably be dealing with assemblies that combine different materials. The right drill bit can make all the difference in joining those dissimilar pieces securely and quickly.
- HSS (High-Speed Steel) bits. These not only make quick work of holes in wood, but they are also excellent at drilling PVC pipe, other types of formed plastic, fiberglass, and soft metals such as aluminum. Titanium-coated HSS bits are even tougher, creating less friction and staying sharper longer than regular HSS bits.
- Cobalt bits. The tough nature of cobalt bits make them ideal for drilling even tough metals, like stainless steel or diamond plate.
- Carbide-tipped bits. Although these are some of the priciest drill bits, they are also the toughest and can drill not only wood, but masonry as well.
- Step bit. Shaped like a terraced cone, these are meant specifically for drilling through thin sheets of metal.
- Countersink bits. Adding a polished look to any wood or melamine surface, countersink bits drill both the primary hole and countersink the top of the hole to allow the fastener head to sit flush with surface.
- Hole saws. These are used to cut large, perfectly round holes in metal or wood.
Precise Cutting
Fabricating projects from different materials inevitably means cutting those materials to suit your needs and the dimensions of the design. Any hardware store worth its salt offers a range of hand and power tools to do the job.
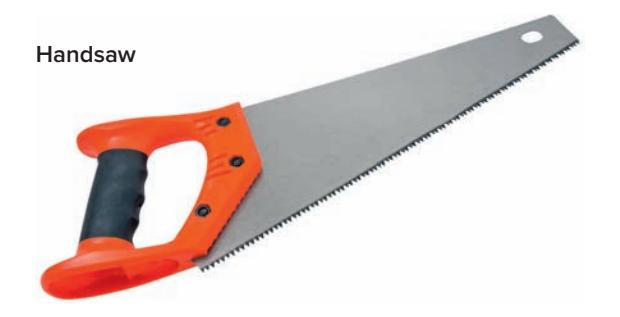
- Handsaw. Handsaws are inexpensive and easy-to-use alternatives to powered saws, but you need to select the right one for the cutting you intend on doing the most (or buy more than one to accommodate different situations). You’ll also have to be prepared for a hefty workout, even on small projects. Rip saws are rough-and-tumble options for crude cutting of large pieces. They move quickly and easily through most wood, but tend to leave a very rough edge. They are best used to rip with the grain of the wood. Crosscut saws cut across the grain of the wood and require more work to make the cut, but also leave a smoother, finer cut edge. Panel or box saws are cross-cut saws meant for finer work (they’re shorter than standard cross-cut saws). Back saws have the greatest number of teeth and are consequently intended for fine woodworking.
TOP TIP: You can create a simple drill-bit depth gauge by wrapping the bit with a band of painter’s tape at a point that matches the desired hole depth.
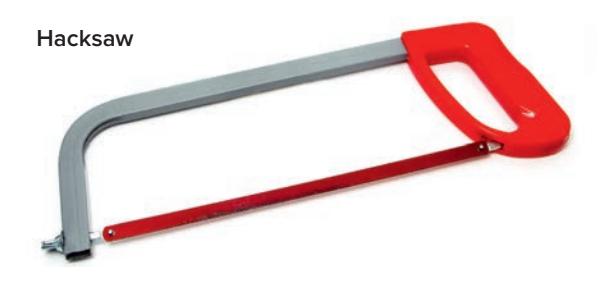
- Hacksaw. The beauty of a hacksaw when dealing with different materials is that you can quickly change the blade to suit the material or the type of cutting you need to do. There are general hacksaw blades, metal-cutting blades, fine woodworking blades, and more. The downside is that they can take quite a bit of effort to cut through something like metal, and the handle design can impede access in certain cutting situations.
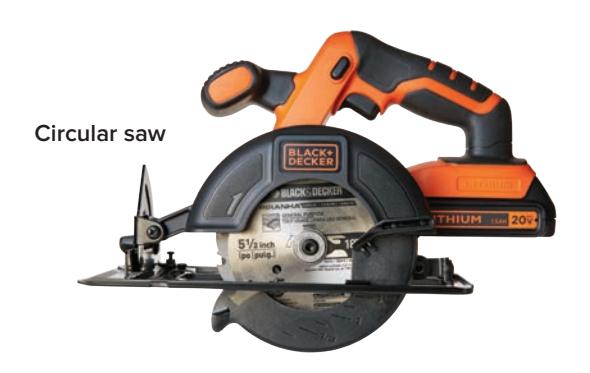
- Circular saw. The word that epitomizes a circular saw is versatility. Fit with the appropriate blade, a circular saw can cut wood, metal, and even masonry. The saw is handheld, which makes it convenient for cutting project materials quickly on site, with little fuss. But used with a jig or guide, a circular saw can also make the long or fine cuts you’d expect to make on a table saw.
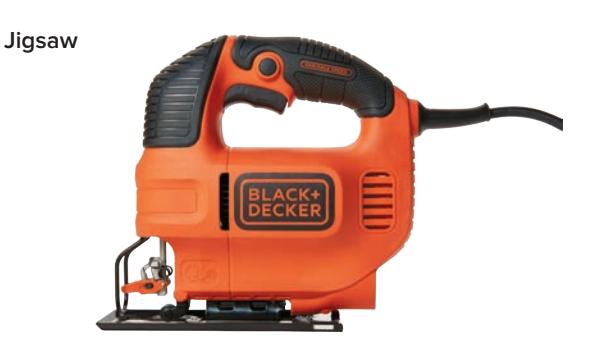
- Jigsaw. Perhaps best known as the go-to tool for curved cuts, jigsaws can also be used for straight cuts. However, they won’t be as accurate or efficient as a circular saw on straight lines, unless you use a guide and are very careful. Even then, the cuts can be jagged. Like most other powered saws, a jigsaw can be fit with a range of blades available at any well-stocked hardware store, including those meant for cutting stone, ceramics, metal, and plastic.
-
Reciprocating saw. This monster is the sledgehammer of saws. A reciprocating saw can make quick work of any wood or metal cutting task. This saw is big and powerful, with a projecting blade that makes its reach impressive. However, reciprocating saws are rarely used for fine work, or where the cut line will be sanded and visible in the finished project. The truth is, for most project work, a reciprocating saw is overkill.
-
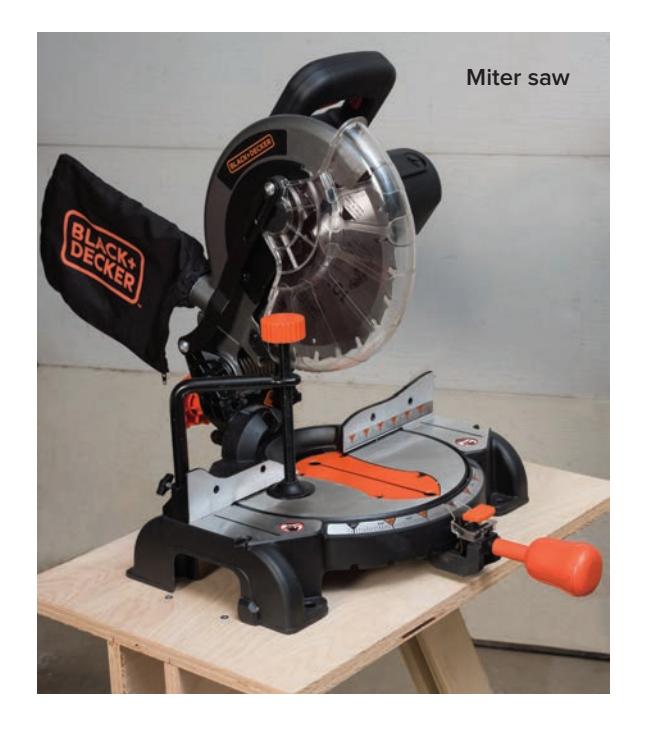
Miter saw. Sometimes called chop saws, miter saws are essentially circular saws mounted on a platform. The mount can be adjusted to hold the saw at a predetermined angle for miters modest to severe. They are fairly portable and are incredibly handy for small-piece cutting—especially for mitered joints. However, these are not effective for cutting unwieldy pieces, such as a sheet of plastic or sheet metal. Any especially wide piece may be simply impossible to cut with the saw.
-
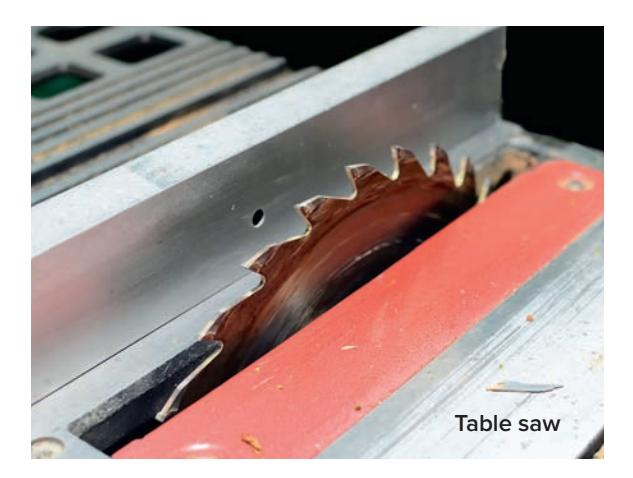
Table saw. Table saws can be quick and efficient at cutting project pieces, especially multiples. A table saw does have its limitations, though. Even small table saws can’t really be considered portable. Changing blades can be an involved process for cutting plastic or metal, and some sheet goods will be difficult to maneuver on the table. They are also expensive and require a great deal of power.
Choosing a Saw Blade
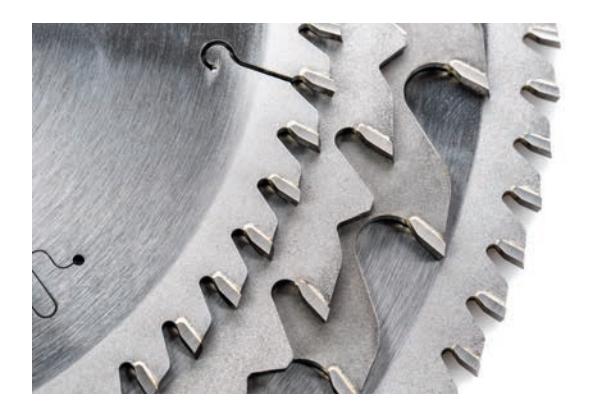
The number and shape of teeth on a saw blade determine how fine and fast a cut it can make.
The type of saw is just one part of the project fabrication equation. You’ll also need to use the right blade to achieve the best cut with the least effort. In general, the number of teeth on any saw blade will determine how fast and clean the blade will cut, and what type of cut it will be capable of making. The more teeth, the finer the cut, with less splintering or other defects. Rip cut blades are meant to make rougher cuts along the length of the wood, and consequently have fewer teeth. Crosscut blades make finer, less aggressive cuts across the grain of the wood and will typically have two or more times the number of teeth that a similar rip cut blade would. (All this holds true whether the blade is cutting plastic, metal, or wood.) Combination blades are a good compromise and an excellent choice for general project work because they can rip and crosscut stock. You can also turn to specialized blades for those moments when you need to get through a bit of sheet metal or a cinderblock.
- Diamond blades, sometimes sold as continuous-cut blades, are a type of circular blade meant for cutting stone and ceramics. Depending on the individual blade, it may be intended for dry work, wet work, or both.
- Turbo blades and segmented blades are types of diamond blade (with serrated rim and gulleted rim, respectively). The blades are used for cutting brick and concrete. Although the finished cut won’t be as polished, most other blades would have a hard time making it through these materials.
- Abrasive blades have a continuous rim rather than individual teeth. The rim is coated with a specialized cutting medium—usually aluminum oxide or silicone carbide—that make these ideal for cutting through metals.
Making the Cut
Regardless of the saw and blades you choose, you’ll want to make the cleanest cut possible. That starts with precise cut-line marking. The clearer the cut line, the more likely you’ll follow it precisely. Use a straightedge and a marker that will visually stand out against the surface of whatever material you’re cutting.
Prevent splintering or other defects when cutting wood or concrete by laying down a strip of painter’s tape along the proposed cut. Mark the cut line on top of the tape, and score the cut line with a utility knife. Saw right through the tape and the score line for an extremely clean cut.
Cutting Around
Depending on the hardware store project you’re tackling (or have designed yourself), you may have to cut unusual shapes, such as square or round tubes. Here’s an easy way to accurately mark and make clean cuts on continuous shapes like pipe and tubing.
What You Need:
- Pipe
- Measuring tape
- Non-permanent marker or grease pencil
- Strip of stiff cardboard
- Masking tape
- Cut a strip of stiff cardboard from a box (the cardboard should be flexible enough to bend into a circle without crimping). The strip should be significantly longer than the diameter of the pipe you’re cutting. Make sure that at least one edge of the cardboard is perfectly straight.
- Wrap the cardboard around the pipe, lining up the straight edge with the cut mark. Overlap the cardboard as much as necessary to make a tight fit. Secure it in place with masking tape.
- Use a marker or grease pencil to extend the cut mark all the way around the pipe. Make sure the mark is clearly visible and then remove the cardboard. Make the cut with a saw, following the cut mark.
– Alternative: If you would like to both mark the tube and create a cutting guide for a circular saw, create a collar from thick cardboard. Mark the cut line as described above, then slide the collar further down the tube to exactly the distance that matches the shoe of your circular saw. Tape the collar in place securely and it will function as a guide for the circular saw cut.
Cutting Metal
Although you can use a jigsaw or table saw equipped with a metal-cutting blade, it is often quicker to cut thin metal like sheet metal with tin or sheet metal snips, especially if the edge won’t be visible in the completed construction. You can also use a hacksaw, although the dimensions of the hacksaw limit the depth of material to which it can follow a cut line. In any case, always smooth the cut edge because it will inevitably be sharp enough to cause injury. A file is a great way to round over a cut metal edge.
Expanded sheet is a handy material that can be a challenge to cut. Although you can use snips of one sort or another, a right-angle grinder with a thin blade will make short work of an expanded sheet cut.
Plumbing pipe, like the pipe used in the Utility Organizer on page 30, is traditionally cut with a snap cutter, a plumbing tool that makes accurate, clean cuts in any pipe. The problem is, snap cutters can be expensive. Most home DIYers rent snap cutters when necessary. Many people, however, use reciprocating saws with a diamond blade in place of a snap cutter. A powerful reciprocating saw can cut quickly through pipe, but it can be hard to control, leaving a slightly uneven cut line. If you feel comfortable handling an angle grinder, use a diamond blade to cut quickly through even thick plumbing pipe (although it can be hard to see the cut line clearly, so you need a good sense of how to cut straight). Hacksaws provide exceptional control, but translate to a lot of time, effort, and expense, because you’ll most likely have to change blades before you’re done with even a single pipe cut. Choose the method that works best for you, your time, your effort, and your budget.
Precise Measuring
No matter what material the project calls for, correct measurements are going to be key to how good the completed construction looks, and how stable and usable it is. Many of the projects in this book, or any built-in project you tackle, will involve two types of measurement: the dimensions of the project itself and measuring the space into which it will be installed.
Although you can follow the directions and measurements for any project in the book exactly as they’re given, you may want to adapt the design of a project like the Custom Laundry Center on page 114 to your own preferences or spaces. Be careful when you customize a project; measurements such as lumber and pipes are not always what they seem—or what they are labeled. A standard modern 2 x 4 is not actually 2 inches by 4 inches, while a 2-inch pipe will actually have an outside diameter larger than 2 inches.
The secret to altering any project’s dimensions is to never change one part or element of the project in isolation. There is typically a domino effect to any change, so you should look at the entire project when altering any measurement.
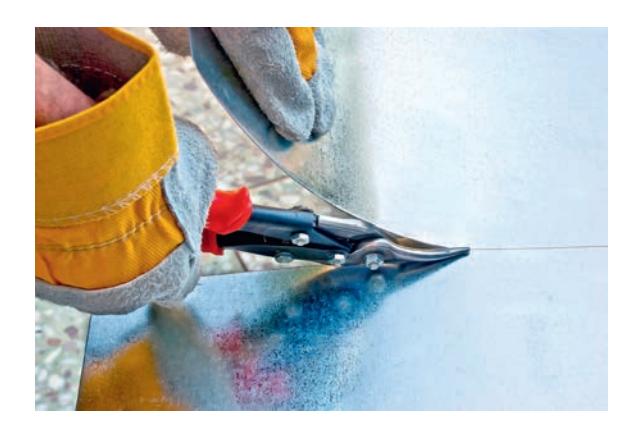
Tin snips are the simplest—and often the most efficient—way to cut sheet metal.
Whenever you’re installing a project, such as the Closet Home Office on page 111, it’s essential to accurately measure the space where the project will be installed, to identify stud location and ensure the finished project will fit appropriately. Although you can do this fairly effectively with a tape measure and stud finder, a laser measurer offers a way to make extremely precise measurements easily and quickly. These handy instruments also allow you to measure
| NOMINAL LUMBER SIZE VS. ACTUAL SIZE |
|
|---|---|
| 1 × 2” | ¾ × 1½” |
| 1 × 3” | ¾ × 2½” |
| 1 × 4” | ¾ × 3½” |
| 1 × 6” | ¾ × 5½” |
| 1 × 8” | ¾ × 7¼” |
| 2 × 2” | 1½ × 1½” |
| 2 × 3” | 1½ × 2½” |
| 2 × 4” | 1½ × 3½” |
| 2 × 6” | 1½ × 5½” |
| 2 × 8” | 1½ × 7¼” |
areas that may be difficult to measure because of access. Laser measurers range in price from $20 to well over $100, with higher prices indicating more exacting accuracy, durability, and added functionality (such as stud finding, wire detection, or greater range).
Gauge Thicknesses (Inches)
| GAUGE | METAL | ALUMINUM |
|---|---|---|
| 3 | 0.2391 | 0.2294 |
| 4 | 0.2242 | 0.2043 |
| 5 | 0.2092 | 0.1819 |
| 6 | 0.1943 | 0.1620 |
| 7 | 0.1793 | 0.1443 |
| 8 | 0.1644 | 0.1285 |
| 9 | 0.1495 | 0.1144 |
| 10 | 0.1345 | 0.1019 |
| 11 | 0.1196 | 0.0907 |
| 12 | 0.1046 | 0.0808 |
| 13 | 0.0897 | 0.0720 |
| 14 | 0.0747 | 0.0641 |
| 15 | 0.0673 | 0.0571 |
| 16 | 0.0598 | 0.0508 |
| 17 | 0.0538 | 0.0453 |
| 18 | 0.0478 | 0.0403 |
| 19 | 0.0359 | 0.0320 |
| 20 | 0.0359 | 0.0320 |
Routing
Although most novice and intermediate home DIYers don’t own routers, it’s a tool worth considering—especially for project work. Routers let you easily add grooves into edges and faces of project pieces, and allow you to put a

A laser measurer gives extremely accurate readings for locating your project.
sophisticated edge profile on wood and metal. Router bits are available for wood, plastic, and metal cutting, adding to the versatility of the tool. Use a router with a jig and you can create elaborate designs in a wood panel.
Finishing Your Project
Some of the projects in this book, and indeed, many projects created with readymade structures will not need to be painted or stained because the raw materials in their natural state may present the look you want. For instance, if you build a Crown Molding Shelf (page 138), the shelf may not need finishing to fit right in.
In other cases, you’ll want to cover up the natural state of the materials you use. That will involve using paint, stain, or a clear finish, depending on the material. No matter what, though, you’ll most likely have to do some amount of sanding or smoothing before finishing your creation.
Super Sanding
Picking the right sandpaper is key to prepping the surface of whatever materials you’ve used in the project. You’ll find sandpaper in many different formats to suit different power sanders and hand sanding applications. These include plain sheets,
self-adhesive pads (round and rectangular), precut forms, and even belts. Start your finishing by selecting the right tool.
You’ll never go wrong sanding by hand. Although it can require a lot more elbow grease, hand sanding also affords you a much greater degree of control. Use a palm or orbital sander for small and medium jobs (either would be appropriate for all the projects in this book). These come with round, square, and pointed pads and allow you to see the surface as you work. Bigger sheet sanders work more quickly and are usually more powerful. Belt sanders use a closed loop of sandpaper and work very quickly, even with fine-grit papers. That means that they can sand a large area quickly, but errors and oversanding can happen in the blink of an eye.
Aside from the sander itself, the paper—and especially the type of abrasive you choose—will be dictated by what you need to sand.
Garnet.
This is the traditional natural material used on the most common sandpapers. It wears off quickly, but is a good choice for a range of materials.
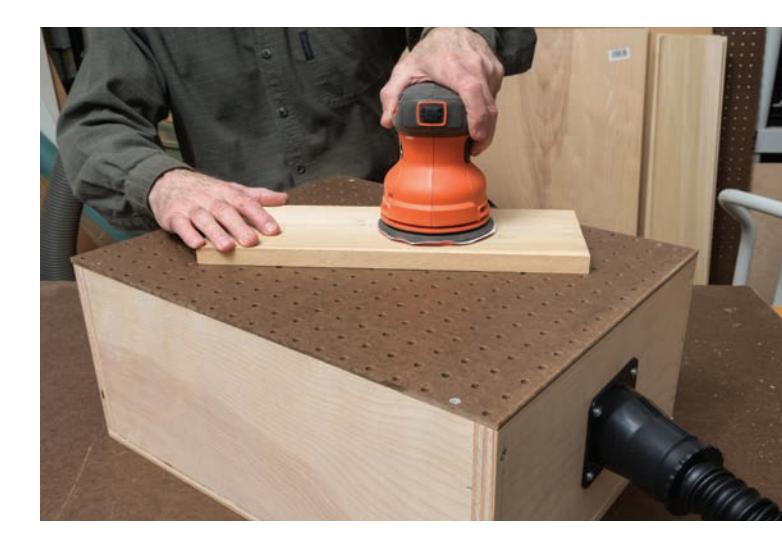
A downdraft sanding box directs air through a pegboard top into a shop vacuum and keeps airborne dust from sanding under control.
Emery.
Also a natural material, emery is used for metal. Coarser grits can quickly remove rust and even residual paint and markings, while finer grits can be used to polish the surface so that it can be left natural.
| SANDING GRITS | |
|---|---|
| GAUGE | APPLICATION |
| 40–60 | These are the coarsest grits and consequently used for the crudest sanding, such as roughing up a surface to be smoothed in degrees, removing prior finishes, or shaping plastics or wood. |
| 60–100 | This range accounts for most of the general prep work done, such as giving wood or metal a tooth prior to painting, or sanding between coats of a finish. |
| 100–220 | This is considered superfine sandpaper meant for finishing work and sanding out minor imperfections in a finish; at the upper end, superfine papers are meant for polishing metal surfaces or working on extremely glossy or high-end finishes on wood. Grits above 220 are exceedingly fine, and those papers are meant for specialized applications, such as polishing fine-machined parts. |
Aluminum oxide.
This common synthetic is an excellent all-purpose sanding medium that lasts appreciably longer than garnet. It can be used equally well on wood, metal, and plastics. It is most often used with power sanders.
Silicon carbide.
Want to get the job done quickly even if the paper doesn’t last as long? Turn to this excellent abrasive. Often used in wet sanding applications, silicon carbide is especially good at rough work—removing paint and rust or roughing up a surface between coats of a finish. It is excellent on wood, metal, and plastic.
Zirconia alumina.
This is a more modern abrasive that is highly effective and lasts even longer than aluminum oxide. It is primarily used for power sander pads and belts and is efficient at removing rust and paint. It works on metal, wood, and plastics—including troublesome surfaces such as fiberglass.
Ceramic alumina.
This is a less-common abrasive that offers all the advantages of zirconia alumina and is primarily used in sanding discs and belts.
The keys to a good finish application, regardless of the product you’re using or the sanding you’ve done, are the following:
Cleanliness. Any dirt, grease, or debris can prevent paint from properly adhering to the surface of metal, wood, plastic, or veneers. Not only should you make sure that obvious dirt and grime are removed from the surface to be painted, you should also take steps to remove contaminants that may be hard to see. That’s why it’s a good idea to clean smooth surfaces such as plastic, or prefinished wood, with glass cleaner.
Tooth. Any surface you’re finishing should be slightly—although not too much—rough. This is called having a “tooth” and allows whatever finish you apply to adhere tightly to the surface. In the case of rougher wood surfaces, providing the appropriate tooth may mean smoothing out the surface slightly with 80-grit sandpaper. In the case of metal pipe or plastic sheet goods, you’ll need to rough up the surface to create any tooth at all.
The right stuff. Key to a great finish on any material is using a product meant for that material. For instance, only a couple of paints are meant specifically for plastic; other types of paint might look good right after application, but they will begin to crack and flake off in short order. Metal also requires specific paints meant for the material, and certain metals may not take paint at all. In most cases, it pays to prime the surface before painting (unless you’re applying a stain or clear finish). Manufacturers’ labels clearly spell out what materials the product is meant to be used on. That’s one of the reasons reading paint and finish labels before applying them is a must.
Special Section: Safety First!
Every aisle in a home center is an unbridled opportunity to discover and build fun and useful creations. But many of those aisles, and the tools and materials they contain, also offer some level of risk if used improperly. That’s why work safety should always be the first consideration when you tackle a new project. The most basic expectation you should have for any project you build is to come away from the process uninjured, with a creation that won’t harm anybody else. The guidelines below will ensure that happens.
Dress for Success
Your workshop is no place for high fashion. Wear the right gear any time you work on a project and you’ll not only make yourself more comfortable, you’ll head off nagging minor injuries, avoid major problems like a snagged loose piece of clothing, and perhaps even prevent long-term damage such as hearing loss.
Gloves. Good work gloves are worth their weight in gold. However, there are many different types of work gloves, and it’s wise to buy specific gloves for different activities. For instance, a combination neoprene-cotton glove would be great for gardening, but not so much for general workshop project building. If you’re going to be handling sharp tools or cutting metal, get yourself some cut-proof metal mesh gloves. For general workshop use, consider a high-quality leather glove, with reinforced palm and fingers and some sort of lining. They’ll not only be comfortable, but they’ll provide a lot protection from small nicks and bruises.

Eye safety. Eyes are fragile organs. Even small damage or irritation can cause big problems. That’s why a good pair of safety glasses is a must for anyone looking to stay busy in a home workshop. Look for a sturdy frame and polycarbonate lenses with side shields. Check the label; glasses rated for impact resistance (as opposed to simple protection against splashes and dust) carry a “+” after the manufacturer’s name. Find a pair that’s comfortable, so keeping them on won’t be bothersome.
Ear protection. Studies increasingly show that hearing loss can occur after what could easily be considered minimal exposure to loud noises. If you’re running a table saw or other power equipment on a regular basis—especially inside the confines of a garage or home workshop you should invest in some quality ear protection. Basic earbuds or earplugs offer some protection, but if your hearing really matters to you, it’s wise to invest a little more in earmuffs specially designed for construction and landscape work.
Dust masks and respirators. One of the most common mistakes home DIYers make when it comes to safety is using a dust mask where a respirator is needed. Simple dust masks are great if you’re sanding or otherwise raising a dust cloud. But for vapors or fumes from solvent or petroleum-based finishes, you need a dual-cartridge respirator, with cartridges rated for use with the material you’re using.
Clothing. Any time you’re working with power tools or manipulating unwieldy or heavy materials, the proper attire can head off injury and make you more comfortable and productive. Whenever possible, wear snug-fitting long-sleeve shirts, which will protect your arms against abrasions and ensure no dangling clothing gets entangled in the moving parts of tools or snagged on sharp corners of materials. Similarly, long pants are usually better than shorts, and snug-fitting long pants are a much better choice than sweats or other baggy clothing. Good work shoes or boots are a must, to keep you steady when maneuvering heavy materials and to protect your feet. Sandals, flip-flops, or open-toed footwear of any kind are not appropriate for working on hardware home projects. Lastly, leave your jewelry, including watches, in the jewelry box; the potential for snagging is just too great.
Best Practices
Most safety practices are a matter of basic common sense. However, many serious workshop accidents occur because someone decided to take a shortcut or do something that flies in the face of commonsense, “just this once.” To prevent any injuries or accidents, follow these guidelines:
Never…
- remove power tool guards, or force them out of position. Sure, safety guards on tools such as circular saws can get in the way and slow you down. But they can also save your fingers and limbs from serious injury.
- overtighten blade-locking nuts on saws.
- change blades or other power tool parts when the tool is plugged in.
- cut or drill when off balance. If you have to lean out over a project to secure or saw a piece, adjust where you’re standing or how the project is positioned.
- carry a power tool by its cord.
- carry tools up a ladder by the handle. Bring them up in a bucket.
- expose tools to severe temperature extremes on a regular basis. Wildly varying temperatures are a great way to ensure malfunction and possibly breakage in your tools. If that happens while you’re using one, there’s a good chance of injury.
Always…
- read the manufacturers’ instructions. Part of the allure of a hardware store or home center is all those bright, shiny new tools and the possibilities they offer. There is an almost irresistible compulsion to start playing with your new toy the moment you get home. Fight that compulsion. Manufacturers uniformly provide concise instructions for the safe and sane operation of their tools. That’s advice from experts that you can only follow if you actually read it. It only takes a few minutes to read through (not “scan”) the material, warnings, and instructions manufacturers provide with their tools. That is some of the most valuable time you’ll spend in the workshop.
- unplug tools and power equipment when not in use. Not only are power cords and extension cords tripping hazards, it’s far too easy to trigger a power tool when moving it around or bumping it if it is plugged in. The best way to make sure power tools are off is to ensure they are unplugged.
- doublecheck that the power cord for any power tool is nowhere near the cut line when beginning to saw.
- stage. Setting out tools, equipment, and supplies in a logical, clear and tidy way, is a surefire way to guarantee success on any project and avoid injury from tools or materials just lying around in your path of travel. Get in the habit—for projects small and large—of setting aside a clearly demarcated, level surface large enough to organize everything you’ll need for the project.
- lift with the knees. Some of the materials in the projects in this book (like prefab cabinets) can be weighty, unwieldy, or both. Back injuries are some of the most common home workshop injuries and most are preventable. Don’t bend over to lift; squat instead. And enlist the aid of a helper before you think you’ll actually need it.
- keep tools sharp. An old construction-site piece of wisdom is that you’ll get hurt quicker by a dull edge than a sharp one. If you don’t know how to properly sharpen your own tools, the local hardware store will most likely sharpen them for a very modest fee. In either case, make tool sharpening a semi-annual routine.
- keep a first-aid kit on hand. Fortunately, any well-stocked hardware store—and every large home center—sells complete first-aid kits, so you don’t need to assemble one yourself. Just buy it, take it home, and place it somewhere in your work area, where it is clearly visible and accessible.
Rung Up
Although many of the projects in this book do not require a ladder, no discussion of workshop safety is complete without touching on the issue of proper ladder use. You should always check any ladder before you use it; look for areas of rust or broken parts. Never use a damaged ladder. In addition, ladders sold by hardware stores have a “duty rating”; your weight and the weight of materials and tools on the ladder at any one time should never exceed this rating. You should also follow the “three point rule” whenever you climb a ladder; at least three limbs should always be in contact with the ladder at all times. More general safety guidelines are specific to the two basic types of ladders.
- Stepladders. Don’t step on the top step (called the “cap” step) and don’t use the ladder as an extension ladder when folded up. Always be sure the spreaders are locked when using the ladder.
- Extension ladders. Although all ladders require a stable base, it is especially important on the greater heights of an extension ladder; any wobbling or unsteadiness translates to a risky situation. When setting an extension ladder, position it so that the ladder is one foot out from the wall for every four feet of ladder height. Tie off the top of the ladder to prevent the ladder from falling backward, and secure the feet—ideally with a cleat.