HOW TO INSTALL A WINDOW
Installing the right windows for your home and region can instantly trim your energy usage. That’s why, when choosing windows for an addition, you should always look for the Energy Star label. A designation given by the U.S. Department of Energy, the Energy Star label ensures a window meets or exceeds federal guidelines for home energy efficiency. An even more important gauge than simply looking for an Energy Star label is to read the NFRC label on the window. Specifically, note the U-factor and Solar Heat Gain Coefficient (SHGC) ratings for the window. If you live in a fairly cold region of the country, you want the lowest U-factor you can find, with a moderate to high SHGC. If your home is located in a temperate area with consistently warm temperatures, the SHGC number is the most important one to you, and it should be as low as possible.
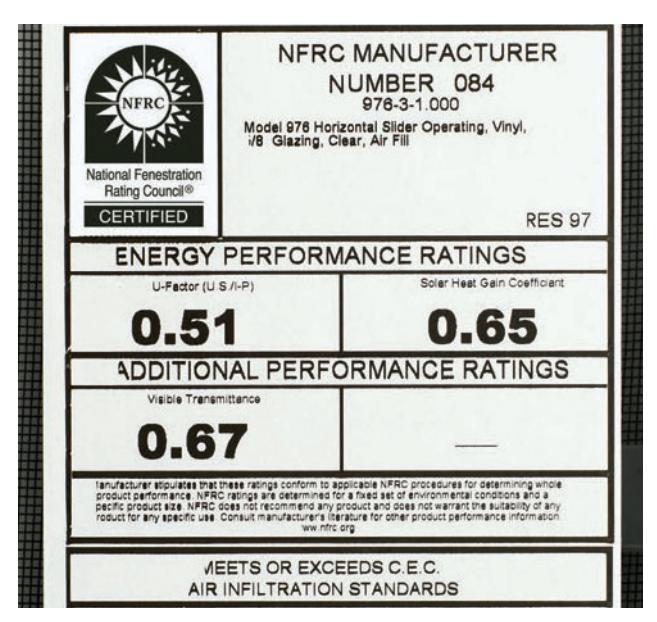
Look for and evaluate energy rating labels, usually attached directly to the glass on new windows.
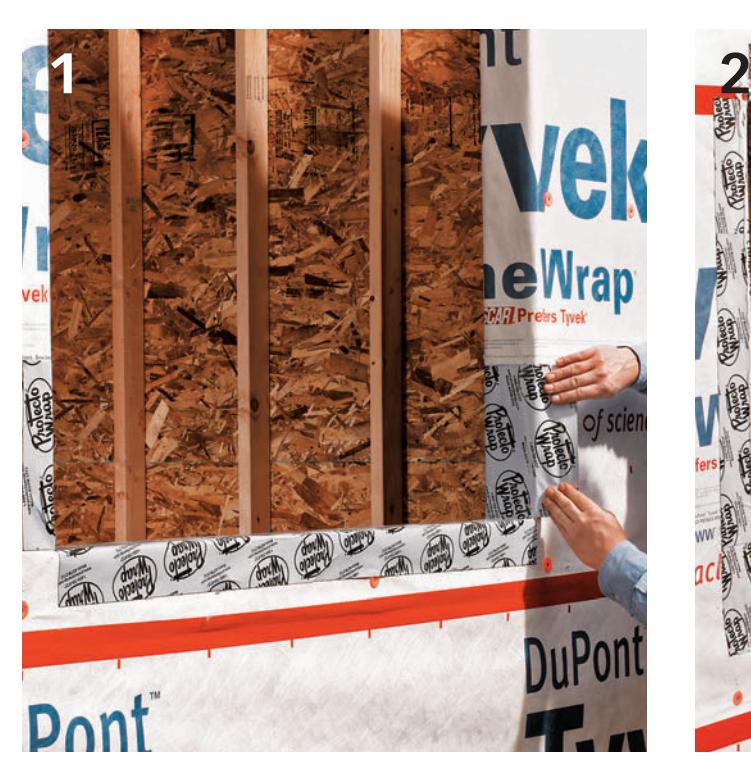
Flash the rough sill. Apply 9”-wide self-adhesive flashing tape to the rough sill to prevent moisture infiltration below the window. Install the flashing tape so it wraps completely over the sill and extends 10 to 12” up the jack studs. Fold the rest of the tape over the housewrap to create a 3” overlap. Peel off the backing and press the tape firmly in place. Install tape on the side jambs butting up to the header, and then flash the header.
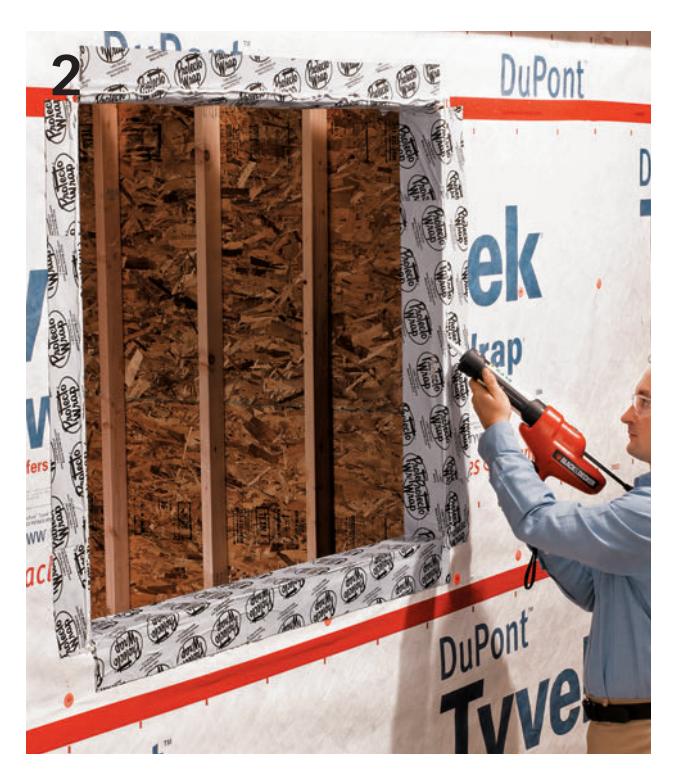
Caulk the opening. Apply a 1/2”-wide bead of caulk around the outside edges of the jack studs and header to seal the window flange in the opening. Leave the rough sill uncaulked to allow any water that may penetrate the flashing to drain out.
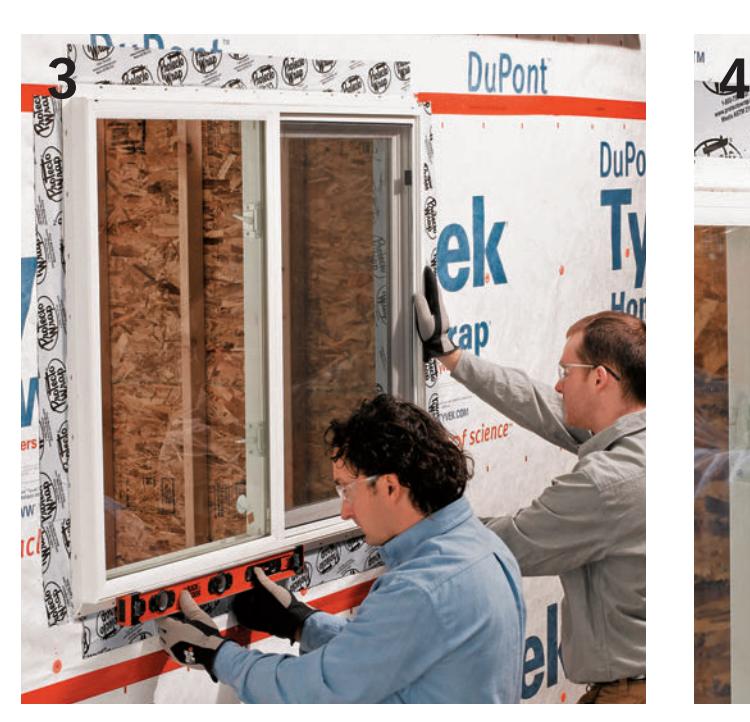
Position the window. Set the window unit into the rough opening, and center it side to side. Check the sill for level.
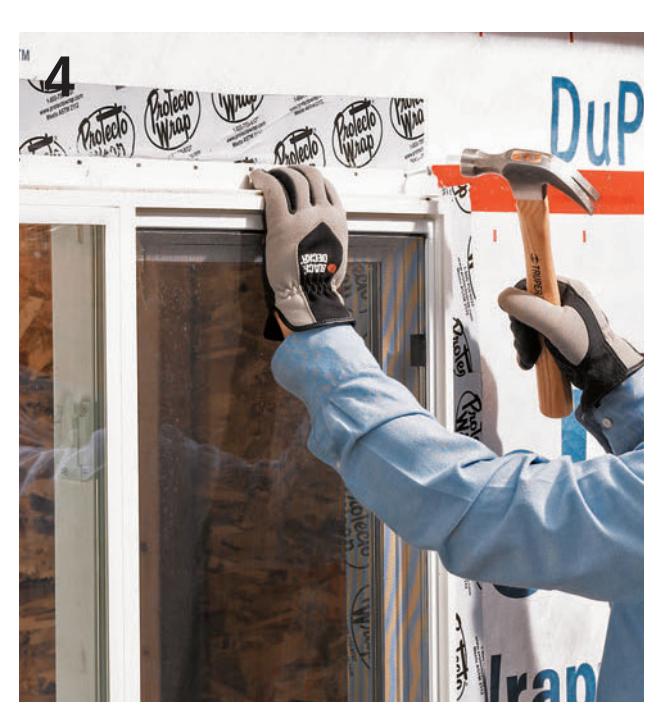
Tack the top corners. Drive a roofing nail through each top corner hole of the top window flange to tack it in place. Do not drive the rest of the nails into the top flange yet.
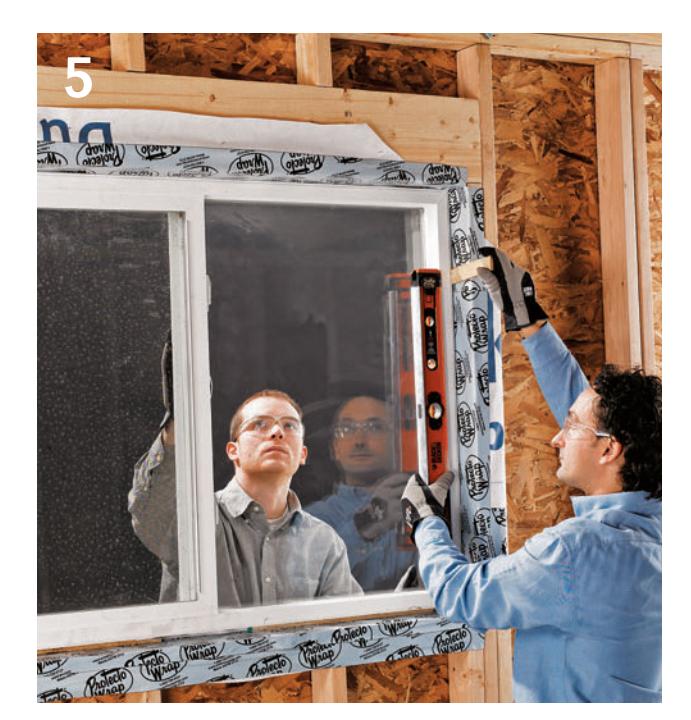
Plumb the window. Have a helper hold the window in place from outside while you work inside. Check the window jamb for square by measuring from corner to corner. If the measurements are the same, the jamb is square. Insert shims between the side jambs and rough opening near the top corners to hold the jambs in position. Use additional shims as needed to bring the jamb into square. Recheck the diagonals after shimming.
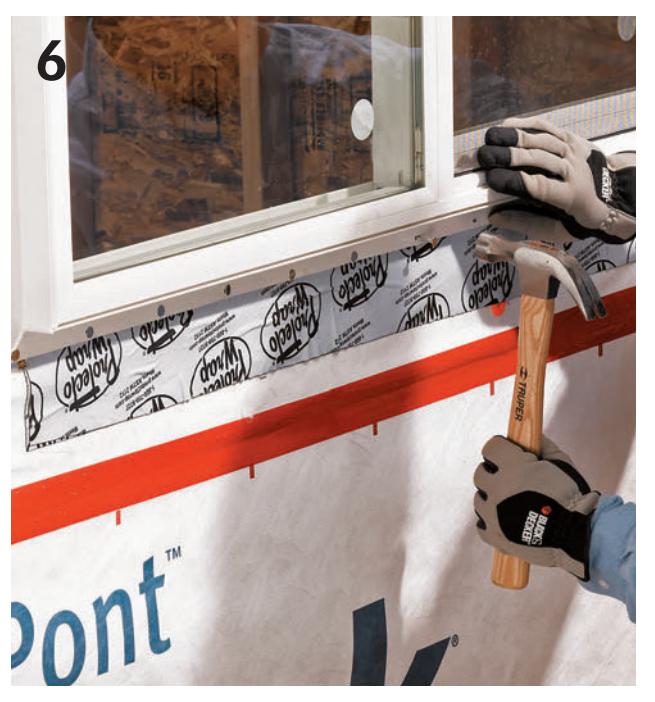
Nail the flanges. Drive 2” roofing nails through the flange nailing holes and into the rough sill to secure it. Handnail this flange, being careful not to damage the flange or window cladding.
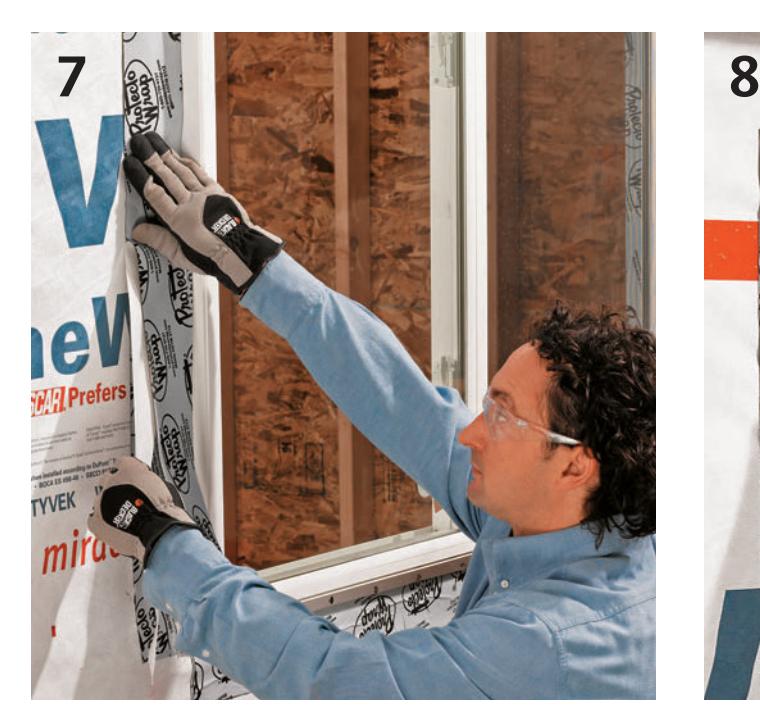
Flash the side flanges. Seal the side flanges with flashing tape, starting 4 to 6” below the sill flashing and ending 4 to 6” above the top flange. Press the tape firmly in place.
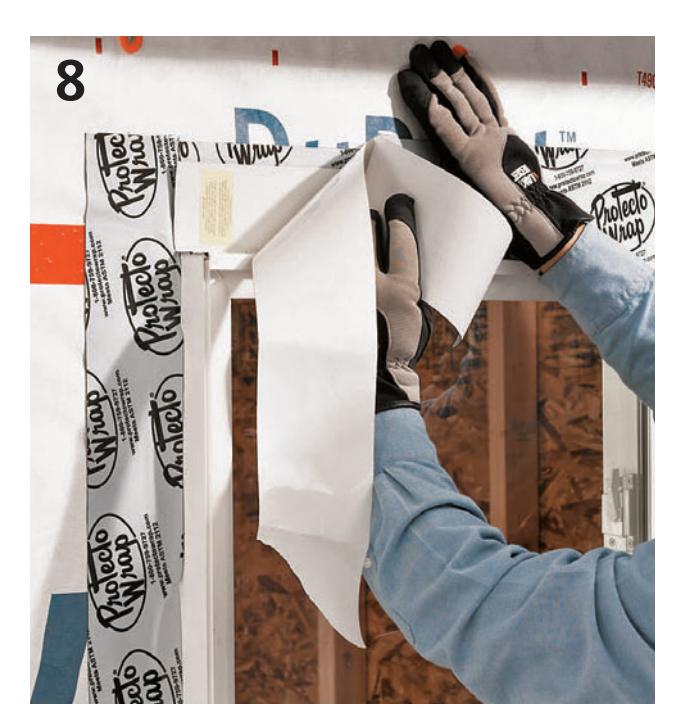
Install the drip cap. Cut a piece of metal drip edge to fit over the top window jamb. This is particularly important if your new window has an unclad wooden jamb with preinstalled brickmold. Set the drip edge in place on the top jamb, and secure the flange with a strip of wide flashing tape. Do not nail it. Overlap the side flashing tape by 6”. Note: If you plan to trim the window with wood brickmold or other moldings, install the drip edge above that trim instead.
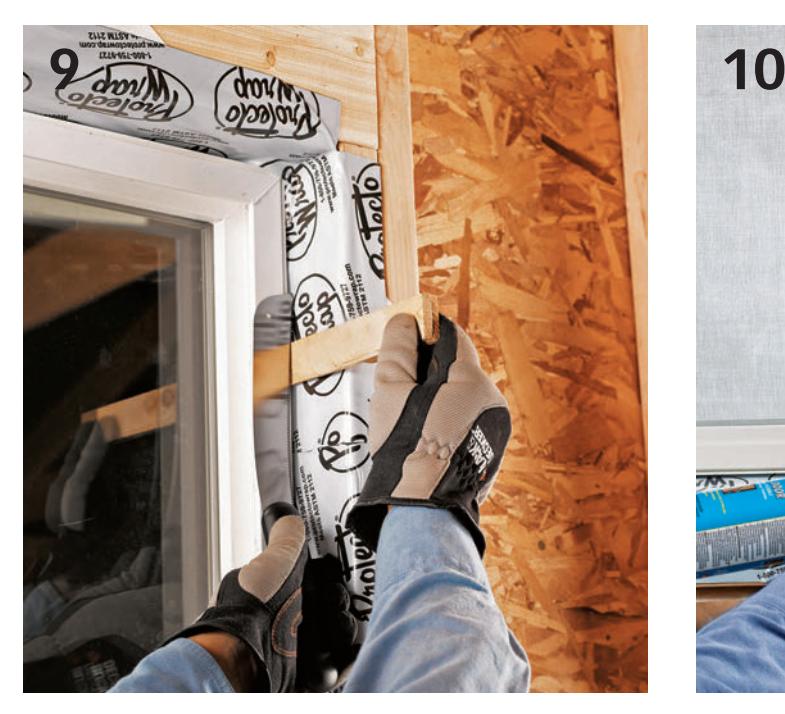
Finish the installation. Cut the shim ends so they are flush with the inside of the wall using a utility knife or handsaw.
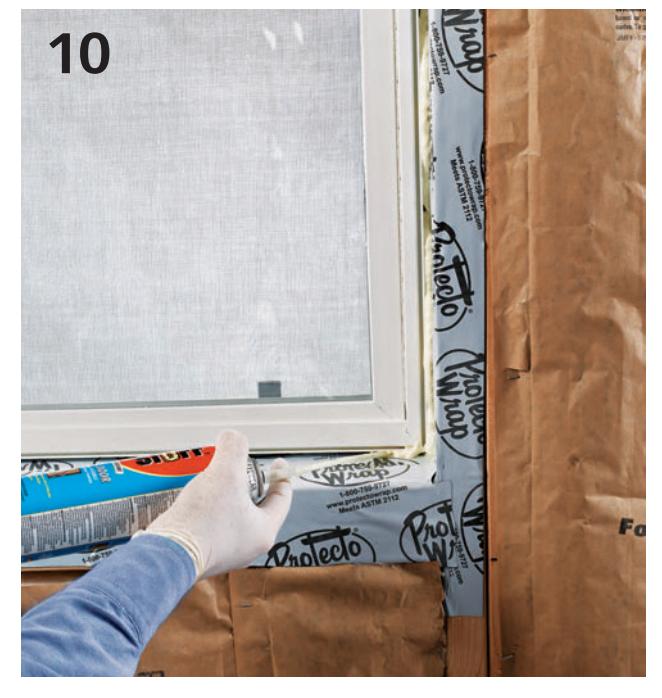
Spray minimal expanding foam insulation for windows and doors around the perimeter of the window on the interior side.
HOW TO INSTALL A WINDOW REPLACEMENT SASH
In some cases, the most economical way to upgrade your windows is to replace just the sash (here used as a plural word). You can order replacement windows that are custom made to fit into your existing window frameworks and come with new vinyl jamb liners. Getting replacement sash and liners depends on taking accurate measurements of the openings. The replacement window suppliers will give you very specific directions for taking measurements.
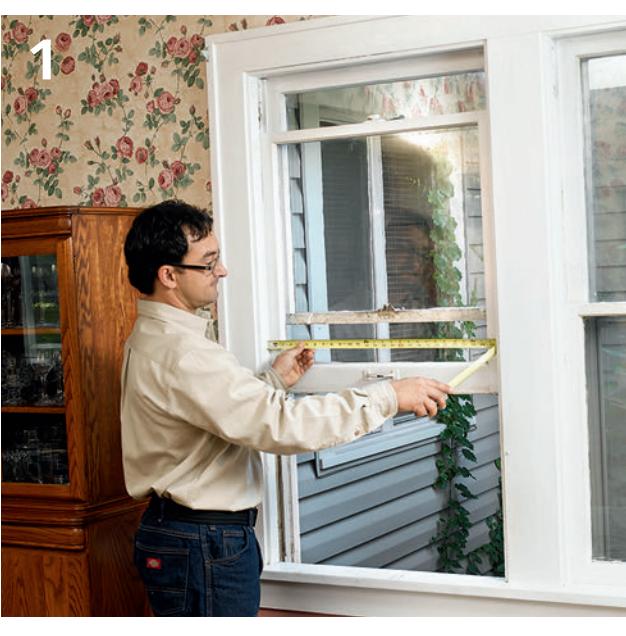
Take careful measurements of your current window sash sizes and openings according to the directions from the replacement-sash supplier.
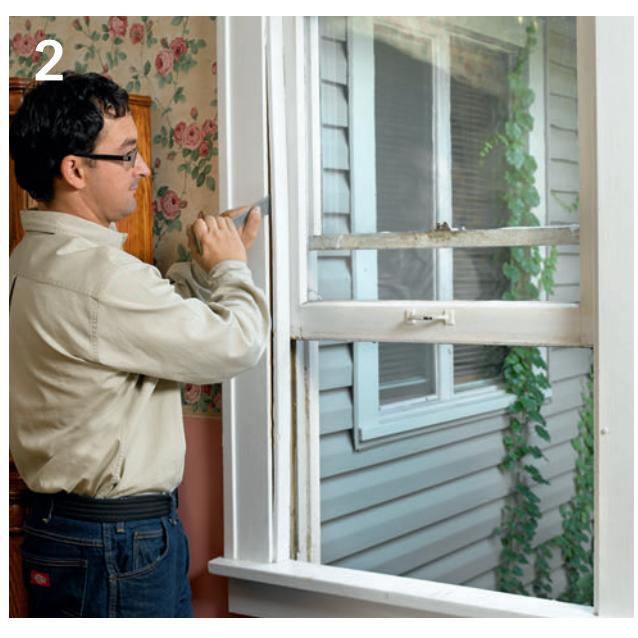
Remove the old window stops to access the sash. If your replacement sash provider is not supplying new liners and stops, save the old ones.
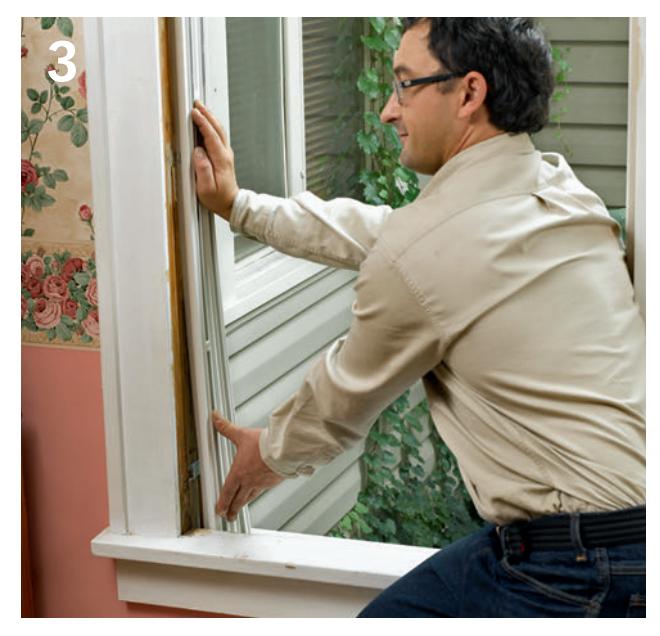
Install the new liners and stops or replace the old ones that you removed.
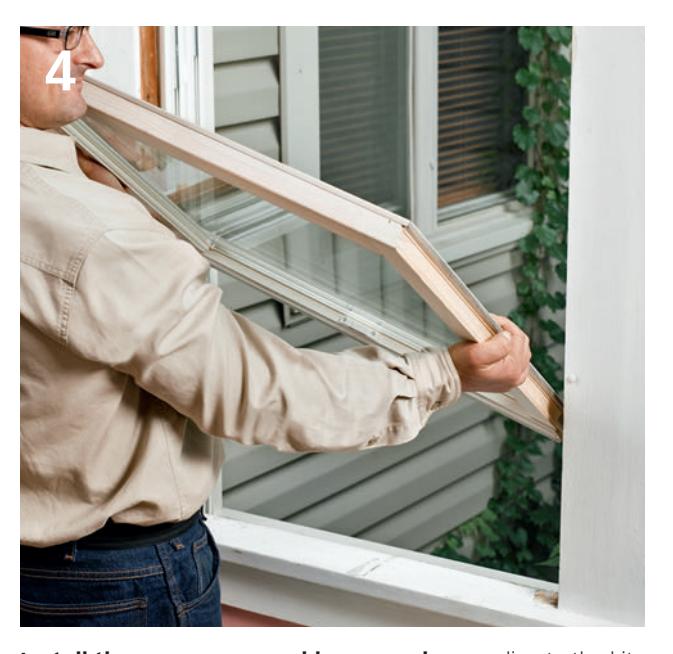
Install the new upper and lower sash according to the kit supplier’s directions.
TIPS FOR FREEING STUCK WINDOWS
Many of us have experienced difficulty with opening windows due to swelled wood or painted channels. Almost as frequent, windows won’t stay open because of a broken sash cord (on very old windows) or failed spring-load device. Double-hung windows with spring-loaded sash tracks require cleaning and an occasional adjustment of the springs in (or behind) the tracks. Casement windows are often faulty at the crank mechanisms. If cleaning doesn’t fix the problem, the crank mechanism must be replaced.
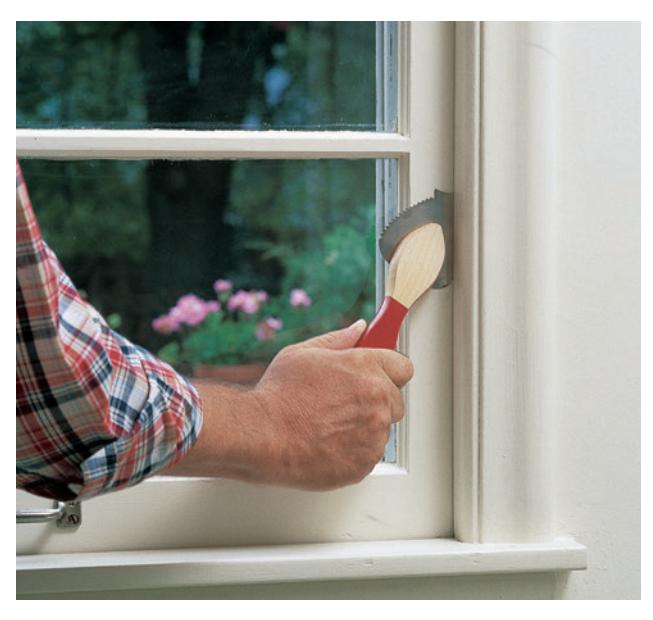
Cut the paint film if the window is painted shut. Insert a paint zipper (the tool seen above, sold at most hardware stores) or utility knife between the window stop and the sash, and slide it down to break the seal.
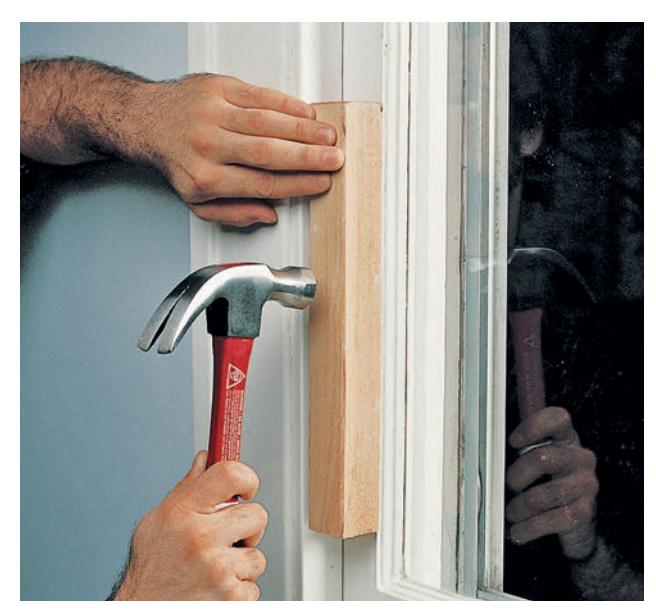
Place a block of scrap wood against the window sash. Tap very lightly with a hammer to free the window.
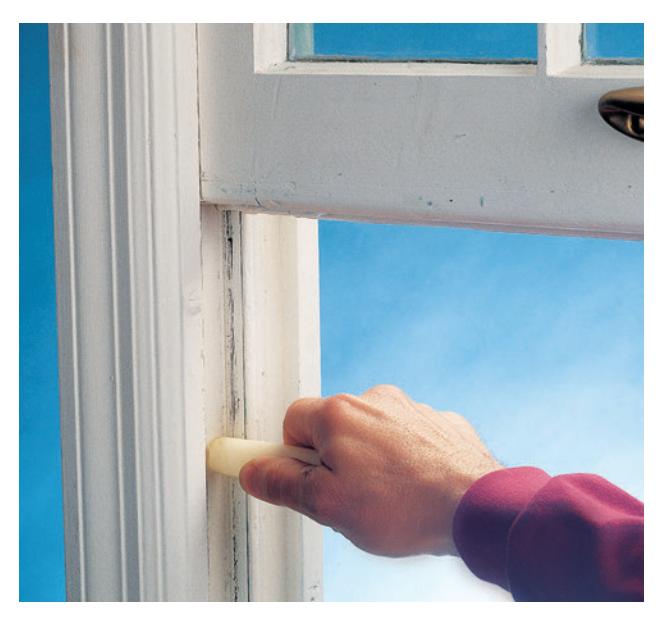
Lubricate window channels by rubbing them with a white candle, then opening and closing the window a few times. Do not use liquid lubricants on wood windows.
HOW TO LUBRICATE CASEMENT WINDOW CRANKS
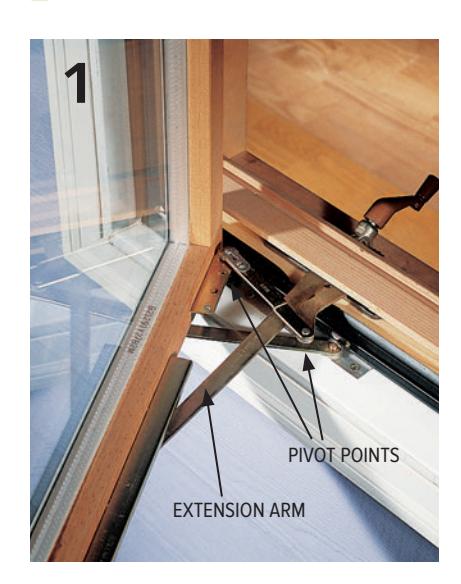
If a casement window is hard to crank, clean the accessible parts. Open the window until the roller at the end of the extension arm is aligned with the access slot in the window track.
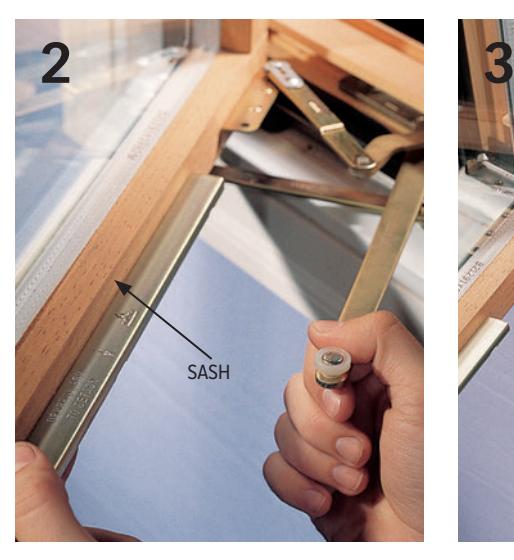
Disengage the extension arm by pulling it down and out of the track. Clean the track with a stiff brush, and wipe the pivoting arms and hinges with a rag.
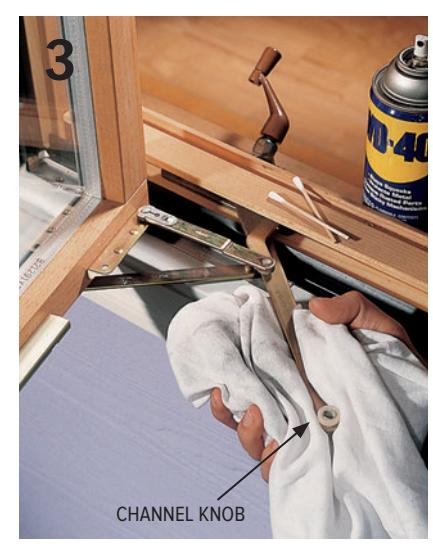
Lubricate the track and hinges with spray lubricant or household oil. Wipe off excess lubricant with a cloth, then reattach the extension arm. If that doesn’t solve the problem, repair or replace the crank assembly.
HOW TO REPAIR A CASEMENT WINDOW CRANK ASSEMBLY
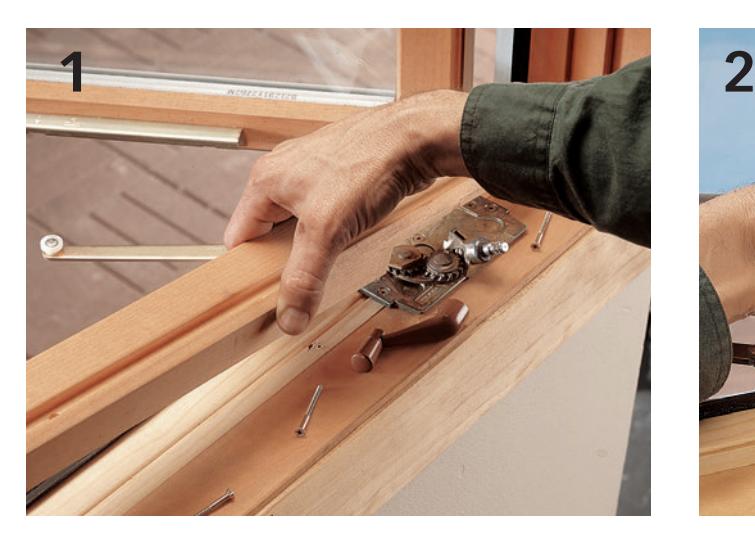
Disengage the extension arm from the window track, then remove the molding or cap concealing the crank mechanism. Unhinge any pivot arms connected to the window. Remove the screws securing the crank assembly, then remove the assembly and clean it thoroughly. If the gears are badly worn, replace the assembly. Check a home center or contact the manufacturer for new parts. Note which way the window opens—to the right or left—when ordering replacement parts.
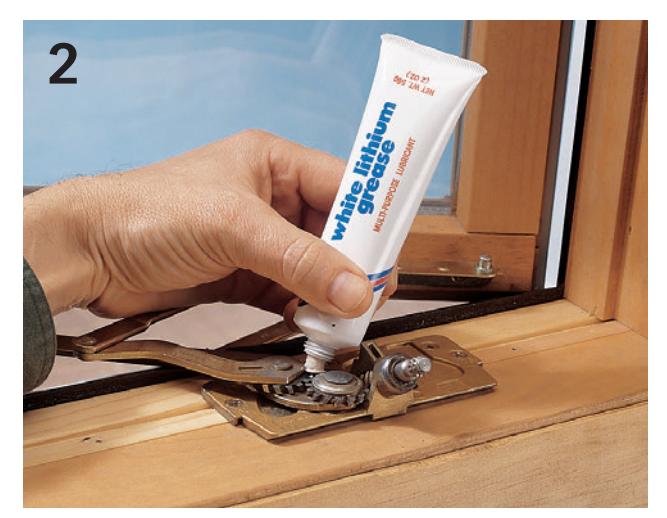
Apply an all-purpose grease to the gears, and reinstall the assembly. Connect the pivot arms, and attach the extension arm to the window. Test the window operation before installing the cap and molding.