ANATOMY OF A HOUSE
Before you start a do-it-yourself carpentry project, you should familiarize yourself with a few basic elements of home construction and remodeling. Take some time to get comfortable with the terminology of the models shown on the next few pages. The understanding you will gain in this section will make it easier to plan your project, buy the right materials, and clear up any confusion you might have about the internal design of your home.
If your project includes modifying exterior or load-bearing walls, you must determine if your house was built using platform- or balloon-style framing. The framing style of your home determines what kind of temporary supports you will need to install while the work is in progress. If you have trouble determining what type of framing was used in your home, refer to the original blueprints, if you have them, or consult a building contractor or licensed home inspector.
ANATOMY OF A HOUSE WITH PLATFORM FRAMING
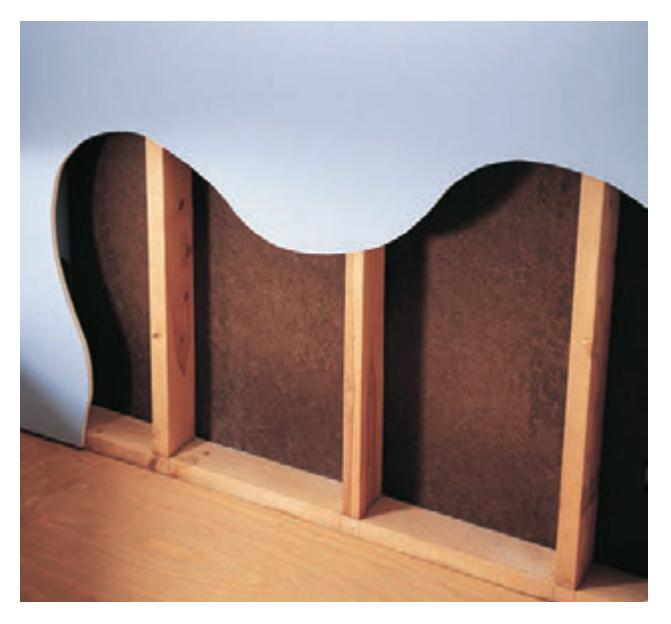
Platform framing (photos, right and above) is identified by the floor-level sole plates and ceiling-level top plates to which the wall studs are attached. Most houses built after 1930 use platform framing. If you do not have access to unfinished areas, you can remove the wall surface at the bottom of a wall to determine what kind of framing was used in your home.
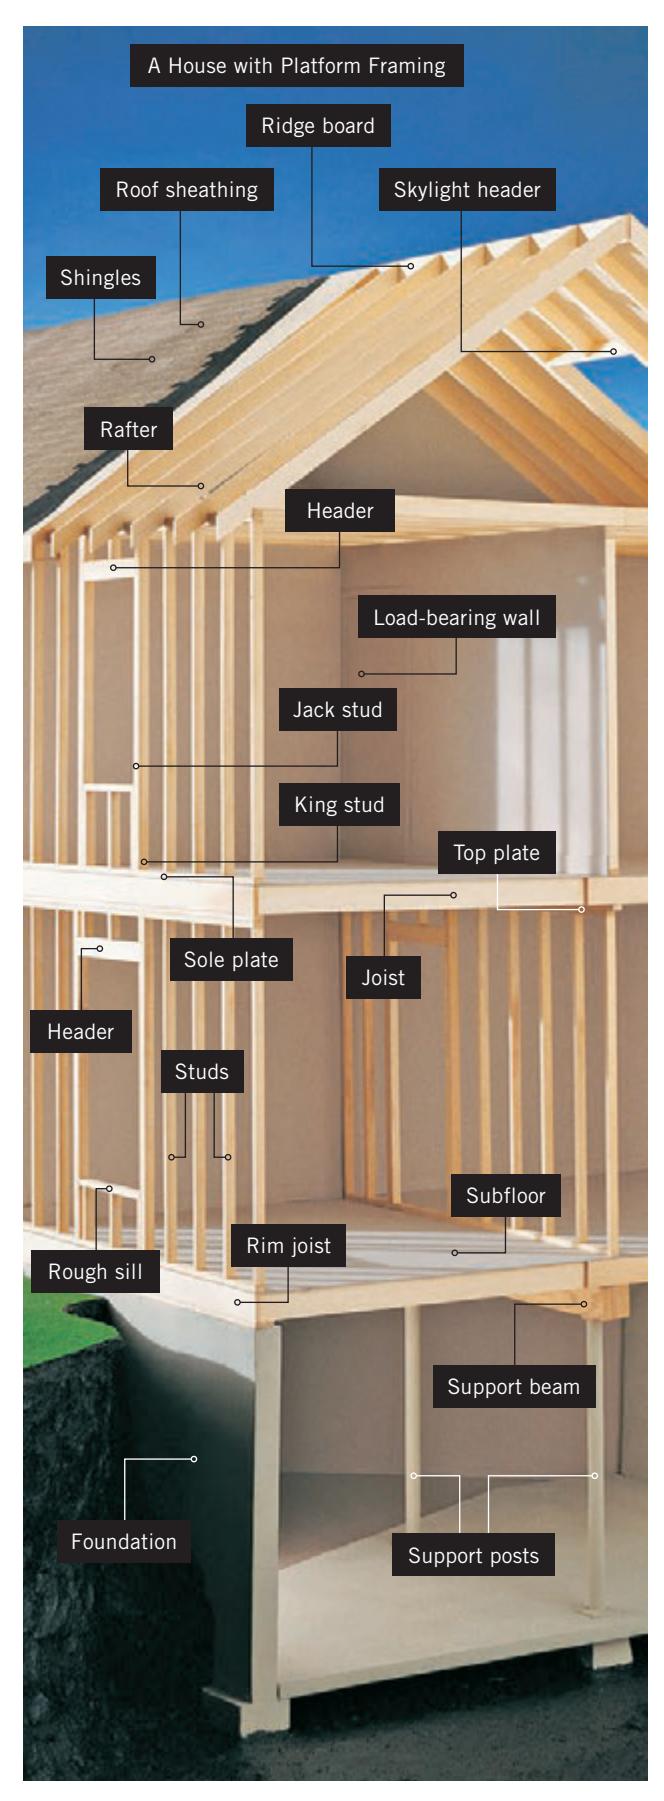
Framing in a new door or window on an exterior wall normally requires installing a header. Make sure that the header you install meets the requirements of your local building code, and always install cripple studs where necessary.
Floors and ceilings consist of sheet materials, joists, and support beams. All floors used as living areas must have joists with at least $2 times 8$ construction.
There are two types of walls: load-bearing and partition. Load-bearing walls require temporary supports during wall removal or framing of a door or window. Partition walls carry no structural load and do not require temporary supports.
ANATOMY OF A HOUSE WITH BALLOON FRAMING
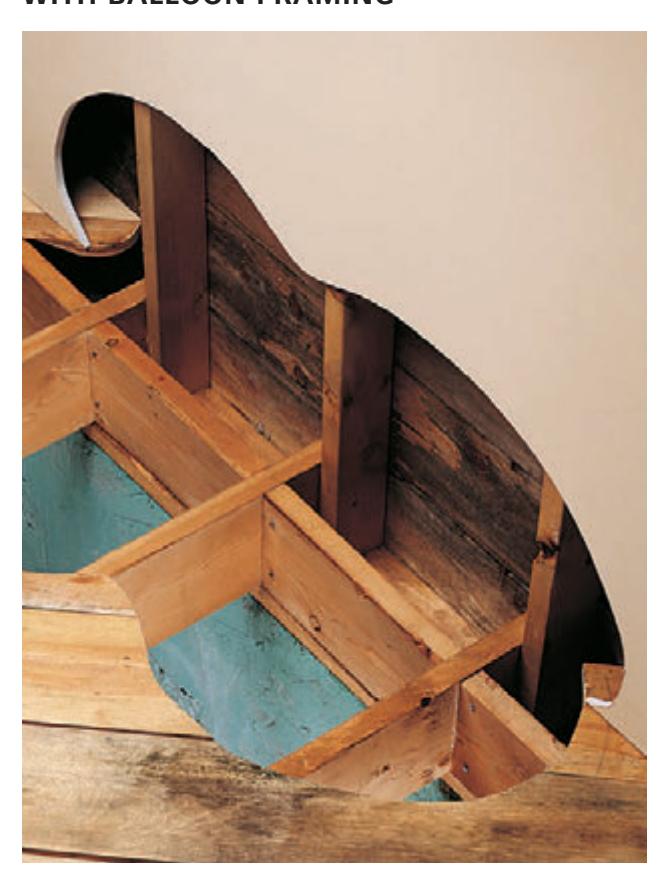
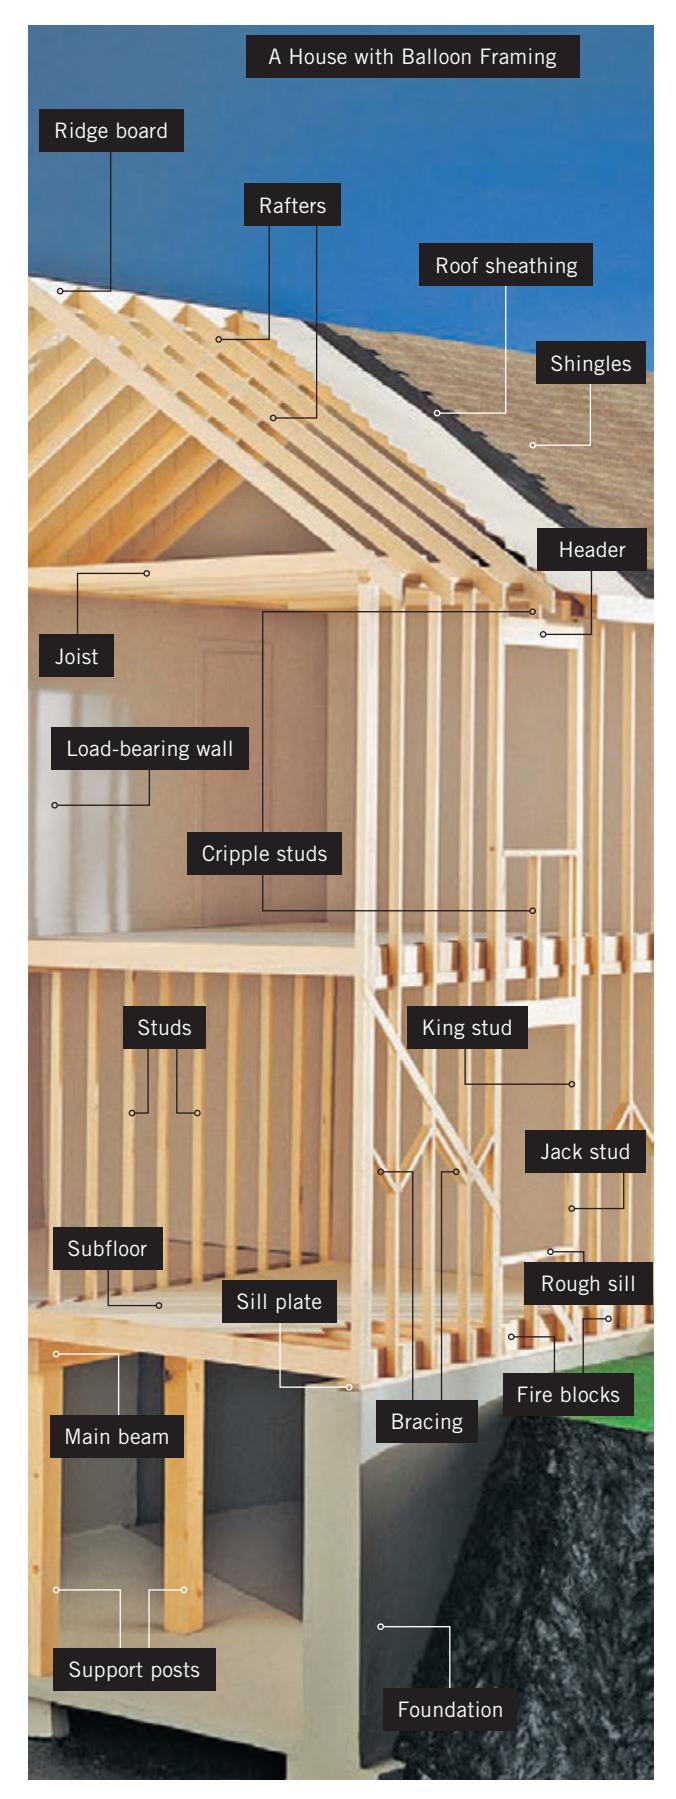
Balloon framing (photos, right and above) is identified by wall studs that run uninterrupted from the roof to a sill plate on the foundation, without the sole plates and top plates found in platform-framed walls (page opposite). Balloon framing was used in houses built before 1930, and it is still used in some new home styles, especially those with high vaulted ceilings.
ANATOMY DETAILS
Many remodeling projects, like adding new doors or windows, require that you remove one or more studs in a load-bearing wall to create an opening. When planning your project, remember that new openings require a permanent support beam called a header, above the removed studs, to carry the structural load directly.
The required size for the header is set by local building codes and varies according to the width of the rough opening. For a window or door opening, a header can be built from two pieces of 2-inch dimensional lumber sandwiched around 3/8-inch plywood (chart, right). When a large portion of a loadbearing wall (or an entire wall) is removed, a laminated beam product can be used to make the new header.
If you will be removing more than one wall stud, make temporary supports to carry the structural load until the header is installed.
Recommended Header Sizes
| ROUGH OPENING WIDTH |
RECOMMENDED HEADER CONSTRUCTION |
|---|---|
| Up to 3’ | 3/8” plywood between two 2 x 4s |
| 3 to 5’ | 3/8” plywood between two 2 x 6s |
| 5 to 7’ | 3/8” plywood between two 2 x 8s |
| 7 to 8’ | 3/8” plywood between two 2 x 10s |
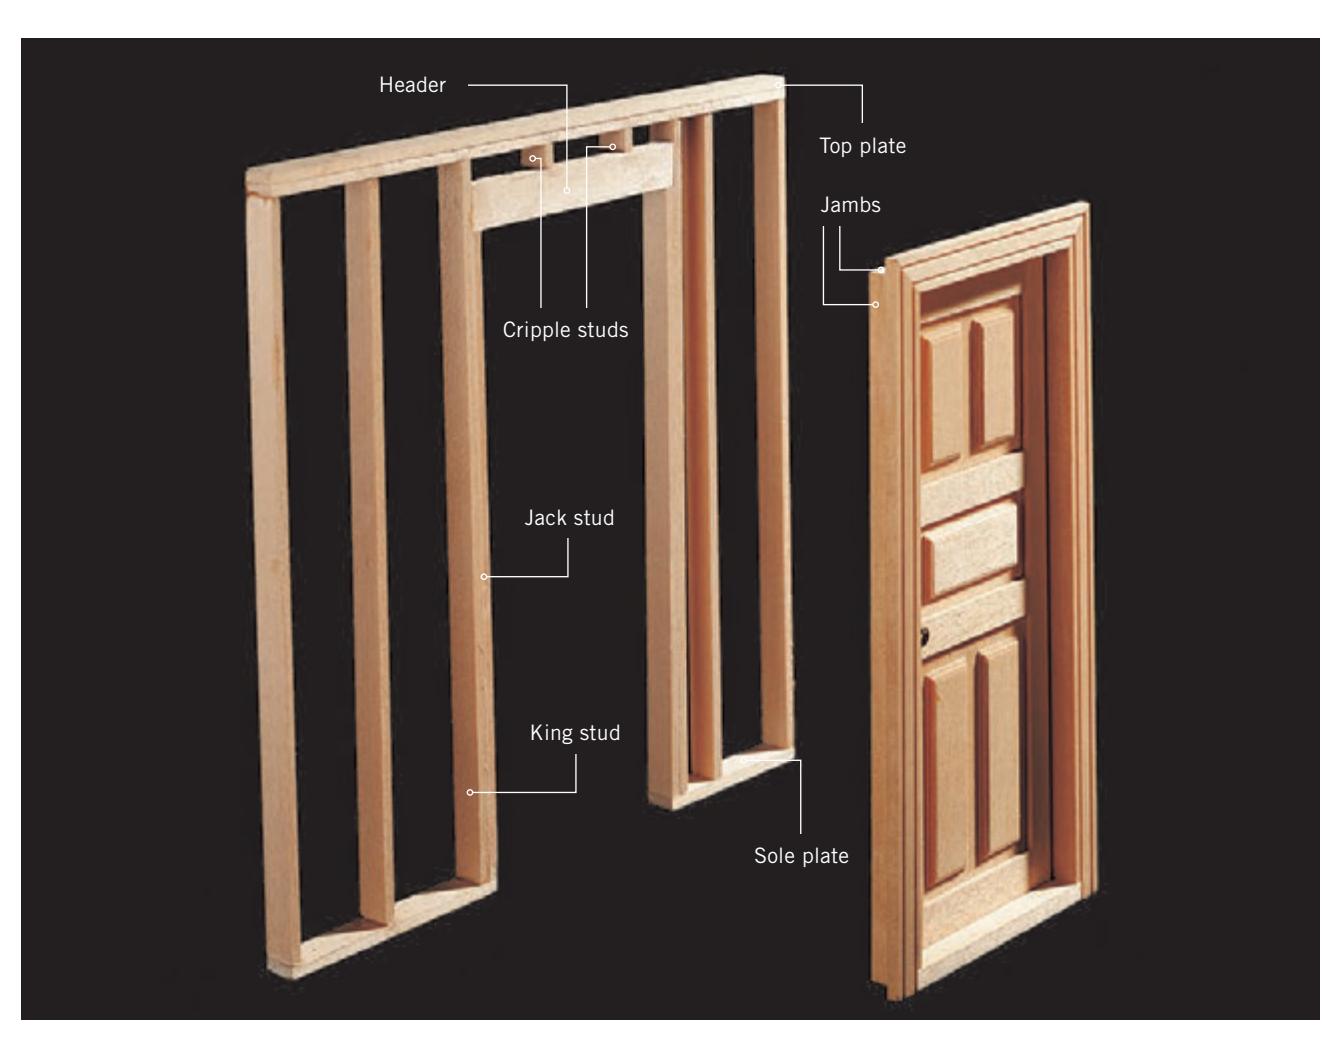
Door opening: The structural load above the door is carried by cripple studs that rest on a header. The ends of the header are supported by jack studs (also known as trimmer studs) and king studs that transfer the load to the sole plate and the foundation of the house. The rough opening for a door should be 1” wider and ½” taller than the dimensions of the door unit, including the jambs. This extra space lets you adjust the door unit during installation.
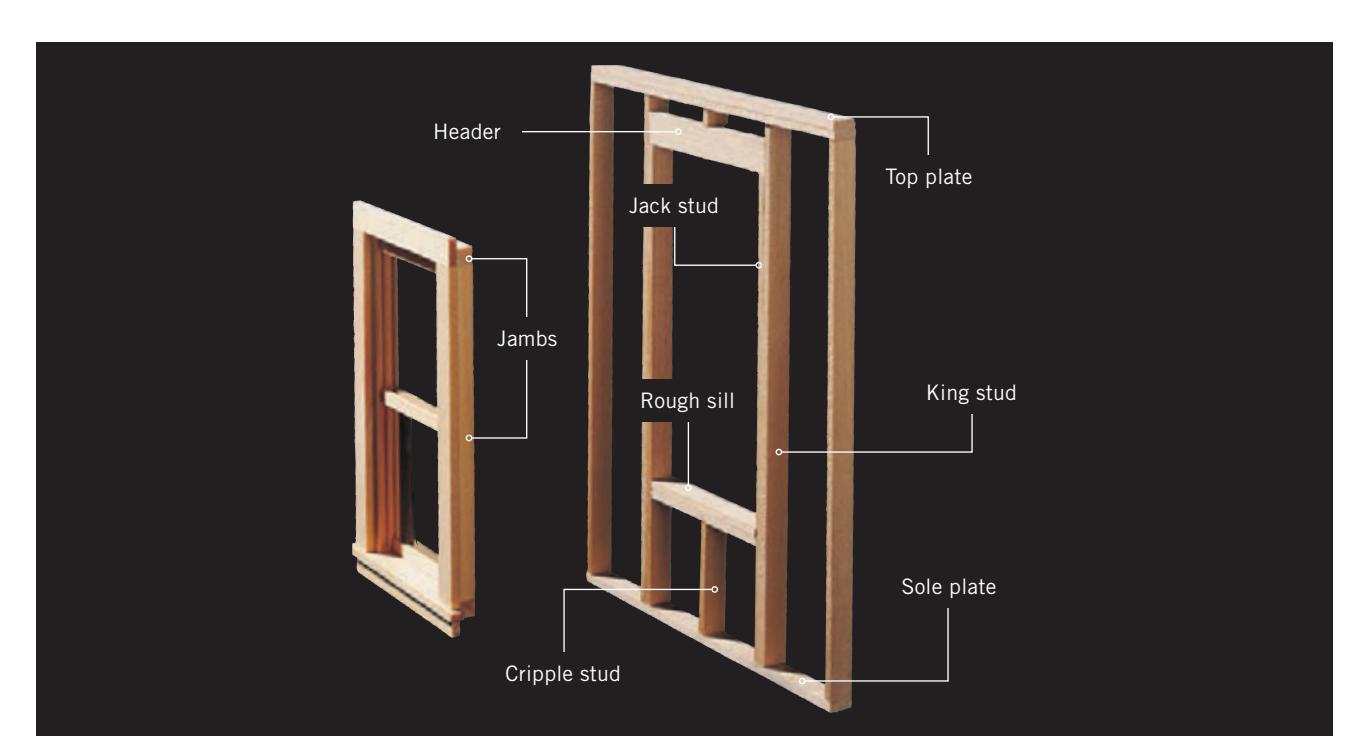
Window opening: The structural load above the window is carried by cripple studs resting on a header. The ends of the header are supported by jack studs and king studs, which transfer the load to the sole plate and the foundation of the house. The rough sill, which helps anchor the window unit but carries no structural weight, is supported by cripple studs. To provide room for adjustments during installation, the rough opening for a window should be 1” wider and ½” taller than the window unit, including the jambs.
FRAMING OPTIONS FOR WINDOW & DOOR OPENINGS (NEW LUMBER SHOWN IN YELLOW)
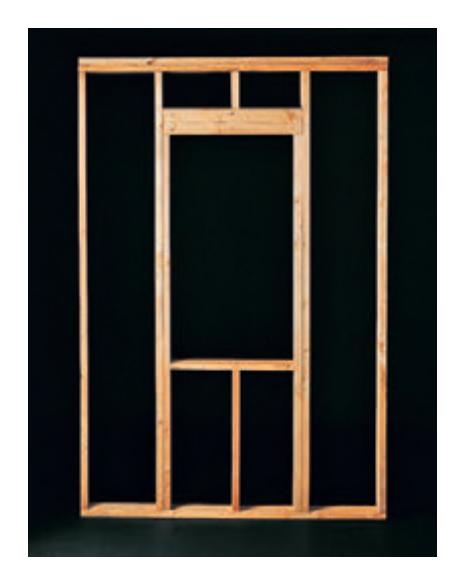
Using an existing opening avoids the need for new framing. This is a good option in homes with masonry exteriors, which are difficult to alter. Order a replacement unit that is 1” narrower and ½” shorter than the rough opening.
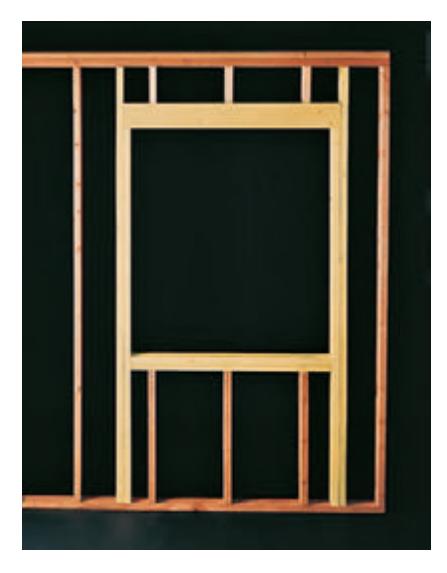
Framing a new opening is the only solution when you’re installing a window or door where none existed or when you’re replacing a unit with one that is much larger.
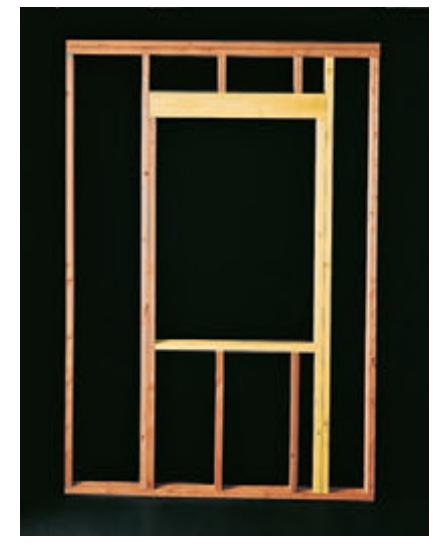
Enlarging an existing opening simplifies the framing. In many cases, you can use an existing king stud and jack stud to form one side of the new opening.