A CLUTTER-FREE HOME
Organized Storage Solutions & Projects

Contents
| INTRODUCTION | 5 |
|---|---|
| Gallery of Storage Success | 6 |
| Address the Mess | 17 |
| The Problem with Clutter | 18 |
| Decluttering Your Home | 20 |
| Maintaining Order | 26 |
| Kitchens | 29 |
| Storage Strategies | 30 |
| Pot Racks | 34 |
| Slide-out Storage | 40 |
| Pull-out Pantry | 44 |
| Vertical Cabinet Dividers | 46 |
| Dish Rack | 48 |
| Pantry Shelf | 50 |
| Pine Pantry | 54 |
| Pull-down Shelves | 58 |
| Bathrooms | 61 |
| Storage Strategies | 62 |
| Full-height Medicine Cabinet | 66 |
| Wall-hung Bath Cabinet | 72 |
| Towel Towers | 78 |
| Glass Shelves | 84 |
| Bedrooms & Closets | 87 |
| Storage Strategies | 88 |
| Closet System | 92 |
| New Closet | 96 |
| Closet Organizer | 100 |
| Underbed Storage | 102 |
| Chest of Drawers | 106 |
| Armoire | 110 |
| Headboard | 114 |
| Shoe Cubby | 118 |
| Tie & Belt Rack | 121 |
| Living Areas | 123 |
| Storage Strategies | 124 |
| Storage Cubes | 128 |
| Suspended Shelving | 132 |
| Mudroom Wall System | 136 |
| Understairs Bookcases | 140 |
| Closet Office | 146 |
| Kids’ Stackable Storage Blocks | 150 |
| Crown Molding Shelves | 152 |
| Stock-Cabinet Hobby Center | 154 |
| Basements, Attics & Garages | 159 |
| Storage Strategies | 160 |
| Laundry Center | 164 |
| Basement Stairway Shelving | 168 |
| Joist Shelves | 172 |
| Basement Storage Wall | 174 |
| Utility Shelves | 180 |
| Garage Deck | 184 |
| Adjustable Shelving | 190 |
| Garage Cabinets | 192 |
| Garage Ceiling Storage | 196 |
| Attic Storage Deck | 198 |
| Workshops | 203 |
| Storage Strategies | 204 |
| Carousel Shelf | 213 |
| Fold-down Work Shelf | 214 |
| Pegboard | 218 |
| Slat Wall | 222 |
| Appendix A: Shelving | 226 |
| Appendix B: Modular Shelving | 228 |
| Appendix C: Wire Shelving | 230 |
| Conversions | 232 |
| Resources | 234 |
| Photo Credits | 234 |
| Index | 235 |
Introduction
What makes this book different from the many other books about home organization and storage? Simple: it not only guides you through the process of decluttering and organizing your home from top to bottom, it also shows you how to create dozens of innovative storage solutions for maintaining order in every room in the house. It isn’t simply a bunch of commonsense tips you’ve heard a thousand times, illustrated with some old photos that resemble your parent’s or grandparent’s house. Nor is it an entry-level woodworking book with black and white diagrams showing you how to build six different spice racks. The Complete Guide to a Clutter-free Home is a practical guide intended for the enthusiastic do-it-yourselfer whose goal is to create an efficient, visually pleasing home for today, where every item has its place.
Since you’re thinking about home organization, and perhaps have even slipped into daydreams about a blissful, clutter-free existence, you’ve surely wondered what the secret is to keeping everything in its place: Better storage containers? More closet space? A remodeled kitchen? A bigger house? Of course, having more space and more places to put things might help, but only temporarily. The fact is, a three-story home can have as many storage challenges as a one-bedroom apartment, it’s just that one can be crammed with a lot more clutter than the other. The real secret to a well-organized home lies in a process of analyzing your everyday activities and finding storage solutions that make it all work better.
To be sure, part of that process is weeding through all the junk you’ve been diverting to piles in recent months or years. This follows a process of its own, which you’ll learn about in the first chapter. But soon enough you’ll come to the more thoughtful work of devising a storage plan for each room, and then creating or choosing the best projects or products to meet your needs.
As you work toward your goal of a clutter-free home, it will help to remember that organization is always a work in progress. Don’t expect a global transformation to happen overnight or even over a long weekend. Once you get started, you’ll find that much of the organizing work involves adopting a new way of thinking in addition to seeking the right place for everything. You’ll also find that each accomplishment, no matter how small, will motivate you to do more. Try to set a doable goal for each block of time you have available, and focus on tackling a specific area before moving to the next. Like any big project, household clutter is best managed one step at a time.
The photos on the next few pages will help inspire you to get the ball rolling and take control of the clutter in your home.
Gallery of Storage Success
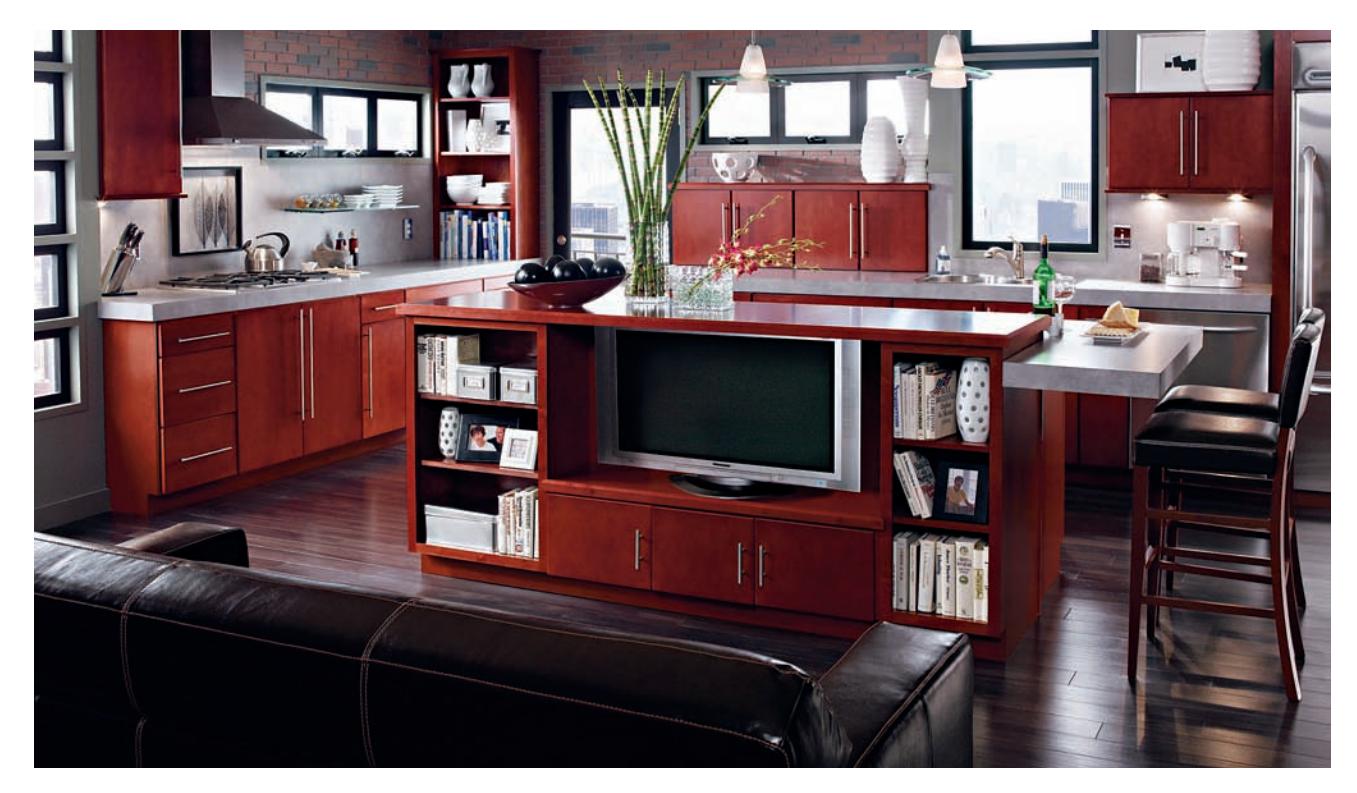
This versatile kitchen island is a one-man-band of clever space utilization. It includes a prep surface for the cook, a breakfast bar for the family, and a spacious storage alcove that is put to good use as an entertainment center. It also creates a visual barrier that helps segregate any kitchen mess from the other living spaces.
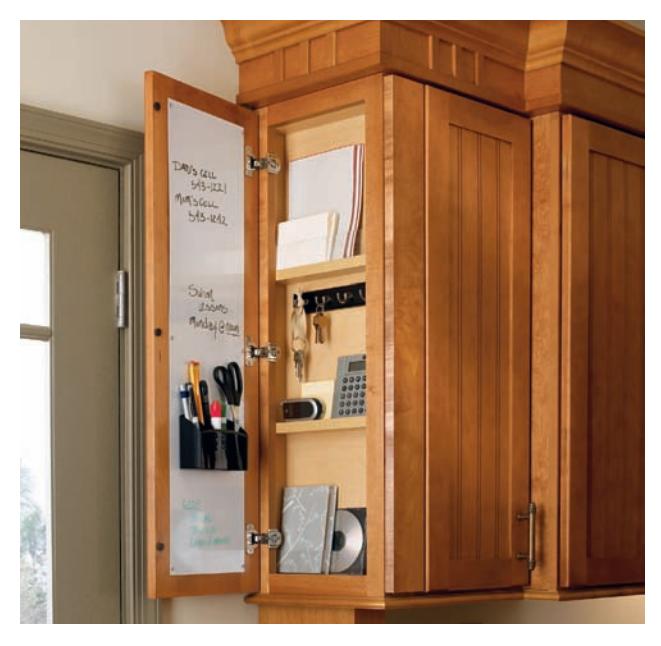
This easy add-on to the end of an upper cabinet run takes pressure off the horizontal surfaces below, where the various notepads, keys, and pencil holders would otherwise reside.
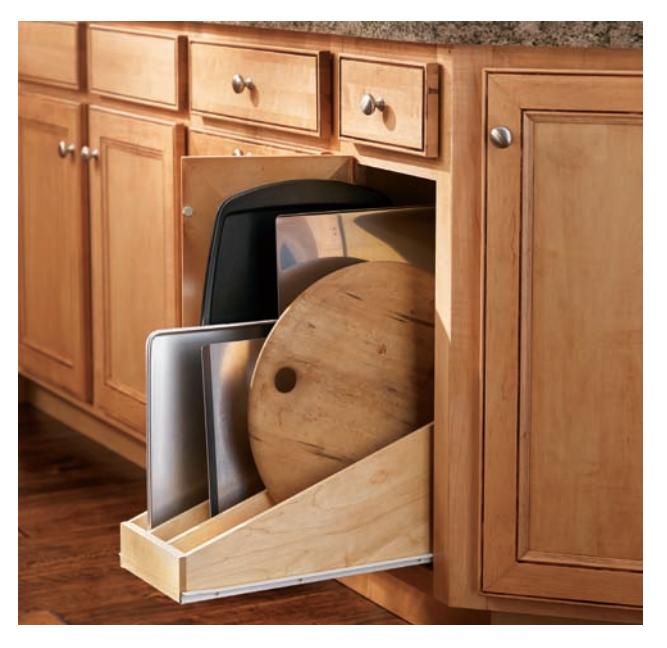
Slide-out cabinet storage units are exploding in popularity, both in the initial design of custom cabinets and as retrofits to existing cabinetry. Finally, hard-to-store smallware like baking sheets and cutting boards have a convenient place for safe keeping.
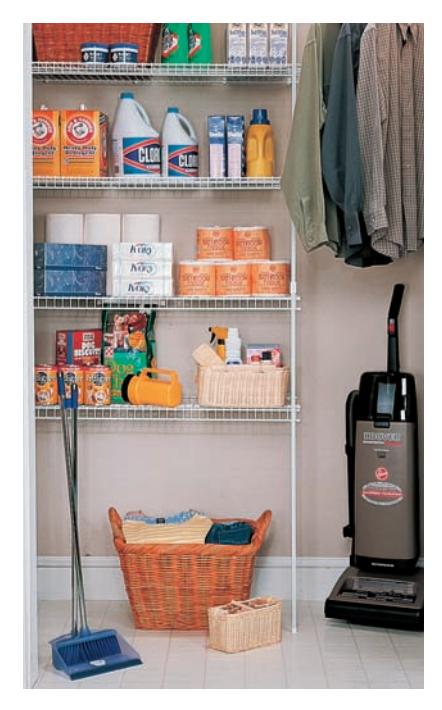
Utility space is often overlooked in favor of more glamorous storage that has a strong design component, like a handcrafted maple block for displaying your fancy German knife set. But a slightly out-of-the-way broom closet with simple coated wire shelving is a valuable storage asset you will use every day.
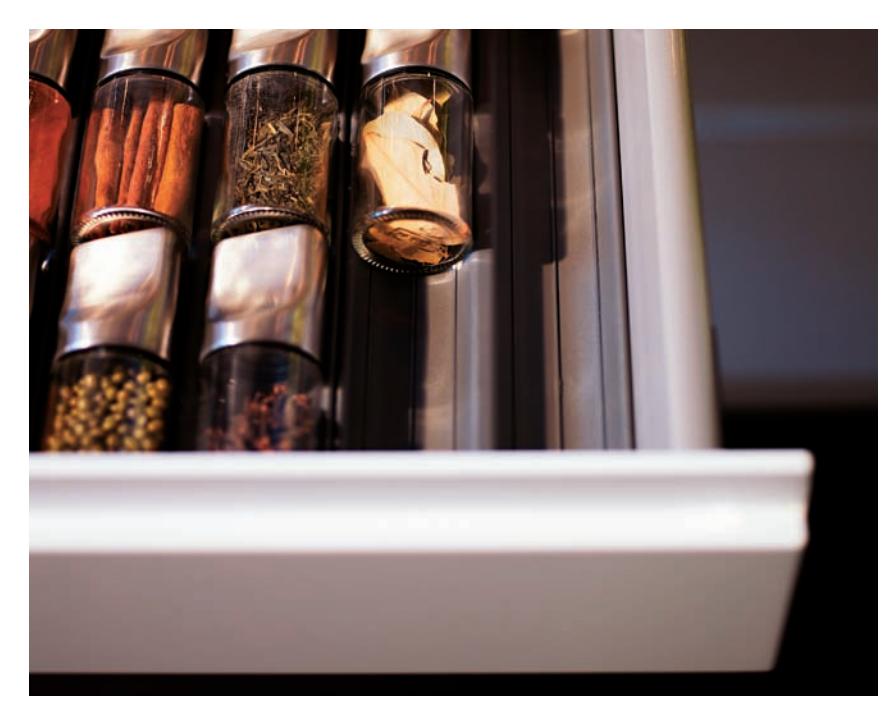
A built-in spice rack that fits into a base cabinet drawer has a couple of advantages: it is convenient and prevents the willy-nilly spread of spice containers; and it keeps spices away from heat and light that can cause them to degrade more quickly. TIP: Look for drawer inserts that will accommodate containers of various sizes (unless you think you’ll actually consume the same amount of turmeric as dried parsley).
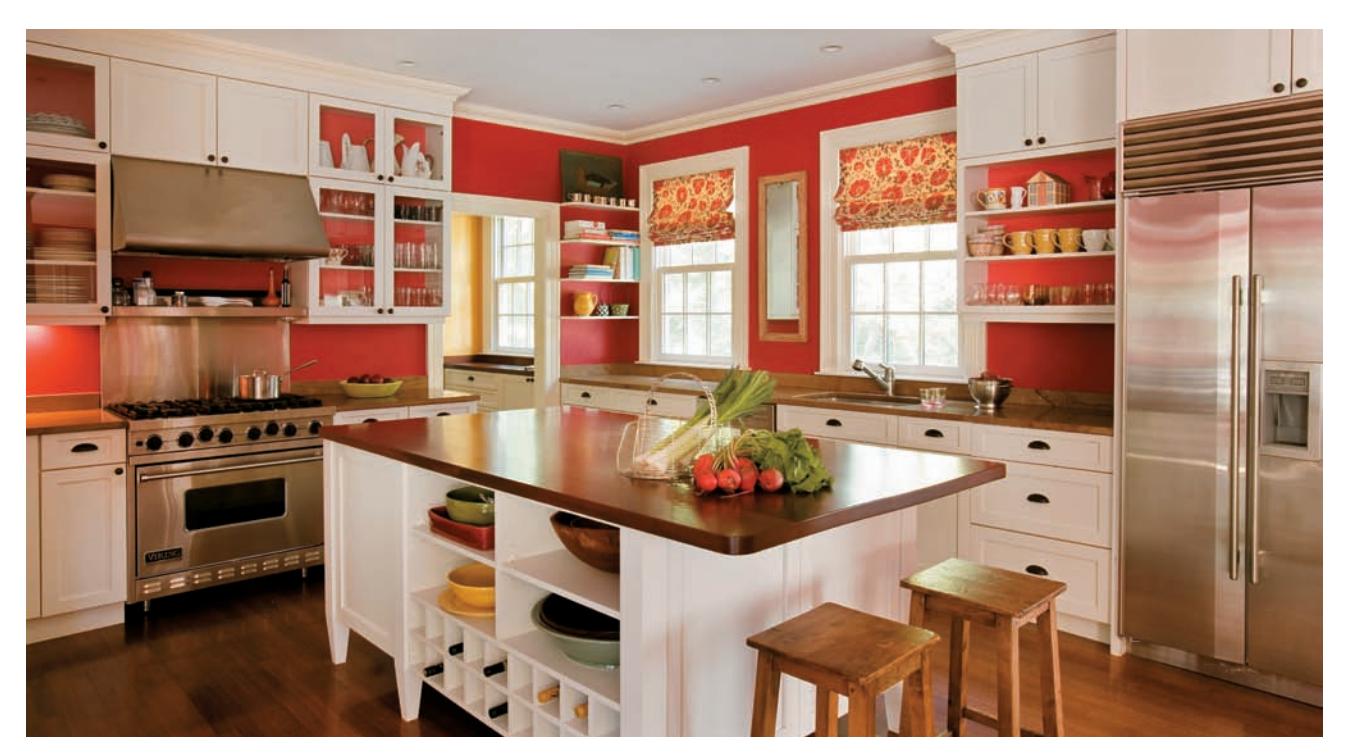
Open shelving in the wall cabinet banks provides at-a-glance storage that can be a nice timesaver. But more importantly, it opens up the appearance of your kitchen—preventing a closed-in feeling that a looming edifice of cabinet doors can cause.
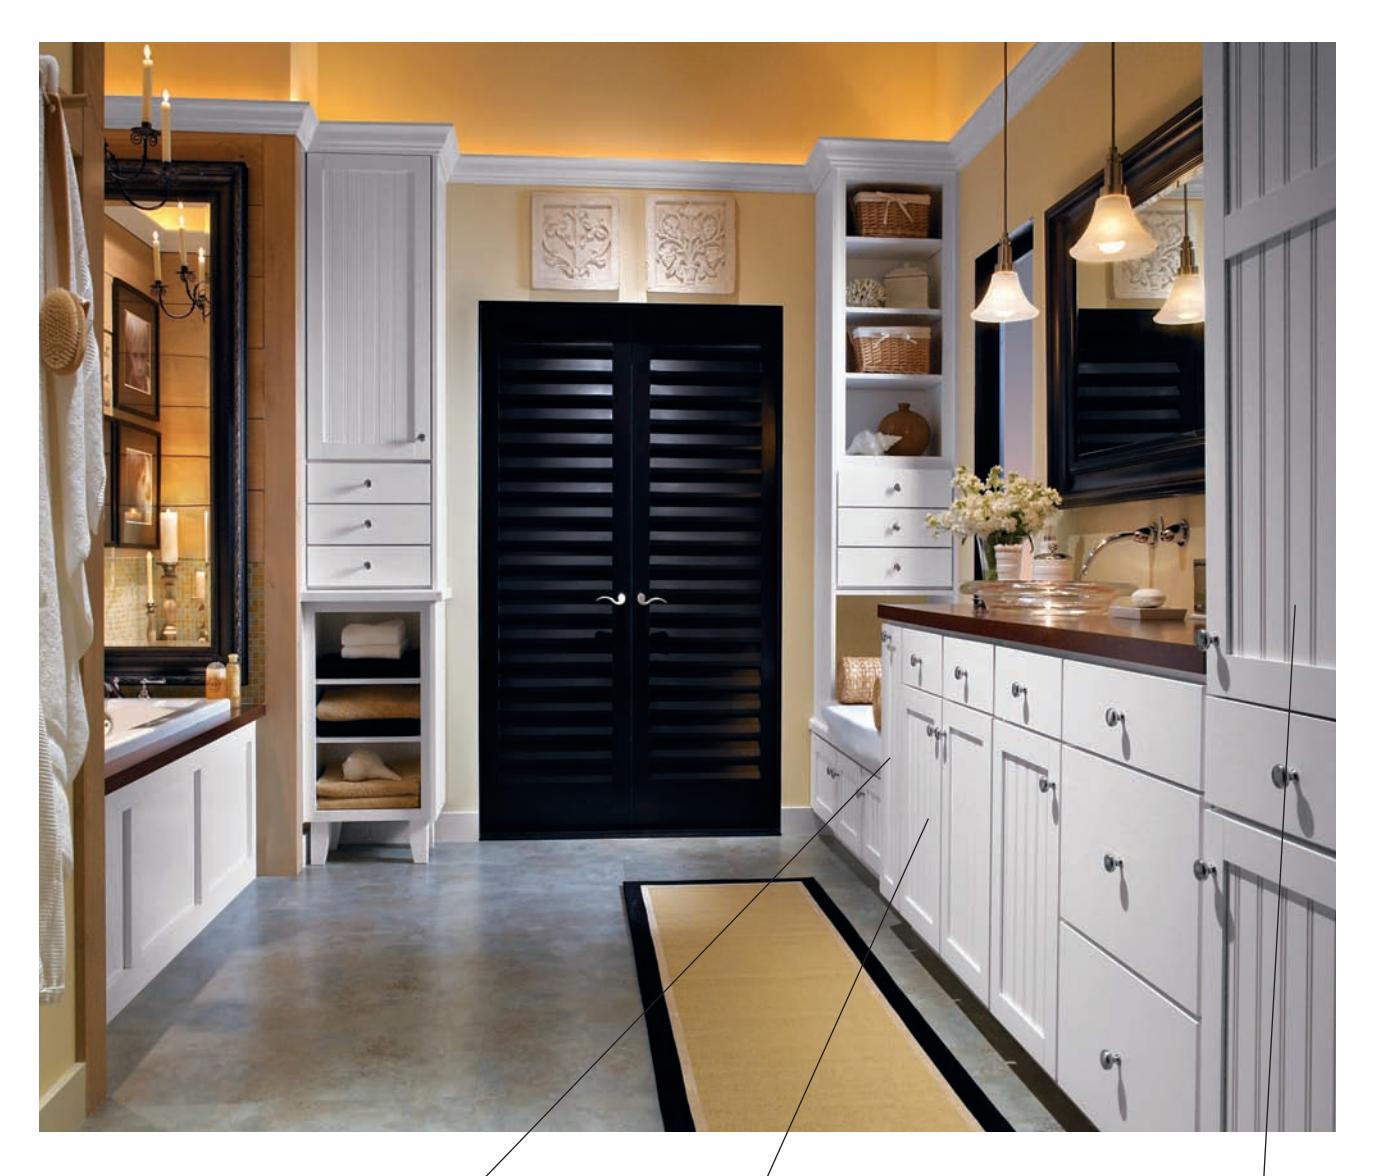
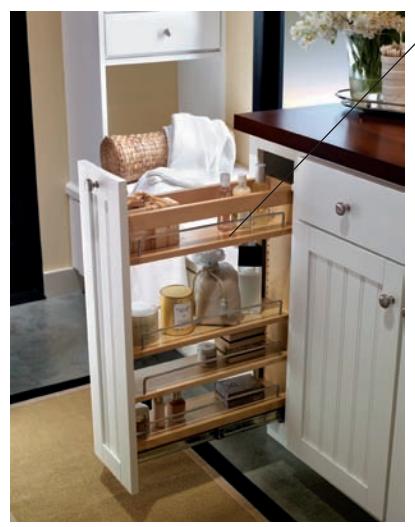
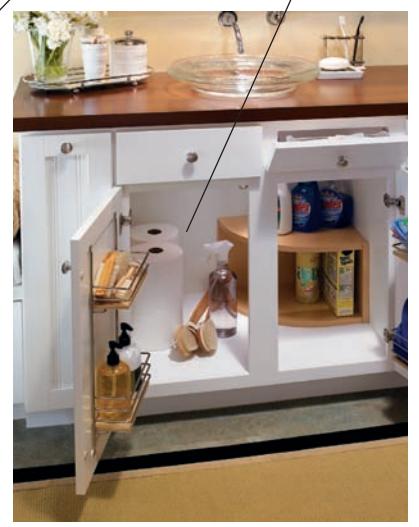
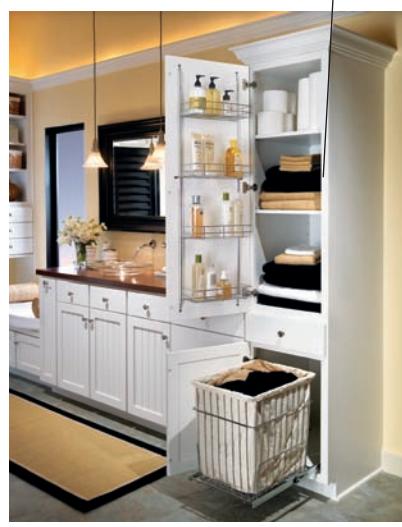
Resembling a galley kitchen, this efficient bathroom layout exploits the economy of cabinetry to great effect. A nice blend of cabinets, drawers, and open shelving, the shared design elements of the cabinetry is even echoed in the access panel for the jetted tub. Clever details include slide-out shelving for organizing bottles and small containers (lower left); an open sink base with a wallmounted drain trap to preserve storage space (lower middle); and door-mounted storage shelves and a pull-out hamper (lower right).
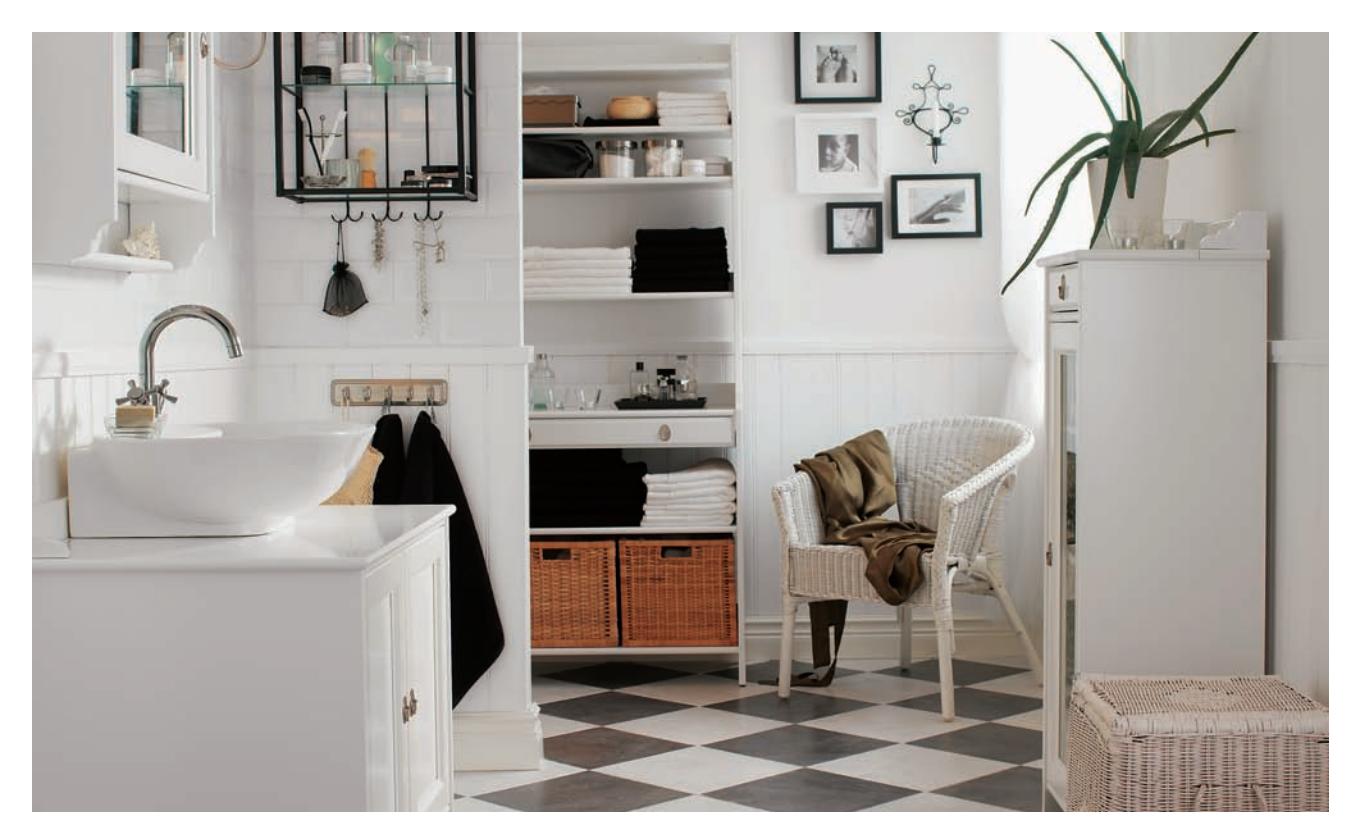
Surface-mounted and stand-alone storage accessories may lack the permanence of their built-in counterparts, but they have the advantage of being moved easily as your storage needs evolve. They also have a light, contemporary attitude.
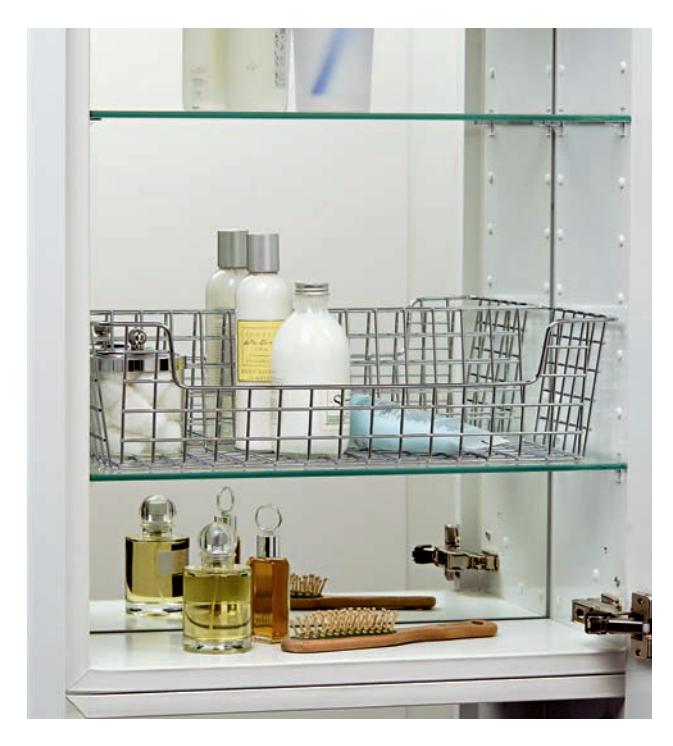
A medicine cabinet with glass shelves is a great place to keep cosmetics and personal care items. Avoid using it to store actual medicine, which should be housed in a cool, dry spot that is either lockable or unreachable by children.
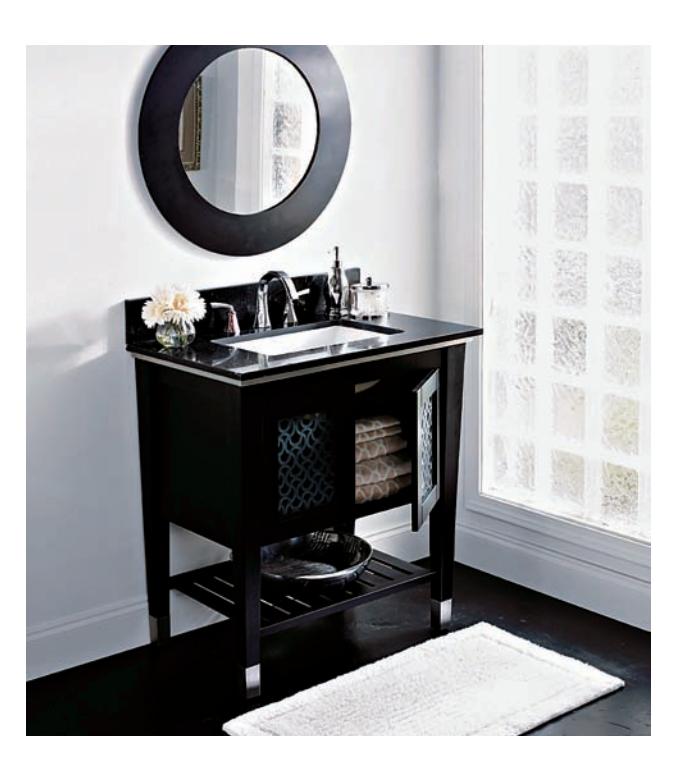
Furniture and fixtures can be combined with great effect in any room, but a bathroom is a prime candidate. Here, a small serving sideboard is fitted with a granite countertop and plumbed to support an undermount lavatory sink. Make sure to fasten plumbed furnishings to the wall or floor for stability and safety.
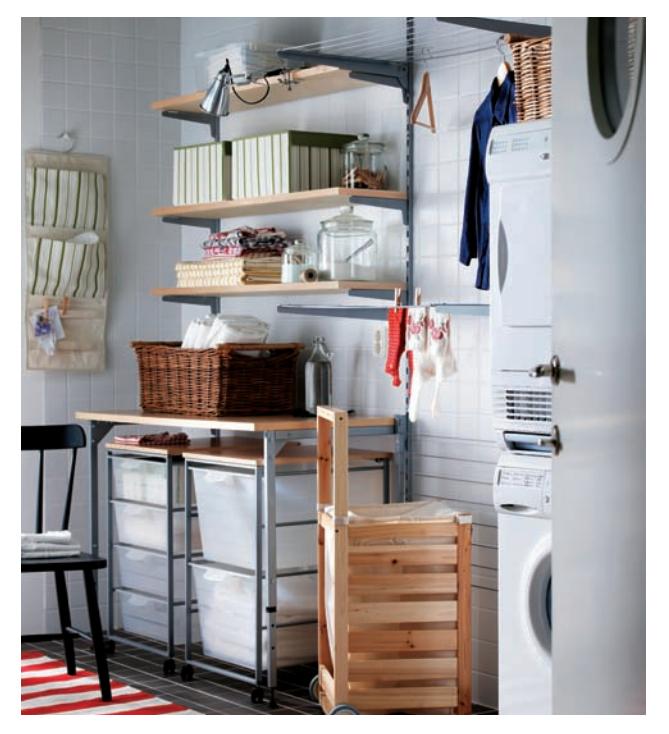
A laundry room can get out of control easily, but rolling laundry carts help keep the mess in check. Sized to be garaged underneath a spacious work surface, they exhibit one of the key features of smart storage: they add capacity without impinging on usable floorspace.
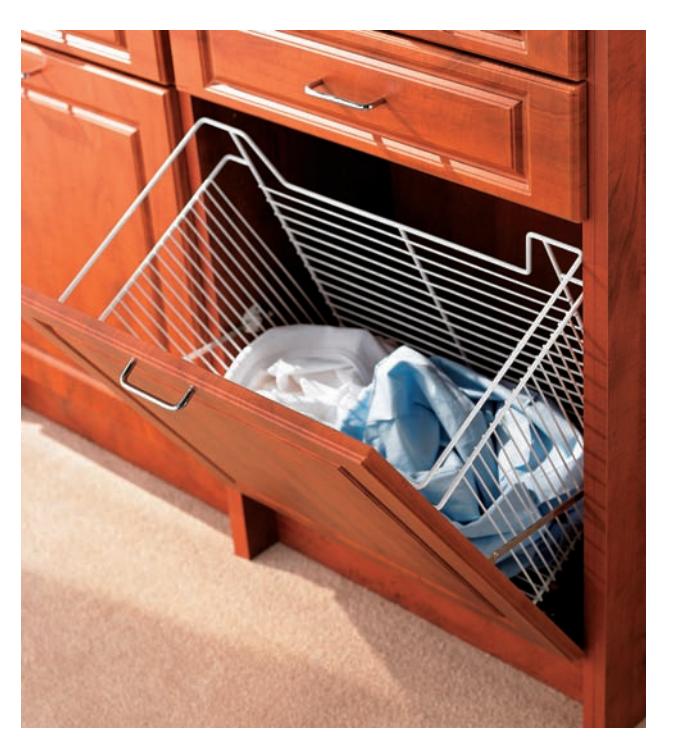
Hopper-style baskets are a good way to take advantage of hard-to-reach cabinet spaces. In addition to low drawers in base cabinets, they can also be used on drawer false fronts, where the drawer cavity is fairly shallow (found mostly on sink base cabinets).
 {alt=”Hopper-style pull-out wire baskets in a kitchen cabinet.”}
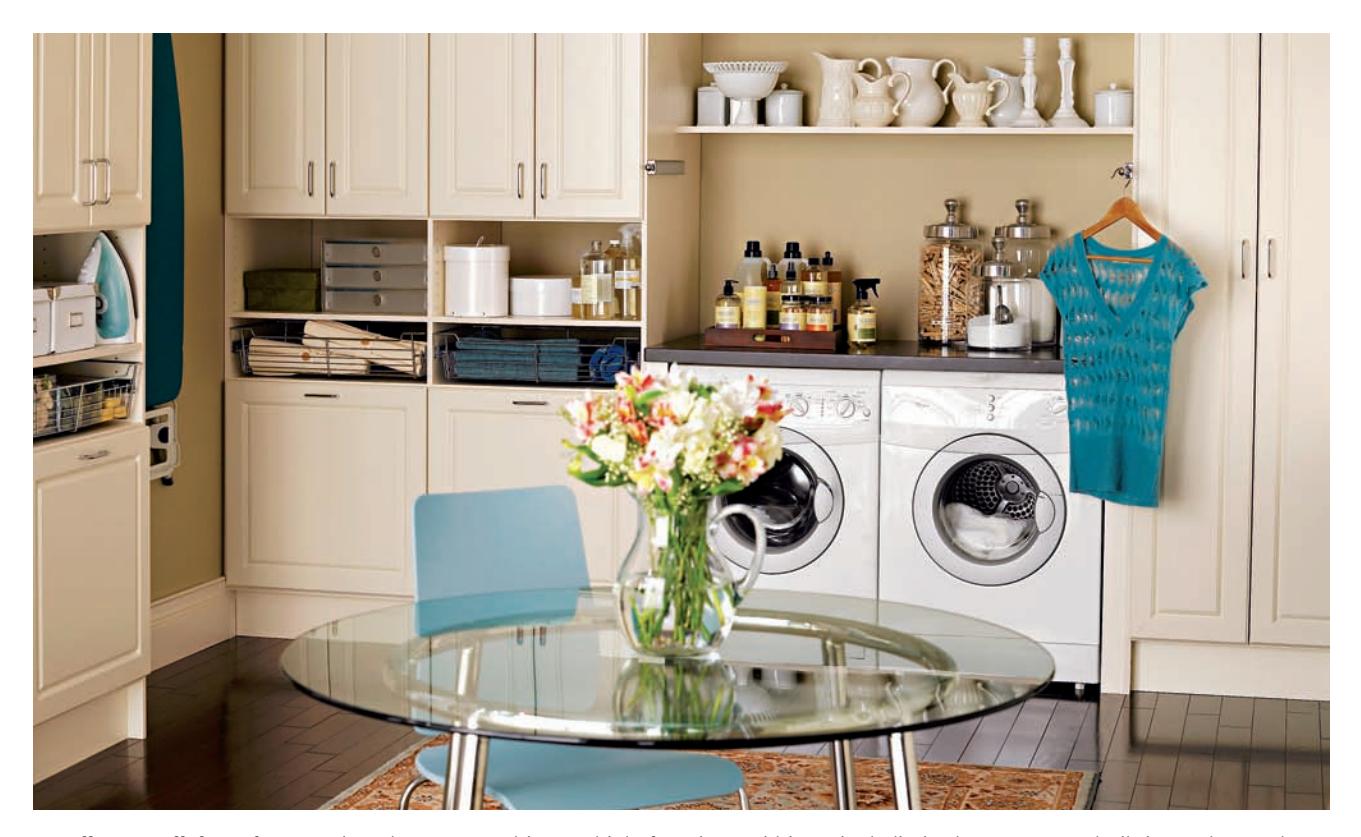
 {alt=”Built-in washer and dryer discreetly integrated into floor-to-ceiling cabinets.”}
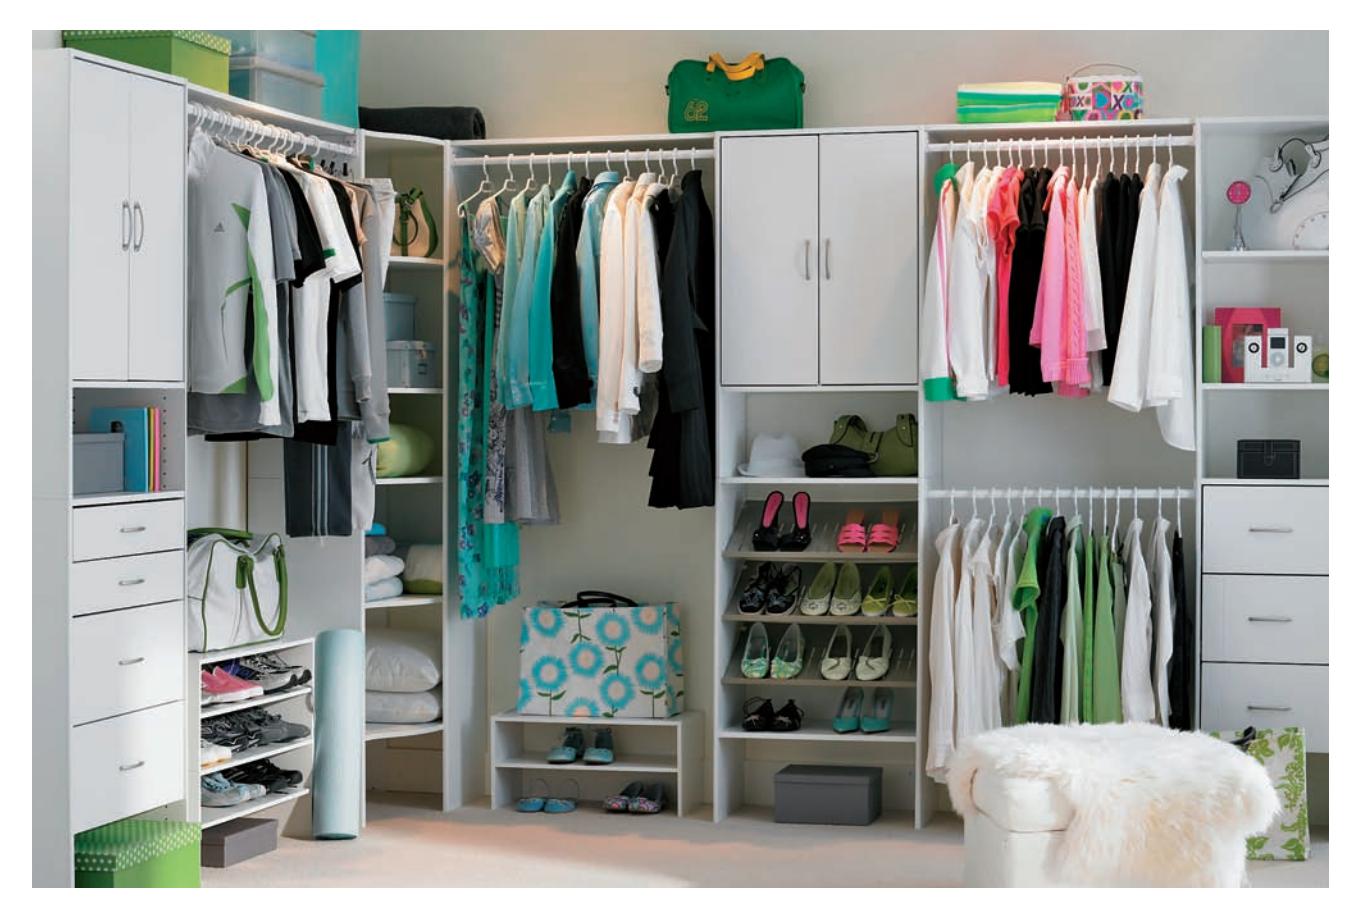
Installing closet organizing systems is a fast-growing industry with technicians who can make a huge improvement in the usability of everything from a small reach-in closet to an adjoining bedroom that’s reconfigured as a walk-in closet. Most building centers carry all the materials you need to create a closet system yourself.
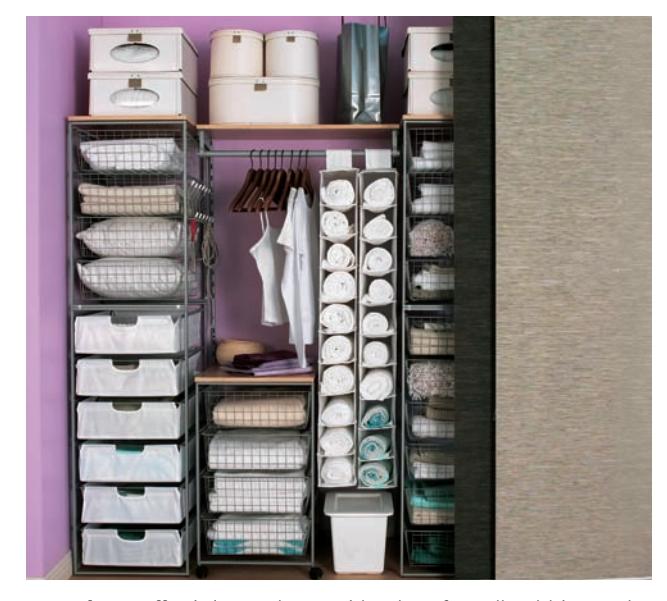 {alt=”A closet interior with multiple small cubbies and drawers for organization.”}
Keep it small. Fitting a closet with a lot of small cubbies and drawers may not be the most efficient way to use your space, but it prevents your closet from turning into a loose collection of junk drawers with no good organizational system.
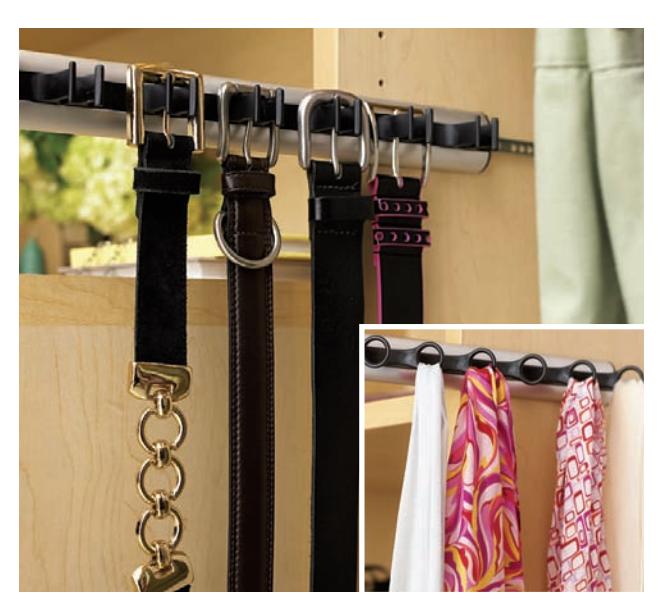 {alt=”A pull-out belt rack and scarf rack (inset) in a closet storage system.”}
There are many accessories available for closet storage systems, but the most common are pullout belt (as shown) and scarf (inset) racks. There are also extendable pant racks that glide out, sunglass storage, hat storage, and more. And never underestimate the value of adding a few simple hooks to any outside shelving or cabinet side.
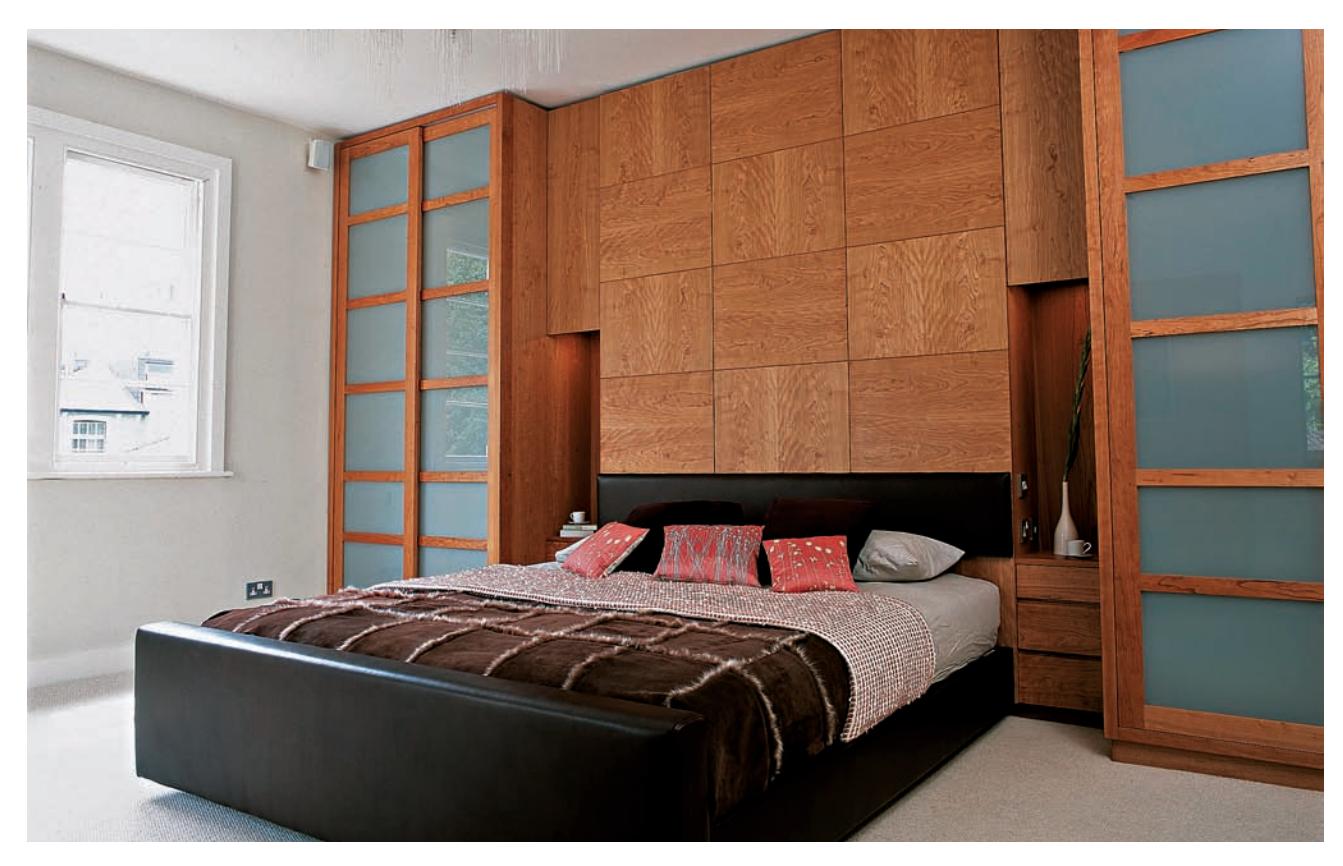 {alt=”A bed surround built into an entire wall, providing storage and a dramatic design impact.”}
A bed surround occupying an entire wall has a dramatic design impact on a room while offering up plenty of storage for a minimal sacrifice of floor space. You can use stock cabinets to build your own surround, or have a custom unit built for you. Consider incorporating a reading light or two into the design.
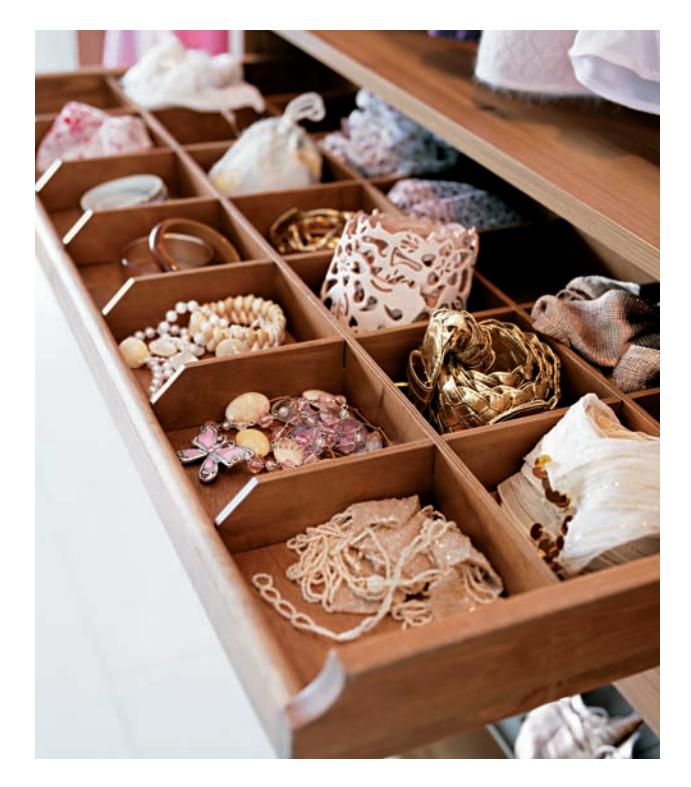 {alt=”A close-up of a jewelry drawer with dividers, keeping valuables organized.”}
 {alt=”A close-up of a jewelry drawer with dividers, keeping valuables organized.”}
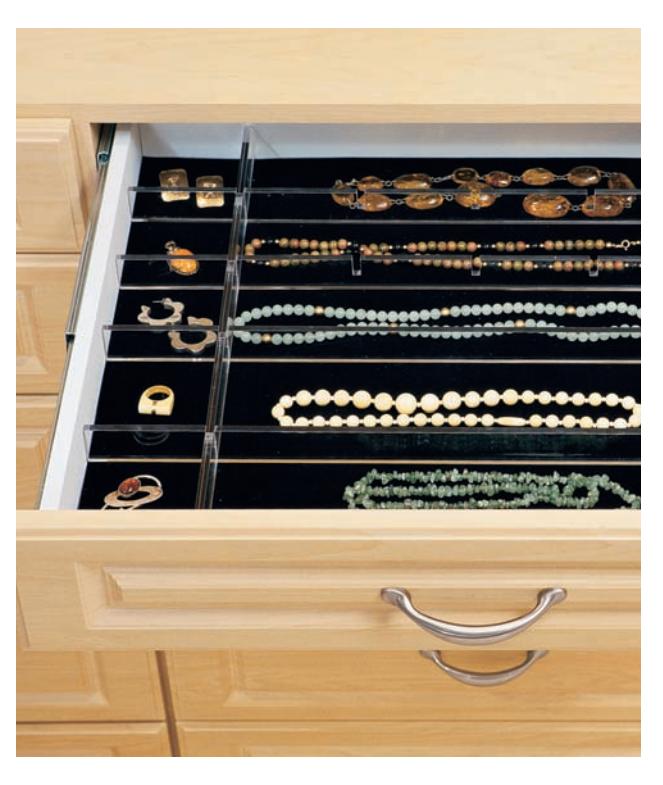
Jewelry drawers with dividers are useful cabinet features. They keep your valuables organized and out of sight, plus they eliminate the need to clutter up your dresser top with a jewelry chest. Soft drawer bottom liners are also available.
 {alt=”A traditional media center with display and hidden storage, blending with room millwork.”}
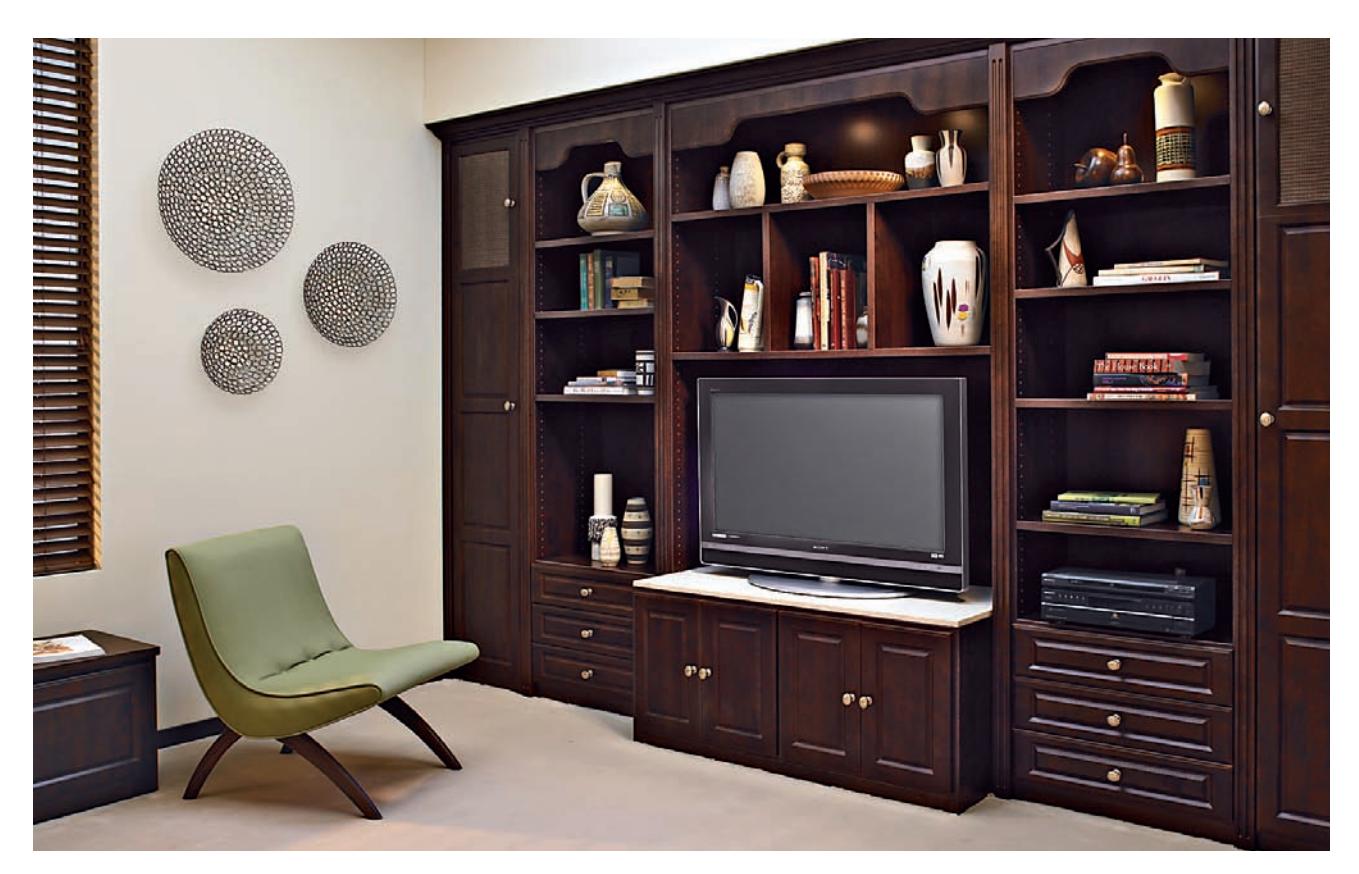
A traditional media center combines media storage with display storage and is designed to blend in with the trim and millwork in the room. Adding a soffit above the media center turns it into a bona fide built-in, and the soffit space can be used to run cables or to house recessed speakers.
 {alt=”An entertainment center with open shelves for media players and hidden storage for DVDs.”}
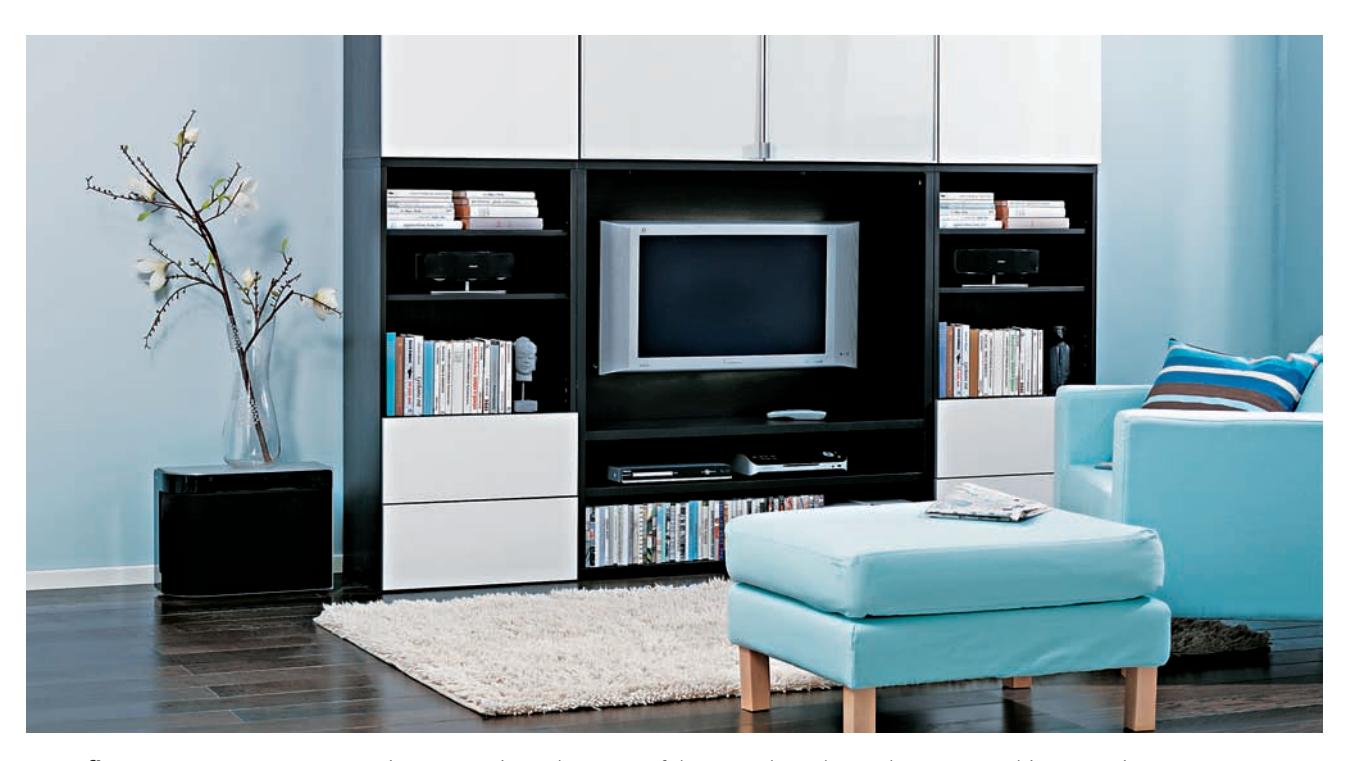
Even flat screen TVs present a major storage issue because of the attendant clutter they attract. This entertainment center contains some storage spaces for items you want left out in plain view, such as electronic media players, while offering hidden storage spaces so elements such as DVDs can be kept behind doors.
 {alt=”A home office or craft center with a slat wall, hangers, baskets, and adjustable shelves.”}
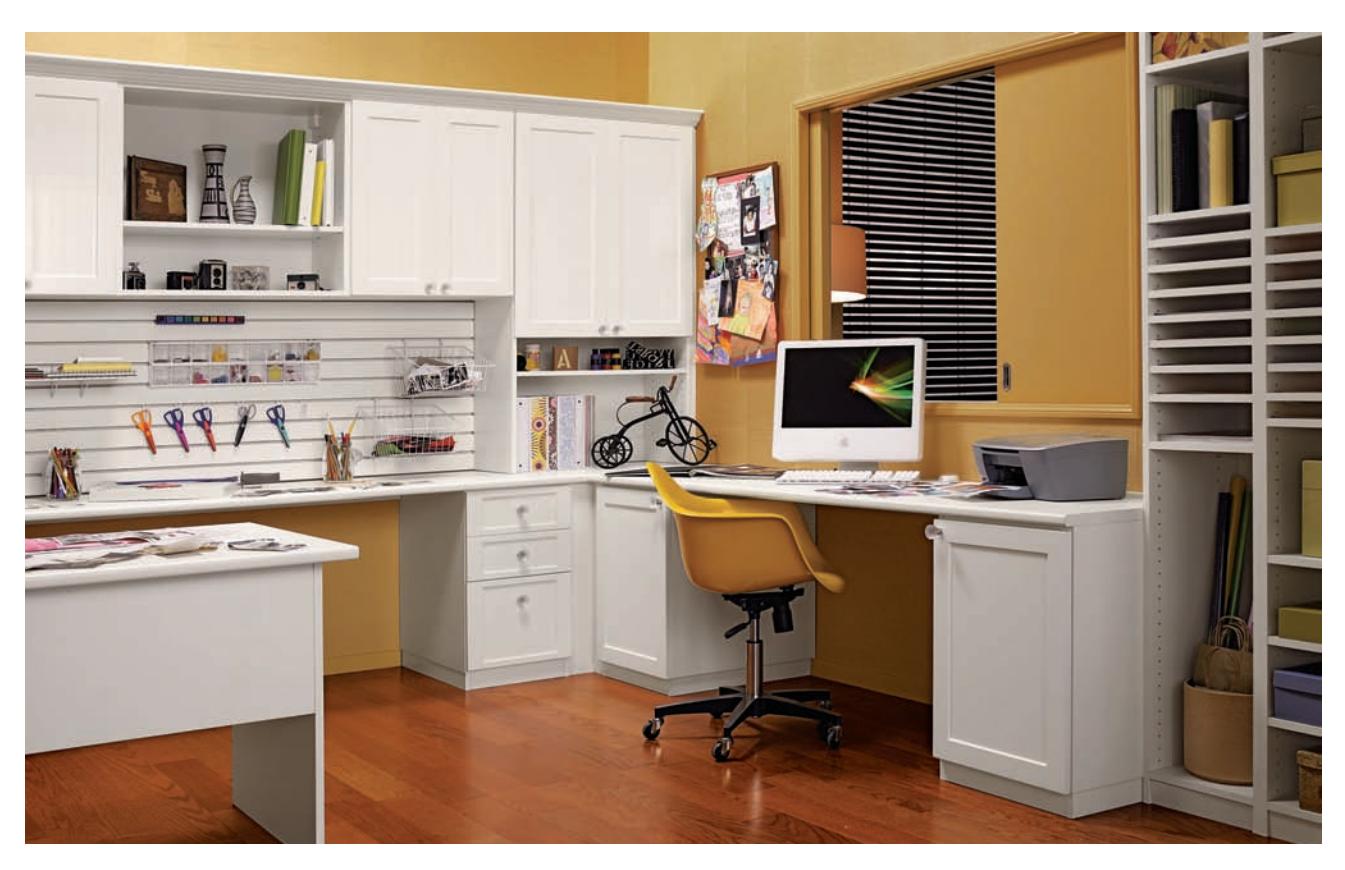
A well-planned home office or craft center has a dedicated spot for just about everything. A slat wall with hangers, baskets, and shelves is easy to customize to your needs. Adjustable shelving also lets you rearrange your storage configurations as needed.
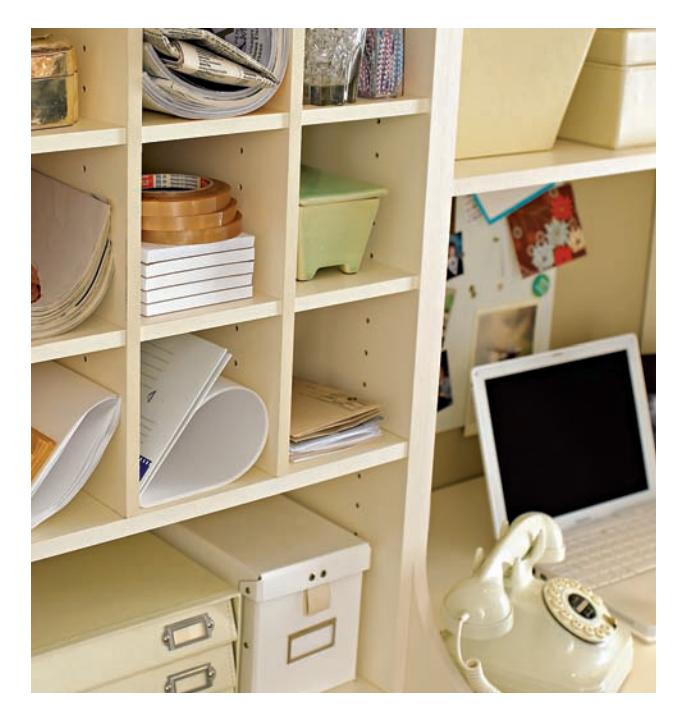 {alt=”Cubbies designed for storing printed matter like mail, magazines, or forms.”}
Here, cubbies were made for storing printed matter, be it mail, magazines, newspapers, or important printed forms. Obviously, they can hold nonprinted matter as well. Building cubbies from scratch is a bit tricky, but you can find ready-to-assemble cubby systems that are very easy to work with.
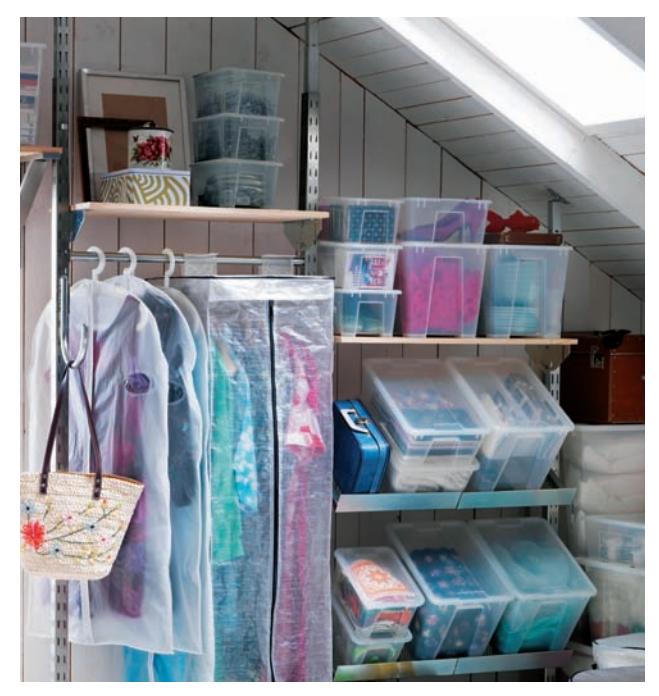 {alt=”Storage system maximizing space in an attic corner with overhead angles.”}
Maximize storage space in attics and under stairs so the overhead angles do not create obstacles. The attic system here makes use of practically every inch of space in a cramped corner.
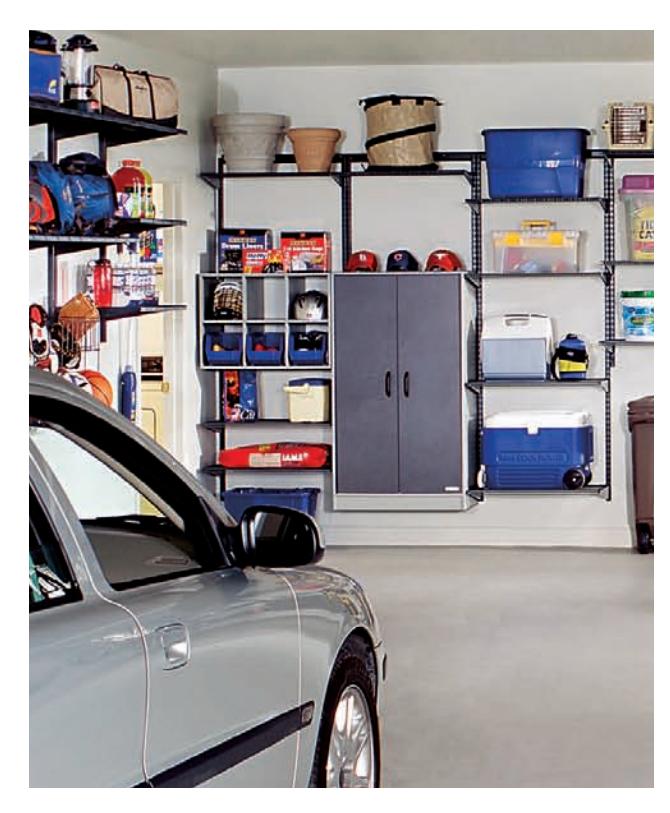 {alt=”A garage organized with storage products, keeping the floor clear.”}
The garage has great storage potential, but unless you’re careful you can easily end up with a bunch of boxes and nowhere to park your car. Most building centers now carry a full line of products to help you organize your garage into an efficient storage area.
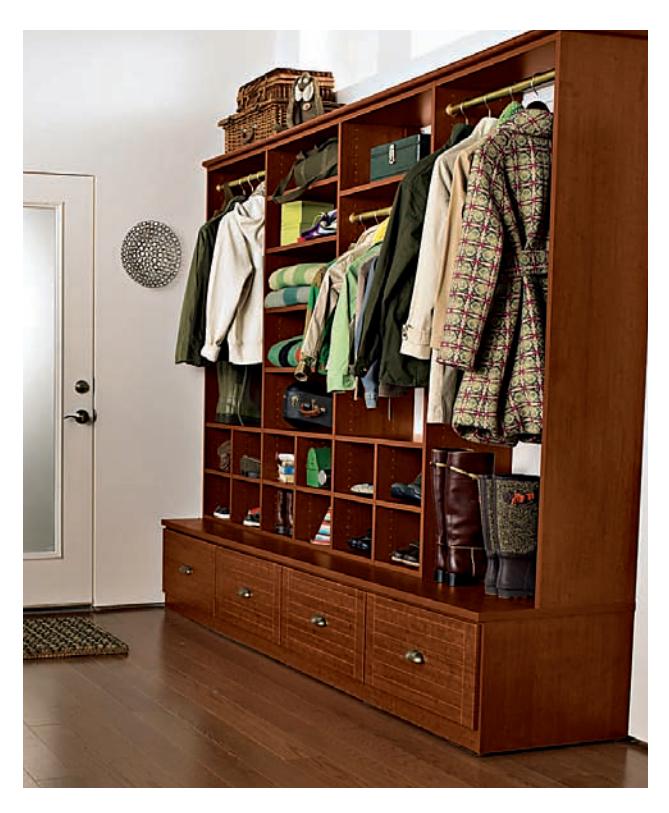 {alt=”An attractive and functional entry area storage unit with dedicated spaces for family members.”}
The entry area to your house should be equipped with plenty of accessible and attractive storage space. Ideally, each family member will have a dedicated area within the larger storage component. Because first impressions count, make sure your entry storage is attractive as well as functional.
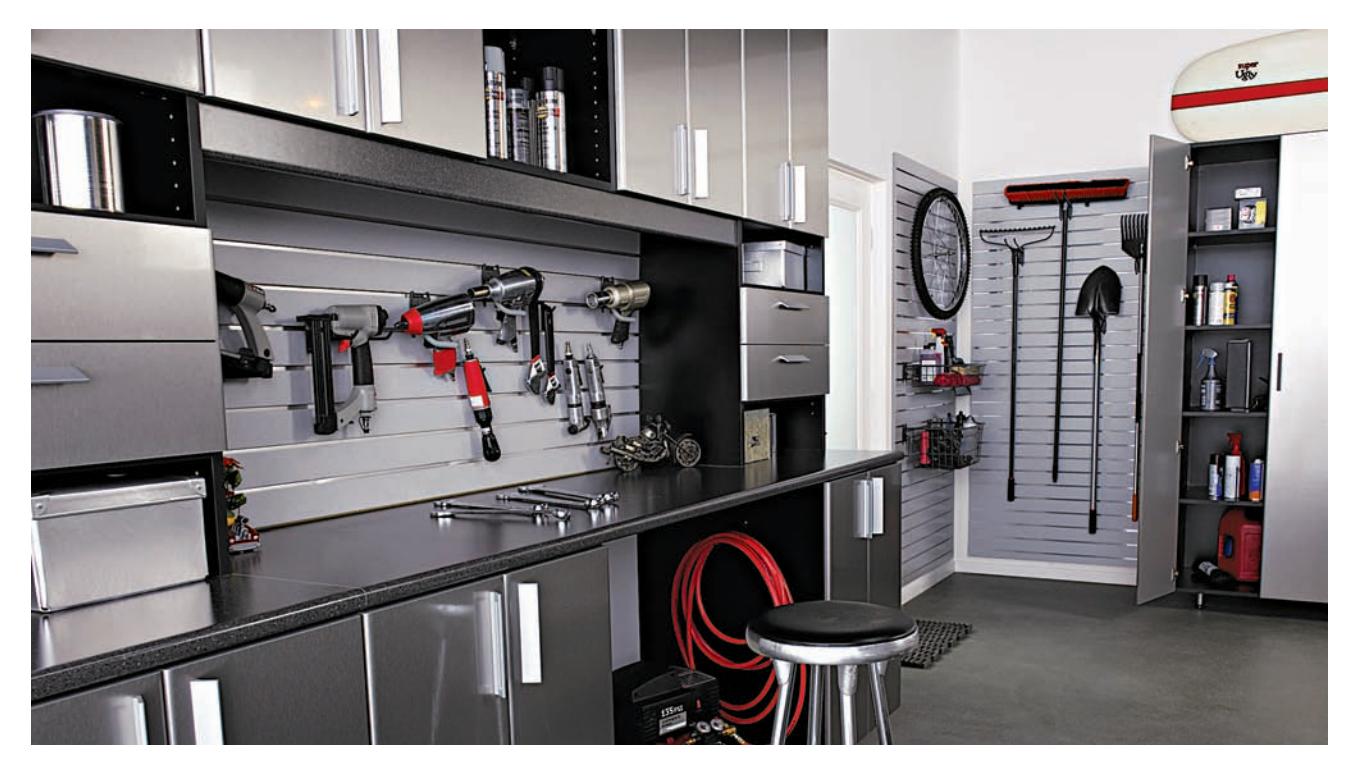 {alt=”A garage with wall-mounted storage cabinets and hanging systems, leaving the floor and countertops clear.”}
Clutter management is partly about storing things and partly about protecting usable space so it stays usable. This garage is a perfect example. Here, the storage cabinets and wall hanging systems leave the floor free and open up countertop space.
 {alt=”A person looking at a cluttered desk with papers, books, and various items.”}
Address the Mess
Tackling clutter is the first step to achieving an organized home. In this chapter we’ll cover the all-important work of paring down your stuff to keep only the things you really need, really use, and really love. As for the rest, you can send it out the door to the landfill, to a friend or charity, or, if you absolutely can’t part with it, into long-term storage. Because a cluttered home can never be an organized home, you have to pitch before you can progress.
The next step is to examine how you use each room in your home. Are your things where they need to be, close to where you use them most often? Are there conflicts within spaces that lead to clutter and inefficiency, such as a family room that serves as living space, home office, and kids’ play headquarters? Where does clutter tend to grow the fastest and why?
Finally, we’ll discuss some techniques for maintaining order in your newly organized spaces. With the right storage systems in place, you’ll find that keeping ahead of clutter is all about good habits, not about changing who you are. In other words, you don’t have to be a born neatnik to make it work (although you will have to get all the other slobs in the house to follow the plan).
In this chapter:
- The Problem with Clutter
- Decluttering Your Home
- Maintaining Order
The Problem with Clutter
Before we get into a full-scale character attack on clutter and what it does to our homes and happiness, let’s start by defining what clutter really is. Clutter is not just stuff that’s disorganized or out of place, like the rolls of holiday wrapping paper stashed behind your office door or last year’s tax returns covering every inch of the dining room table. Clutter is also the direct result of a slow but steady accumulation of things that we didn’t ask for, shouldn’t have bought, or no longer need.
Clutter is gifts that we keep out of guilt, like that horribly tacky party tray from your sister-in-law (which you strongly suspect was regifted). Clutter is broken things that you never got around to fixing. Clutter is bits and pieces of nostalgia that you hoard for posterity. In short, clutter is all the stuff that you’d get rid of or move to a more suitable place if you only had the time to go through it and the will to make the tough decision to toss.
So, aside from how it looks, why is clutter so bad? For starters, it affects us all in both practical and psychological ways. It doesn’t just fill our living spaces; it fills our minds. Seeing a jumble of misplaced items in every room is a constant reminder of unfinished business and unresolved issues. All this emotional baggage weighs heavily on the spirit, sapping our energy and possibly keeping us from doing something new, something positive.
The practical effects of clutter are more obvious. You simply can’t live and work efficiently or peacefully in your home when the traffic routes are blocked with laundry and every flat surface is covered with old papers. Clutter makes everyday things (car keys) hard to find and time-sensitive things (mortgage bills) easy to forget. Perhaps most important, clutter takes up valuable storage and display space where cherished and truly useful items could go. That’s why you have to minimize your clutter before you can plan new storage systems. If you don’t, you’ll just be bailing out a sinking boat by moving the water from bow to stern.
 {alt=”A person’s hand sorting through a pile of papers on a desk, with a ‘Keep’ and ‘Toss’ box nearby.”}
One person’s clutter is another person’s treasure. The first step in any serious effort to make your home clutter-free is to sit down with everyone in the household, negotiate, and settle on a definition of clutter that works for everyone.
 {alt=”A stack of old newspapers and magazines on a table, representing accumulated clutter.”}
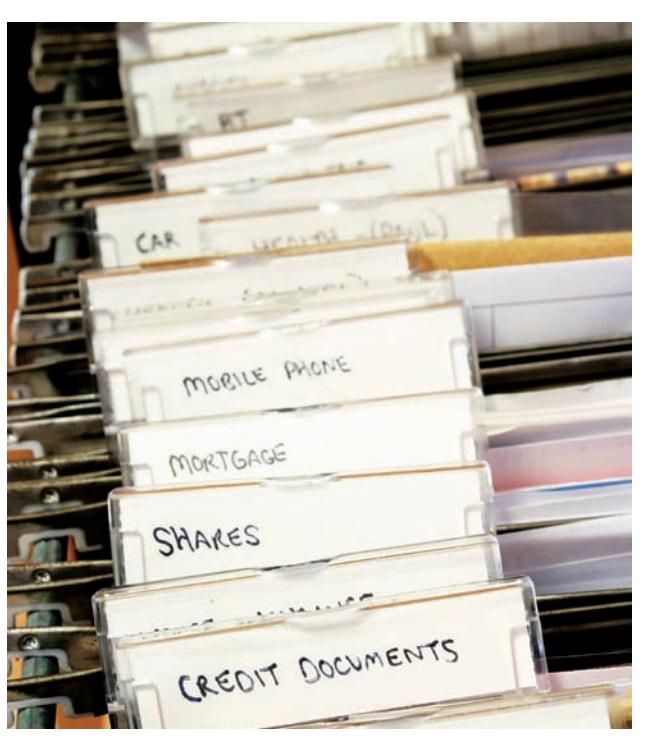
Clutter is the slow accumulation of unwanted paperwork or items that are an inevitable byproduct of our lives. The act of managing this byproduct is the first step to decluttering.
 {alt=”A cluttered guest room before organization, filled with miscellaneous items and boxes.”}
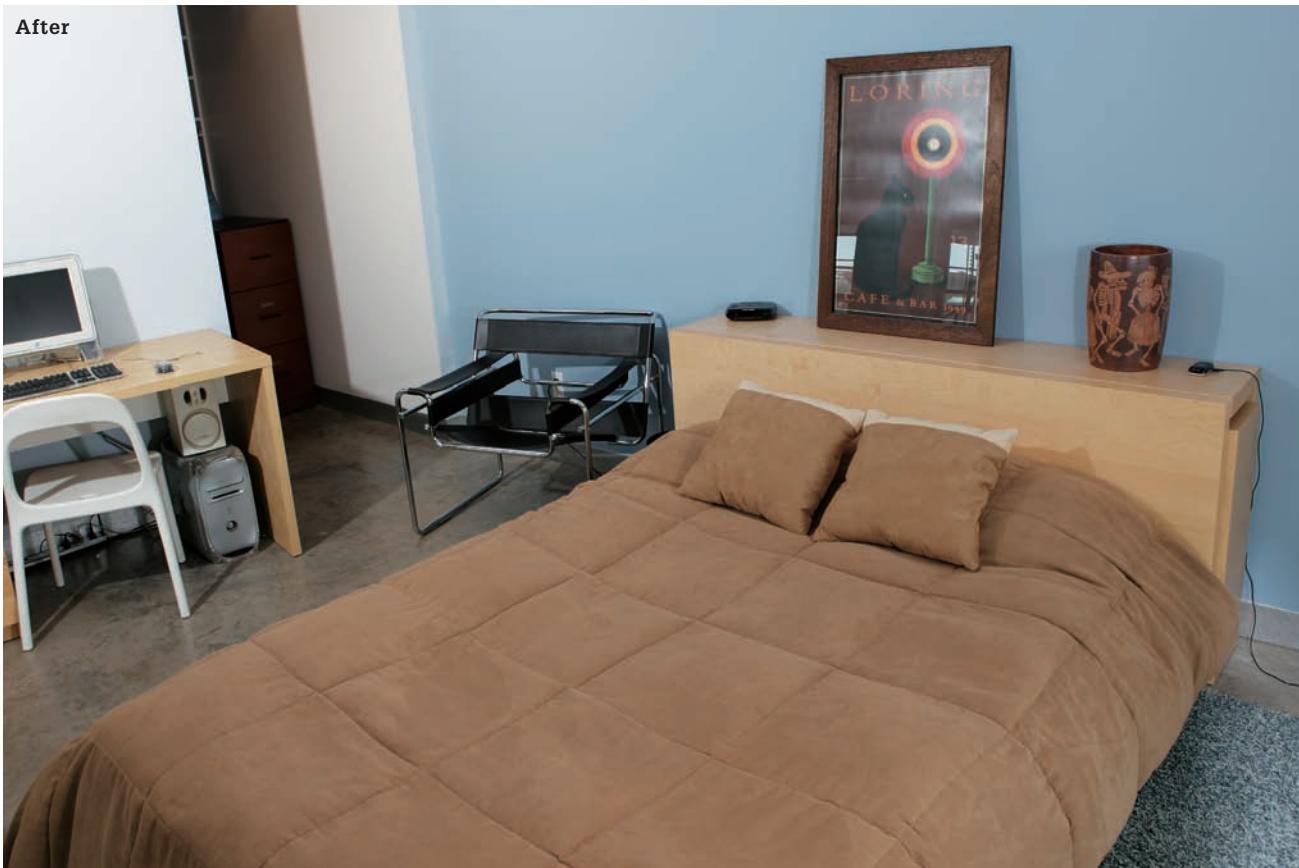 {alt=”The same guest room after organization, transformed into a pleasant space with a bed, desk, and efficient storage.”}
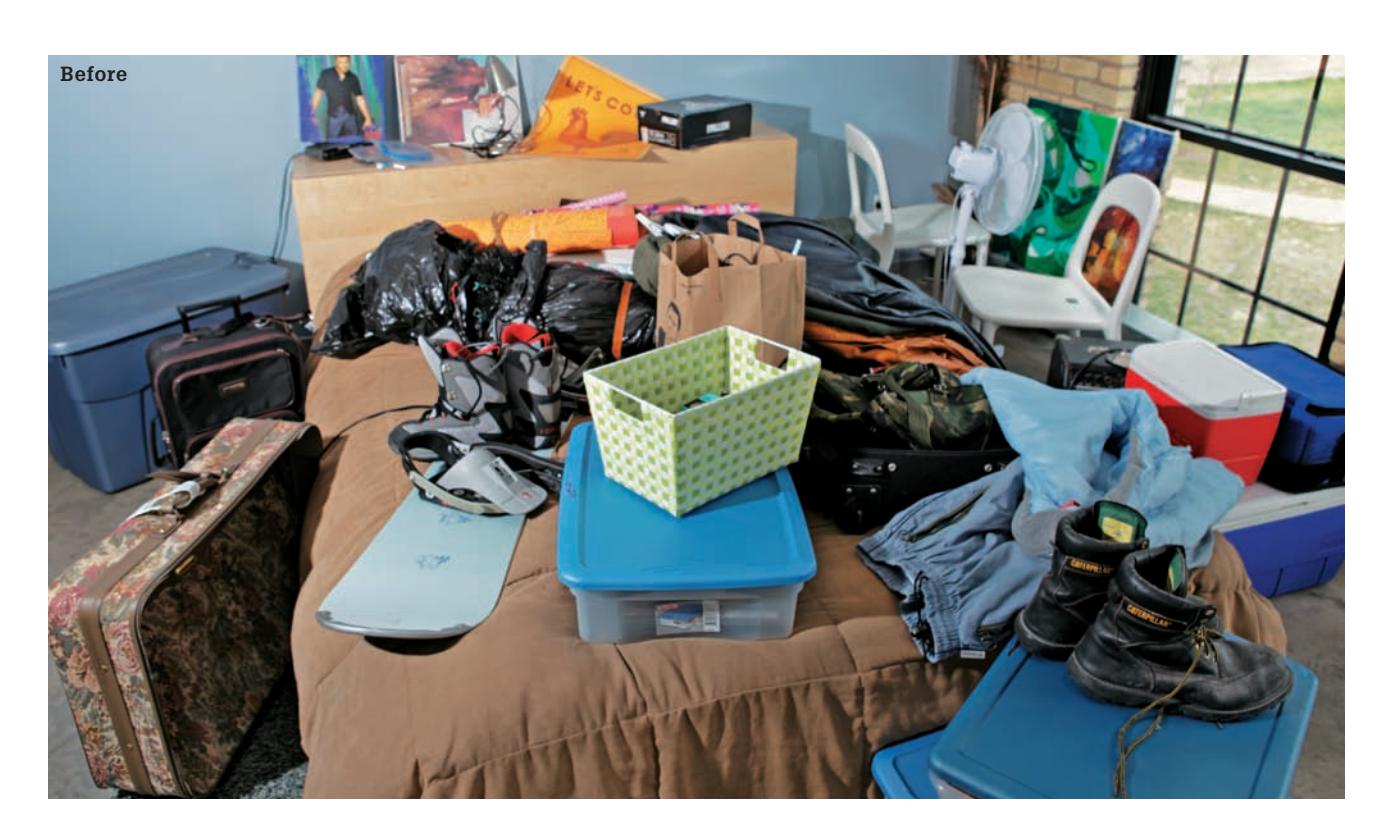
Clutter eventually becomes its own problem. Before a cleanup, this guest room served only as a huge receptacle for miscellaneous stuff. Taking the time to pitch unwanted junk and organizing the space with efficient storage and a work area transformed it into a pleasant guest room that also serves as a home office.
Decluttering Your Home
As evidenced by the numerous books and television shows about home organization, decluttering is much more than tidying up around the house. It’s also distinctly different from spring cleaning. Cleaning is, for the most part, mindless manual labor (which is probably why many people find it so therapeutic). Decluttering is all about making decisions: Will I ever read this book again or should I donate it to the library? Where can I store these craft supplies so my visiting relatives don’t have to trip over them? Am I really attached to all of my grandfather’s old hats, or will one or two preserve his memory just as well? Why is this house such a wreck all of the time?
Decluttering is finally saying “the buck stops here,” with the primary goal of regaining control of your household and, consequently, a big part of your home life. The work is at times difficult and exhausting, but the rewards are almost guaranteed to exceed your expectations. No one knows this better than professional organizers: people who earn a living by helping others make decisions about their own stuff.
Organizing experts work from different philosophies and methods. Some adhere to the principles of feng shui and help clients improve the flow of positive energy in their homes through decluttering, furniture arrangement, and other techniques. Other pros focus more on practical goals than spiritual ones. All, however, recommend a systematic approach to decluttering. They know from experience how hard it is to succeed without some guidelines and planning. Following are some tried-and-true tips from the gurus of home organization.
Make it Fun for the Whole Family
Most experts recommend having kids declutter their own rooms, play areas, and toy collections. This promotes a sense of responsibility for managing their stuff, and it gives them a say in what stays and what goes. It’s also the best way to get them involved in ongoing clutter maintenance.
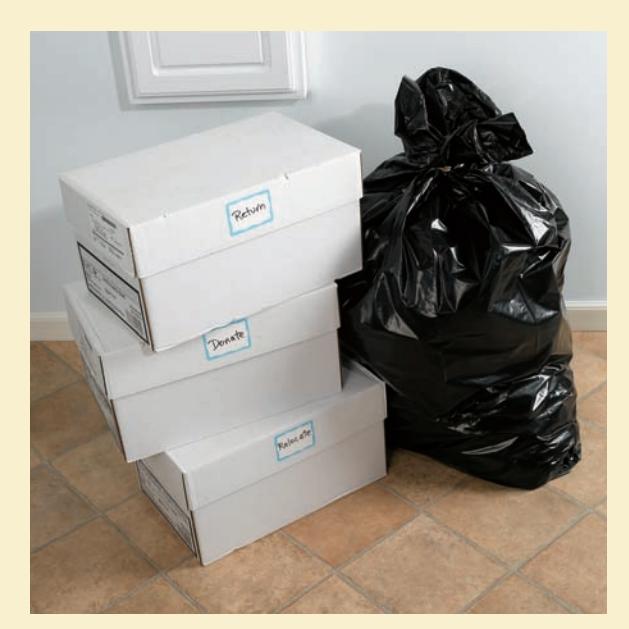 {alt=”Three cardboard boxes labeled ‘Keep,’ ‘Donate,’ and ‘Trash’ on a floor, ready for sorting items.”}
If it’s not trash, it either stays in the room or goes into one of three boxes. Sticking to this rule helps you make a decision on the spot.
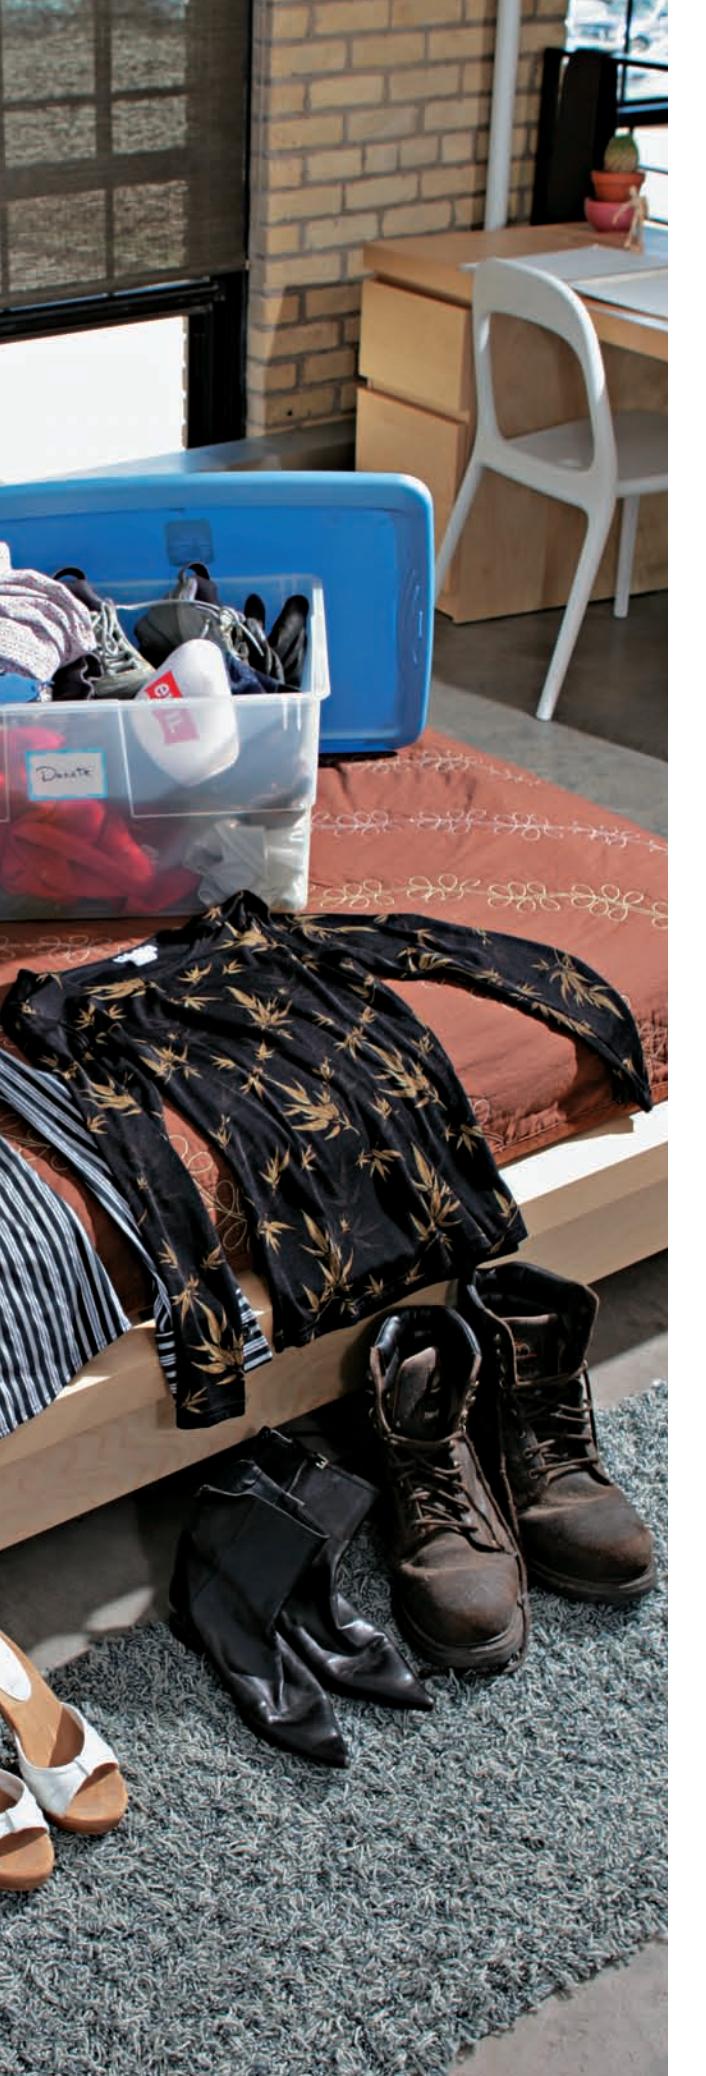
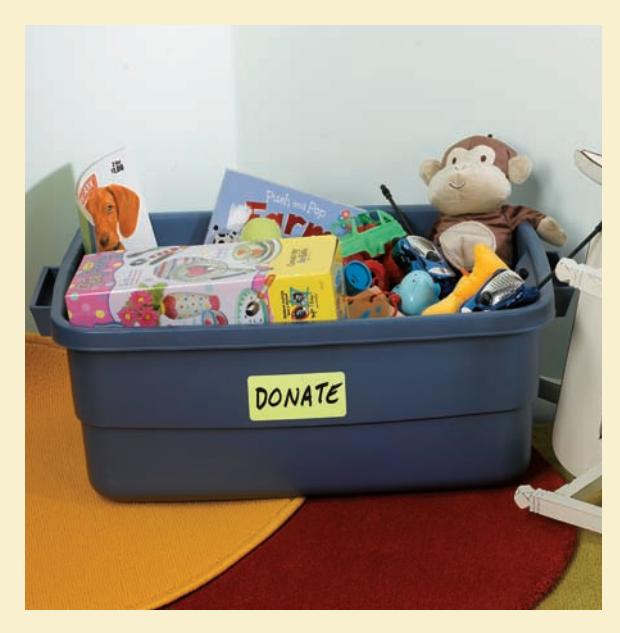 {alt=”A person sorting through a pile of clothes and items on a bed, with a ‘Donate’ box nearby.”}
You can motivate children to part with toys by holding a contest—the one who purges the most stuff wins a prize. Reward everyone involved (including yourself) in the big clear-out.
The Decluttering Process
The goal of decluttering is to get rid of excess stuff until you’re left with only the things you really need, use, and love. You will also move items to the places where they really belong. This prepares you for the next big step of organizing and storing your things in each space so everything looks and works just right. Start by breaking up the job into smaller tasks. For the initial battle of sorting and pitching, arm yourself with these tools:
- Boxes or trash bags for throw-away junk
- A “donate” box for items you’ll take to a local charity
- A “return” box for items that belong to someone else and for things that you want to give away to friends
- A “relocate” box for items that you’re keeping but that belong in another room or area of the house
- Optional: A “sell” box for any valuable items you’d like to resell for cash
At the end of each decluttering session, do the following:
Take out the trash. Don’t leave your boxes and bags sitting in the house.
- Put your donate and return boxes in your car, preferably in the passenger’s seat. This forces you to deal with them soon and prevents you from driving by your friend’s house or the charity thrift shop without your drop-off items.
- Walk through the house with the relocate box and deliver everything to its proper location.
Set a goal for each sorting session, whether its organizing one shelf in the library or tackling the hall closet, and finish the job completely before starting somewhere else. When each area is decluttered—and, ideally, cleaned—put away the broom and other cleaning supplies that you used. Leaving them out and in the way will only create more clutter and detract from your sense of satisfaction in a job well done.
For big jobs, schedule plenty of time to complete the task at hand. Treat the session as a work day by starting early and taking as few breaks as possible. Scheduling is especially important if roommates or other family members are involved in the effort. Kids who are old enough definitely should take part in helping out. However, for some stages of the process, it might be wise to arrange for your kids to sleep over at a friend’s house.
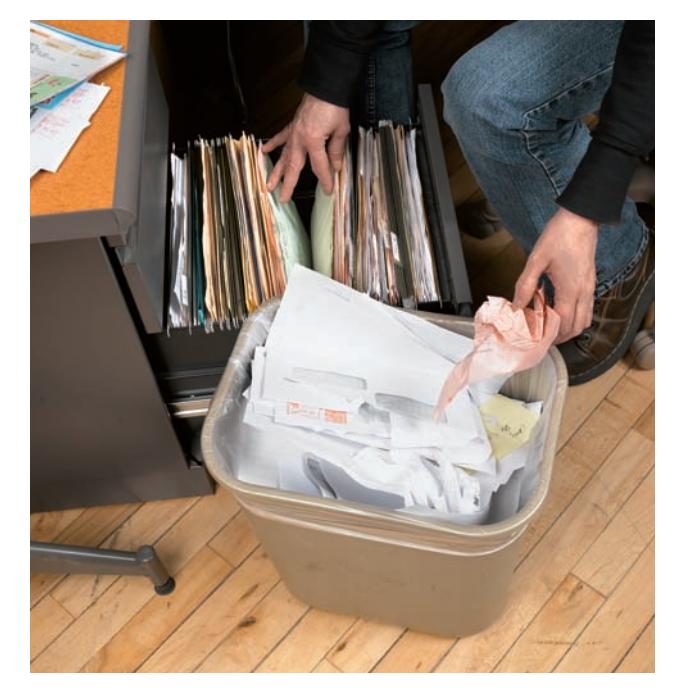
Start small. Before tackling surface clutter it’s a good idea to clear out dedicated storage areas, like file cabinets and junk drawers. This makes room for stowing the current stuff that you’re more likely to keep for a while.
Getting Started
You don’t need a grand, comprehensive plan to start decluttering. You can begin with any part of the house, but preferably those areas that bother you the most. Try to save the worst clutter spots—the garage, basement, storage shed, etc.—for later in the process. If you’re especially pressed for time, tackle something small, like a single kitchen cabinet or a bathroom drawer. You’ll be amazed at how much this motivates you to do more.
Next, set your sights on an entire room or just part of a room. Your own bedroom is a good place to start, as you’ll quickly create a sanctuary that gives you a jolt of decluttering energy each time you’re in it. Whenever possible, clear clutter at the time of day when you’re best equipped to make decisions. If you’re a morning person and do your best work in the early hours, don’t wait until nighttime to start rummaging. Decisiveness is the key to working effectively.
One of the best methods for helping to decide what to do with an item is to ask yourself how the thing makes you feel when you see it. If it brings up memories of a fun trip or a happy time in your life and it’s attractive, it might be a good candidate for a display item. If, on the other hand, it’s a gift from someone you don’t particularly like but you feel obliged to keep it, perhaps you can relieve yourself of the guilt (and the item) by giving it away to someone who will really enjoy it. Our homes are full of things that conjure up feelings of one kind or another (often unexpectedly as we glimpse them in passing). Considering each item for its positive impact on your everyday life is a good way to decide what stays out, what goes into storage, and what you’d be better off cleansing from your house and mind forever.
Most home organization professionals urge their clients to set time limits for usable items, reasoning that if they haven’t used something in six months or a year they probably never will and should get rid of it. A time limit is an effective measure for a lot of household clutter, such as single-purpose kitchen tools that you bought on a whim (or received as a gift) but have never used. Setting a one-year limit on everyday clothing is also a good idea. Other items aren’t so well suited to the time limit test. For example, if you bought a plumbing snake to clear a drain a while back and you’ve been lucky enough not to have needed it since, you’d still want to keep it because clogged drains are a fact of life and you’ll need that snake sooner or later.
Another test for assessing clutter involves replacement cost versus real-life value. If you think of storage space in your home as having value, how much is it costing you to keep inexpensive items that you’ll probably never need again? This is a good test for people who tend to hang onto leftover building and landscape materials. For example, a new sheet of drywall costs about six dollars. A partial sheet leftover from your basement remodel is worth even less. Throwing out the drywall cutoffs is a good investment, since the value of the storage space they occupy is worth far more than the replacement cost of new material.
Touch It Once—Don’t Procrastinate!
Efficient business people and office workers apply this rule to paperwork every day. When you pick something up, make a decision about it—put it away or into the appropriate box—and move on. Deferring the decision for later quickly becomes a bad habit that will leave you with a huge pile of work at the end of the day.
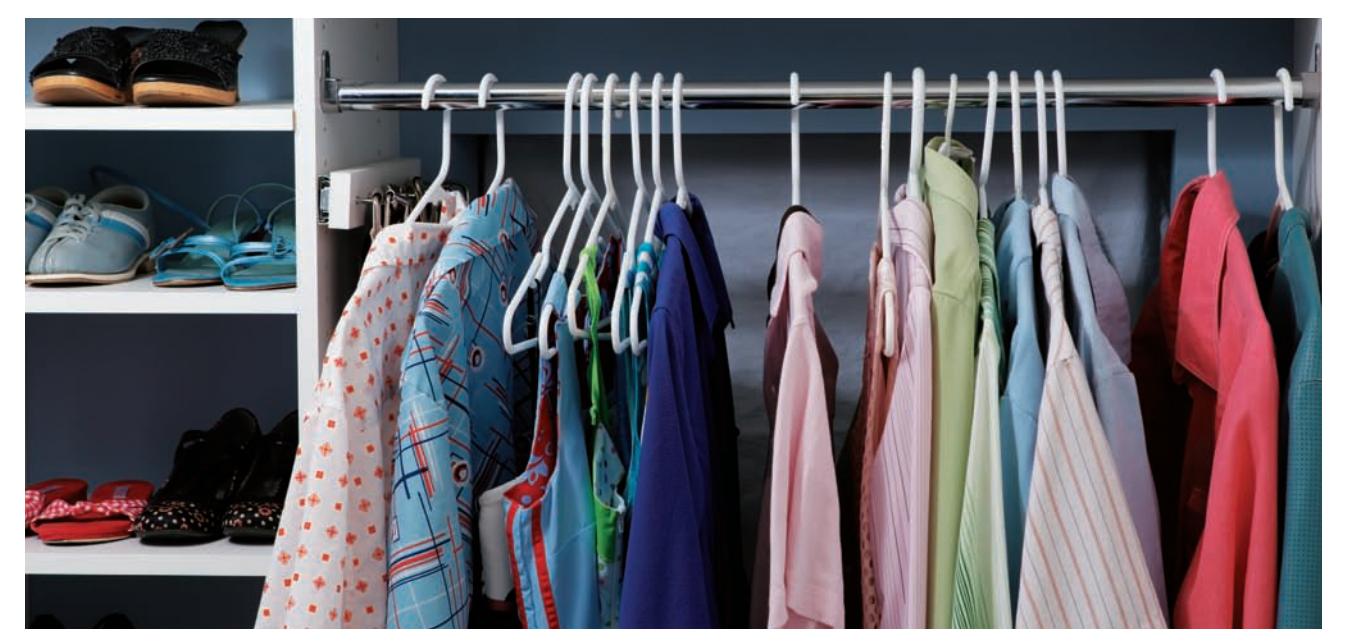
Try this time limit test for clothing: Face all of your hanging clothes in one direction. Each time you wear an item, hang it back up in the opposite direction. At the end of a year, all items still facing the original direction probably belong in the donate box.
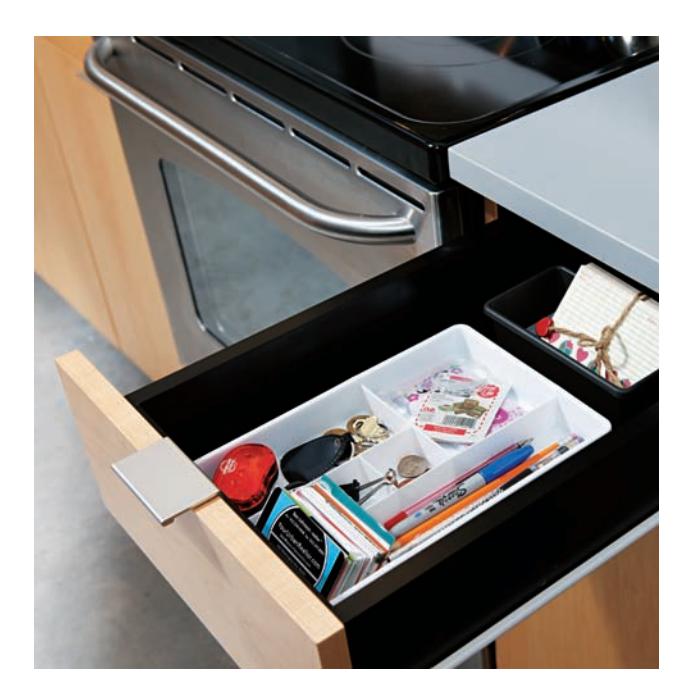
Compartment systems in junk drawers and other miscellaneous storage spaces prevent your catch-all junk drawers from becoming clutter bins.
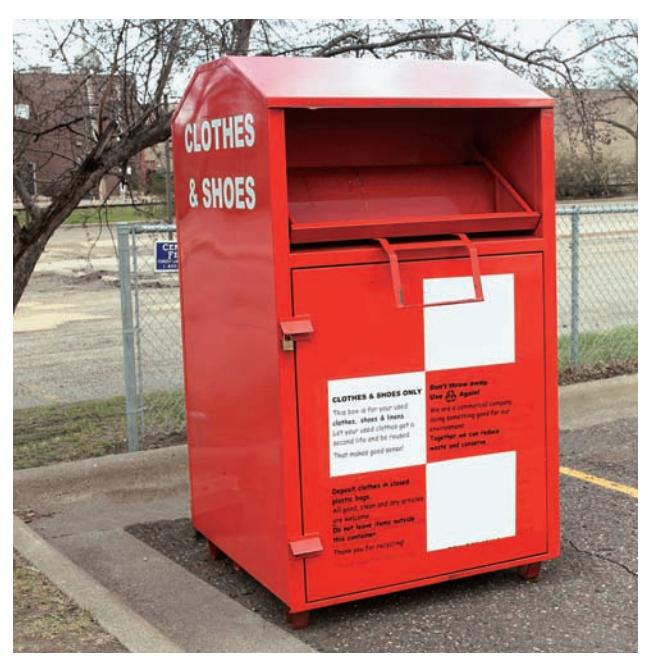
You will start noticing a lot more of these collection bins around town once decluttering is on your mind. Be sure your items for donation are clean and in good repair before dropping them off.
Keep Your Eye on the Ball
Decluttering is not the time to read old love letters or look up friends in your high school yearbook, as this is a sure way to bring the cleanup day to a screeching halt. Save the trip down memory lane for after your house is in order. If you feel you must review some old things before deciding their fate, put them in a box (a small one, preferably) and commit to going through it more thoroughly immediately after you’ve organized everything else.
It’s okay if you want to cling to some catch-all places, like a junk drawer or a toy chest. These are necessary parts of most home storage plans. Of course, these areas tend to accumulate clutter faster than anywhere else, so it’s a good idea to go through them and pitch stuff frequently. Likewise, it’s okay to have everyday items that you frequently use out in the open as long as they’re in a convenient location. Your house may never be a candidate for a cover story in Metropolitan Home, and it can look as “lived in” as you like. Just make sure the stuff that’s out isn’t getting in the way of your normal activities.
Charity organizations make it incredibly easy to donate all sorts of household goods. Many will even send a truck to your house to pick up big stuff, like couches and other furniture. Otherwise, you can drop off clothing, books, toys, games, small appliances, and dishware at thrift outlets, churches, homeless shelters, and other charitable organizations. Just look through the phone book or do an Internet search to find out which places are set up to accept donations. If you have some nice suits and other business attire to give away, find a local back-to-work program that helps outfit clients for job interviews.
Donating goods not only aids those in need, it also helps to reduce clutter in the big picture and keeps more stuff out of the landfill. Since many charitable donations are tax-deductible, ask your tax preparer about keeping records of your donations. In general, you should record a description and estimated market value for each item, the date of donation, and the name and tax identification number of the charity.
Choosing to donate can also help you make tough decluttering decisions. If guilt has prevented you from throwing out gifts you don’t use or clothes your kids have outgrown, you can feel good about giving the items to someone who really needs them, making your decision to purge that much easier.
Turning Clutter Into Cash
Can’t decide what to do with that nice, hand-me-down coffee table from your folks that never quite fit in your living room? What about the elaborate beer-making kit that failed to turn you into the next great brewmaster? Today, the answer is simpler than ever: sell it online, through bartering and private auction websites. All you have to do is post a description (and perhaps a photo) of your item, and let the buyers come to you. Another option is to sell your stuff for cash at resellers like pawn shops, vintage clothing stores, second-hand stores, and antiques dealers, depending on the type of goods. Or you can put your things up for sale through a consignment shop, which might bring a better price than an immediate cash exchange. However, if you have loads of miscellaneous stuff to sell, you’re probably better off pawning it the old-fashioned way, by holding a yard sale. Here are some tips for making the most of a sale:
- Before you plan the sale, make sure you have enough stuff—that is, enough potential income—to make the time and effort worthwhile. If your own collection of merchandise seems paltry, ask neighbors whether they’d like to join you or if they have any juicy items to add to your sale.
- Plan the sale for a Saturday (or Saturday and Sunday) that’s not on a holiday weekend. Good weather is a must, and you’ll just have to cross your fingers for that.
- Advertise like a pro. Create large, colorful signs with clear lettering (all signs should look the same), including directions, your address, and the sale date and hours. Post the signs on all major streets in the area
- Organize and price-label all of your merchandise in your garage the night before the sale so you can start setting up at the crack of dawn. Yard sale junkies hit the streets early. You want your sale to appear chock-full of goodies so as not to lose driveby customers.
- Assemble a staff of a few friends or family members to help meet the crowd and make quick sales.
- Prepare to bargain. You’ll sell more stuff and have more fun doing it if you’re willing to haggle a little over prices.
- Slash prices near the end of the day. Remember, the goal is to get rid of all your stuff. When it’s all over, take unsold items to a charity drop-off, or set large pieces along the road with a Free! sign. You’ll be amazed at how quickly the stuff will disappear.

If you post it, they will come. Advertising is the key to a successful yard sale.
Assessing Function
With the dreaded task of clutter clearing behind you, there’s not only less stuff to deal with, in the process you’ve also inventoried everything you’re keeping. But before you head to the store in search of bins and file boxes, take some time to brainstorm on the function of each room. The goal here is to make sure your stuff—and the work you do with it—is in the right place to begin with. For each main space, ask yourself these questions:
- How is the space currently used?
- What is the ideal use of the space?
- What changes do I need to make to meet the ideal (or at least get close to it)?
For example, let’s say your formal dining room has become the default location for bill-paying and general household paperwork. If this function has prevented you from using the room for special meals, the current setup is less than ideal. What you need is a dedicated office space. A little creative brainstorming and thoughtful planning will lead you to the right solution. Perhaps you can carve some space out of a corner of the kitchen or living room. Or maybe you can equip an extra bedroom to serve as both office and guest quarters. Is there an underused closet that can be converted to an office (see page 146)? If the dining room offers the only available space in the house, let it serve double duty by moving the paperwork and office tasks to a modified armoire or corner unit with doors. Simply shut the doors to restore the formal ambience for dining.
Taking a step back and thinking about organization and function in the bigger picture is the key to making the most of your home’s available spaces. Once you’ve mapped out a plan for each room, you can narrow your focus to dealing with the stuff itself. The tips and projects in the following chapters will help you do just that.
Visualize Your Plans
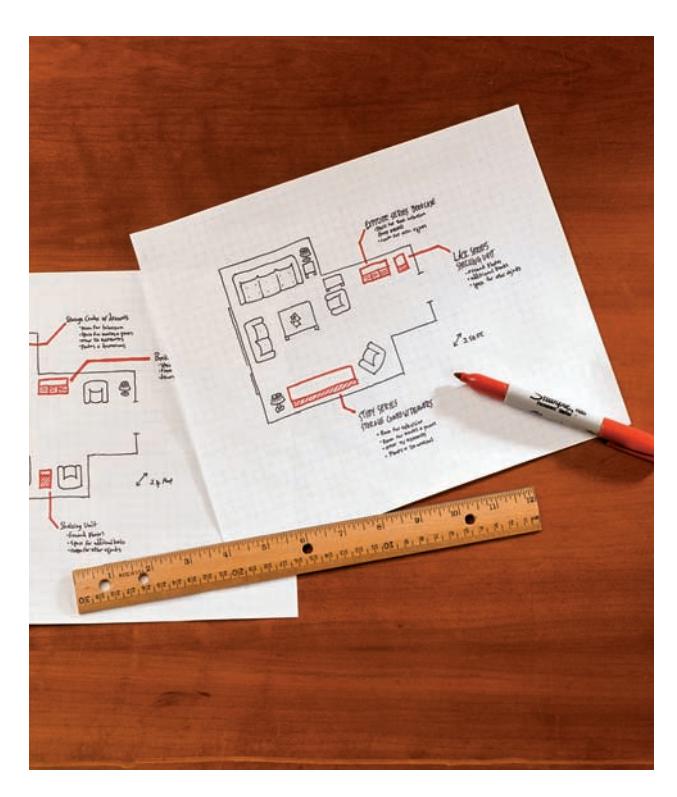
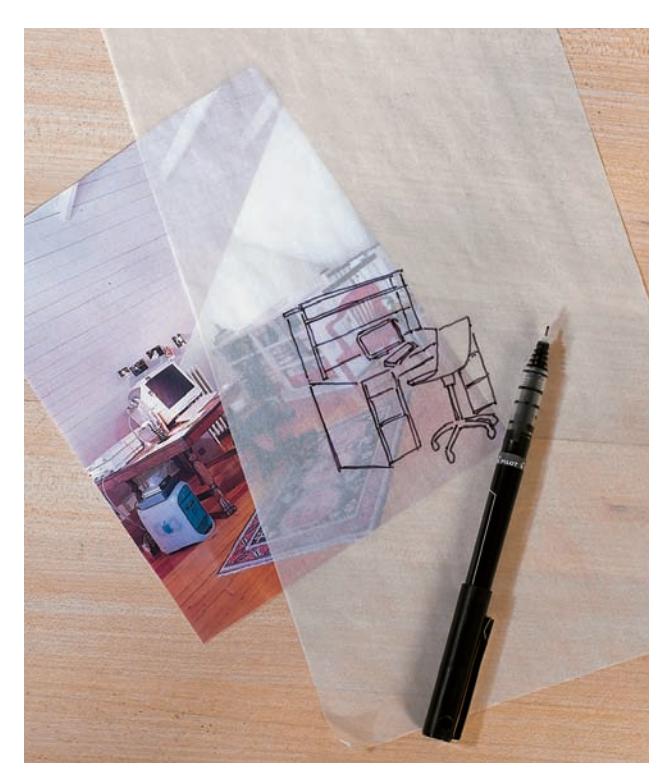
Try drawing a scaled floor plan of the space onto graph paper if you’re having trouble visualizing major changes to a room’s setup (left). Add all furniture and other features that will stay, plus any new items for the proposed plan. Experiment with different layouts to find an arrangement that works. Alternatively, you can print out a photo of the room, then sketch ideas onto an overlay of vellum or tracing paper (right).
Maintaining Order
No matter how much stuff you purged in step one or how well you planned your new storage systems, you’ll soon be right back where you started without a little discipline. That’s the bad news. The good news is you don’t have to be an organized person by nature to keep a tidy home. What you need are effective systems and handy storage spaces that allow you to take charge of your stuff with less effort.
Consider this real-life example: You’re a passionate foodie who subscribes to several cooking magazines. You seldom have the time to read each issue before the next one arrives in the mail, so the old ones start to pile up. You might even leave new issues lying around in conspicuous places (like the kitchen table) to remind yourself to read them. Does this work? If it did, you wouldn’t have a clutter problem.
Instead, store any unfinished magazines near your favorite reading chair. Don’t worry, you won’t forget they’re there. And when you get a few moments to read, you won’t waste precious time looking for them. The next problem to tackle is the inevitable stockpile of old, unread magazines at your reading spot. It’s time to separate the wheat from the chaff: look through the table of contents in each issue and tear out the must-read articles and recipes. Recycle the rest of the magazine (at this point, it’s mostly ads anyway). Prioritize the articles so you read those you’re most interested in first, and file any recipes you really want to try. Now you’ve reduced a stack of old magazines to a handful of select pages.
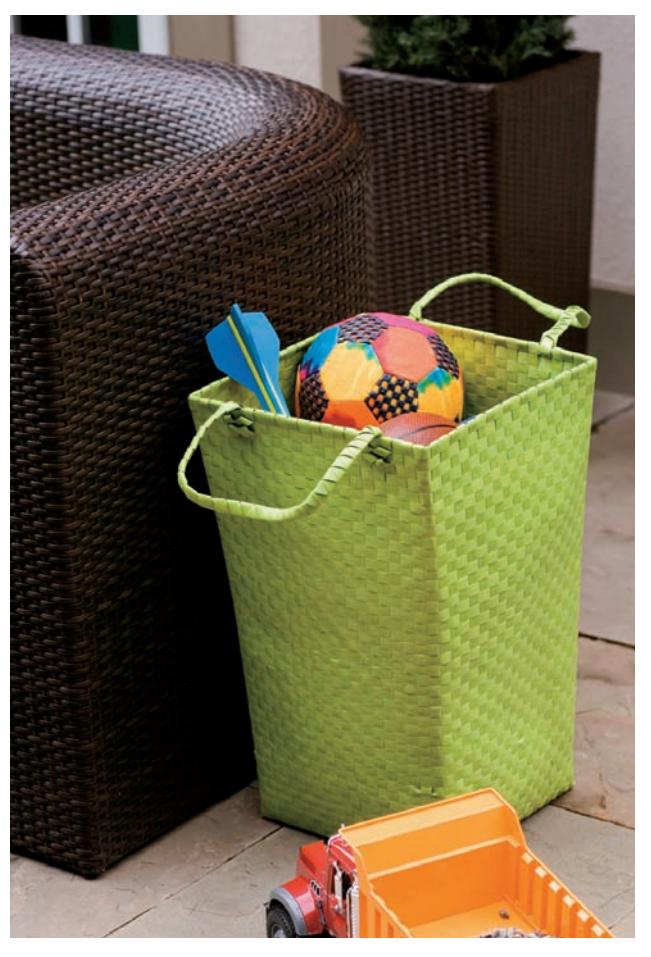
The best storage solutions fit with your everyday life. If your kids’ favorite place to play is the family room, that’s probably where the toy bin should go.
Basic Principles of Organization
-
- Efficiency follows reality. Storage solutions must conform to the way you really live. If you tend to leave coats draped over kitchen chairs instead of hanging them in the coat closet, you need a better storage solution—perhaps some coat hooks or a coat tree next to the entry door.
-
- Store the most-used stuff close at hand. Everyday cooking utensils and pots and pans should be reachable from the stove. Magazines and newspapers belong near your reading chair.
-
- Beware of container clutter. Too many boxes, bins, and bags can lead to more clutter than the stuff itself. Weeding out excess items periodically and moving seldom-used things to long-term storage reduces the need for more storage vessels.
-
- Keep it simple. Complicated storage systems are bound to be ignored, especially by kids.
-
- Leave room to grow. Plan some extra room for the ebb and flow of accumulated stuff. Space flexibility helps contain clutter between periodic weed-out
-
- Never trust your memory. Clearly label all boxes used for long-term storage, or use clear plastic bins that reveal the contents at a glance.
Organizing Tips from the Pros
THE ONE-IN, ONE-OUT RULE.
Whenever you buy or acquire something new, particularly a nonnecessity, select one existing thing in your house to get rid of.
10-MINUTE DECLUTTER.
Devote 10 minutes each day to tackling your home’s most common clutter, whether it’s sorting the mail, gathering laundry, hanging clothes in your bedroom, recycling newspapers and magazines, or organizing your desk. Enforcing a 10-minute toy pickup is a good way to keep kids on track, too.
ANNUAL DECLUTTER.
Most people find the motivation for some kind of spring cleaning session. So now that you’ve learned the process (and benefits) of a whole-house decluttering, why not start your annual spring cleaning with a day of purging? The cleaning will go faster with less stuff in the way, and you’ll break the pattern of steady unchecked accumulation each year.
JUST SAY NO (OR A FIRM MAYBE).
If you’re prone to accepting hand-me-down items from friends and family on an impulse, try using this test: don’t take the item home with you when it’s first offered. Ask for a day or two before making a decision. Take measurements of the item (especially if it’s furniture or anything large), then go home and make sure it fits the space you have planned for it. You’ll be surprised at how often you say “no, thanks” after you’ve slept on the decision for a night.
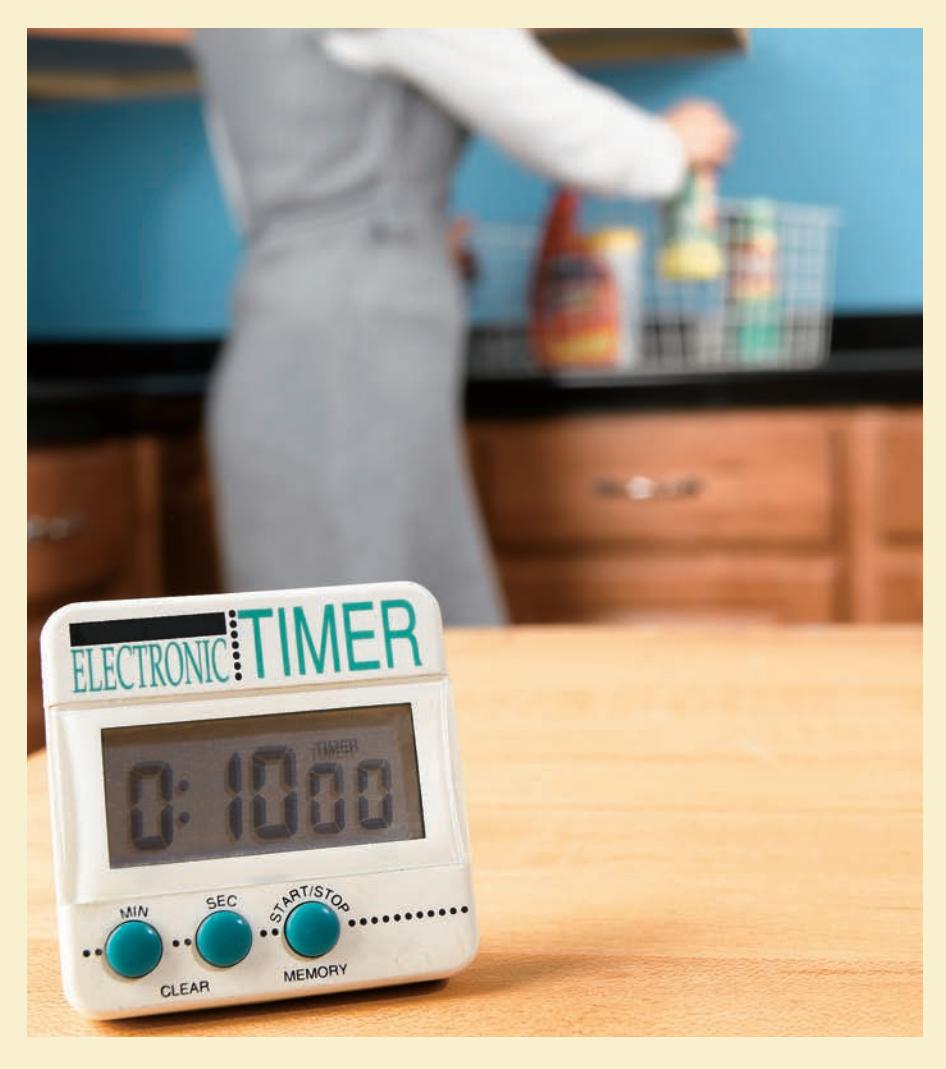
Try to make regular organizing a fun challenge. Professional organizers often suggest setting a timer to help you move as quickly as possible on your daily decluttering blitz.
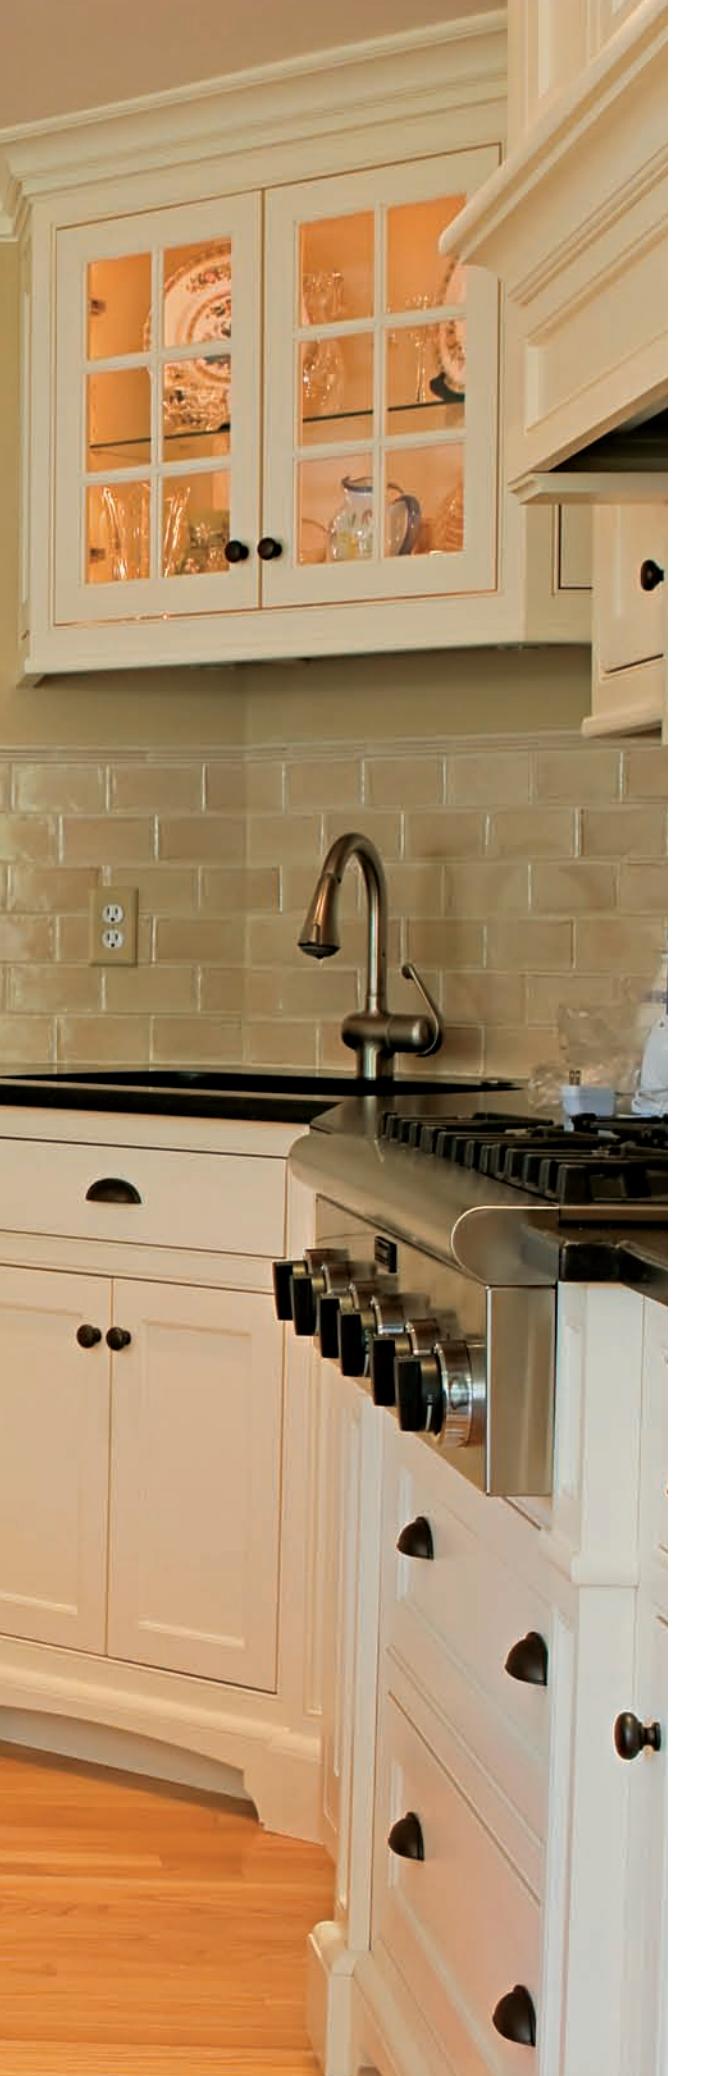
Kitchens
As the true hub of the modern home, the kitchen presents some unique challenges for the war on clutter. The biggest challenge is providing storage for a vast and complex assortment of food-related items, from frying pans and corkscrews to linens and dishware.
How and where all that stuff is stored is often the biggest factor in how smoothly a kitchen operates. In most kitchens, the storage systems consist of a set of cabinets and a pantry of some sort (if you’re lucky). Cabinets hold a lot, but being little more than rectangular boxes, they’re not as user-friendly or as space-efficient as they could be.
Making the most of this space requires some thoughtful rearranging to ensure everything is right where it belongs. Ordinary cabinets can use some help from simple add-ons and devices that improve access and visibility of stored items, in addition to bumping up their capacity. Where your existing storage spaces are falling short, a custom-built unit might do the trick, such as the pot rack on page 34 or the pantry project on page 44. If your kitchen is like most, it’s ripe with opportunity for cutting clutter and improving organization.
In this chapter:
- Storage Strategies
- Pot Racks
- Slide-out Storage
- Pull-out Pantry
- Vertical Cabinet Dividers
- Dish Rack
- Pantry Shelf
- Pine Pantry
- Pull-down Shelves
Storage Strategies
With all that it’s required to hold and do, a kitchen is a complicated room, to say the least. Space is at an absolute premium, and fitting in all the necessary tools and supplies in an organized manner can be like packing the trunk of a car for a long road trip.
To help you solve this spatial jigsaw puzzle, manufacturers and home centers offer an endless array of products designed for maximizing storage and minimizing clutter. These can do for an overloaded cabinet what a filing system does for a stack of paperwork. And where store-bought products don’t quite fit your space or offer the look you’re after, creating something of your own design (with a little help, of course) is always a good option.
As you dive into the details of organizing your kitchen, it’s important to keep in mind the true purpose of this busiest of rooms. The kitchen is a work area, first and foremost. The more you can arrange and maintain the space for storing, cooking, and serving food, the better it will serve your household. Using the counters as a catchall for mail and newspapers, or the cabinets for storing light bulbs and holiday dishware, only means those spaces aren’t available for work on a daily basis. Respect the kitchen as a workplace, and you’ll find it much easier to control clutter and keep the stage set for fixing the next meal.
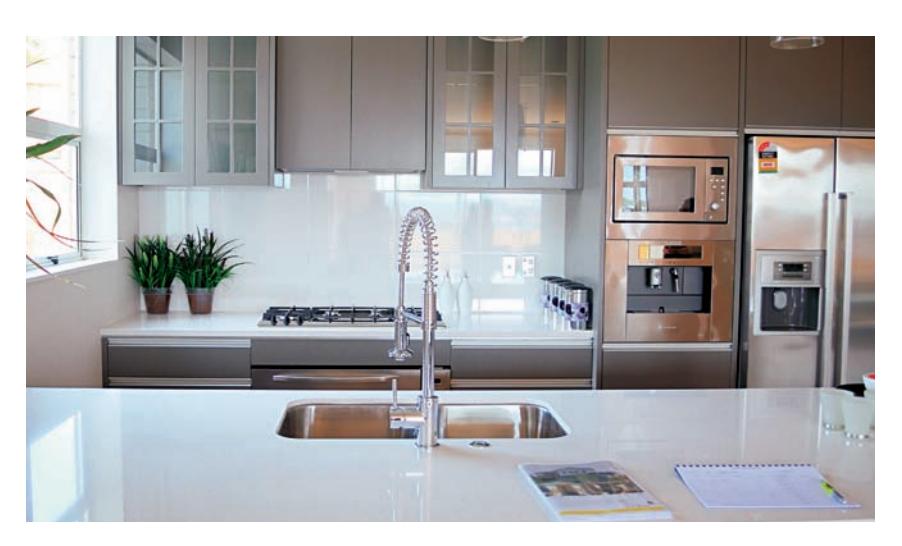
Open counter space is worth its weight in gold in any kitchen. Preventing clutter here is key to an efficient work space—and peace of mind.
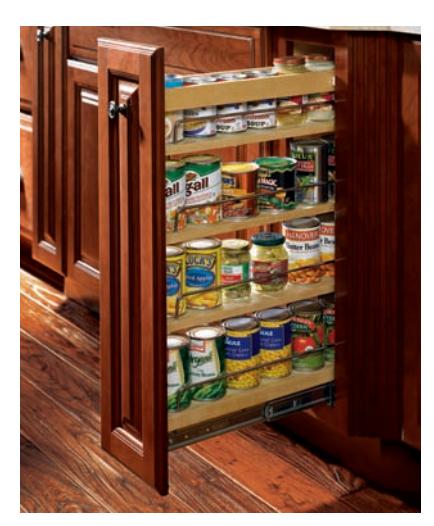
Commercial kits make it easy to convert a narrow cabinet into an easy-access shelving unit. The shelf unit mounts to the cabinet box and has brackets for installing your own hardware.
Cooking Tools & Equipment
Follow two basic themes when organizing cooking equipment: point of use and frequency of use. When you need a whisk in a hurry because your cream sauce is starting to separate, is the tool right at your fingertips or is it buried deep in a drawer on the far side of the sink? The point of use rule dictates that the most-used tools belong next to the stove or cooktop.
Frequency of use is just as straightforward: everyday pots and pans belong right in the cooking area, preferably hung on a pot rack. Give less priority to occasional-use pieces, such as double boilers, stockpots, and roasting pans (depending on the type of cooking you do). In general, each item should have to earn its place. If you haven’t used an item in a year or more, consider getting rid of it or storing it in a less-convenient location. Pieces that come out only for specific holiday meals might be best stowed in long-term storage with the rest of the holiday stuff.
Pull-out trays or shallow drawers are great for organizing equipment and small appliances in large base cabinets. The pull-out feature makes for easy access and eliminates digging for pieces in the back of the cabinet. Cookie sheets, cutting boards, and other flat items are best stored on-edge. You can outfit cabinets with commercial racks or install custom-fit, full-height dividers (see page 47). If you have open space above your wall cabinets, you can use it for storing (and displaying) infrequently used cookware, serving pieces, or dishware propped against the wall and held with a piece of trim.
Dishware
Finding room for every piece of dishware can really put your spatial and organizational skills to the test. Everyday pottery should go where it’s easy to reach for both serving meals and unloading the dishwasher. Although most people do it, it’s difficult to store all of your dishware in close proximity. It’s better to separate the everyday stuff from the occasional-use pieces and store the latter in less convenient locations. Here are some other tips that can help:
- Wire stands (sometimes called shelf expanders) help separate small stacks of dishware, so you don’t have to pull down a tall, heavy stack to get to pieces at the bottom.
- Teacups and coffee mugs can hang from cup hooks screwed into the bottoms of shelves. The space below can hold more mugs or stacks of plates and saucers.
- Fine dinnerware, glassware, and china are better stored away from the everyday stuff, where it’s out of the way and safe from breakage. Container stores sell padded cases for safely storing fine pieces. Same goes for good silverware and serving pieces.
- Deep drawers with heavy-duty glides can be fitted with plate organizers. These eliminate the heavy lifting required when dishware is stored in wall cabinets.
- Good kitchen knives belong in a knife block or on a wall-mounted holder nearest the food prep area. In-drawer holders are good, too, if they’re easy to access and you can spare the space.
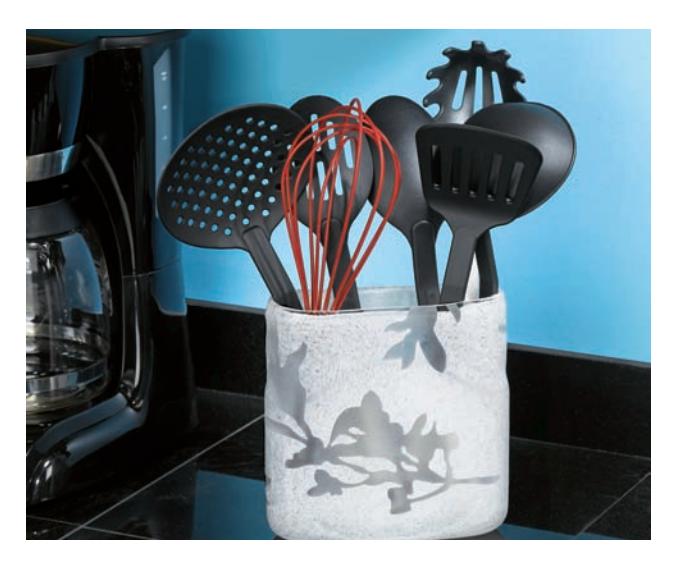
A sturdy metal canister or ceramic pitcher next to the cooktop is ideal for storing spatulas, spoons, and whisks at the ready. Another option is to hang the tools from a wall-mounted bar or rack.
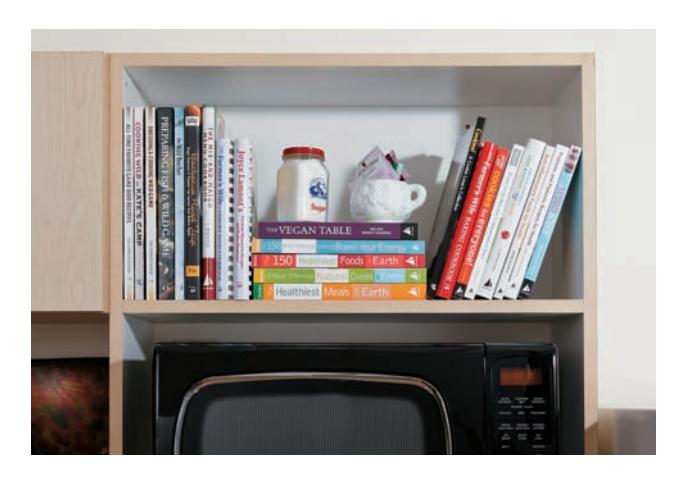
Cookbooks don’t get top billing in most kitchens, but some cooks like to keep their favorites close at hand. Here, a lesser-used cabinet had its doors removed to create a bookshelf.
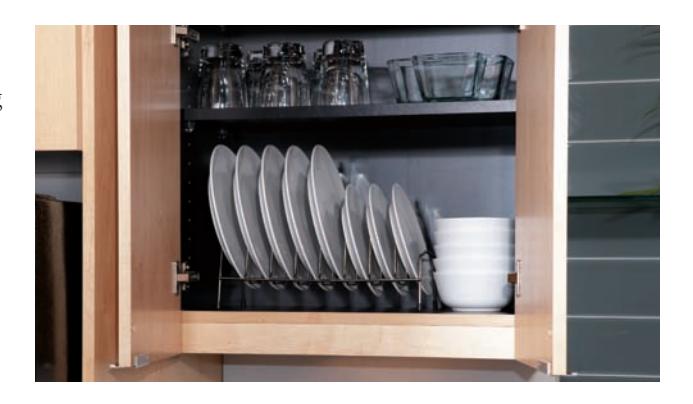
Simple accessories like dish racks, shelf expanders, cup hooks, and placemat racks make the most of primary cabinet space and keep everyday dishware in one convenient location.
Dry Food & Spices
For most cooks, organizing foodstuffs, cooking oils, and spices is as much an issue of visibility as it is of space. How often do you make emergency runs to the grocery store because you’ve suddenly run out of flour? Or how much time do you spend searching for that one critical spice? The solution is to arrange supplies efficiently while keeping every item in view.
Dry foods and baking supplies work best on shallow shelves lining the walls of a pantry or in pull-out trays or drawers in cabinetry (see pages 40 to 43). If you don’t have a bona fide pantry, perhaps you can install pantry-style shelves in a nearby closet. For spices, visibility and easy access are key. Shallow spice racks can mount inside cabinet doors or onto the backsplash wall space between the countertop and wall cabinets. For drawer storage, transfer spices to identical shaker jars and write the name of each spice onto the jar cap.
Keep baking staples like flour, meal, and sugar in clear containers so you can see when supplies are getting low. This also eliminates the mess of paper bags. Just make sure the containers have large openings so you can easily reach in with a measuring cup.
These days, lots of people buy in bulk, which saves money but creates a super-sized storage problem. One solution is to designate an out-of-the-way storage area—in a laundry room, utility room, or the garage and use it like a merchant’s stock room: With all of the bulk items stored in one place, you always know where to go for backup supplies. Basement stairway shelves are another good option for bulk-food storage.
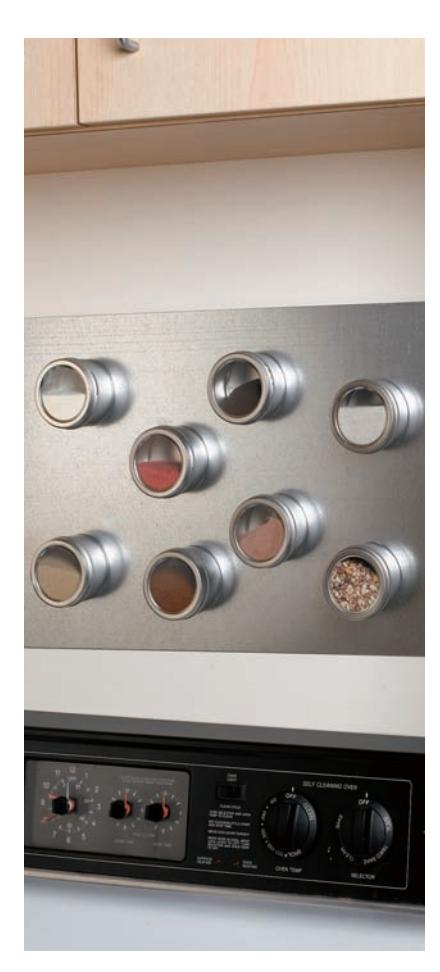
To keep spices out of the way but clearly in view, store them in clear-top, magnetic spice tins stuck to a customcut metal sheet or store-bought strips mounted to the backsplash area near your cooking surface.
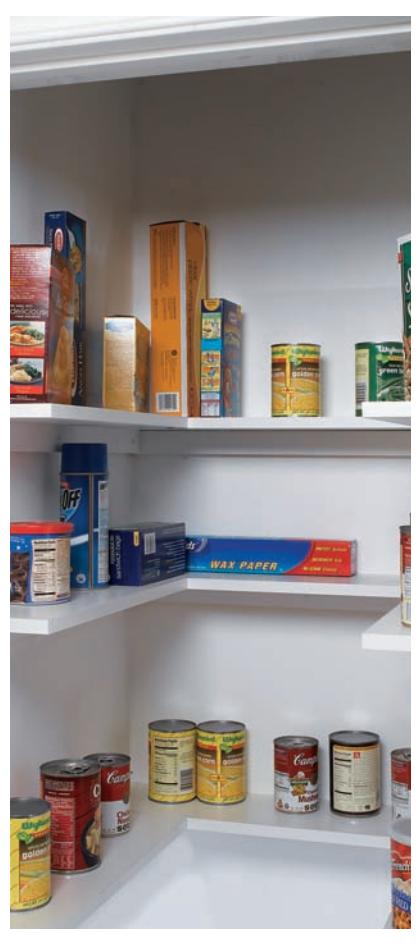
Classic pantry shelving can be built with $1 times 6$ boards mounted to $1 times 1$ or 1 × 2 wall cleats. Include short shelves for canned goods and taller shelves for flour bins and cereal boxes. High shelves are good for storing occasional-use items.
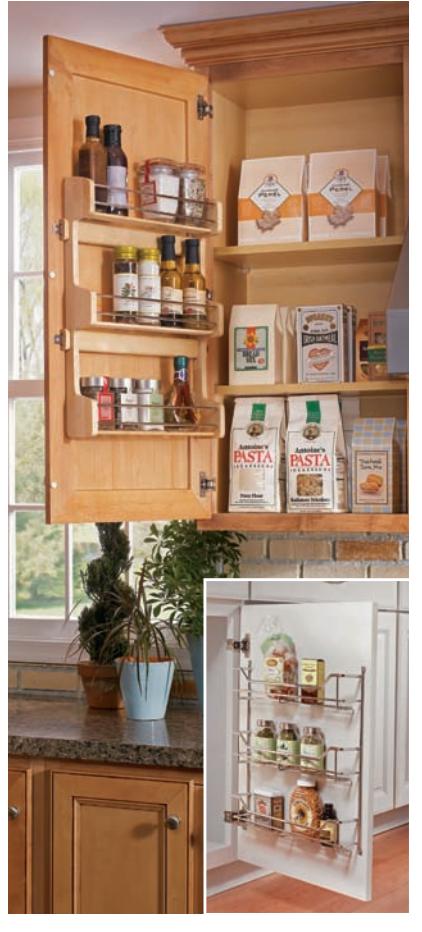
For concealed storage consider using DIY kits on the inside of cabinet faces. They are available in many styles and finishes. Consult the manufacturer’s instructions for installation and weight capacities.
Cleanup & Recycling
With recycling now standard practice in the kitchen, the single trash bin stashed under the sink just isn’t enough (it never was terribly convenient anyway). Today’s solution to disposal is to group the trash and recycling in one easy-access location. The best option is to install a pull-out rack system in a base cabinet for holding all necessary bins (you have to give up some cabinet space, but it’s worth it).
As for that freed-up space under the sink, a pull-out wire basket is perfect for organizing cleaning supplies and dish detergent, and you never again have to grope around for items in the back of this cumbersome and often cruddy cabinet space. To help keep your sink-top area clean and uncluttered, install a tilt-out tray behind the false drawer front on the sink-base cabinet. This simple system mounts to the cabinet frame and drawer front. Concealed-hinge trays are completely hidden when closed.
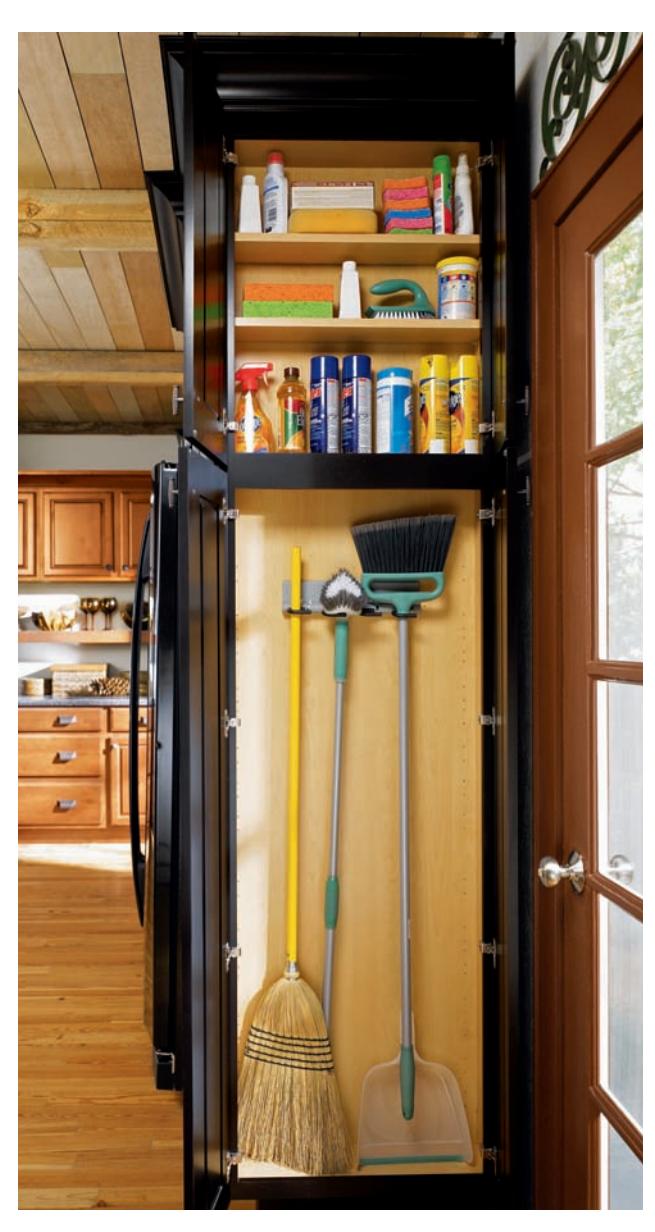
Utility closets, broom closets, laundry room storage areas and the like can all benefit from closet systems and components. Let point of use and frequency of use guide your organization plan in these everyday work areas.
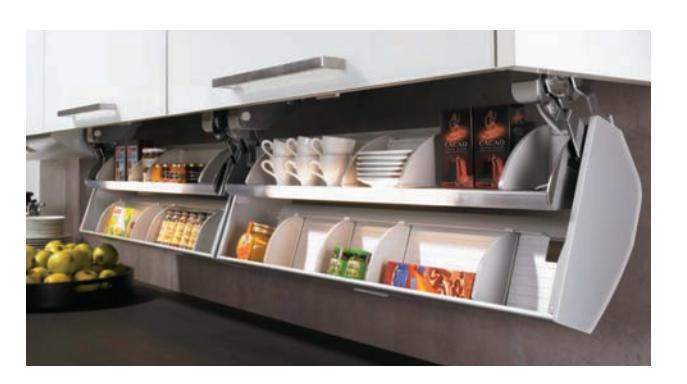
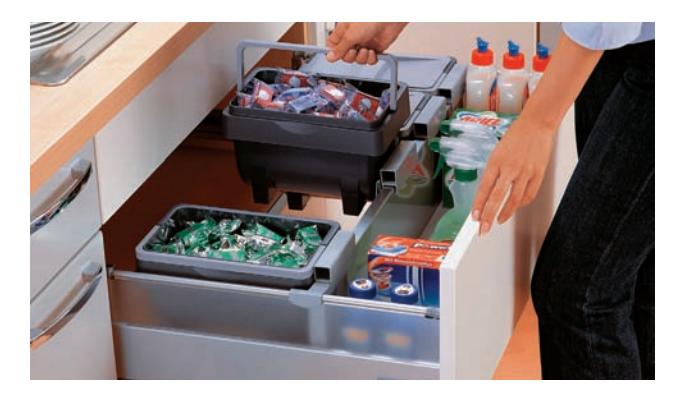
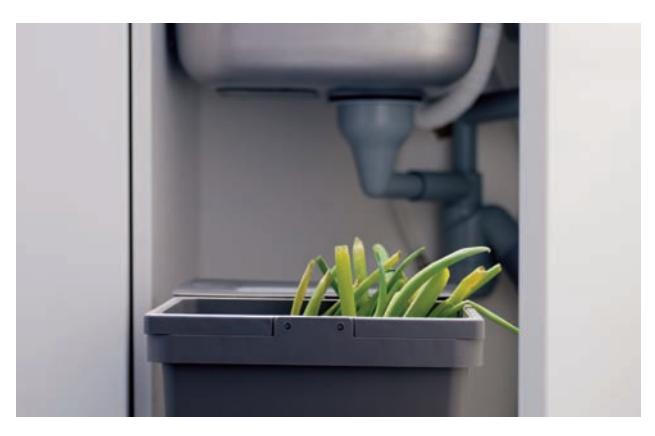
Three simple ways to improve kitchen cleanup: pull-out trash and recycling bins (bottom); pull-out under-sink organizer (middle); false front tilt-out tray (top).
Pot Racks
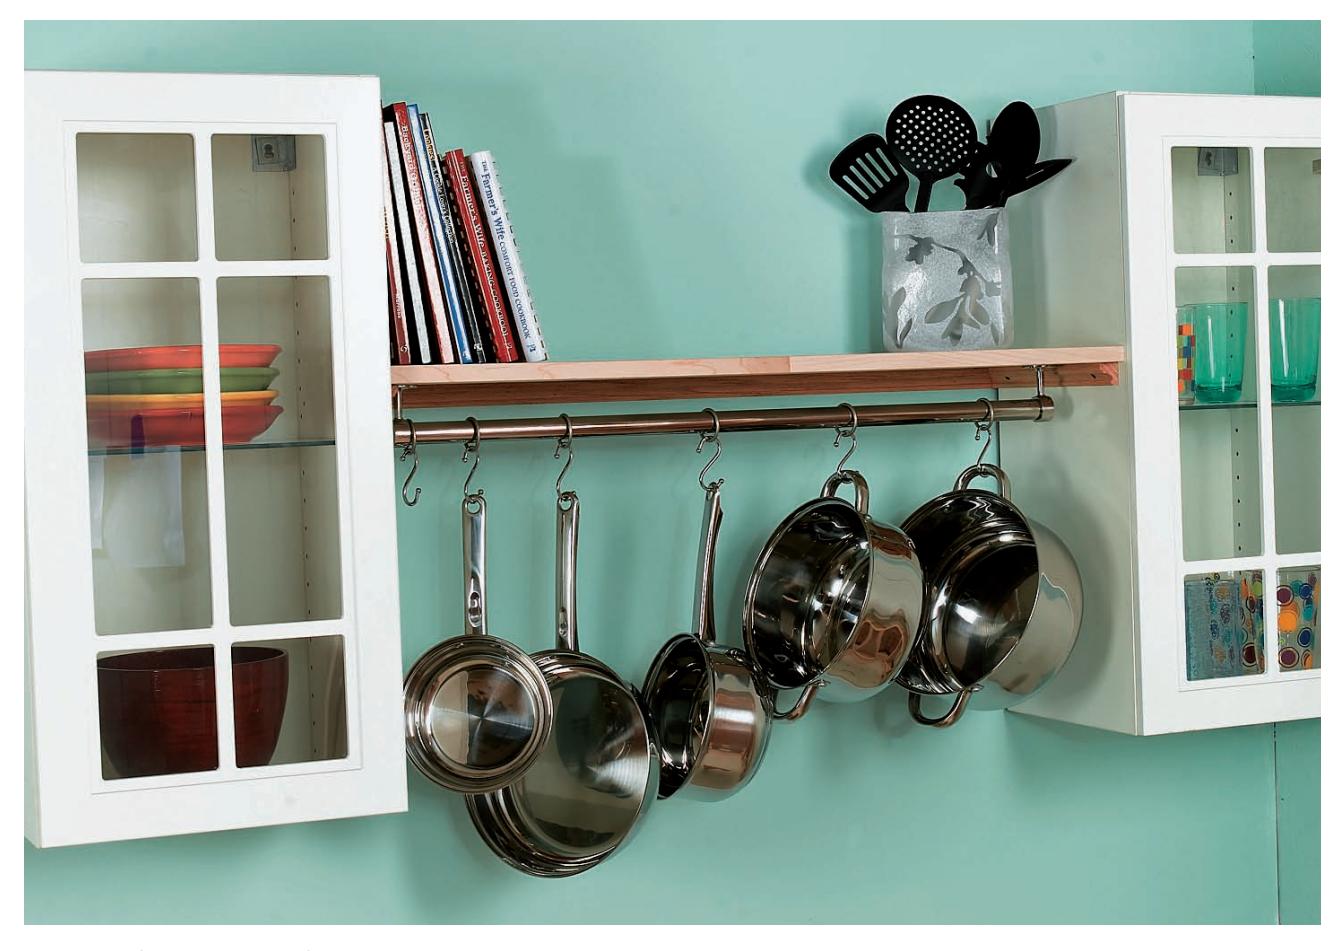
Pot racks free up loads of cabinet space and save you time during cooking. The storage shelf above can hold anything else you like to have at the ready.
Nothing eats up valuable cabinet space like a full set of pots and pans. And for cooks who like to get serious in the kitchen, rummaging through stacks of pans in the heat of preparation is a major inconvenience. That’s why many home chefs prefer to store their most-used cookware on an overhead rack, where all of the pieces are visible at a glance and you can easily reach up and pluck down what you need without having to search through a cabinet.
The three custom pot racks shown on the following pages combine the space-saving convenience of pot hangers with a deep storage shelf above perfect for storing stock pots and other hard-to-hang pieces or a collection of your favorite cookbooks. The simple designs can be customized with any finish and hardware you like, and you can size your unit to fit any space in your kitchen. Because the racks are wall-hung, you don’t need an island or a high ceiling, like you do with many ceiling-hung pot systems.
All of the materials for these racks are available at most home centers and hardware stores. You can also shop online to choose from a wide range of specialty hardware, including shelf brackets, hanging rods, and hooks in various materials and finishes such as stainless steel, wrought iron, nickel, chrome, and brass. For a built-in look, choose a shelf material and finish that matches your kitchen’s cabinets and woodwork. Lumberyards and hardwood suppliers carry solid and edge-glued $1 times 12$ stock in almost any species of wood. For a painted shelf, use 3/4” poplar, or use basic melaminecoated shelf stock and leave it unpainted.
Hanger-rod Pot Rack
This design features a standard-size closet rod supported by two shelf-and-rod brackets. Home centers carry the 1%”-diameter closet rod in chrome, painted steel, and wood, and you can find other finishes online. Chrome and brushed nickel rods look good with sleek decorative brackets, also available online. For the individual pot hangers, you can use standard S-hooks so the pots face out, or combine rings and S-hooks so the pots face to the side for greater storage capacity.
Tools & Materials
- Work Gloves
- 3/4” Finish-grade oak shelving (or shelf stock as desired)
- Eve Protection
- Circular saw
- Finish materials
- Straightedge
- Orbital sander
- Decorative rod end caps
- Hacksaw
- Drill driver
- Construction adhesive
- Metal file
- Closet rod
- Brackets
- S-hooks
- Wood screws
- Finishing tools
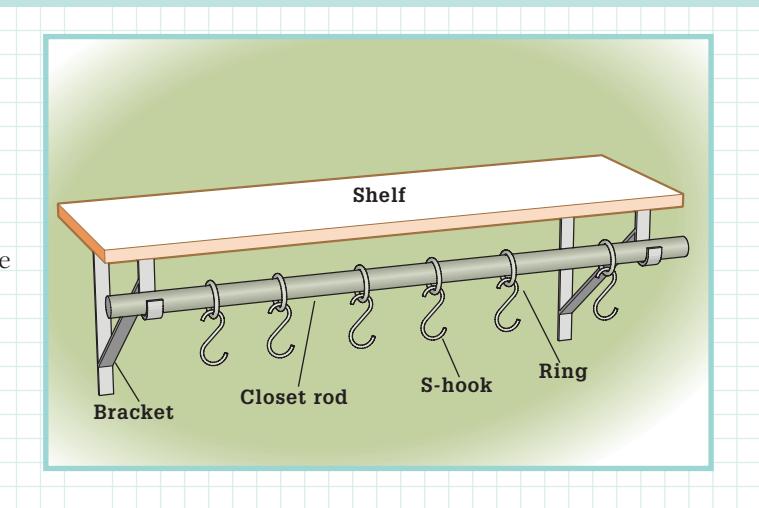
How to Build the Hanger-rod Pot Rack
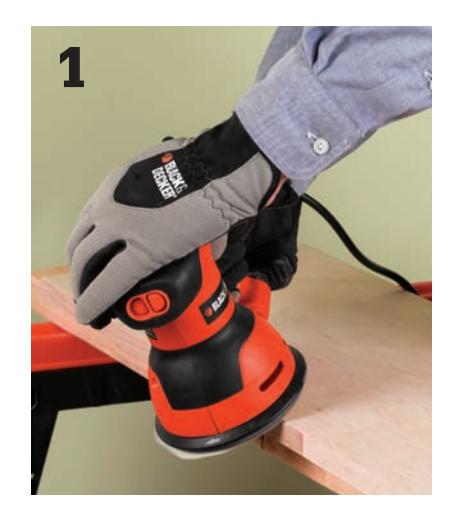
Cut the shelf to the desired length using a circular saw and edge guide. Sand smooth and finish the shelf with three coats of polyurethane, or paint it with primer/sealer and two or more top coats. Cut the closet rod to length with a hacksaw. File the cut edges as needed.
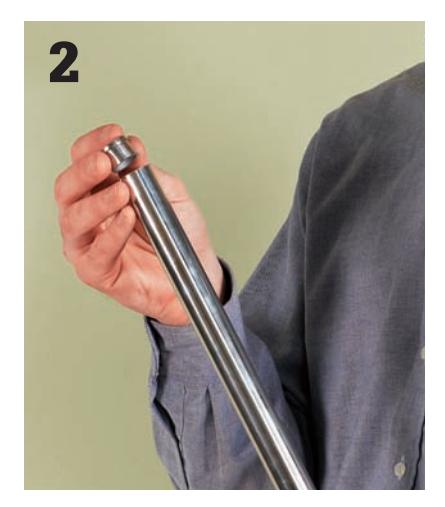
Cover the ends with decorative end caps. Tip: Your pot rack will look best if the rod is a little bit shorter than the shelf
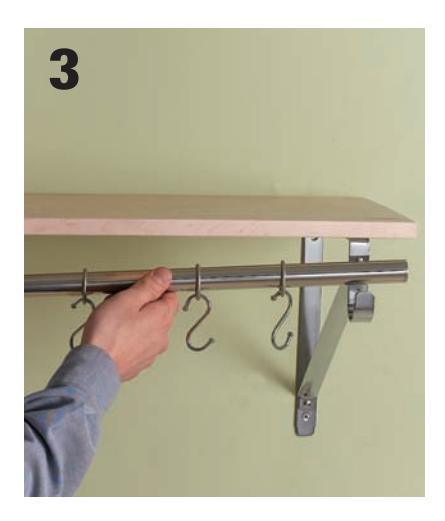
Assemble the shelf. Anchor the shelf brackets to the wall studs with screws, making sure the tops are perfectly level with each other. Attach the shelf to the brackets with screws. Add hooks to the rod, and then set the rod on the brackets with dabs of construction adhesive to prevent movement.
Suspended-shelf Pot Rack
A variation on standard shelf construction, the suspended shelf design has its shelf mounted to the bottoms of inverted brackets. Inverting the brackets gives you built-in bookends above the shelf and leaves the pot area below open for easy access. Large decorative key hooks or cup hooks serve as fixed hangers for the pots. Remember, this rack should only be used for lightweight cookware or cups.
Tools & Materials
- Circular saw
- Straightedge
- Level
- Drill/driver
- Pliers or socket wrenches
- Panhead screws
- Panhead bolts and nuts
- 3/4” finish-grade oak shelving (or shelf stock as desired)
- Cup hooks (5)
- Shelf brackets (2)
- Wall anchors
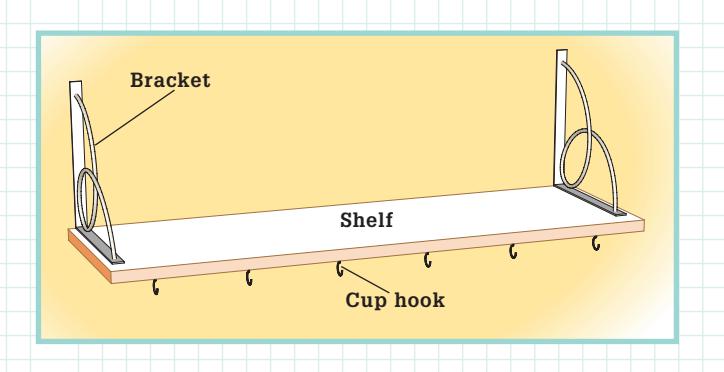
How to Build the Suspended-shelf Pot Rack
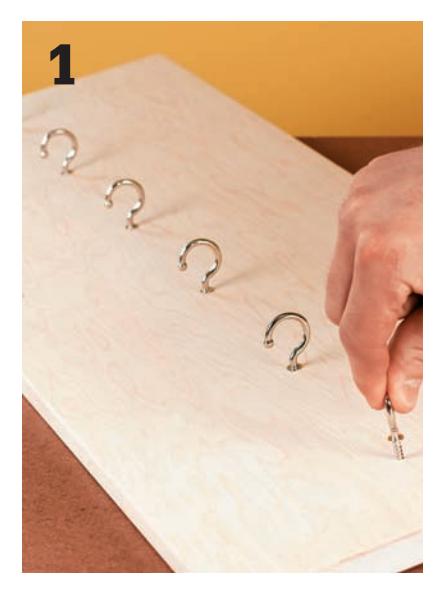
Cut the shelf to length and finish as desired (see Step 1 on page 35). Install the cup hooks with even spacing on the bottom face of the shelf. Make sure there’s enough room so your largest pan won’t touch the wall.
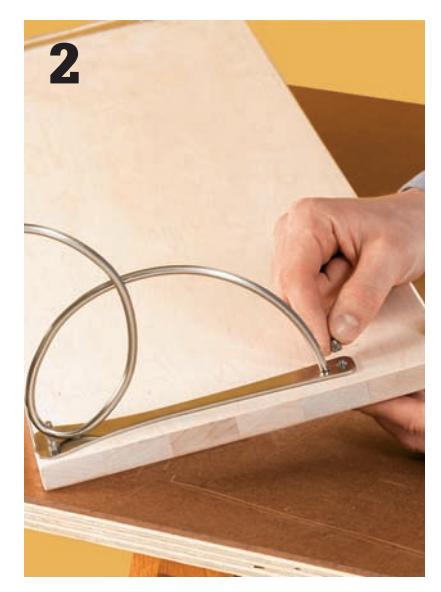
Secure the brackets to the shelf with nice-looking panhead (or other) machine bolts and nuts. The bolt heads should go on the bottom of the shelf, and the threaded ends should be flush with the top of the nuts.
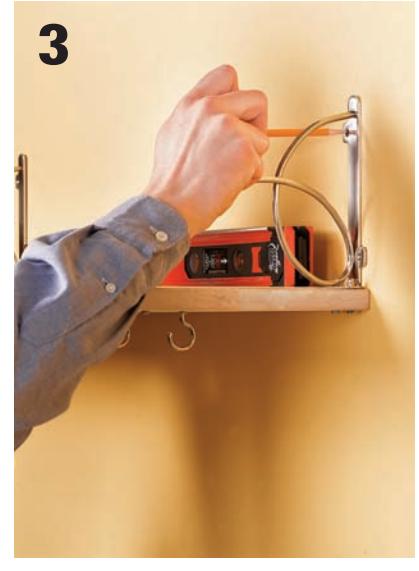
Fasten the brackets to the wall with heavy-duty panhead (or other) wood screws. Make sure the shelf is perfectly level and drive the screws into wall studs or use heavy-duty, hollow wall anchors.
Built-in Pot Rack
The built-in rack is designed to span between two wall cabinets or between a cabinet and nearby wall. You can also use the same basic construction to build a large triangular corner shelf between two adjacent walls.
The pot rack shown here is made with metal tubing secured to the shelf with matching railing brackets. An alternative option is to install individual pot hooks as shown in the Suspended-shelf Pot Rack (page 36).
Tools & Materials
- Work Gloves
- Eye Protection
- Finish screws and nails
- Cabinet Level
- Metal tubing and brackets
- Drill
- Circular saw
- S-hooks or rings
- Miter saw
- Finishing materials
- Shelf Pipe cutter
- Nail set
- Hammer
- Finishing tools
- 3/4” finished wood (shelving)
- Molding (for cleats)
How to Build the Built-in Pot Rack
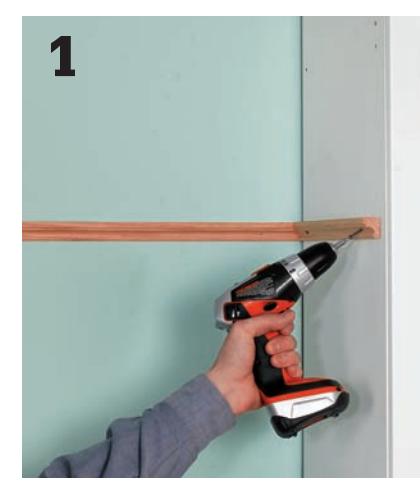
Install the cleats flush with the level lines using finish screws. Draw a level line along the wall and supporting cabinets %” below the desired height for the top of the shelf. Finish the molding for the cleats as desired and cut to length, mitering the inside corners and beveling the exposed front ends at 30°. Cut the shelf to fit snugly between the cabinets. Finish the shelf as desired.
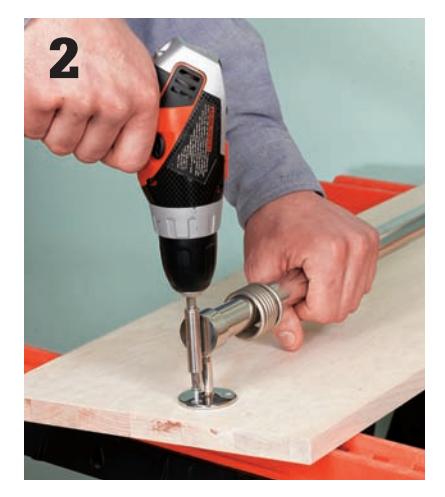
Cut the tubing to length with a plumber’s pipe cutter. Add rings and/or S-hooks for the pot hooks (see page 36). Fit the railing brackets over the ends of the tubing and mount them to the shelf bottom with screws.
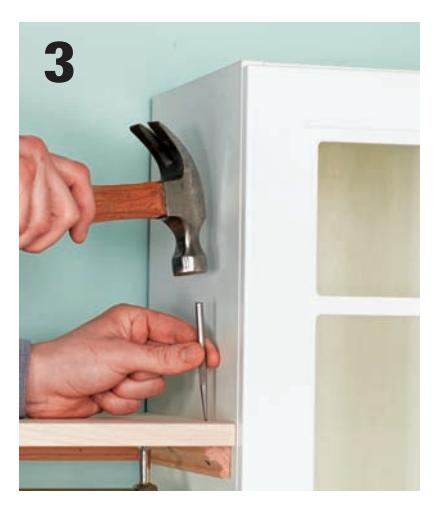
Set the shelf in place, and then fasten it to the cleats with finish nails driven through pilot holes.
Wooden Ladder Pot Rack
This inexpensive, easy-to-build pot rack is a wonderful organizer and great addition to any kitchen, especially kitchens that suffer from limited cabinet or countertop space. Most busy cooks have one or more overhead racks in their kitchens to keep frequently used cooking utensils within reach. Overhead racks also give proud cooks an opportunity to show off gourmet pans and other high-end cooking equipment.
The project shown here is a ladder-style rack made with wood dowels, from which the pots are hung with pot hooks. For an interesting variation, try building the rack with a ladder made with 3/4” (or 1” if you can find it) metal electrical conduit. When sanded, the conduit has a matte finish similar to brushed aluminum or stainless steel.
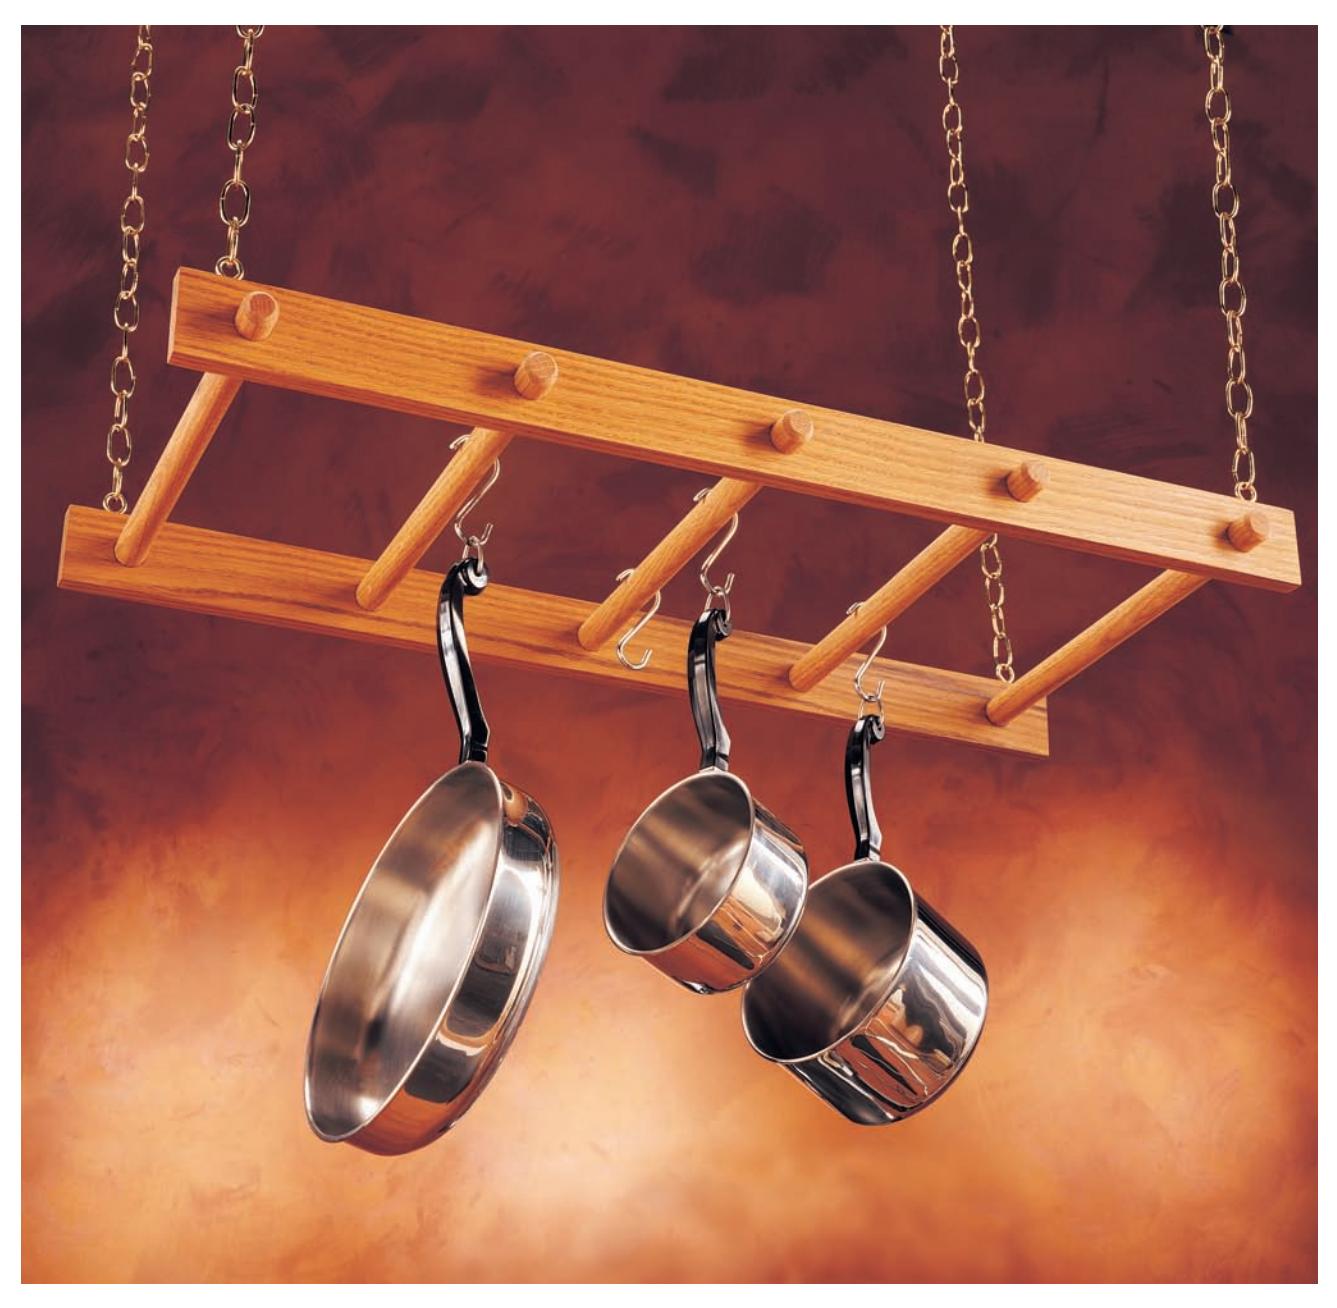
A solid oak ladder with round rungs makes an intriguing kitchen pot rack that’s easy to build.
Tools, Materials & Cutting List
Tools
- Work Gloves
- Eye Protection
- Circular saw and straightedge
- Drill with 1” bit
- Finish sander
- Clamps
- Portable drill guide
- Nail set
- Hammer
- Wood mallet
Materials
- 16 ft. decorative chain
- 1×3” x 8 ft. oak (1)
- 1”-dia. x 3 ft. oak dowel (3)
- J-hooks (to hang pots) (4)
- Eye hooks (4)
- Backer board
- 4d finish nails
- Wood glue
- Finishing materials
| Key | Part | Dimension |
|---|---|---|
| A | (2) Stretcher | 3/4 × 2 1/2” × 3 ft. oak |
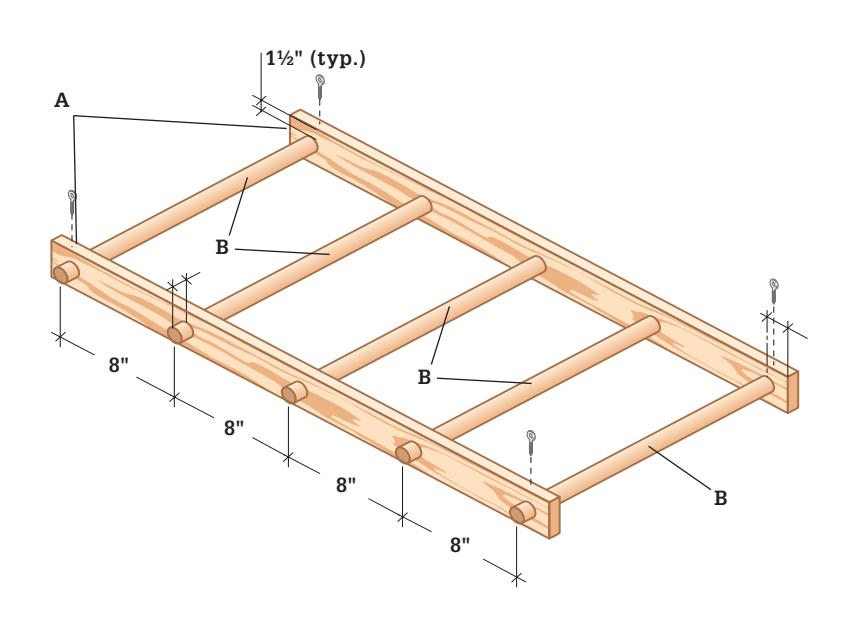
| B | (5) Dowel | 1”-dia. × 18” dowel |
How to Build the Wooden Ladder Pot Rack
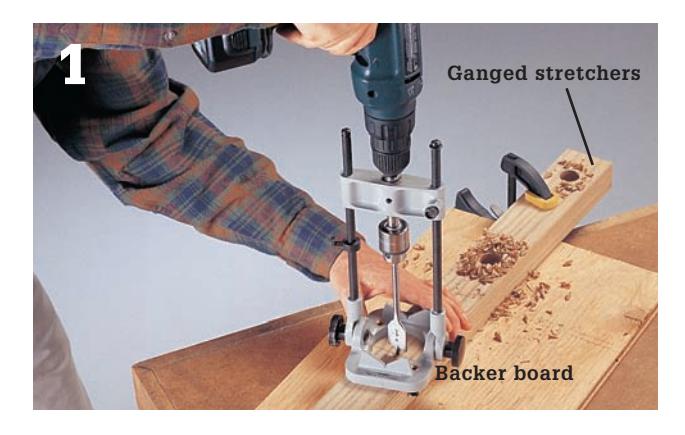
Make the stretchers. Cut your hardwood stock to size (here, 3/4 x 2 1/2”) and then cut the stretchers to length. Drill 1”-dia. holes in the stretchers spaced 8” apart on-center (See Diagram above). To ensure that the holes align, gang the stretchers together with their ends flush. Use a backer board to prevent drill tearout.
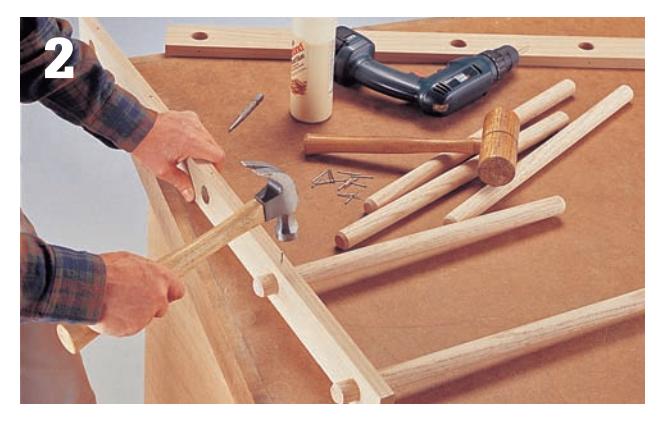
Assemble the ladder. Cut 1” doweling to length (we used oak stretchers and oak doweling, which is relatively easy to find). Sand all parts. Insert the dowels into the holes in the stretchers. Make sure the amount of dowel projecting out from each hole is uniform. Secure the dowels with glue and a single 4d finish nail driven through a pilot hole in the stretcher edge and into the dowel, pinning it. Hang from ceiling joists with chains.
Slide-out Storage
A base cabinet with slide-out trays or shelves is one of those great modern conveniences that has become standard in new kitchen design. Not only do slide-out trays make reaching stored items easier than with standard cabinet spaces—no more crouching and diving into the deep recesses of cavernous low shelves—they also store more items far more efficiently. With a few shallow trays, a standard base cabinet can hold dozens of food cans and still leave room for tall items like cereal boxes and bags of flour or even deep pots and countertop appliances.
To get the most from your new slide-out system, think carefully about how you will use each tray. Measure the items you’re most likely to store together, and let the items dictate the spacing of the trays. Most standard base cabinets are suitable for trays. Wide cabinets (24” or wider) without a center partition (middle stile) are best in terms of space usage, but trays in narrow (18”-wide) cabinets are just as handy. If you have a wide cabinet with a middle stile, you can add trays along one or both sides of the stile. For economy and simplicity, the trays in this project are made with 3/4”-thick plywood parts joined with glue and finish nails. If you prefer a more finished look (not that there’s anything wrong with the look of nice plywood), you can use 1×4 hardwood stock for the tray sides and set a 3/8”-thick plywood bottom panel into dadoes milled into the side pieces. Another option is to assemble plywood tray pieces using pocket screws so the screw heads don’t show on the front pieces of the trays.
Tools & Materials
| Tools | Materials |
|---|---|
| Work Gloves | Drawer slides (1 set per tray) |
| Eye Protection | 1×2 poplar (or other hardwood to match trays, if desired) |
| Framing square | 3/4” finish-grade plywood |
| Circular saw with straightedge guide or table saw | Wood glue |
| Drill | 6d finish nails (or pneumatic brads) |
| Level | Wood screws |
| Tape measure | Finish materials |
| Hammer | |
| Clamps |
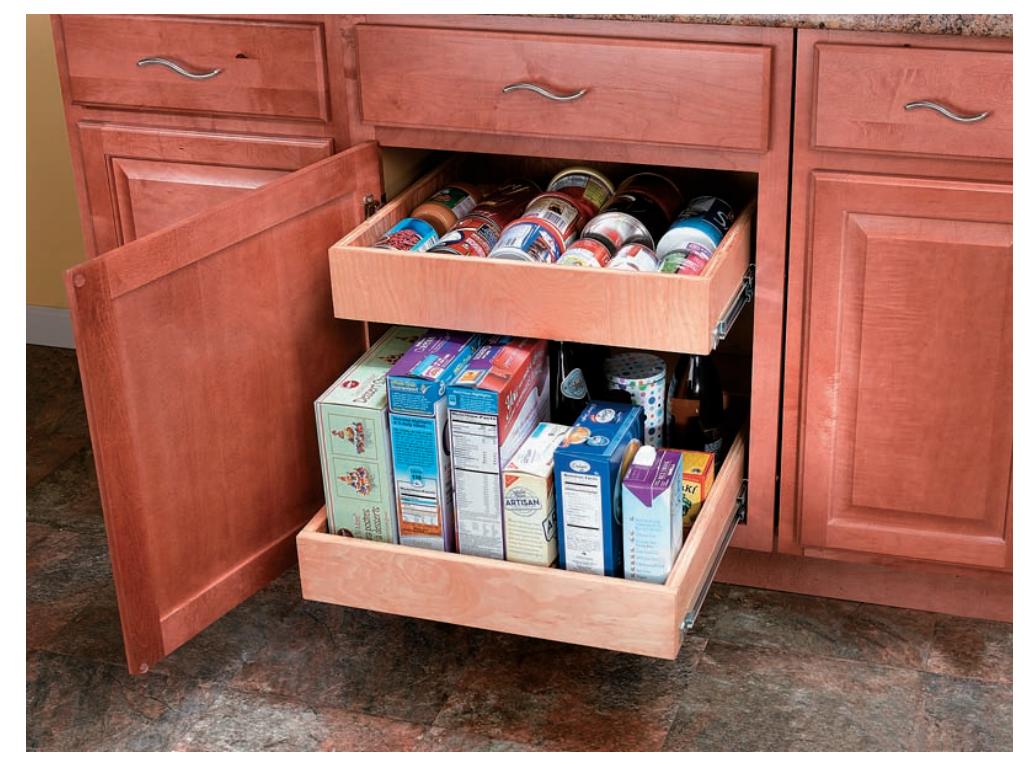
Slide-out trays eliminate the everyday problem of hard-to-reach and hard-to-see spaces in standard base cabinets. Better still, you can install your trays to accommodate the stuff you use most often.
Drawer Slides
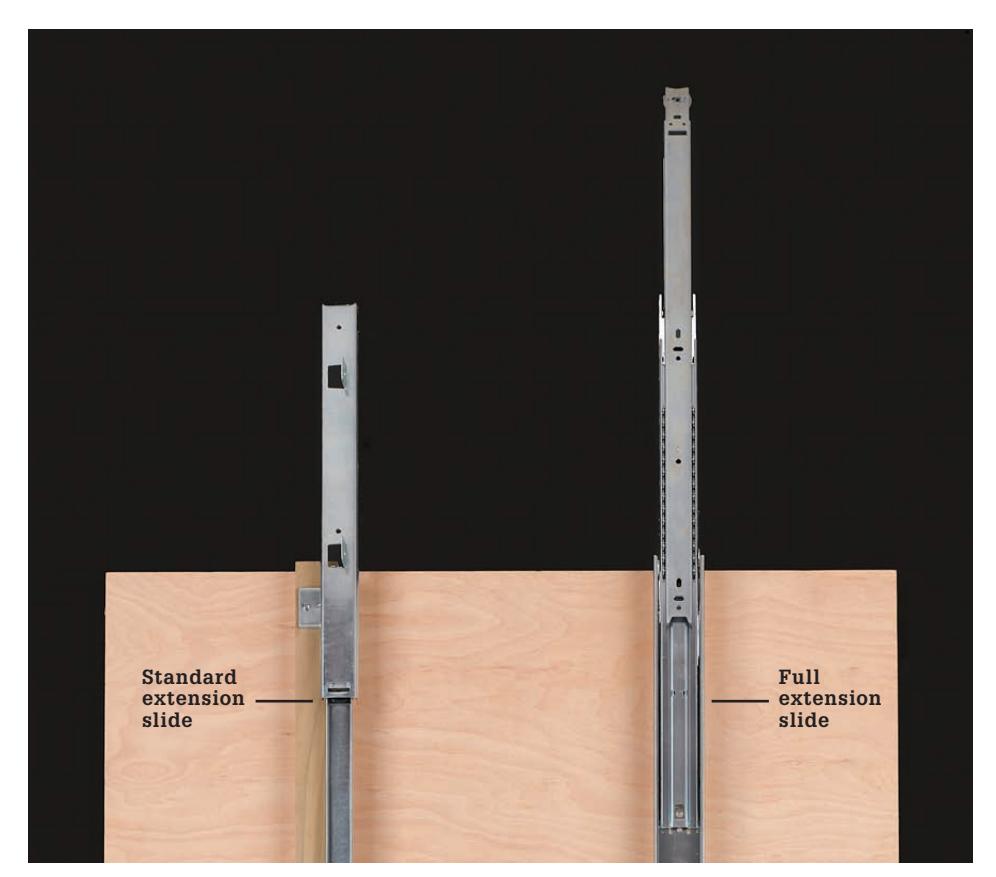
Drawer slides suitable for pullout shelves are commonly available in both standard (left) and full extension (right) styles. Standard slides are less expensive and good enough for most applications—they allow the tray to be pulled out most of the way. Full extension slides are a little pricier than standard slides, but they allow the tray to be pulled completely out of the cabinet box for easy access to items in the back.
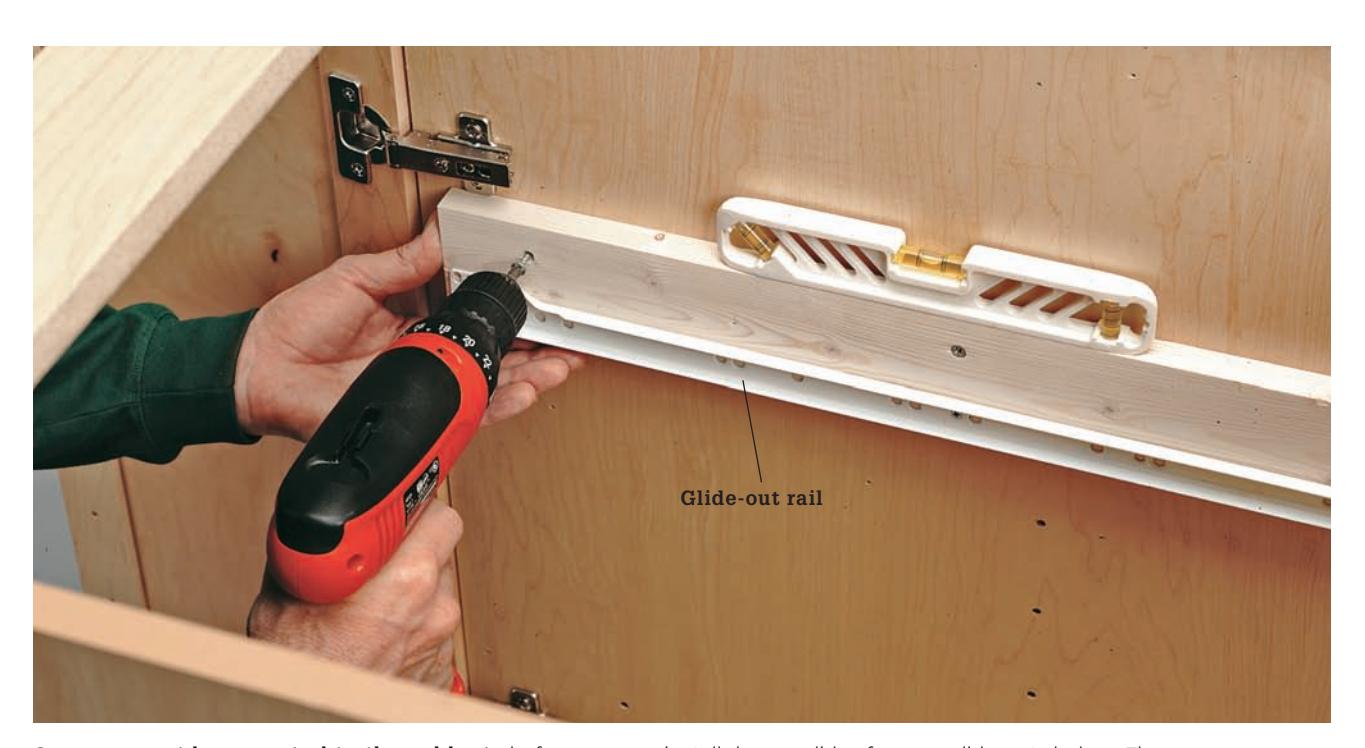
Spacers must be mounted to the cabinets before you can install drawer slides for your glide-out shelves. They are necessary for the drawers to clear the cabinet face frame and the door. For 3/4” spacers, a 1×2, 1×3, or 1×4 works well. Paint or finish it to match the cabinet interior.