---
title: "Bathrooms: Bathrooms"
id: "5396"
type: "page"
slug: "01-bathrooms"
published_at: "2026-07-18T02:42:28+00:00"
modified_at: "2026-07-18T16:10:39+00:00"
url: "https://preppers-paradise.com/library/thecompleteguidetobathrooms6thedition/01-bathrooms/"
markdown_url: "https://preppers-paradise.com/library/thecompleteguidetobathrooms6thedition/01-bathrooms.md"
excerpt: "This comprehensive guide empowers homeowners to undertake bathroom renovation and improvement projects, offering detailed instructions for transforming spaces into functional and luxurious sanctuaries"
taxonomy_category:
- "Books"
- "DIY & Home Improvement"
- "Free Teaser"
taxonomy_post_tag:
- "accessibility"
- "bathroom design"
- "bathroom renovation"
- "demolition"
- "diy projects"
- "fixture installation"
- "home improvement"
- "plumbing"
- "remodeling"
- "tiling"
---
# BATHROOMS: Bathrooms
[← BATHROOMS](/library/thecompleteguidetobathrooms6thedition/)
Chapter 1 of 20 · Free teaser
# BATHROOMS
Updated 6th Edition
Beautiful Upgrades & Hardworking Improvements You Can Do Yourself

## NOTICE TO READERS
For safety, use caution, care, and good judgment when following the procedures described in this book. The publisher and BLACK+DECKER cannot assume responsibility for any damage to property or injury to persons as a result of misuse of the information provided.
The techniques shown in this book are general techniques for various applications. In some instances, additional techniques not shown in this book may be required. Always follow manufacturers' instructions included with products, since deviating from the directions may void warranties. The projects in this book vary widely as to skill levels required: some may not be appropriate for all do-it-yourselfers, and some may require professional help.
Consult your local building department for information on building permits, codes, and other laws as they apply to your project.
| Introduction | 7 |
|----------------------------------------|-----|
| GALLERY OF BATHROOMS | 9 |
| BATHROOM ELEMENTS | 19 |
| Traditional + Jetted Bathtubs | 20 |
| Showers | 24 |
| Sinks | 26 |
| Toilets + Bidets | 28 |
| Cabinets + Vanities | 30 |
| Lighting | 34 |
| Heating + Ventilation | 35 |
| Walls + Ceilings | 36 |
| Flooring | 37 |
| GETTING STARTED | 39 |
| Determining Your Needs | 40 |
| Designing for Accessibility | 42 |
| Bathroom Design Standards | 47 |
| Drawing Plans | 50 |
| Simple Plumbing Layouts | 52 |
| Removal + Demolition: Toilets | 54 |
| Removal + Demolition: Sinks + Cabinets | 56 |
| Removal + Demolition: Showers + Tubs | 58 |
| Building a Wet Wall | 62 |
| SHOWERS + BATHTUBS | 69 |
| Installing Showers | 70 |
| Shower-Enclosure Kits | 72 |
| Neo-Angle Showers | 78 |
| Curbed Shower Base | 84 |
| Wet Rooms + Curbless Showers | 92 |
| Alcove Bathtubs | 102 |
| Three-Piece Tub Surrounds | 108 |
| Drop-In Tubs | 112 |
| Freestanding Tubs | 116 |
| Sliding Tub Doors | 120 |
| Hinged Tub-Shower Door | 124 |
| Jetted Tubs | 128 |
| Bathtub + Shower Fittings | 136 |
| LIGHTING + VENTILATION | 187 |
| Vanity Lights | 188 |
| LED-Backlit Mirror | 190 |
| Ceiling Lights | 192 |
| Vent Fans | 196 |
| WALL + FLOOR PROJECTS | 201 |
| Installing Cement Board | 202 |
| Wall Tile | 208 |
| Tub Tile Surround | 212 |
| Toilet Enclosure | 218 |
| Radiant Floor Heating | 224 |
| Floor Tile | 230 |
| BATHROOM ACCESSORIES | 239 |
| Medicine Cabinets | 240 |
| Accessorizing for Universal Design | 242 |
| Grab Bars | 244 |
| Glass Shelving | 246 |
| Towel Warmers | 248 |
| Measurement Conversions | 250 |
| Resources | 252 |
| Photo Credits | 253 |
| Index | 254 |
[Adding a Bathtub Shower](#page-141-0) 140
**[TOILETS](#page-176-0) 175**
[Toilets](#page-177-0) 176 [Bidet Seats](#page-185-0) 184
## Introduction
At their best, bathrooms are places of refuge. A well-designed bathroom is the perfect intersection of privacy, comfort, and essential function. That's a lot to ask for from one small room in a house. Fortunately, there are a wealth of fixtures, furnishings, and surface treatments from which to choose. Those enable you to create your own personal spa-like sanctuary.
Increasingly, that's what homeowners want from the bathroom—a luxurious space that they not only use every day, but enjoy using every day. Understandably, new bathroom design is being led by the different ways homeowners want to use their bathrooms. Where once the good old American toilet was unchanging and simple, now homeowners want a bidet-toilet (or at least a bidet seat) for the hygiene and comfort of a separate European fixture, with the convenience and economy of a single throne for the room.
Faucets have not only grown more stylish, but they are also increasingly "smart," with touchless and touch-activated models available everywhere faucets are sold. This new technology makes something as basic as washing your hands easier and more hygienic. Again, luxury and comfort coming together in new and interesting ways.
The luxury is key. Even homeowners with only a modest bathroom space to transform, expect a certain level of luxury. And they don't have to look further than their local home center to find it. Multiple showerheads—once exclusive to high-end hotels and million-dollar homes—are now within easy reach (literally and figuratively) of just about every homeowner. The jetted tubs that once required excessive floor space can now be found in modest alcove models that will bring an opulent, rejuvenating experience to even the most cramped bathroom.
Trends come and go. Plants and black fixtures? Appealing, but perhaps not here for the long haul. Glass tiles, curbless showers, and sleek tankless toilet designs? They will likely endure.
In any case, start with your comfort and the special features that mean the most to you, whether that's a his-and-her double-bowl vanity or a slide bar, dualhead shower fixture. Then choose the finish, color, or style that complements the overall look you're after. Given the vast wealth of choices, there's just no reason not to have the bathroom of your dreams.
## Gallery of Bathrooms
For what are usually fairly small spaces in a home, bathrooms are their own style islands. They don't necessarily have to follow the design philosophy used throughout the rest of the house, because they serve as remote, separate spaces. However, given the amount of time you'll spend in your bathroom, it only makes sense to create a visual style that is every bit as pleasing as the room is comfortable to use.
The options shown in these pages represent the astounding range of style elements that can affect the feel and flair of this high-traffic space. These are all meant as improvements in a room where the money you invest often comes back to you in a measurably higher home value (bathrooms and kitchens remain the two remodeling areas with the biggest return on investment, real estate–wise).
The inspirational examples shown here also reflect the practical considerations that temper any decision you might make. Tile floors? Consider whether traction is more important than looks. Vessel sink? Will small children be able to reach over the lip to use the fixture? Always keep in mind that bathrooms are where the beautiful meets the practical. Fortunately, as the photos in this section amply illustrate, you never have to do without one to have the other.
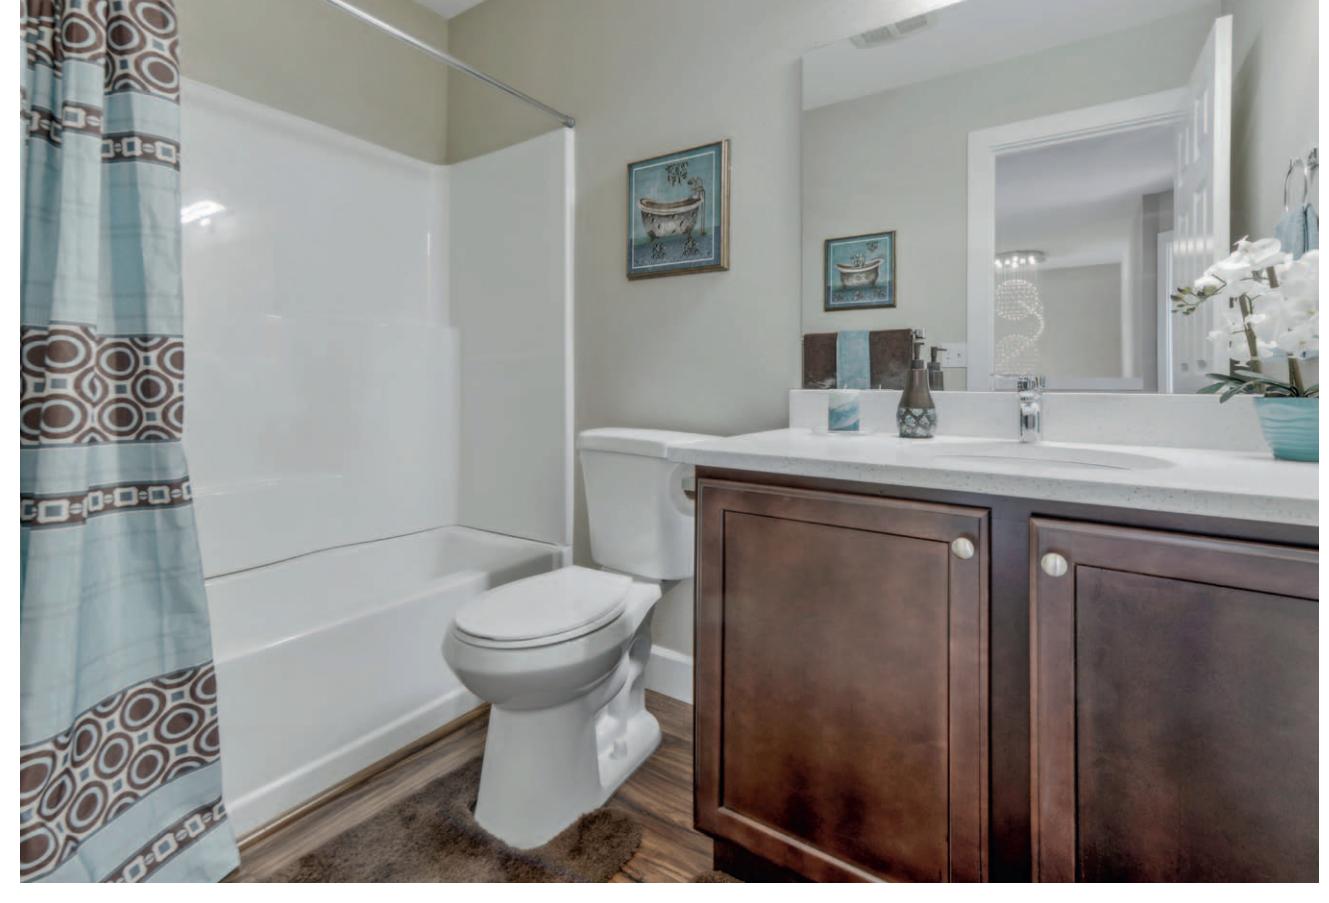
**Clean and simple can be calming.** A small space is often well-served by a more subtle look. Muted colors, bright reflective surfaces, and abundant lighting lend a sparkling feel to this guest bathroom, while ensuring that is easy to keep clean. It was also inexpensive to create and serves the needs well.
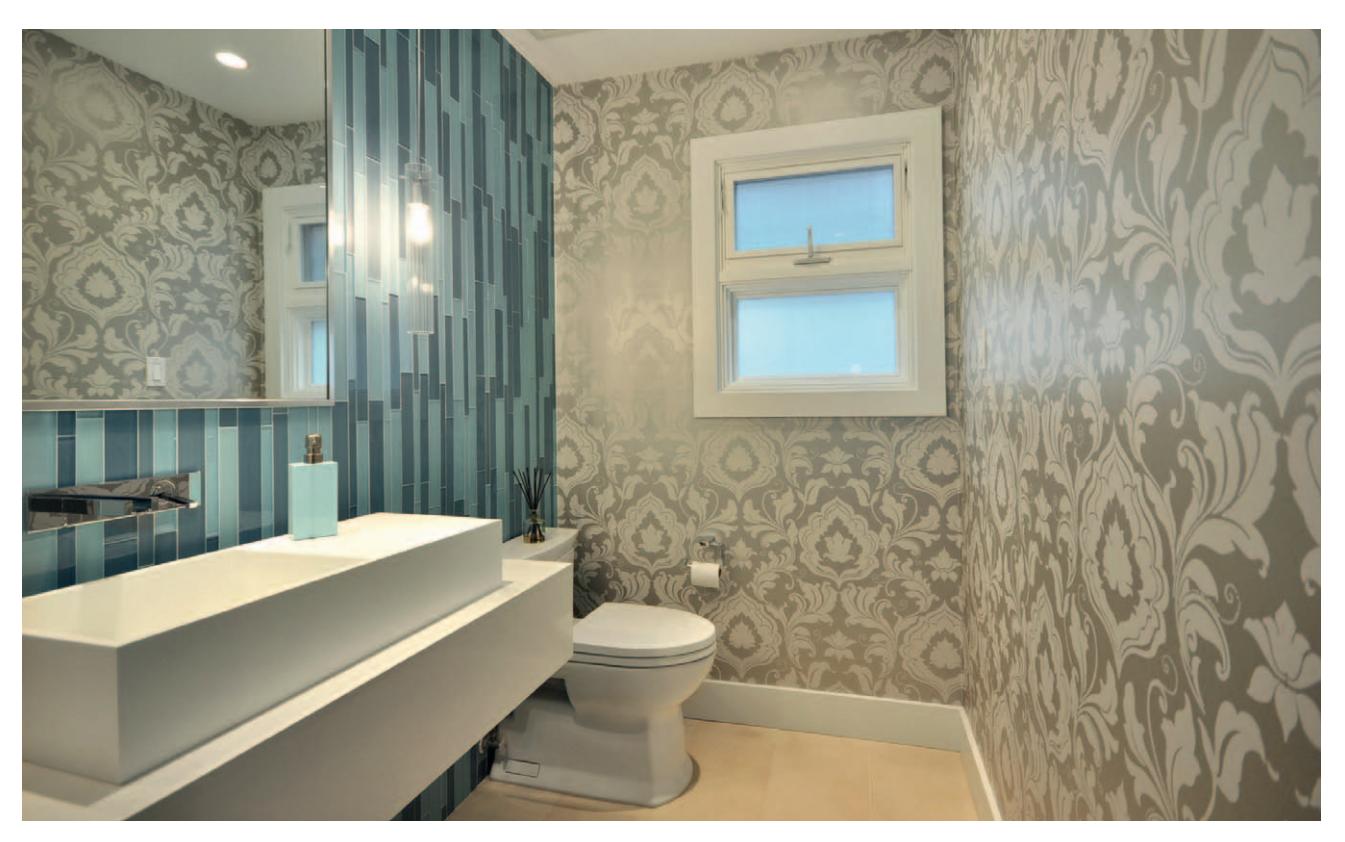
**Be bold in a half bath.** Because powder rooms are used only briefly, and the space you need to cover is modest, you can let your creativity loose in the space. Here, the homeowner has contrasted stunning patterned wallpaper with an accent wall of sophisticated glass tile. The busy surfaces are moderated by solid color floor and ceiling and simple, modern, linear tray sink. The space is modest, but the look is anything but.
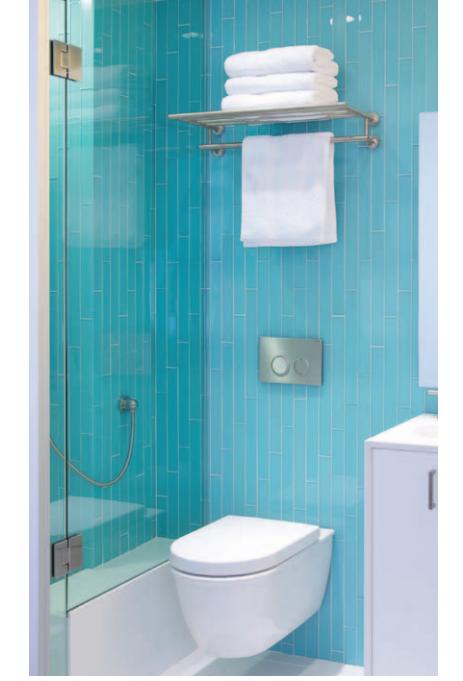
**Use light to enlarge a small room.** Space may be at a premium in this bathroom, but it doesn't look that way. Diagonal glass tiles run vertically make the ceiling seem higher, and the light, bright color and glass surface amplifies available light, making the space appear more open and airy. The wall-mounted toilet also conserves space, as does the handy shelf-and-towel rack unit.
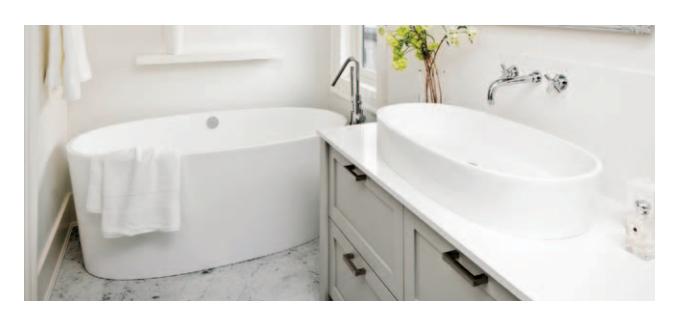
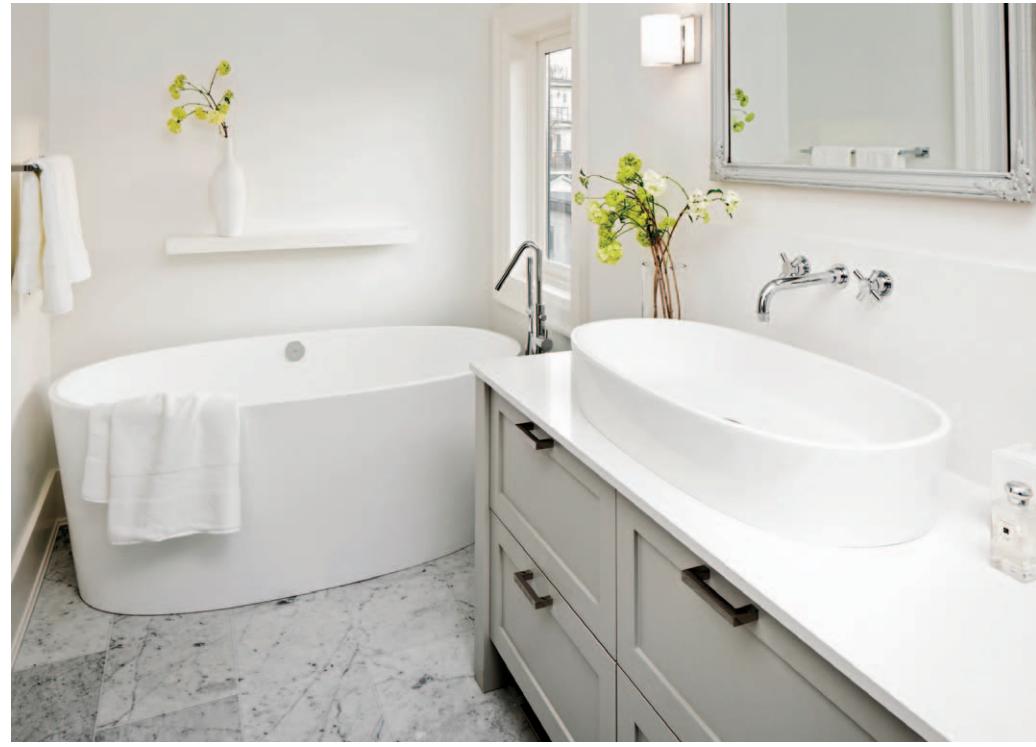
**Match curves to curves.** A tray vessel sink (below) is not unusual in today's contemporary bathroom, but an oval version is. The shape of this lovely sink mirrors the shape of the bathtub, creating a repetition that helps guide the eye through the room's design.
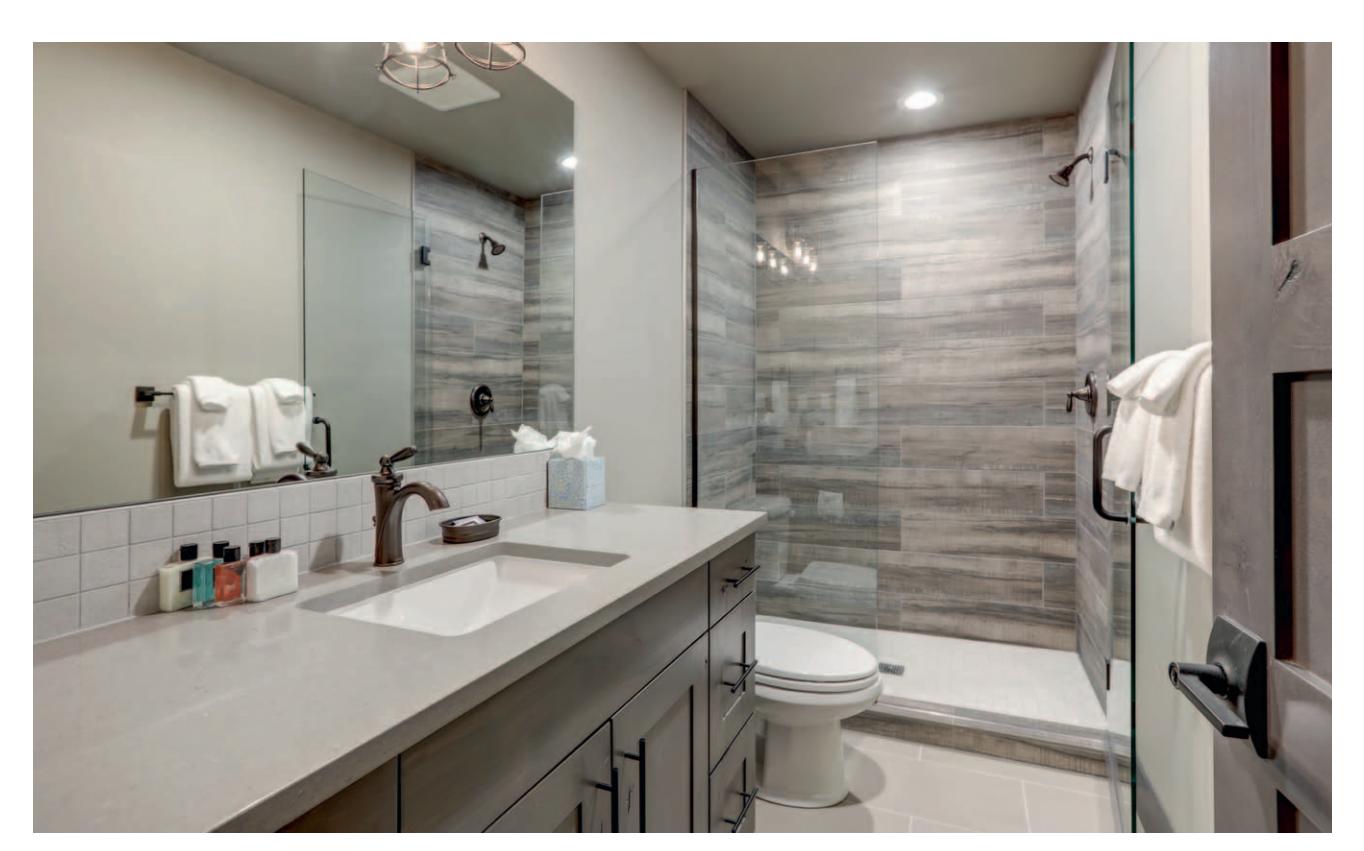
**Swap the tub for luxury.** Many bathroom alcove tubs are small and cramped. Replacing a tiny tub with a curbless shower creates a showcase bathroom and an exceptional morning shower experience.
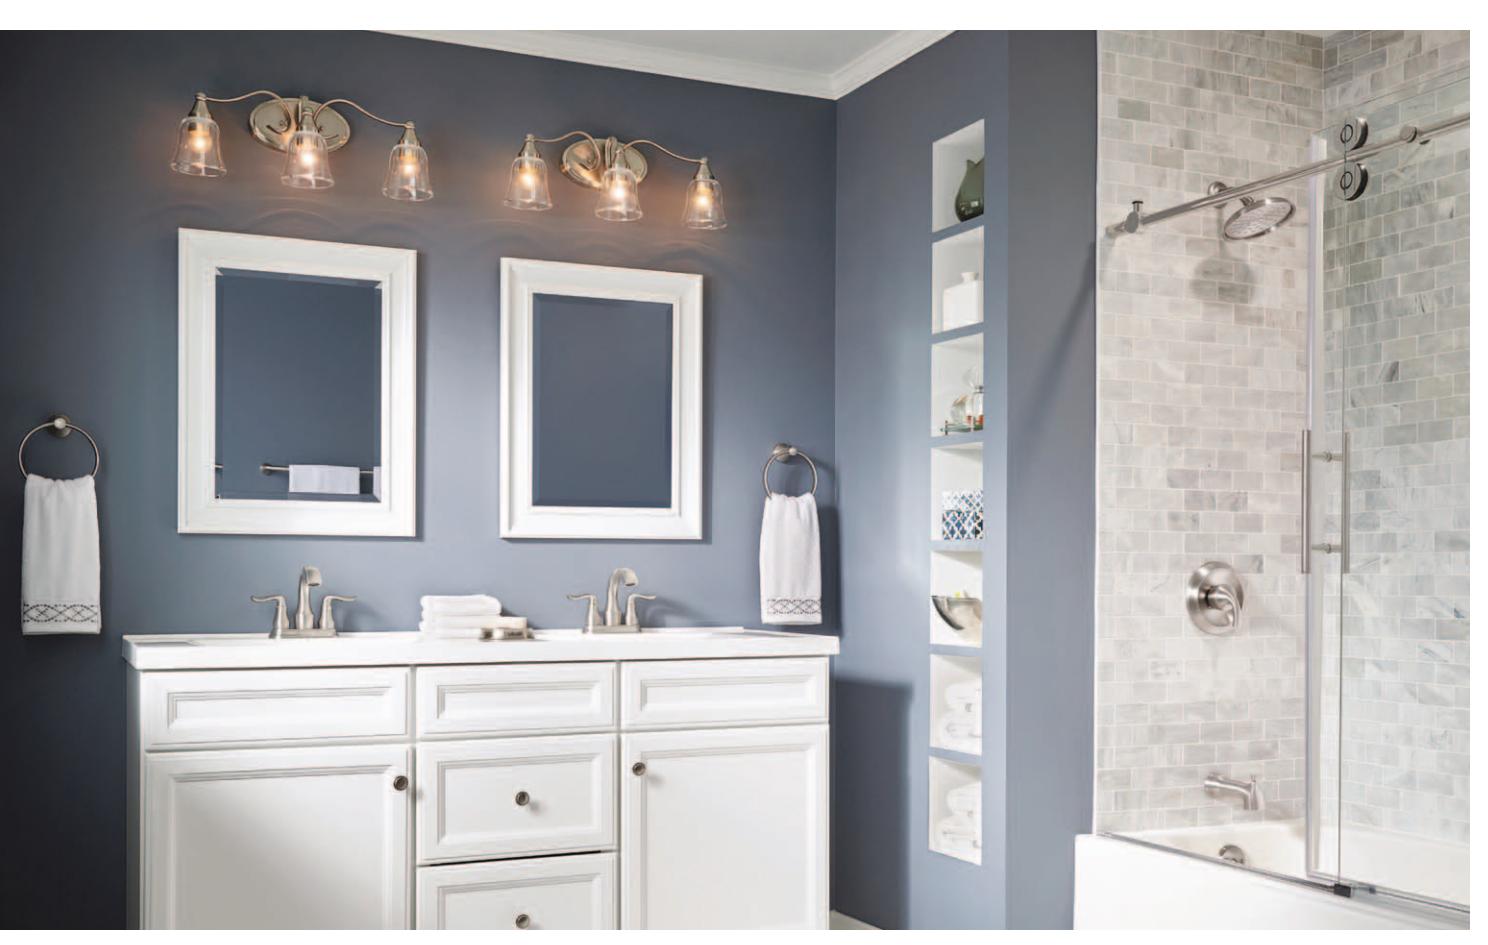
**Play it safe with matching fixtures.** You can please the eye and streamline your fixture shopping by buying a suite of fixtures from the same family, such as the showerhead, controls, and faucets in this bathroom. The brushed-nickel finish is easier to keep clean than chrome, and it adds a sophisticated aspect to the look of the room.
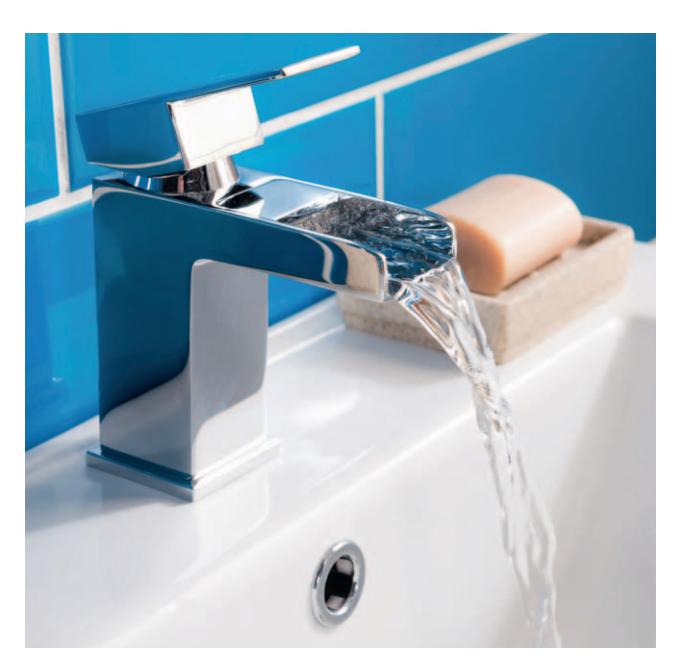
**Accessorize with small bathroom fixtures.** Faucets are the jewelry of the bathroom, and it doesn't take a huge investment to opt for bling. This waterfall faucet adds a literal splash of style to the room without breaking the bank.
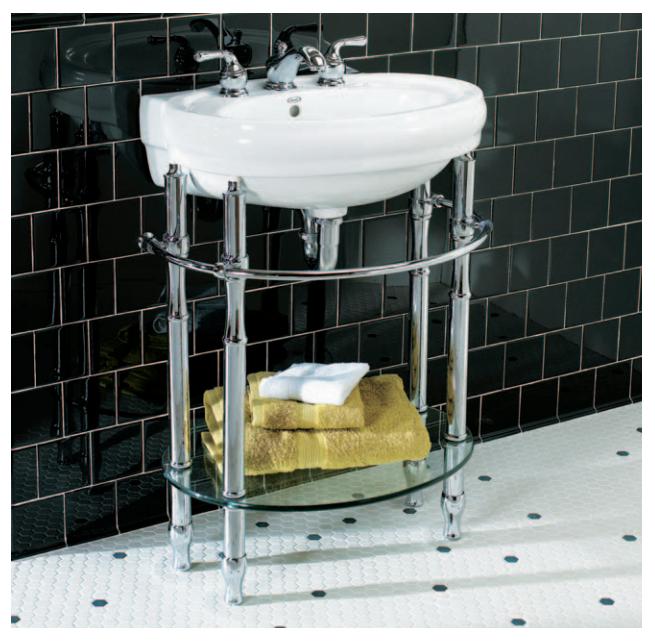
**Save space with a console sink.** Most console sinks are modest in size, usually featuring only the sink and supporting structure. This one features the added bonus of a shelf between the legs, offering a place for towels or other small item storage.
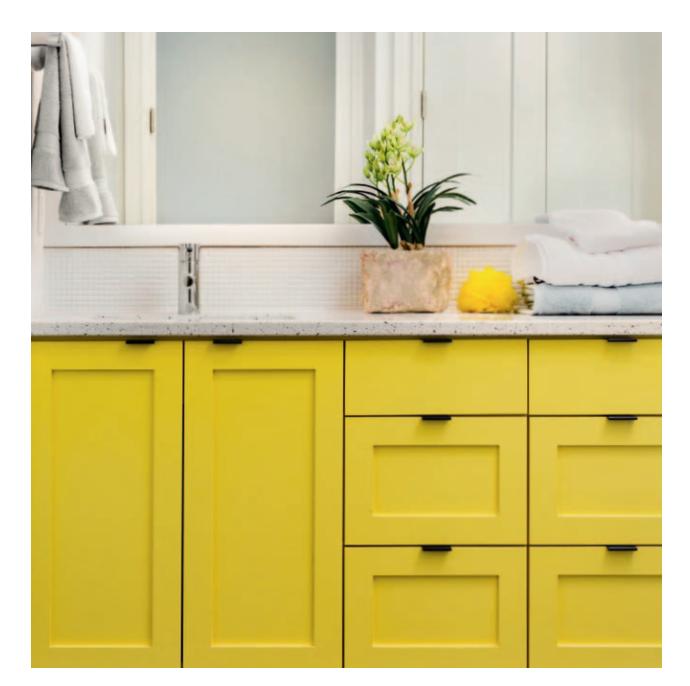
**Colorize vanity fronts for a showstopping effect.** The small surface area of vanity drawer and cabinet door fronts provides the ideal canvas for a shock of bold color in an otherwise white room. This is a great way to revive older, beat-up vanities, without the expense of replacing them.
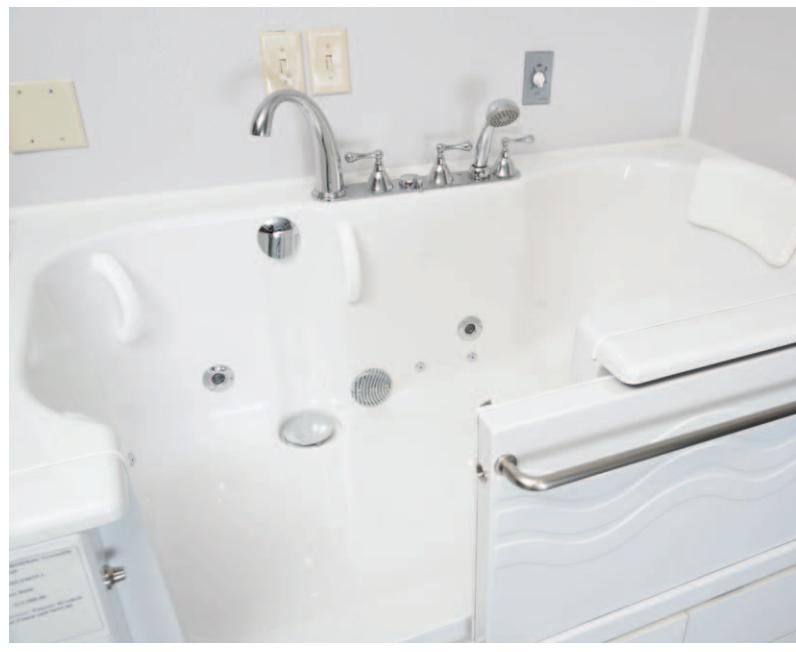
**Walk into luxury.** Today's walk-in tubs are more than just pragmatic accessibility features for bathers with mobility issues. Manufacturers now outfit walk-in tubs with luxury features, such as the jets and chrome fixtures shown here.
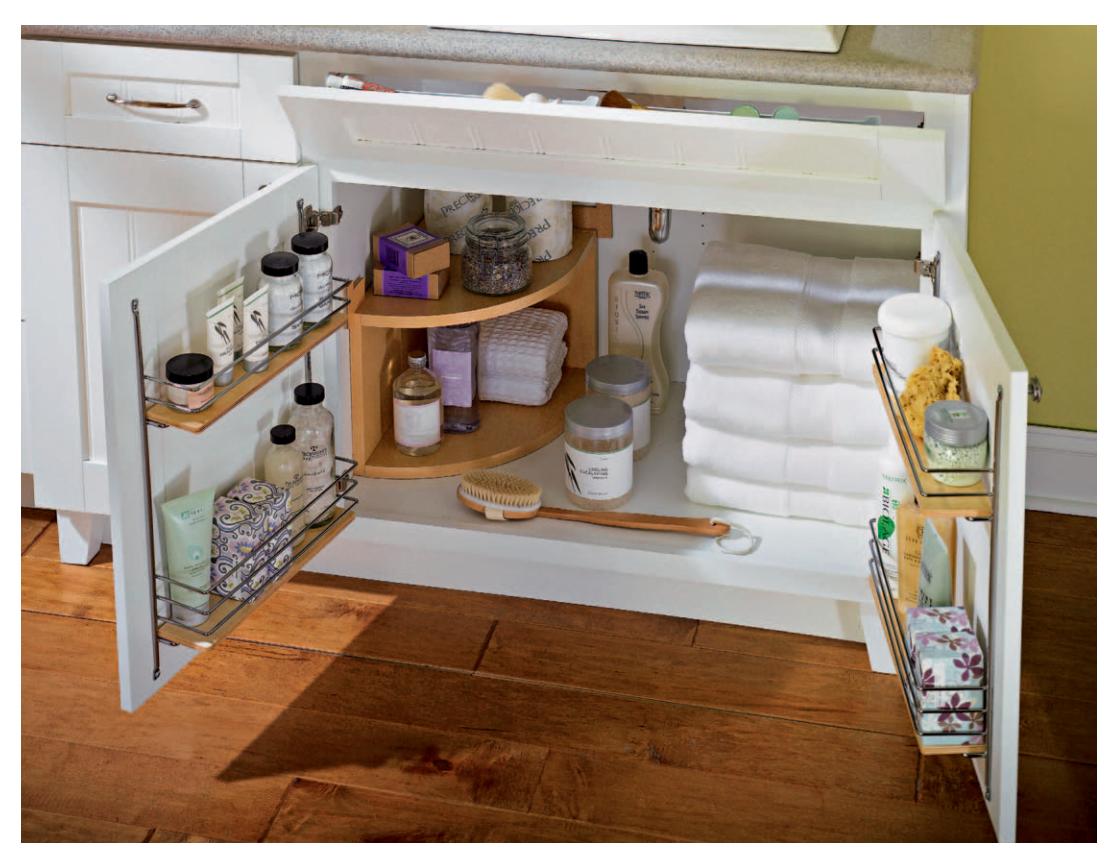
**Optimize vanity cabinets.** There's no excuse to leave your undersink area bare, with a clutter of odd-sized bottles, jars, and other bathroom necessities. You can organize the space and make the most of its storage potential with a few aftermarket installations, such as the corner shelf and screw-on door-back racks shown here.
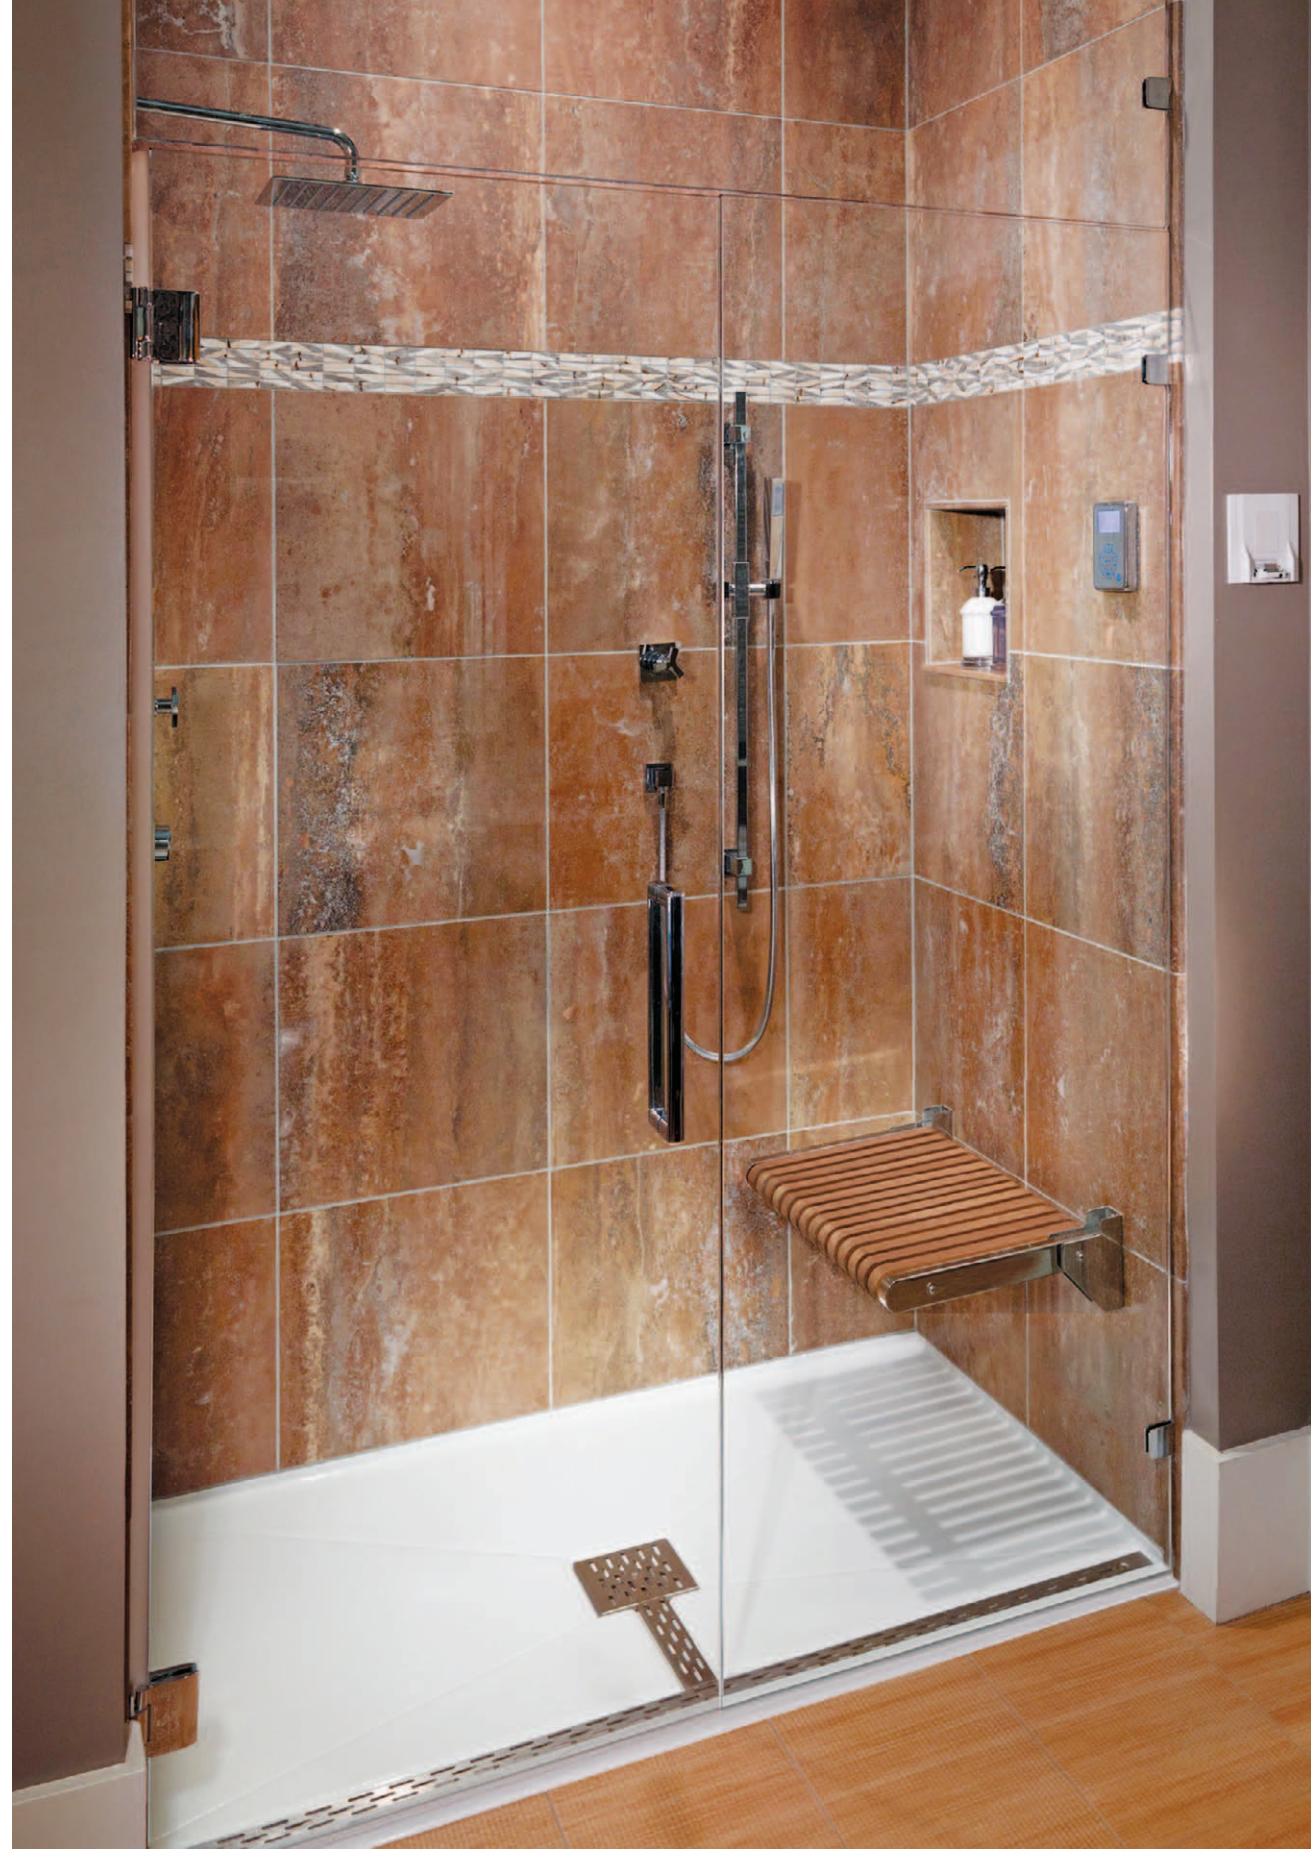
**Style and accessibility can go hand in hand,** as this stunning shower illustrates. A chic trench drain ensures no water from this curbless shower makes it onto the floor outside, and a seat and handheld shower wand on a sliding bar make showering as easy for people with mobility issues as it is for anyone else in the house.
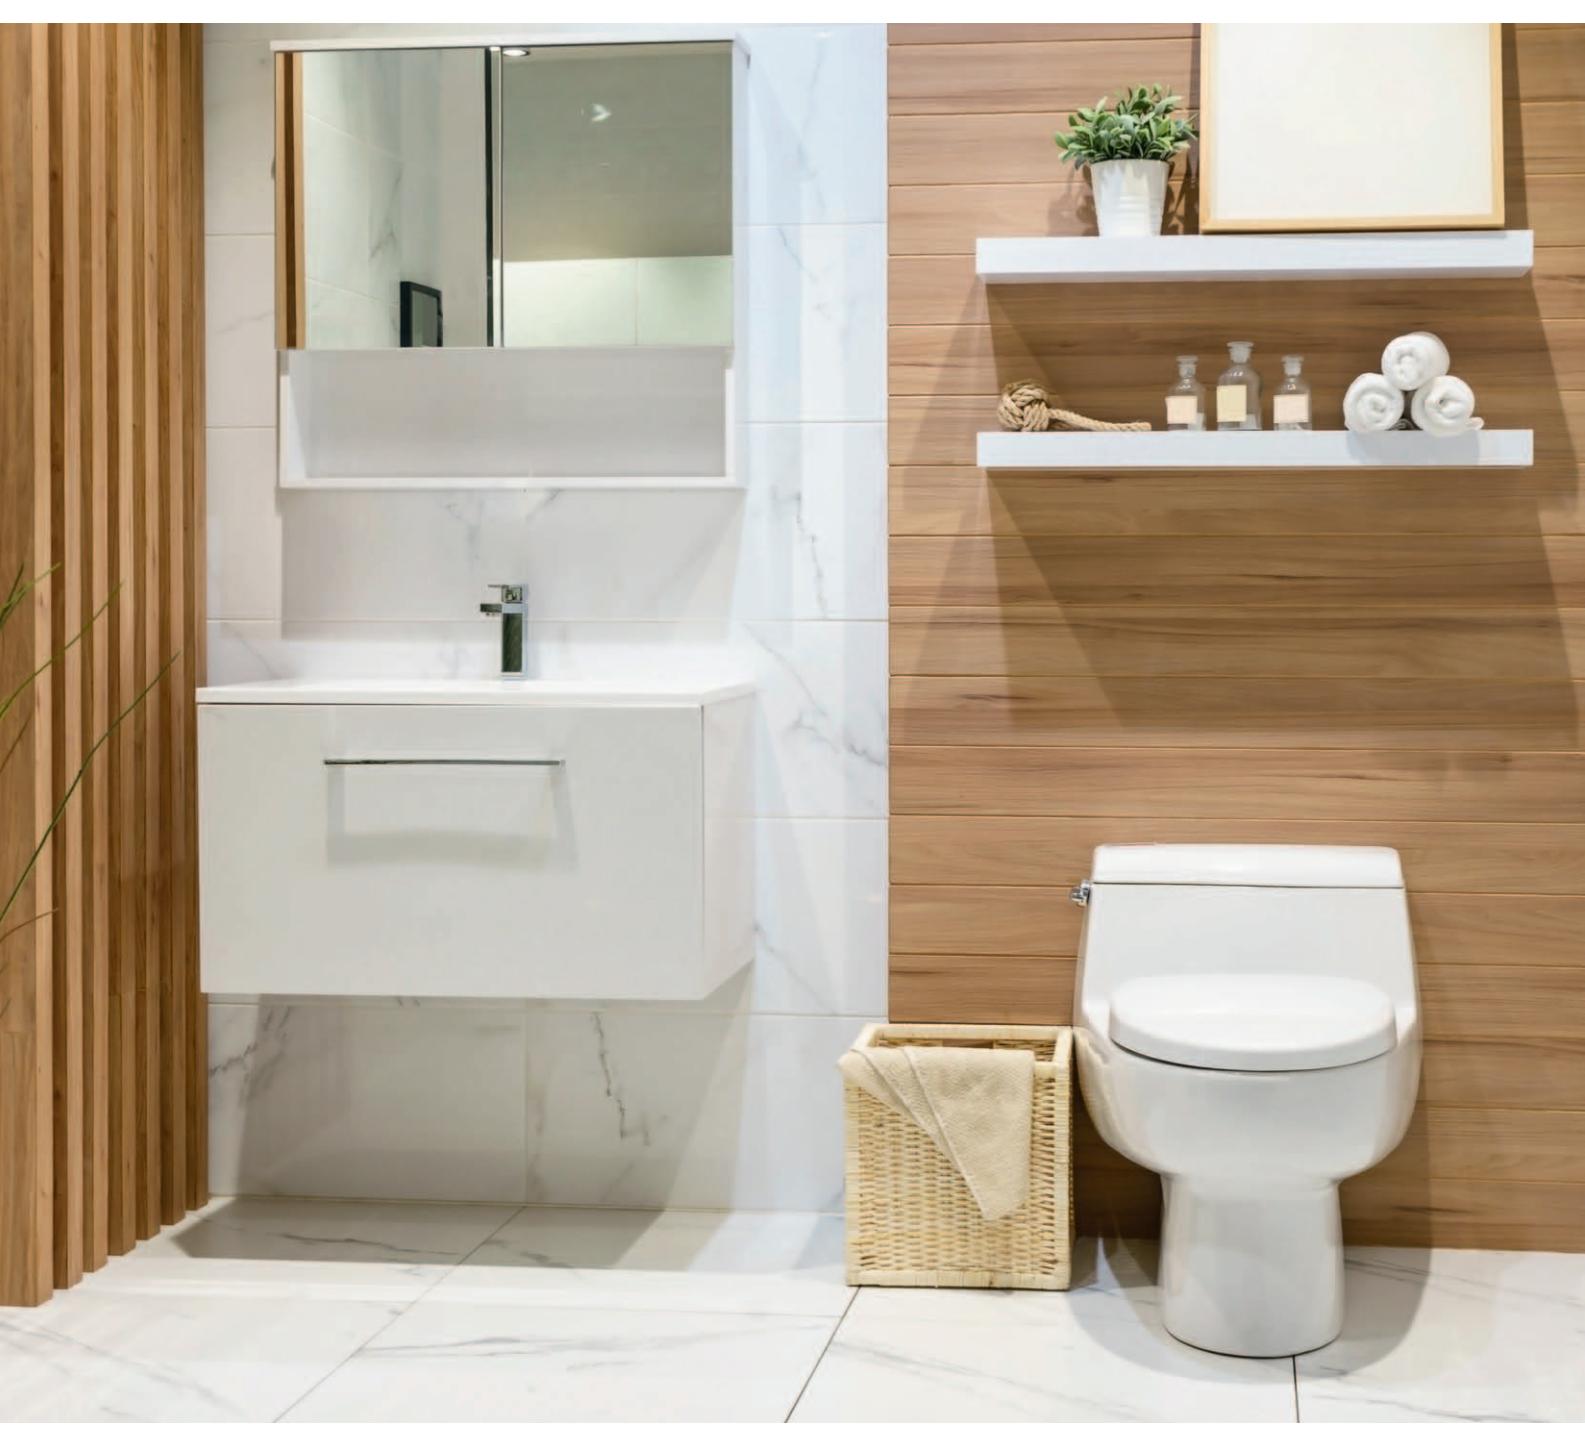
**Warm with wood.** The bright white, hard, reflective surfaces and stark white light that shouts cleanliness in a bathroom, can also be cold and unwelcoming. Warm and soften the style of a pure white bathroom with wood accents like the side panel and toilet backdrop wall surface in this modest powder room.
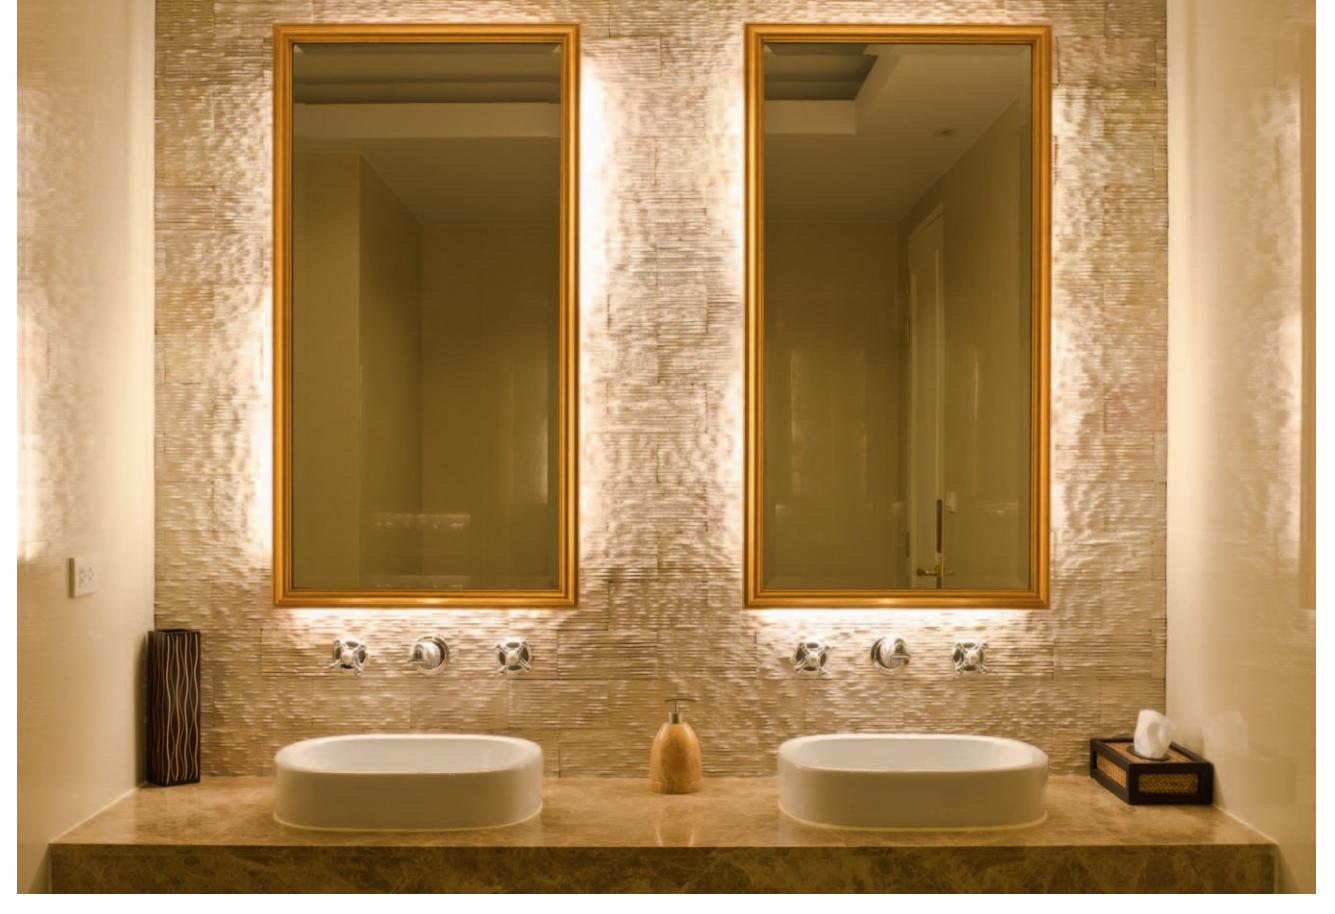
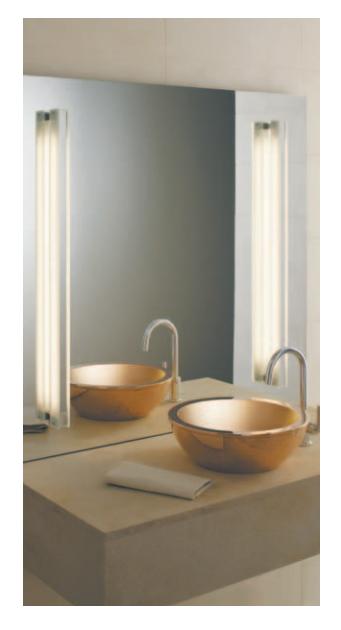
**Light for drama.** Hidden lighting can be as much a stylistic decision as a functional feature. Here, lights behind sink mirrors provide soft illumination that is flattering to the skin and the image in the mirror, while adding a warmth and sophistication to the room.
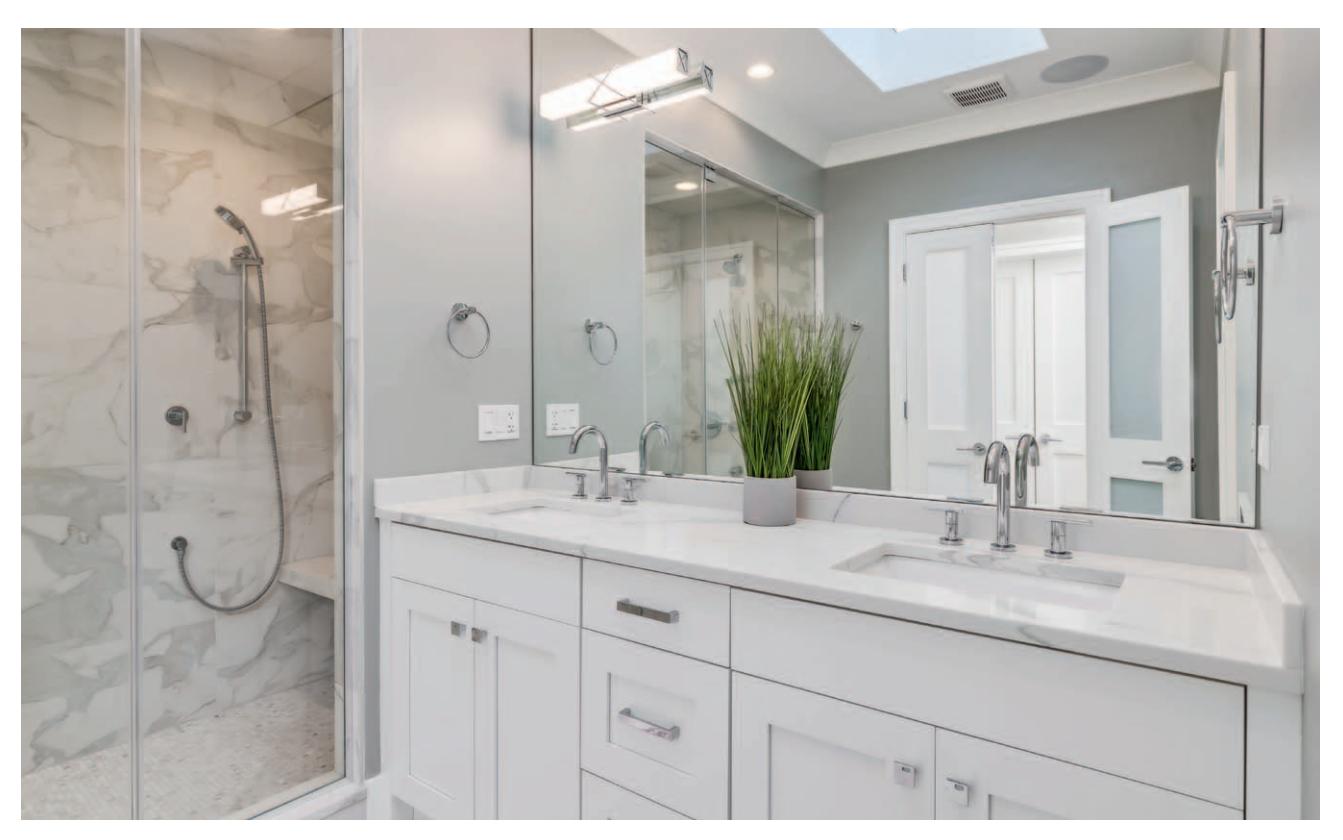
**Mix and match for the best bathroom lighting.** Most bathrooms—especially those that see a lot of use—will benefit from multiple fixtures and types of light. This well-appointed shared bathroom features a skylight that supplies abundant natural light during the day and different types of fixtures, controlled by different switches, for area lighting at other times.
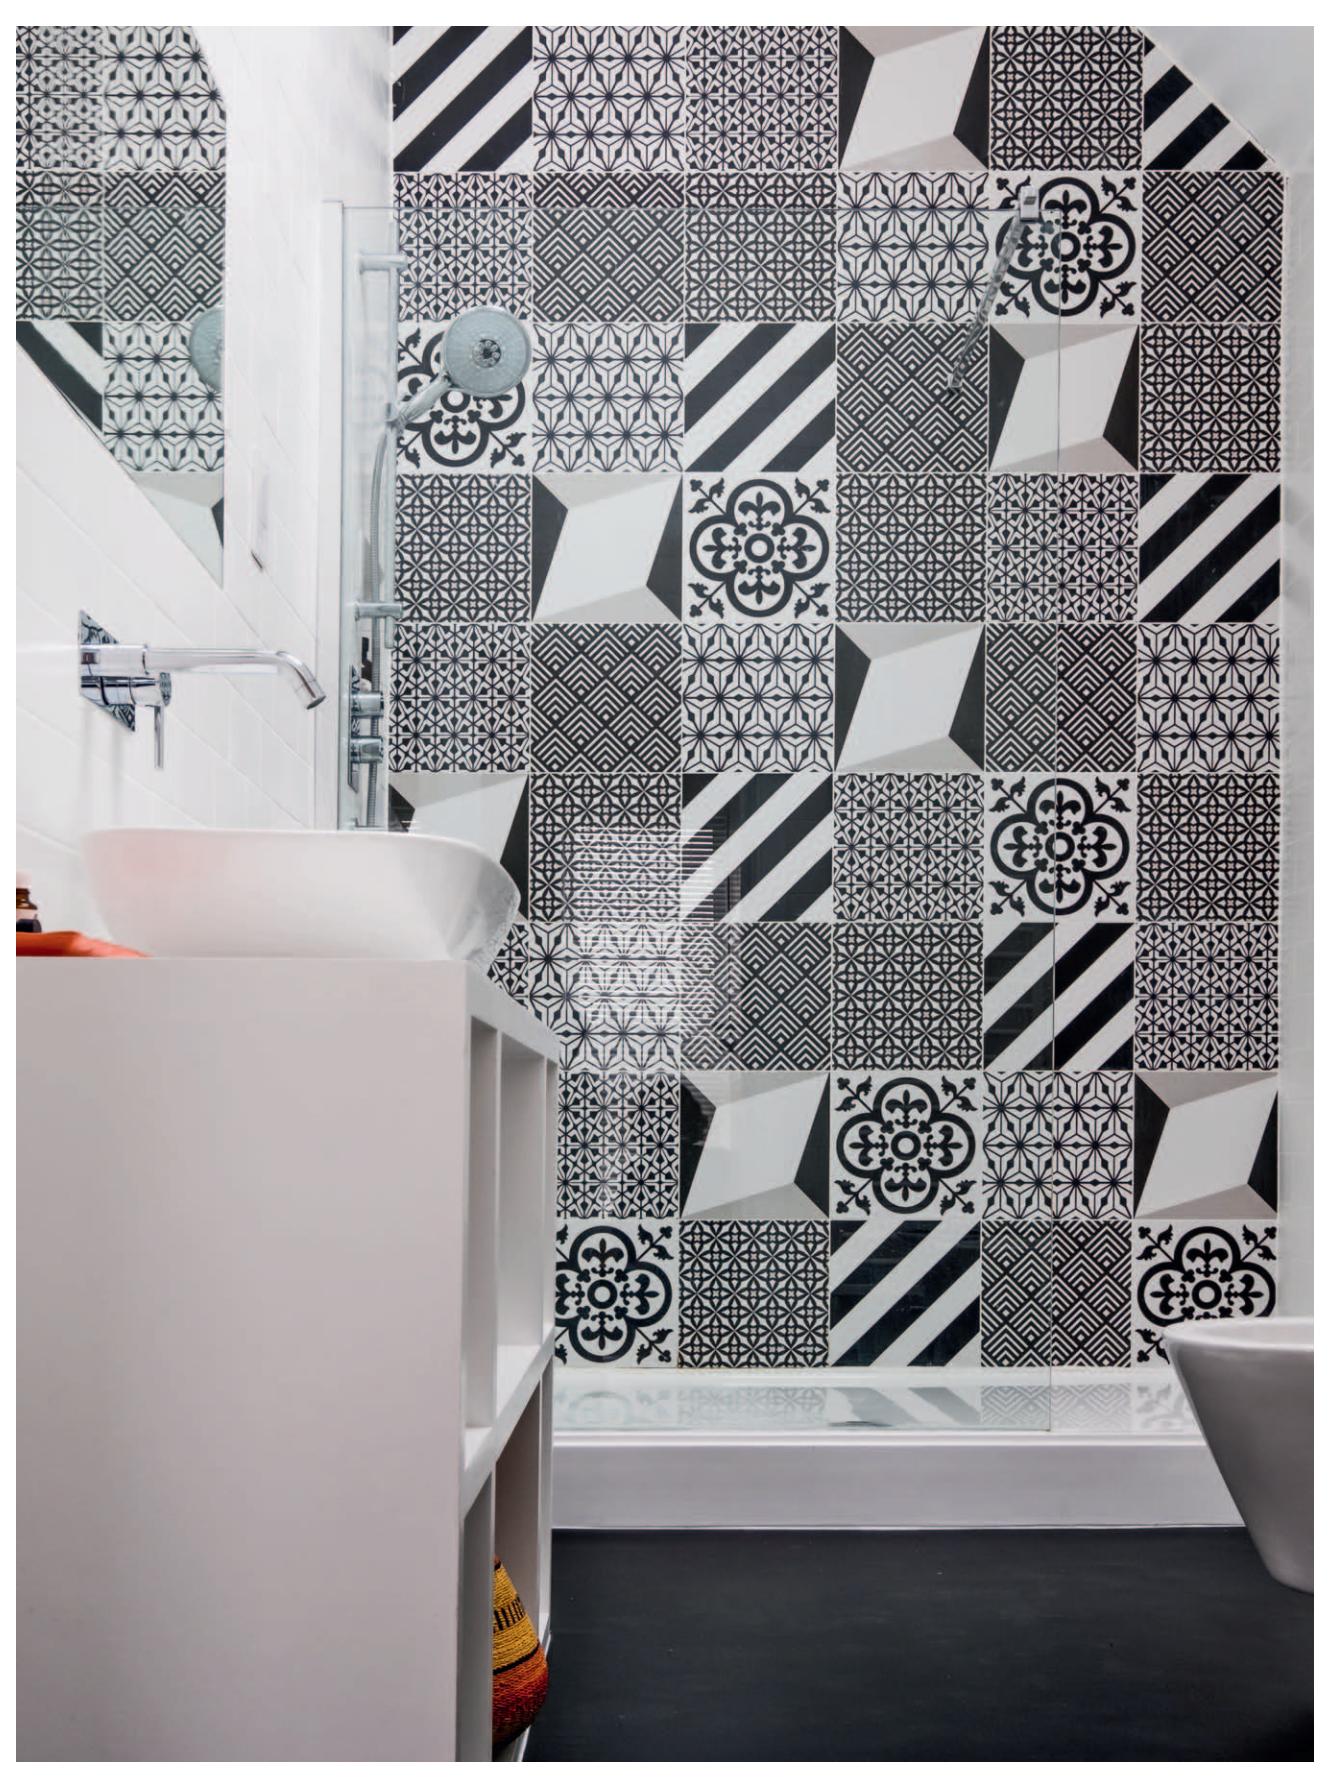
**Transform with tile.** A tiny, undistinguished bathroom becomes a stylish showcase with a wall of artsy black-and-white tile. Mixing and matching tile like this can create a dynamic effect without ruining your budget. Simple, effective, and memorable.
## Bathroom Elements
This is the golden age of bathroom design. There are so many options for each and every component that goes into a bathroom, that the biggest challenge you'll face is simply whittling down your choices to a manageable short list.
Aside from empowering you to create a signature look in your bathroom, all those options also mean that there are stunning choices for affordable prices. Whether you're looking for one-of-a-kind tile, or want a vanity that makes a bold design statement, you'll probably find just what you're looking for with an attractive price tag on it.
Let's not forget, though, that bathrooms are about comfort as much (or more) than looks. From your choice of showerhead, to the toilet you pick, right down to the surface materials, all play a part in how pleasant the space will be. That's why you should keep the needs of all the users of the room in mind when choosing bathroom elements.
In any case, remember that accurate measurements are your best friend whether you're replacing an old faucet or adding tub-shower doors. Accuracy matters and simply making exacting measurements and checking them twice will head off a lot of frustration in installing new bathroom elements.
#### In this chapter:
- Traditional + Jetted Bathtubs
- Showers
- Sinks
- Toilets + Bidets
- Cabinets + Vanities
- Lighting
- Heating + Ventilation
- Walls + Ceilings
- Flooring
### Traditional + Jetted Bathtubs
Although you can find bathtubs in a wide variety of sizes and shapes, your existing bathroom floorplan usually dictates exactly what size you should buy. But if you don't mind moving some plumbing, or you are building an all-new bathroom, your options expand dramatically.
Tubs are categorized first by the method used to install them. The three basic installation styles are alcove, deck-mounted, and freestanding.
**Alcove tubs** are the most common. They are often enclosed on three sides, which is why they are also called "recessed tubs." One-piece tub-and-shower combination fixtures are also available to fit standard-size alcoves. Custom sizes can be made for odd-size alcoves.
**Deck-mounted tubs**, also called drop-in tubs, generally rest directly on the subfloor or in a thinset mortar base. They are surrounded by custombuilt decks or platforms. Typically, these tubs have a larger capacity than attached-apron tubs. The cost of making the deck can cause these tubs to be more expensive than other types, but the design possibilities are nearly limitless.
**Freestanding tubs** are available in an amazing range of styles and materials. The two basic types of freestanding tub are footed and pedestal, but within those two groups are a large number of interpretations that range from the classic clawfoot tub to ultramodern units that are almost works of art. In any case, these are most often fabricated from enameled iron, polymer, or, on the high side, marble or other stone surfaces. They are meant to hold up to abuse because they lack the protective structure of an apron or deck. The plumbing is most often exposed, and the hardware presents even more design possibilities.
**Corner tubs** are becoming increasingly popular, not only because they allow homeowners to make use of what is often dead space in the bathroom, but because they are now often designed to include a surprising amount of room for bathers.
**Semiattached tubs** are butted to a wall, essentially giving the appearance of a freestanding tub while conveniently exploiting a plumbed wall in the same way as an alcove tub. Semiatttached tubs are an interesting variation that allows the homeowner to add a design element with the choice of the three-sided apron (for which manufacturers often offer interchangeable options).
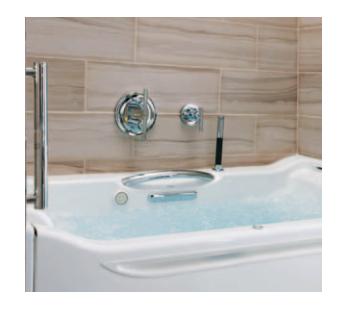
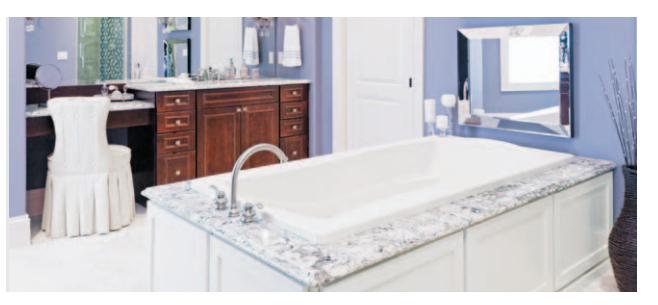
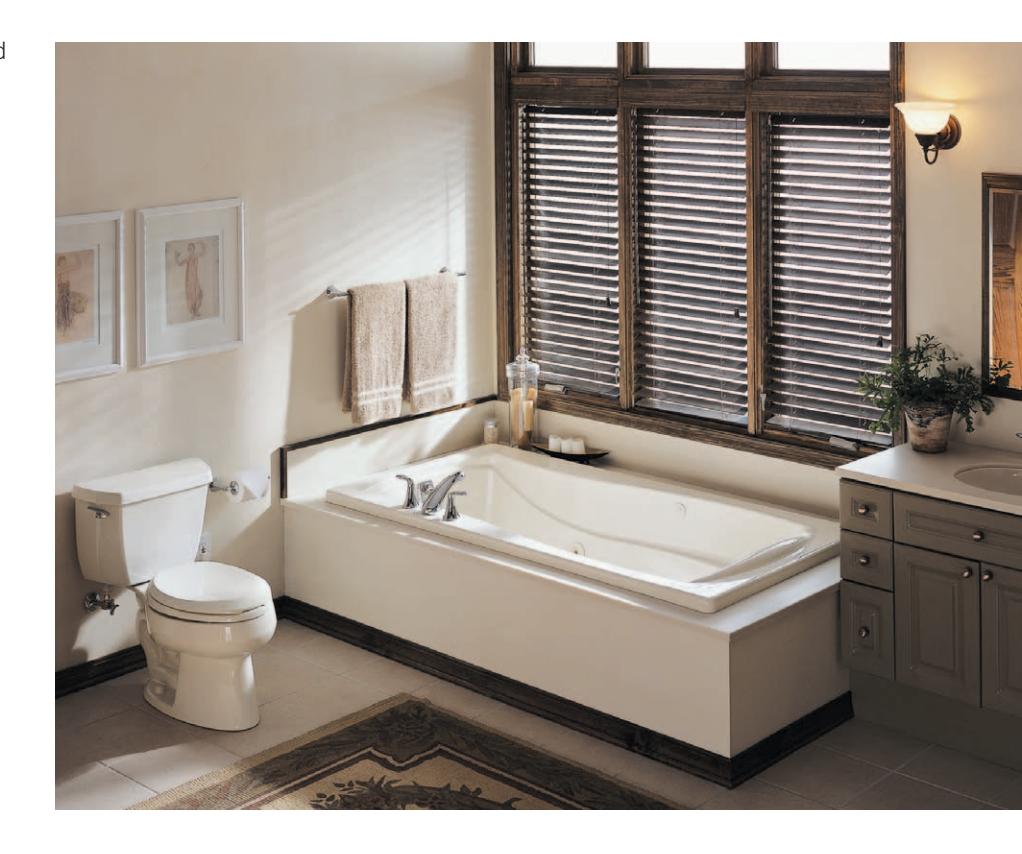
**A deck-mounted tub** can be customized to fit your space and your bathroom's design. This deck was built to blend, and it complements the vanity, walls, and floor. The side-mounted faucet and controls allow bathers to recline completely in either direction without bumping up against the hardware. The jets inside the tub ensure a spa-like bathing experience that turns an everyday ritual into something special.
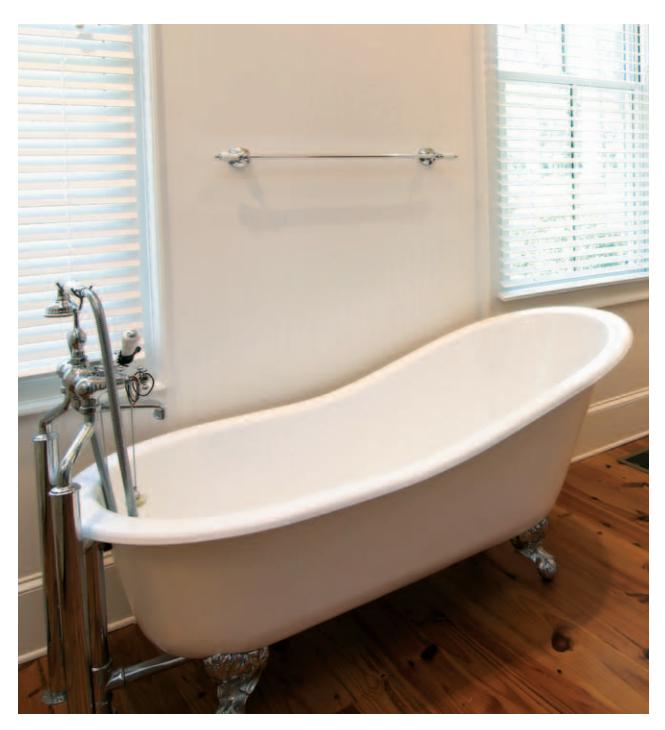
**A clawfoot tub** is an iconic bathroom fixture. The original models made of cast iron with an enameled porcelain finish can be found through architectural-salvage companies, although the supply is dwindling and the prices are climbing. Reproductions of this style are made with lighter-weight composites and polymers.
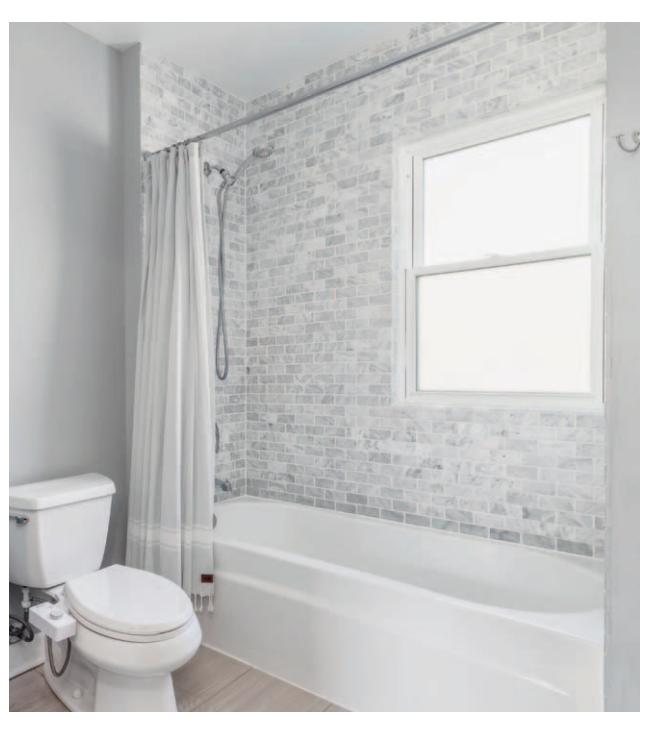
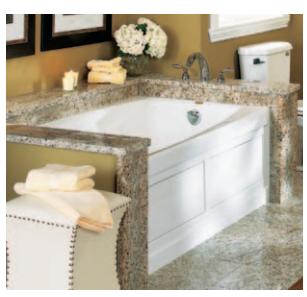
**Traditional one-piece alcove tubs** remain one of the most popular choices among homeowners. The tub lends itself to accents such as high-end surround tile and distinctive fixtures and hardware.
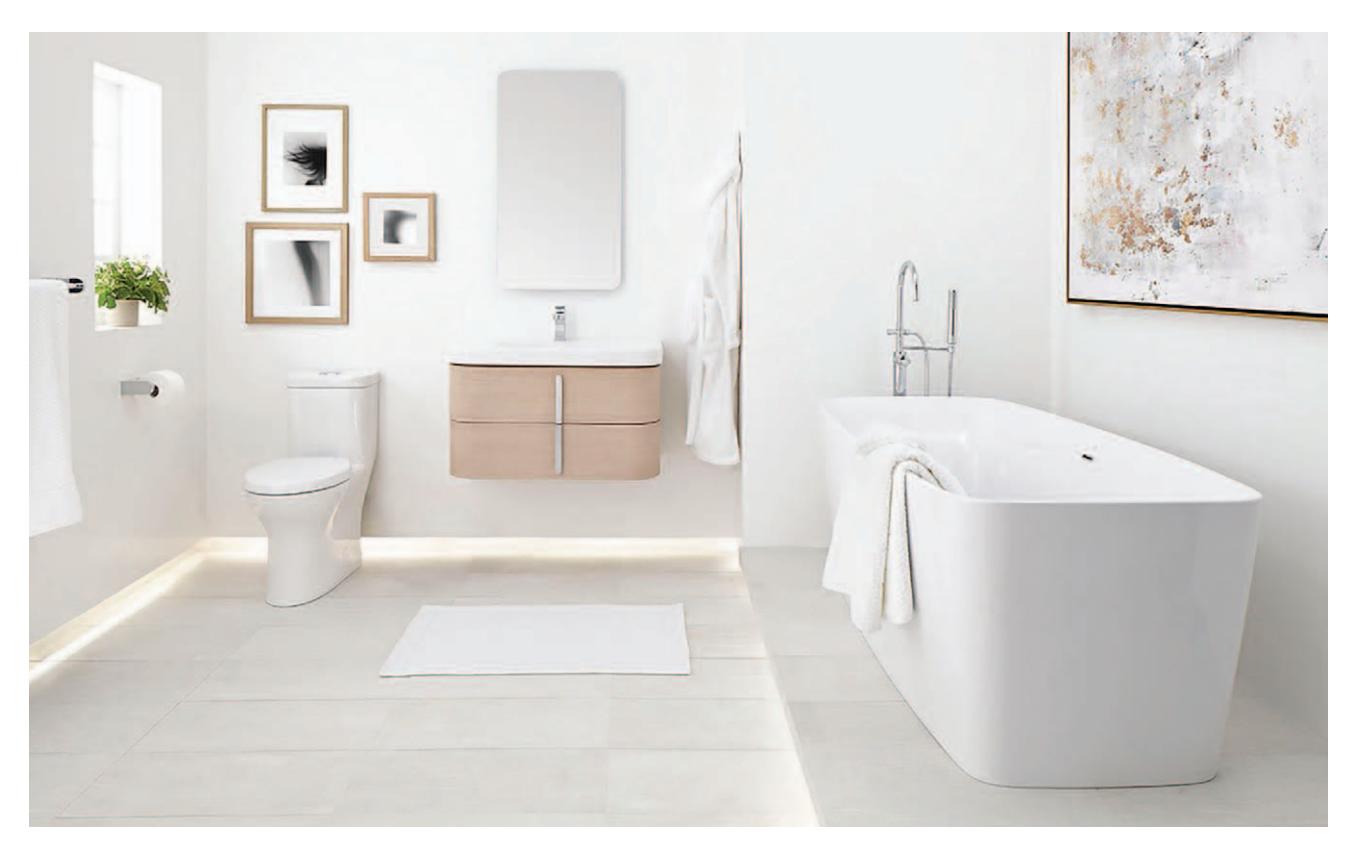
**Match your tub to the sink and toilet** by purchasing all at once as part of a suite. The freestanding tub in this room is a spectacular addition only made better with the inclusion of a sleek toilet and matching vanity-top sink. It's a stunning look that makes the room stand out.
#### Tub Materials
Tubs are manufactured from many different materials, each with its own pros and cons.
**Fiberglass** is an inexpensive, lightweight material that can be finished in a variety of colors. It is easily molded, so fiberglass tubs can have seats, grab bars, soap dishes, and shampoo shelves molded into the sides. Though fiberglass has many benefits, its surface can scratch easily, and its color will fade.
**Acrylic,** like fiberglass, can be molded into just about any size and shape. Unlike fiberglass, however, the color runs through the entire substance, making it less likely to show scratches or to fade.
**Enameled steel tubs** are pressed from sheets of steel and coated with a baked-on enamel similar to that of cast-iron tubs, but the enamel layer is thin and susceptible to chipping. It doesn't retain heat well and tends to be noisy.
**Cast iron** is the most durable material available for tubs. Iron is cast into a tub shape, then coated with a baked-on enamel that is relatively thick (1 ⁄16 inch), resulting in a richly colored finish. The enamel is strong, durable, and resistant to chips, scratches, and stains.
Cast iron is just about indestructible, but it's also extremely heavy. In some cases, the floor framing must be reinforced to support the additional weight. Cast iron is used most commonly for clawfoot and other stand-alone bathtubs.
**Polymer** can be cast into just about any tub shape and is a solid color throughout, making it impervious to scratches. The finish can be made to mimic quality surfaces such as marble or granite. Polymer also retains heat well, although the gel coat used on polymer breaks down over time.
**Solid-surface tubs** are gaining popularity. As with solid-surface countertops, the tubs can be made in one piece of resin or quartz and formed into many different shapes—including some with built-in features such as soap dishes. The materials retain heat well, come in many surface looks, and are durable.
## Specialty Tubs
**Soaking tubs** are deeper and have higher sides than other styles. Traditional Japanese versions feature sides as high as 4 feet, but contemporary American soaking tubs usually have walls from 20 to 36 inches high. Traditional soaking tubs are tall enough that bathers may sit, rather than recline, although the shallowest modern models are soaking tubs only to the extent that they will allow an adult to be covered completely with water when reclined. The experience is luxurious and meditative.
**Large deck-mounted tubs** offer options when it comes to locating the spout and valve handles. In many cases this means you can position the spout near the tub center so you can lean back against either end of the tub without hitting any hardware.
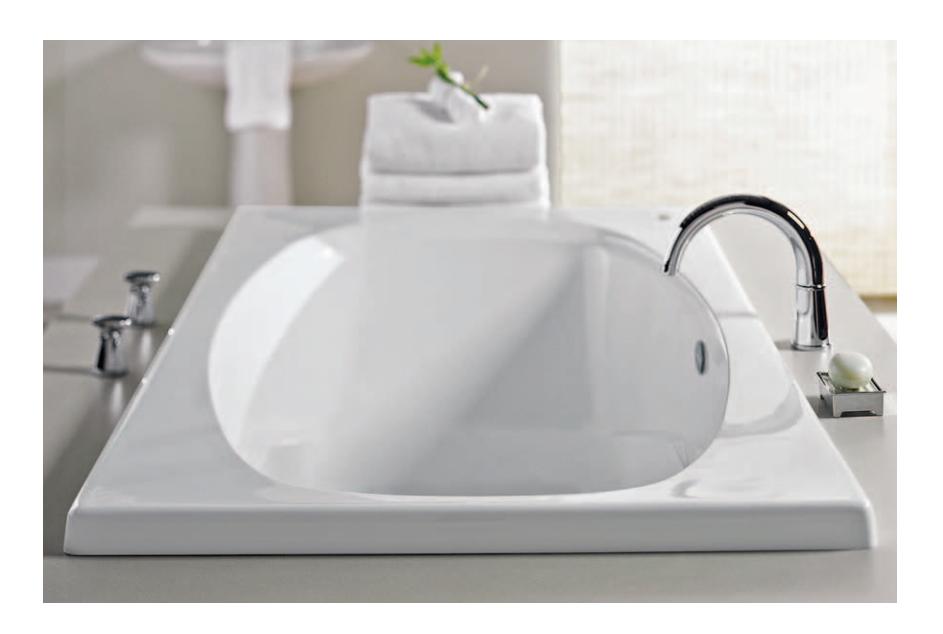
**Jetted tubs** come equipped with either water or air jets. Water jets recirculate tub water, heating it and then blowing it out under variable force that the bather can adjust. Air jets blow air into the bath water from different angles to provide different effects from a relaxing bath to a fairly invigorating massage.
Water jets are more traditional and the more popular option. However, water-jet models are also more expensive, more difficult to install, and appreciably harder to keep clean because contaminants from soap to bath salts make their way into the jet lines, fouling them.
Either type of jetted tub is available in all formats, including stand-alone, alcove, and drop-in. Jetted tubs are almost universally made of acrylic and, because of the plumbing and mechanicals, are more expensive than any other type of tub. Most run thousands of dollars, and the price rises with both the size of the tub and the options, which can include mood lighting, headrests, timers, and touch-pad or remote controls.
Before investing in a jetted tub, carefully measure the space, and draw up plans for how and where the plumbing will run (most models are built with all the plumbing and mechanicals attached the body of the tub). Be aware of the maintenance any tub you're considering will require. Balance that against how much you will use the tub.
Because so much of the apparatus is integral to the tub, installing a jetted tub is a reasonable do-it-yourself project. It requires knowledge of basic plumbing, electrical, and carpentry principles, and will usually take the better part of a weekend for the average homeowner to install.
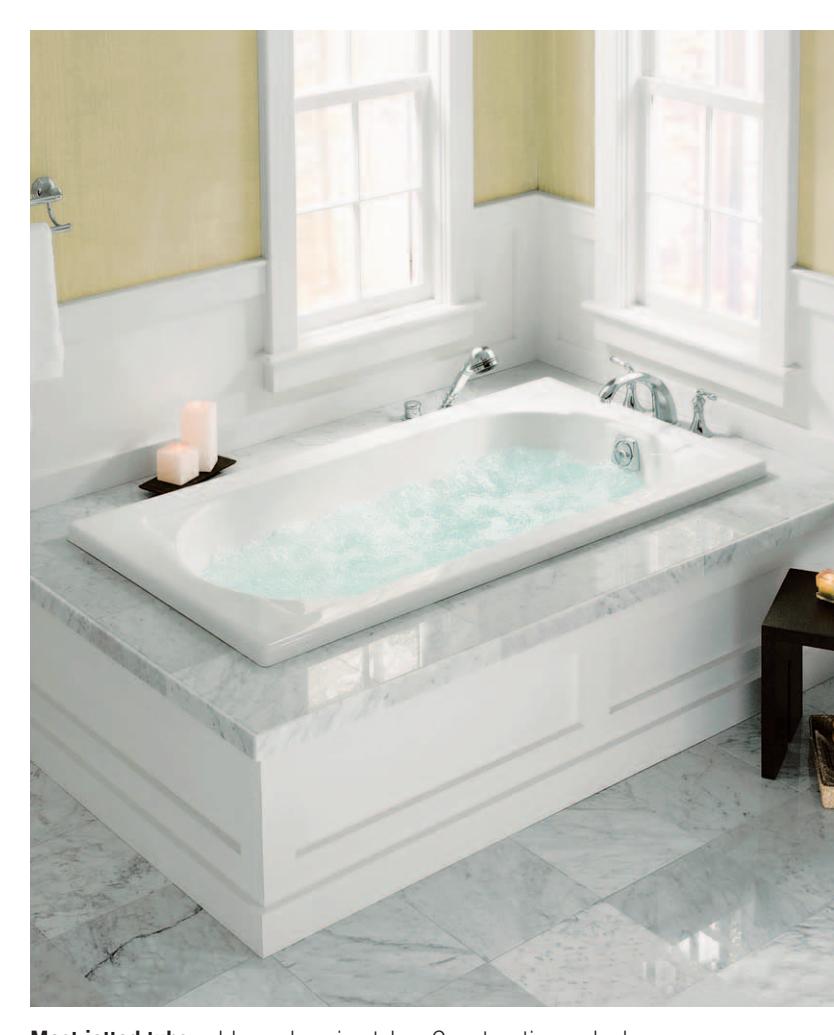
**Most jetted tubs** sold are drop-in styles. Constructing a deck is a way to customize the installation while hiding the integral plumbing lines and mechanicals. You'll likely need to install a 220-volt GFCI outlet, or hardwire the tub into the bathroom's circuit.
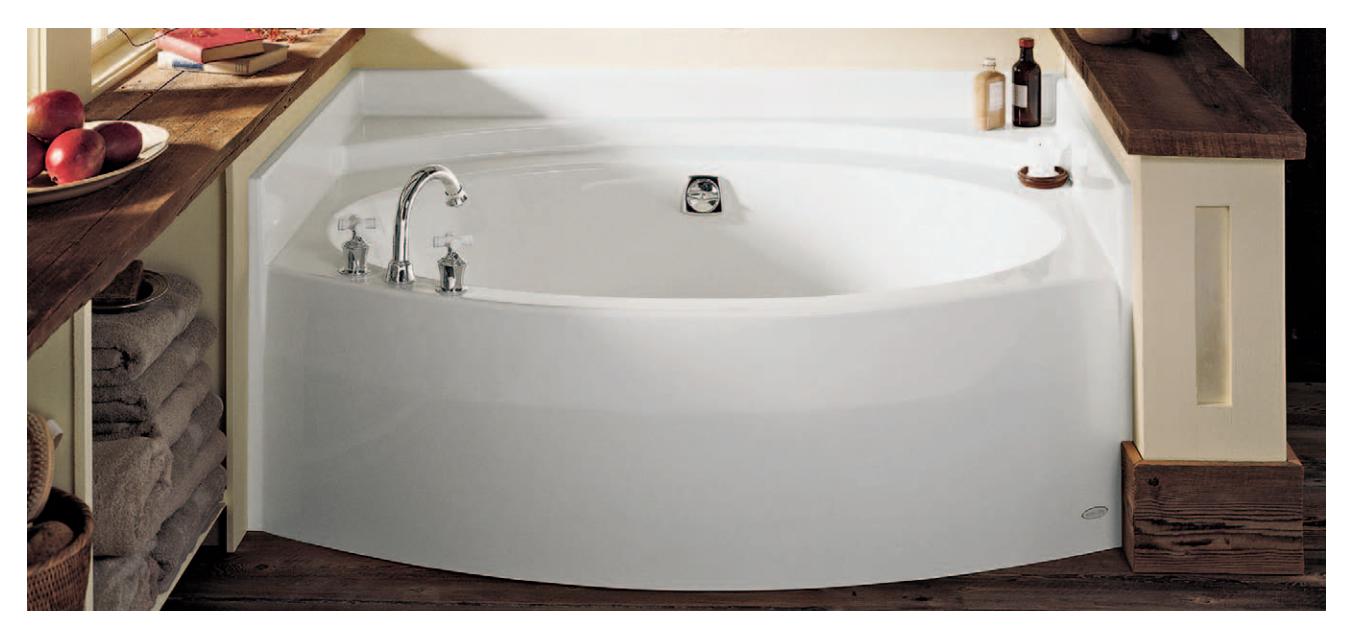
**Install a curved-front alcove tub** to enjoy maximum bathing space in a limited footprint. A model with the faucet and controls offset increases the usable interior space even more.
## Showers
Tub-and-shower combos remain the most common bathing setup, largely because the combination crams the most function into the least amount of space. They also allow users to bathe either way, making them ideal in a bathroom used by more than one person. However, most combination units are not luxurious baths or showers.
For luxury, you'll want a dedicated bathing structure. And, in fact, more and more homeowners are abandoning tubs for full-featured walk-in shower enclosures. Within the modest footprint taken up by an alcove bathtub, it's quite possible, and within most homeowners' budgets, to install an upscale shower with frameless glass panels, custom tile work, a sleek curbless shower pan, and multiple showerheads.
If budget is a concern, you can find all-in-one shower-enclosure kits that include a base, three-wall surrounds, and the hardware and fixtures you'll need. Increasingly, these prefab products can be fairly upscale as well, featuring inset tile columns, multiple showerheads, stylish grab bars, and molded-in shelves and recesses for body-care products.
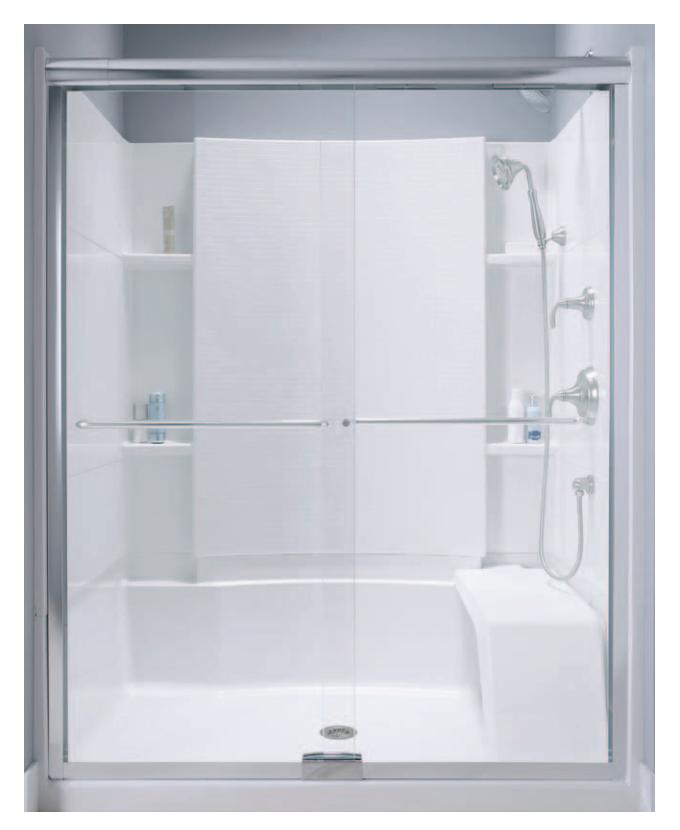
**One-piece alcove shower enclosures** can be simple and modest or incredibly upscale and detailed, such as the oversized unit shown here.
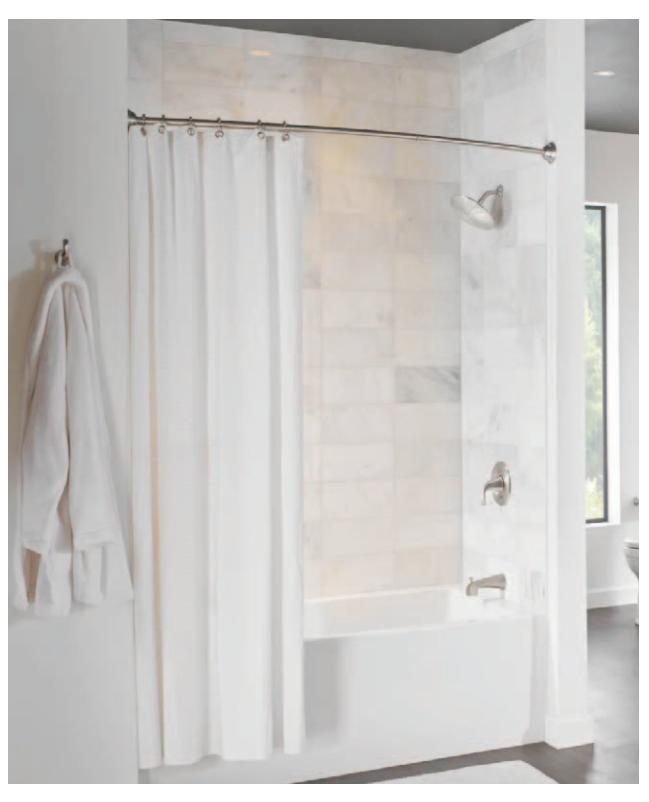
**The most common shower** in homes across America is the one that fits inside an existing alcove tub. It's a simple setup, especially when paired with a shower curtain rather than a sliding glass door.
One-piece enclosures are widely available for the DIYer. Seamless stalls are molded from fiberglass or acrylic, making this option easy to clean and maintain. A wide range of sizes and styles are available. Some include seats, linear drains, steam units, and other chic features.
**Neo-angle showers** are designed to fit into corners. Made of acrylic or fiberglass, they are completely self-contained with integrated shower bases, walls, and doors.
**Shower-surround panels** are used to construct simple, inexpensive shower enclosures. They are built above a preformed shower pan. Three individual panels are bonded to the walls of the framed alcove, and the seams are sealed.
**Freestanding showers** are complete units unattached to walls. These are the least common option and range from sheetmetal or fiberglass units to elaborate glass-block enclosures.
**Custom shower stalls** can be designed to fit into odd or unusually shaped spaces. The walls can be finished with the surface material of your choosing, such as ceramic or stone tile, glass block, or even solid-surface material to do away with grout lines. Specialized options, such as benches, steam-bath fixtures, shelves, and soap dishes, can be incorporated into the design.
**Curbless showers** are designed for physically challenged users. The shower entrance has no curb at all, providing easy access to the shower. One-piece molded units are available, or barrier-free showers can be custom-built. Most have built-in shower seats and grab bars.
**Shower doors and curtains** are usually purchased separately from the shower itself. Options range from simple plastic curtains costing a few dollars to custom-made tempered-glass doors.
**Multiple showerheads,** shower towers, and steam showers can create a more luxurious shower. Steam showers require extra plumbing, wiring, and a shower stall with doors that seal tightly.

An overhead light ensures safety in the shower. Make sure that any light installed in a shower area is moisture resistant. Some shower lights include a heating element.
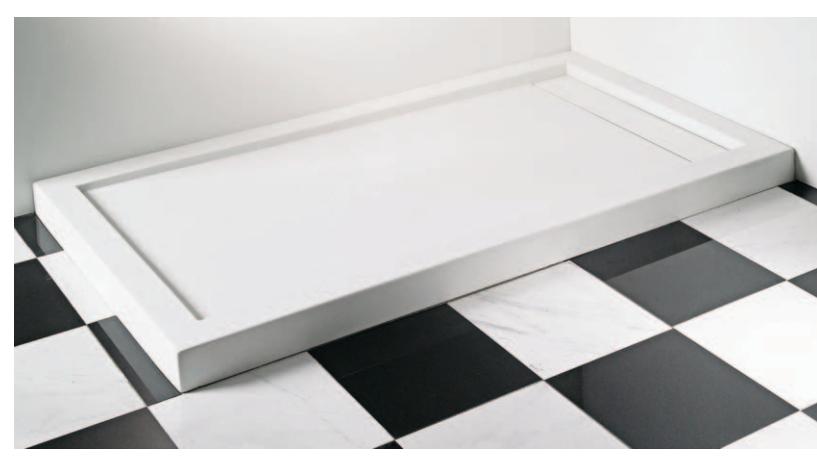
**Prefab shower trays** come in a variety of styles, including sleek features like the concealed trench drain in this unit.
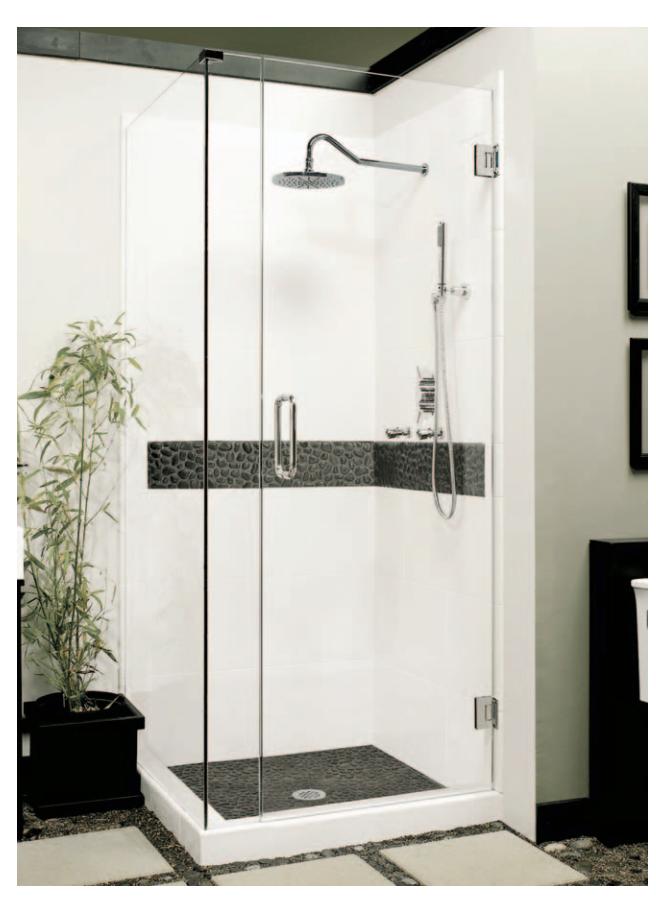
**A simple shower enclosure** using off-the-shelf pan, hardware, fixtures, and frameless glass panels can create a jaw-dropping centerpiece to an already stunning bathroom.
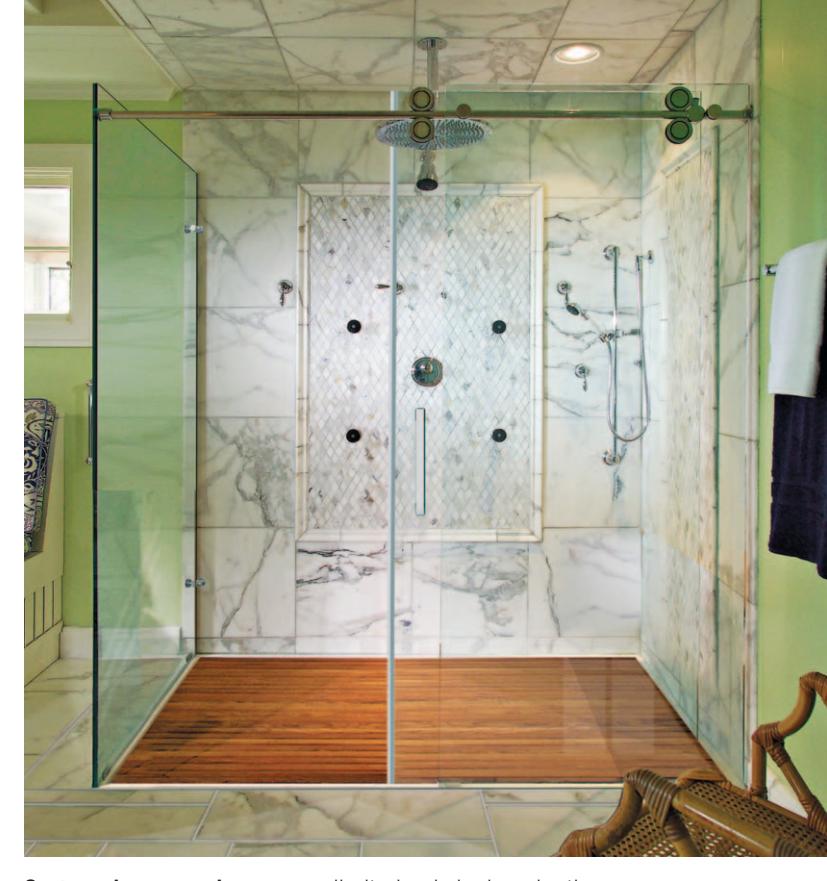
**Custom shower enclosures** are limited only by imagination and can include, as this one does, a wood-slat floor over a curbless drain pan, marble walls, and multiple showerheads for a sumptuous experience.
## Sinks
The variety of sinks available today practically guarantees that you can find a lavatory sink to match your space, budget, and taste. The most significant difference between the major sink types is the manner in which they are installed: wall mounted, pedestal or console, and countertop.
**Wall-mounted sinks** hang directly from the wall, taking up little space and offering easy access to plumbing hookups. Basic wall-mounted sinks are good options for utility bathrooms or half baths, where exposed plumbing and lack of storage space are not serious drawbacks. Designer wall-mounted styles feature attached aprons that hide plumbing. These are also accessibility features, allowing people in wheelchairs to roll under the sink for easy use.
**Pedestal sinks** and **console sinks** are wall-mounted styles that rest on a pedestal or legs that may or may not provide actual support to the sink bowl. A decorative pedestal may conceal plumbing and can be a smart choice for a small guest bathroom or powder room where floorspace is particularly scarce. Console sinks have legs supporting the front two corners and often feature an apron to mask plumbing connections. The advantage of a console sink over a pedestal model is that small baskets or a modest, simple shelving unit can be placed underneath for additional storage.
**Self-rimming sinks** drop into a cutout in the countertop, with the rim overlapping the cutout's edges.
**Integral sinks,** usually made of solid-surface material or cultured marble, are molded into countertops and are easy to install and maintain.
**Undermounted sinks** are attached with clips beneath a cutout in a solid-surface, stone, or concrete countertop.
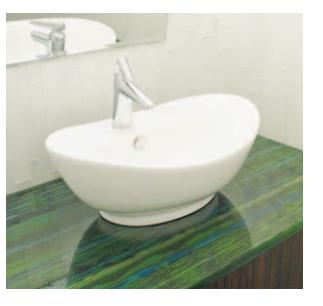
**Vessel sinks** sit on top of a countertop, with only a small cutout for the drain.
Sinks can be made of a number of materials. **Cultured marble** is an inexpensive material often used to create integral sink-and-countertop combinations to fit standard vanity sizes.
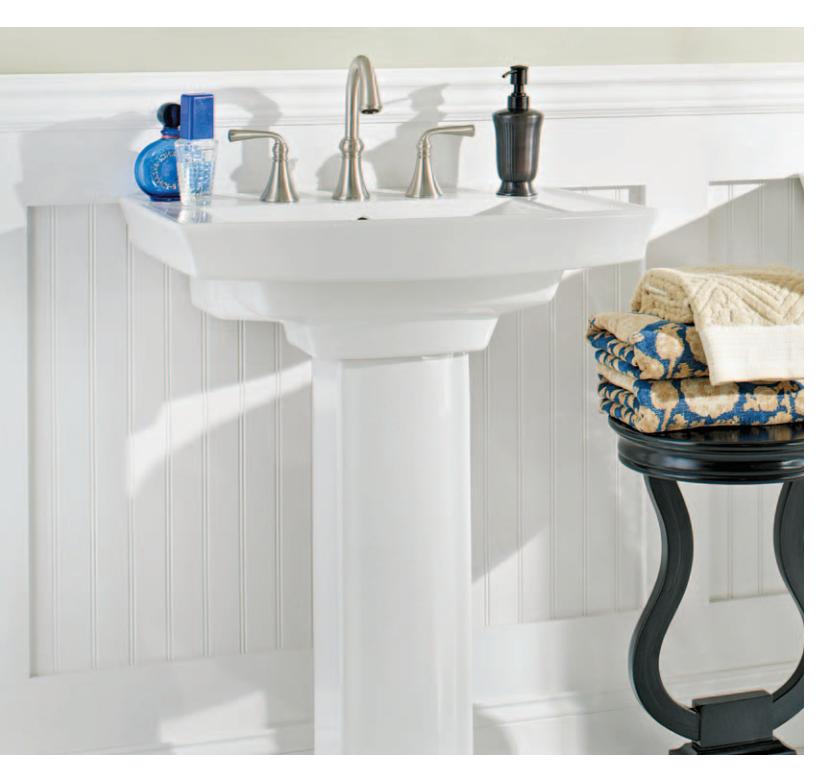
**A pedestal sink** has visual appeal and an efficient footprint but lacks any storage.
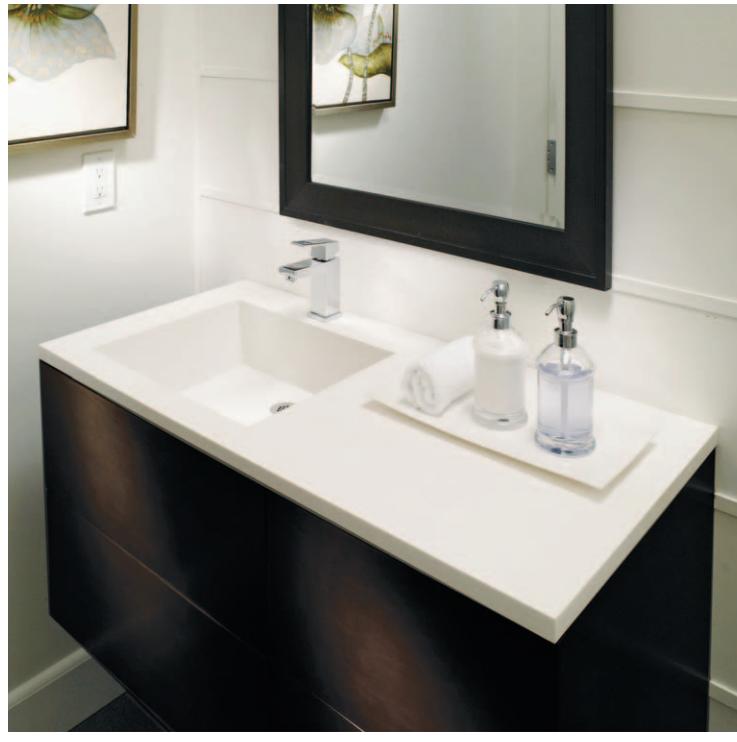
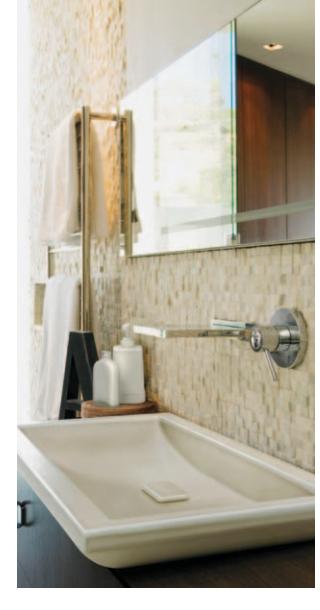
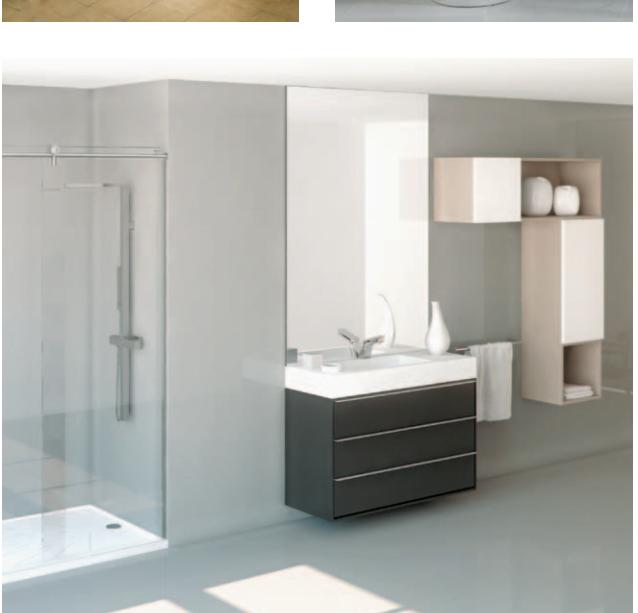
**A solid-surface sink and countertop** are the perfect match for a modern single-handle faucet and chic wall-mounted vanity.
**Porcelain** (vitreous china) may be used for self-rimming sinks. It has a durable glossy surface that is nonporous and easy to clean. Porcelain sinks are readily available in white and almond, and you can special order other colors. For a truly unique addition to your bathroom décor, consider a handpainted porcelain sink in a floral or other one-of-a-kind design.
**Solid-surface material** is long lasting and easy to clean; scratches can be buffed or sanded out. It is one of the more expensive choices for bathroom sinks, but its durability and ease of care help justify the price. Solid-surface sinks are available in self-rimming, undermounted, and integral models, with a variety of colors and patterns to choose from.
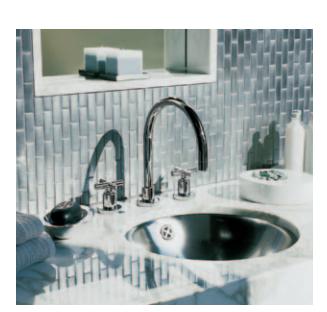
**Stainless steel** brings a high-tech look and durability to bathroom sinks. It is available in either a satin or mirror finish. Price varies according to thickness, or gauge—the lower the gauge number, the thicker the steel. Look for 18-gauge material with a noise-reducing undercoating. Because they are lightweight, stainless-steel sinks are often used for undermounting.
**Composite and acrylic sinks** are less common because they aren't ideal in high-traffic areas. However, where the sinks won't see a lot of use, these can be low-cost, attractive alternatives to more durable materials.
**Tempered glass** is used to create stylish vessel sinks for bathrooms. Undermounted styles can be lit from underneath to create a mood-setting glow. Art-glass sinks continue to grow in popularity, and, if crafted properly, a cast or fused-glass sink can be every bit as durable and safe as tempered glass with a nearly infinite number of possible designs and colors.
**Other materials, such as concrete, copper, carved stone, and wood,** can be used to create more stylized bathrooms. Enameled cast iron is extremely durable but available in limited shapes and colors, which is why it is used less often than other options. Volcanic rock is a relatively new material, but one that comes in a range of bold and subtle colors and appearances and is amazingly durable. Before you select a sink made of an unusual material, consider the shipping time, installation procedures,
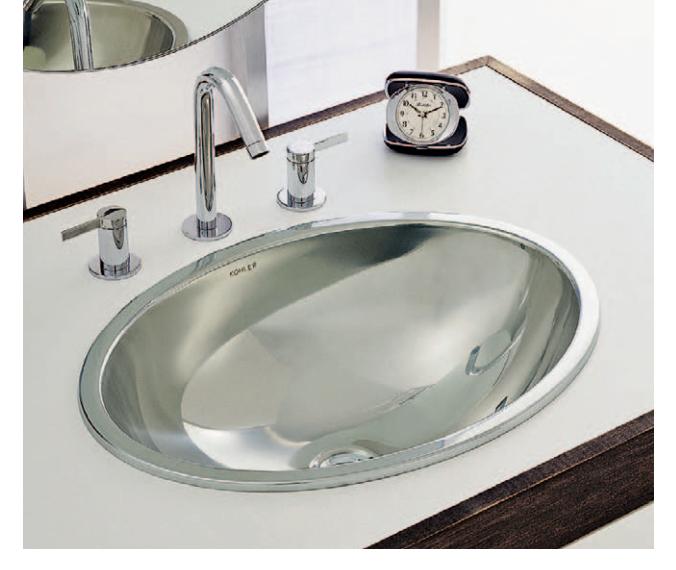
**Self-rimming sinks** (also called drop-ins) fit into a cutout in a countertop and usually are secured with mounting clips from below.
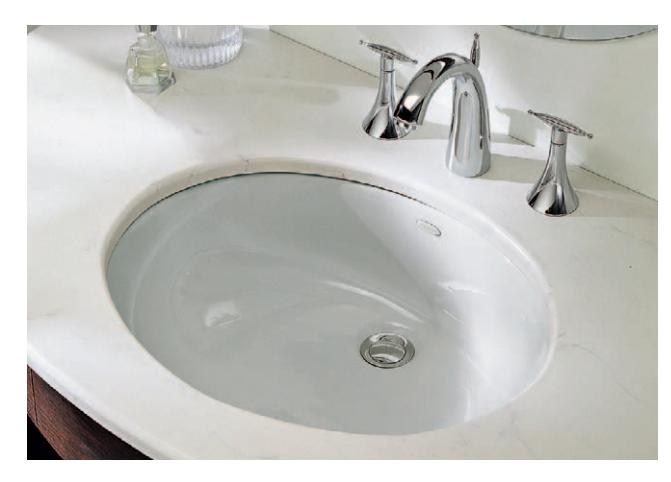
**Undermount sinks** have a very contemporary appearance and offer some clean-up advantages, but they can only be installed in countertops that have a contiguous waterproof composition (such as solid surface or poured concrete).
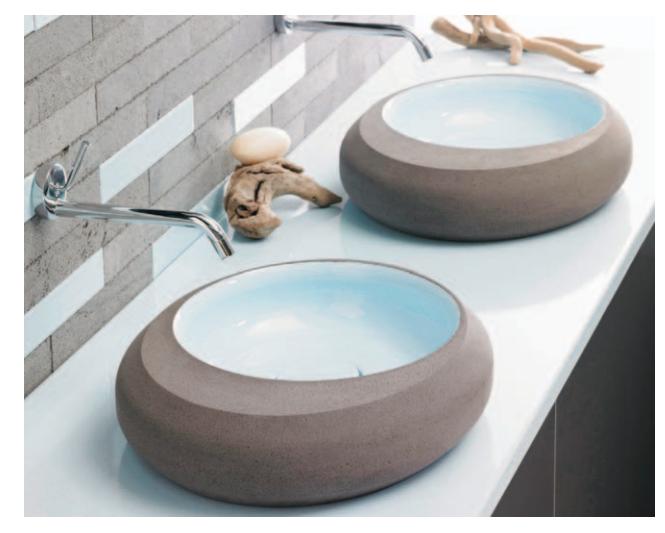
maintenance, and cost. **These artistic sinks** are crafted from volcanic rock, as is the counter they rest on. The material offers a unique and incredibly durable surface.
### Toilets + Bidets
The toilet is the essential centerpiece fixture in a bathroom—the room is not really a bathroom without one. Although the bidet as a personal hygiene fixture and bathroom standard has not become commonplace in America, toilets with integral bidet functions are gaining popularity.
The biggest advances have occurred in toilet design. Not only are there more designs than ever before, but there is also a lot of variation in actual types of new toilets—not to mention that there are even new cleaning technologies that can change your life for the better. Chief among these is the selfcleaning toilet, a unit that keeps the bowl clean with the help of a special cartridge full of cleaning fluid. Periodically change the cartridge, and you may never have to scrub a toilet bowl again.
Beyond the technology, you'll need to decide on a form for any new toilet you buy. That can be a complicated decision. The standard two-piece tank toilet now shares the market with unibody models and streamlined, tankless, wall-mounted versions. All are high-efficiency fixtures, as mandated by law, so the choice is usually just a preference of design style and weighing the pros and cons of each type. A wallmounted model saves floor space and gives you the option of seating heights, but it requires more fabrication work than replacing a standard toilet with another standard model. Other toilet variations may completely conceal plumbing pipes for a more elegant appearance.
Of course, the real choice for most homeowners is in the look of the toilet or bidet. Thankfully, you won't hurt for options, and all are fairly easy to install. To make things even easier, you can select a toilet as part of a bathroom suite, comprising a matching bathtub, toilet, and sink.
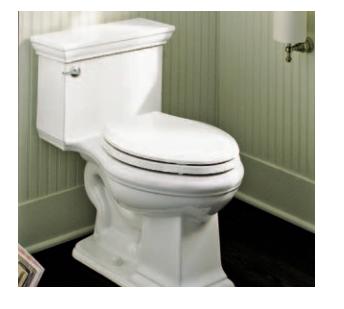
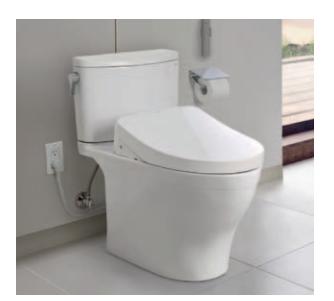
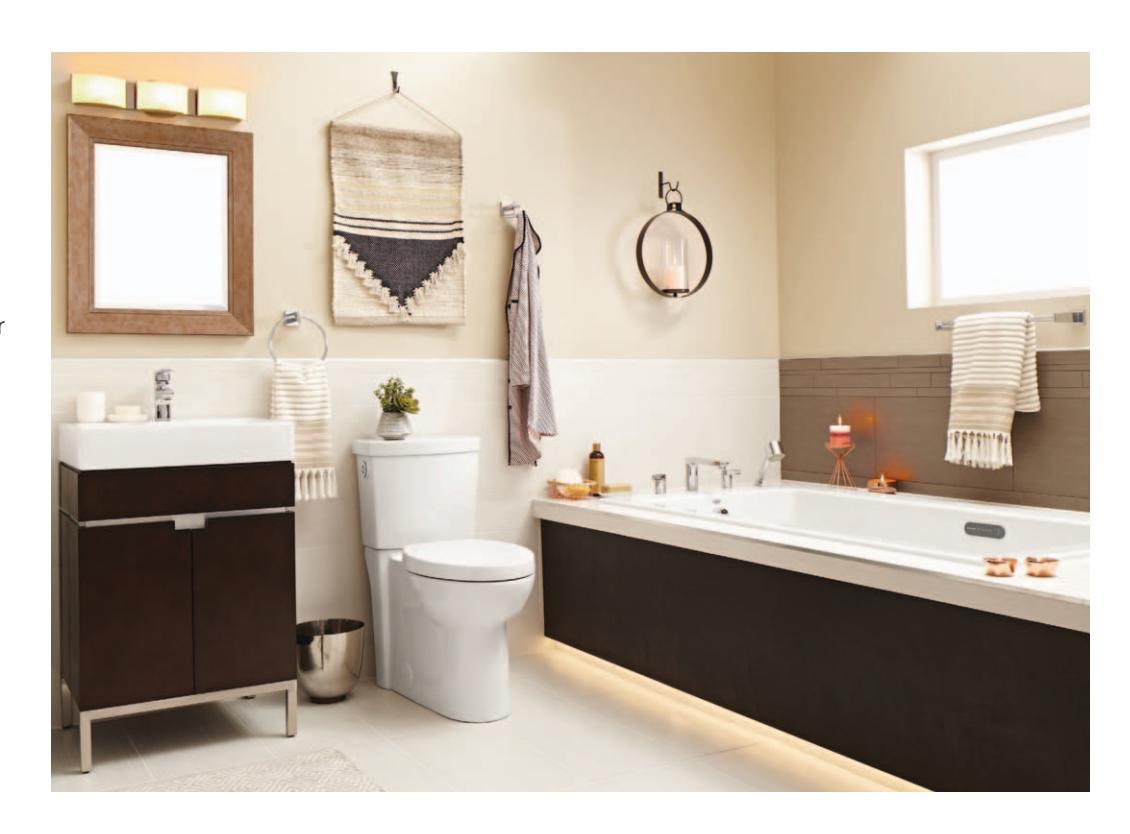
**Today's toilets** are wonderful style statements all on their own but ultimately should complement the tub if there is one and the sink if possible. Integrating the toilet in this way makes for a unified design; the comfort is already built right into modern toilets.
#### Toilet Types
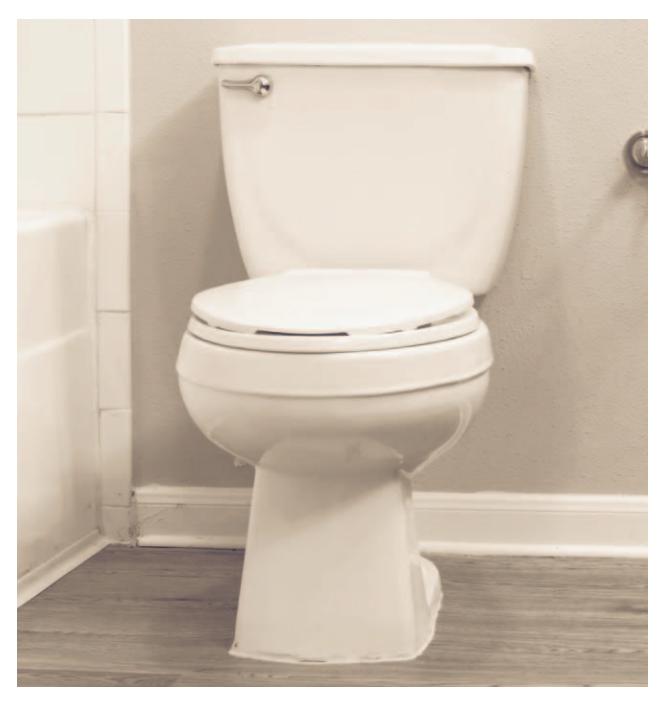
**Two-piece toilets** have a separate tank and bowl, and they account for the vast majority of toilets in homes today. Their main advantage is low cost.
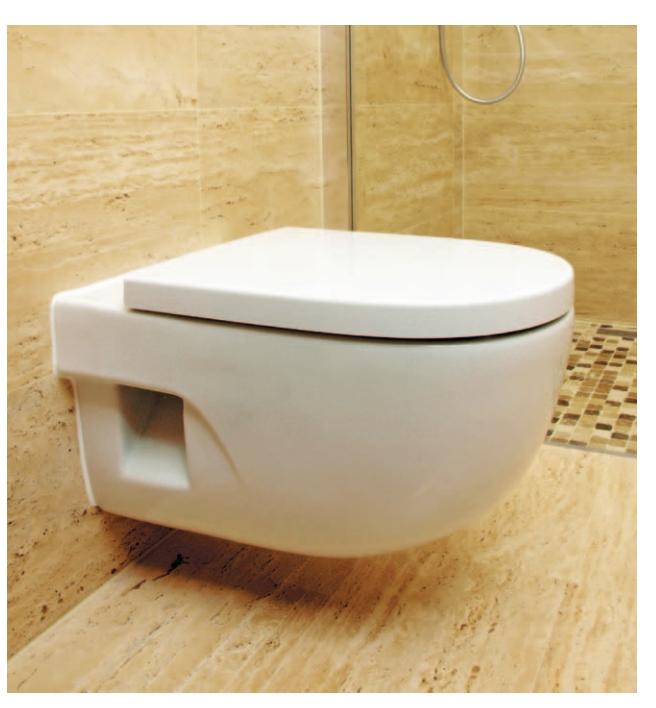
**Wall-mounted toilets** are space-saving options that are easy to clean around, but require an in-wall tank.
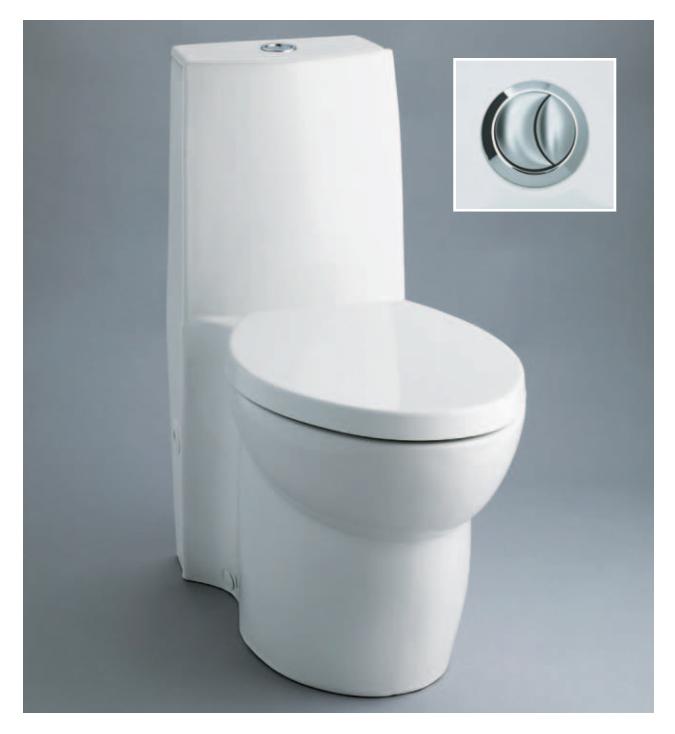
**Flushing mechanisms** are changing rapidly to keep pace with the demand for greater water economy. One common technology is the dual-flush design, which has a light flush option for liquid waste only that can save 20% on water usage over standard 1.6-gallon models.
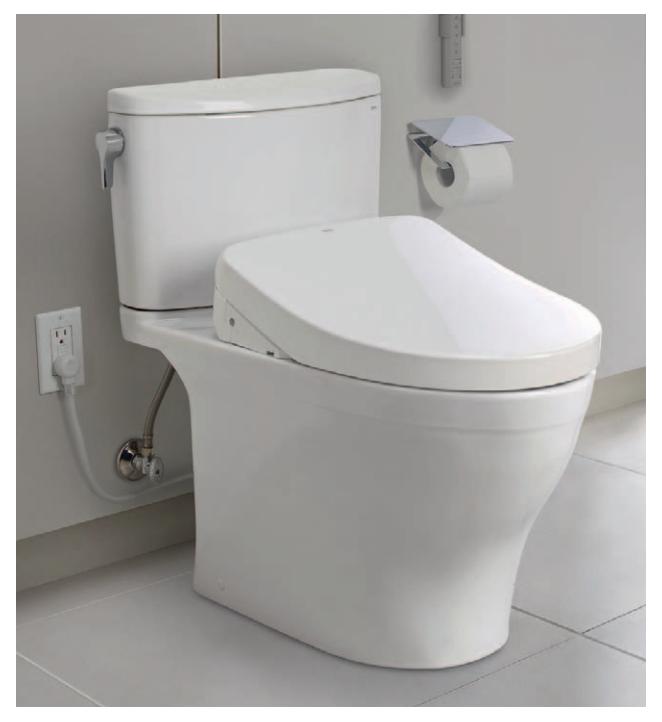
**The most recent technological development in toilets,** the bidet toilet includes a hygienic bidet function incorporated into the seat. With an integral water heater, this combines both convenience and comfort.
### Cabinets + Vanities
Storage will always be at a premium in most bathrooms. A major reason for remodeling bathrooms is to add storage that better serves the people who use the room. Storage options can be broken down into two basic categories: cabinets and shelves. However, within these categories, you'll find a head-spinning number of variations and options. For instance, both cabinets and shelves are offered as freestanding units, attached and affixed models, and custom storage units that you build into the bathroom remodel.
Wall cabinets are often shallow, but they are incredibly useful concealed storage in the bathroom because they can be put just about anywhere in the room—including over the door. Cabinets come in many different configurations designed specifically for the confines of the bathroom, from shallow, tall, and thin wall-mounted units to deeper freestanding cabinets meant to accent vanity storage.
Vanity cabinets are incredibly adaptable. You can use the traditional enclosed vanity for a maximum of interior storage space or pick up a legged variety with a lower shelf that supplements the hidden cabinet storage. Vanity cabinets range from the miniscule to the mammoth, and they come in every design style you can imagine for your bathroom.
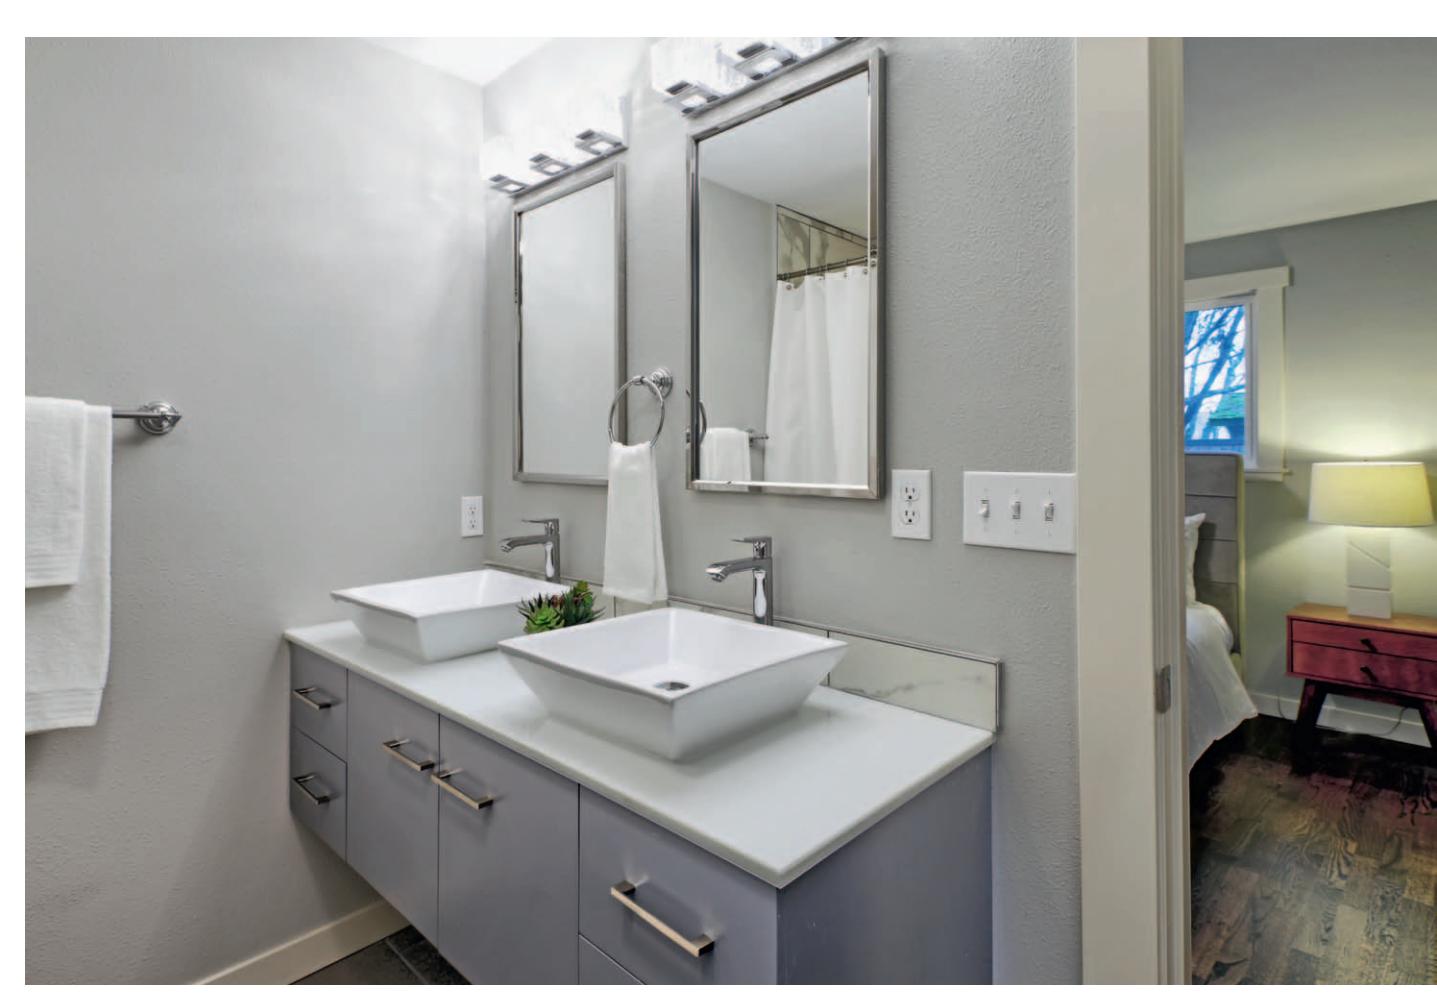
**This stylish wall-mount vanity** is an excellent choice for the space, offering a top surface that can accommodate his-and-her sinks, not to mention abundant storage. It also leaves space underneath that makes keeping the floor clean easier.
Medicine chests are classic cabinets used in all manner of bathrooms. Although usually shallow, the storage is quick access and provides a place to keep certain items, such as medicines, out of the reach of children. Where medicine chests were once outfitted just with glass or plastic shelves, today you can buy a model that includes a power strip for charging battery-operated personal care devices and specialized storage for grooming equipment. In any case, the chests can be surface mounted or recessed into the wall for a sleeker look. Many upscale versions also include integral lighting.
Stand-alone cabinets, often called "linen cabinets," are usually tall and narrow. The shape takes advantage of the available vertical space in most bathrooms. These are handy not only for towel storage but also for supplies such as toilet-paper rolls, extra boxes of tissue, and more.
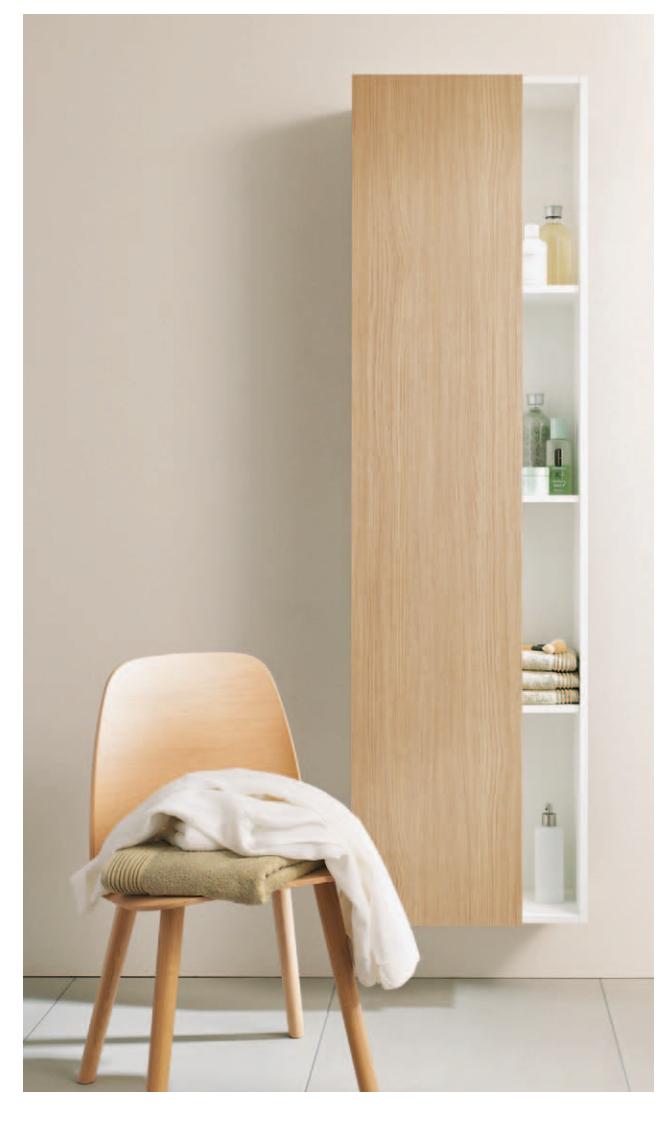
**Tall, thin cabinets** are often excellent choices for additional storage in a bathroom. The shape takes up a modest amount of space and provides abundant storage. Combining open shelving with enclosed cabinetry in a unit such as this ensures that just about anything you might need to store in the room has a proper place to go.
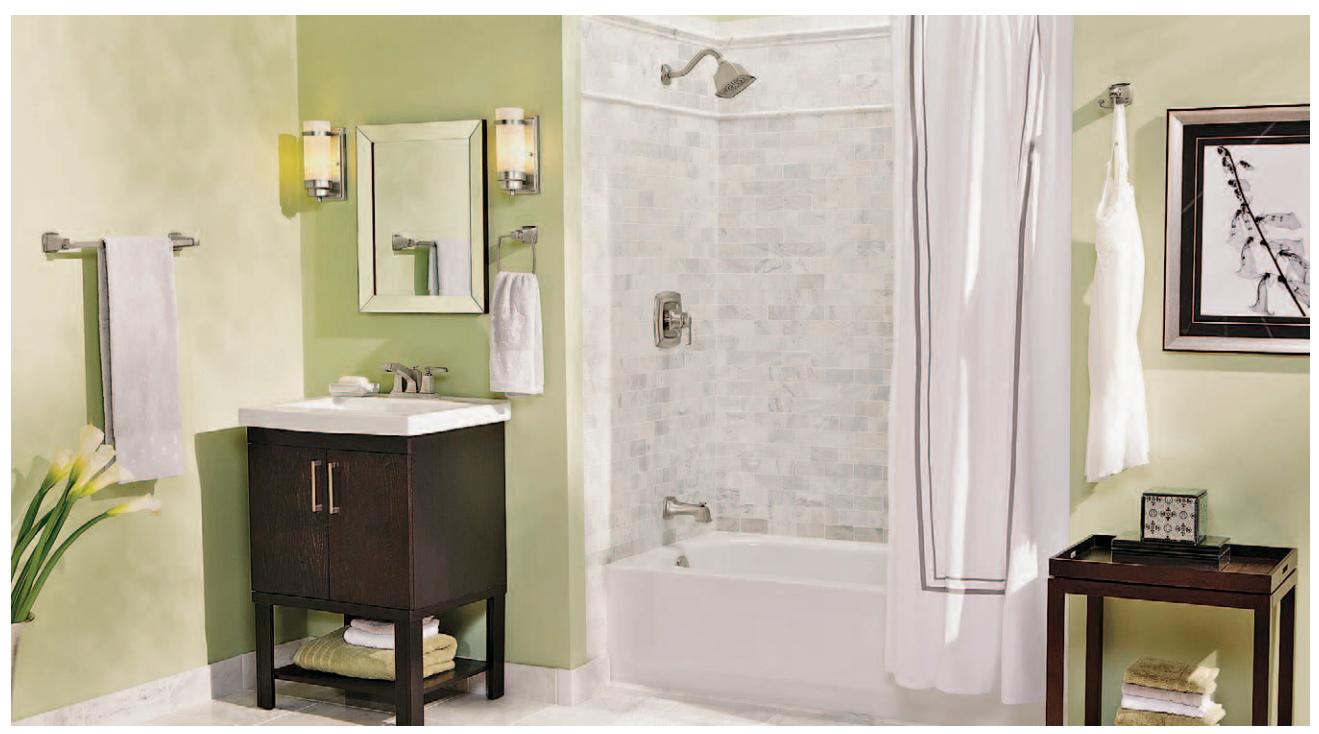
**Vanities with legs** lend an open and airy feeling to the bathroom and provide an option for useful shelving underneath. The hardware on this vanity was selected to match the brushed finish of the chic faucet and shower fixtures, creating a unified look.
Cabinets come in many shapes and sizes, but the basic choice you'll have to make at the beginning of your search for the perfect bathroom cabinets is whether to buy what's available at retail or build (or have built) custom cabinets that fit the space and your needs like a glove.
Stock cabinets are mass-produced in convenient, standardized sizes. Most of these are created from medium-density fiberboard (MDF) carcasses with veneer or laminate surfaces, although several manufacturers do produce wood cabinets. Prices vary widely depending on craftsmanship and detailing, but stock cabinets are inevitably less expensive than full custom units.
Custom cabinets are built to suit the size and shape of the area you have available, in the material of your choosing. You can have custom cabinets built by a craftsman, but some manufacturers offer custom cabinetry services—you simply provide measurements and select from a menu of materials and details, and they produce and deliver the cabinets to be installed by a local installer (or you). In either case, the lead time is usually much greater for custom cabinets than it is for stock units.
Shelves can be a useful and flexible addition to any bathroom, and they are wonderful complements to cabinetry. The selection of shelves available for bathrooms is astounding, and, as with cabinets, you can custom-build shelves to suit your precise needs. Keep in mind that any shelves you install are decorative elements as well as useful storage.
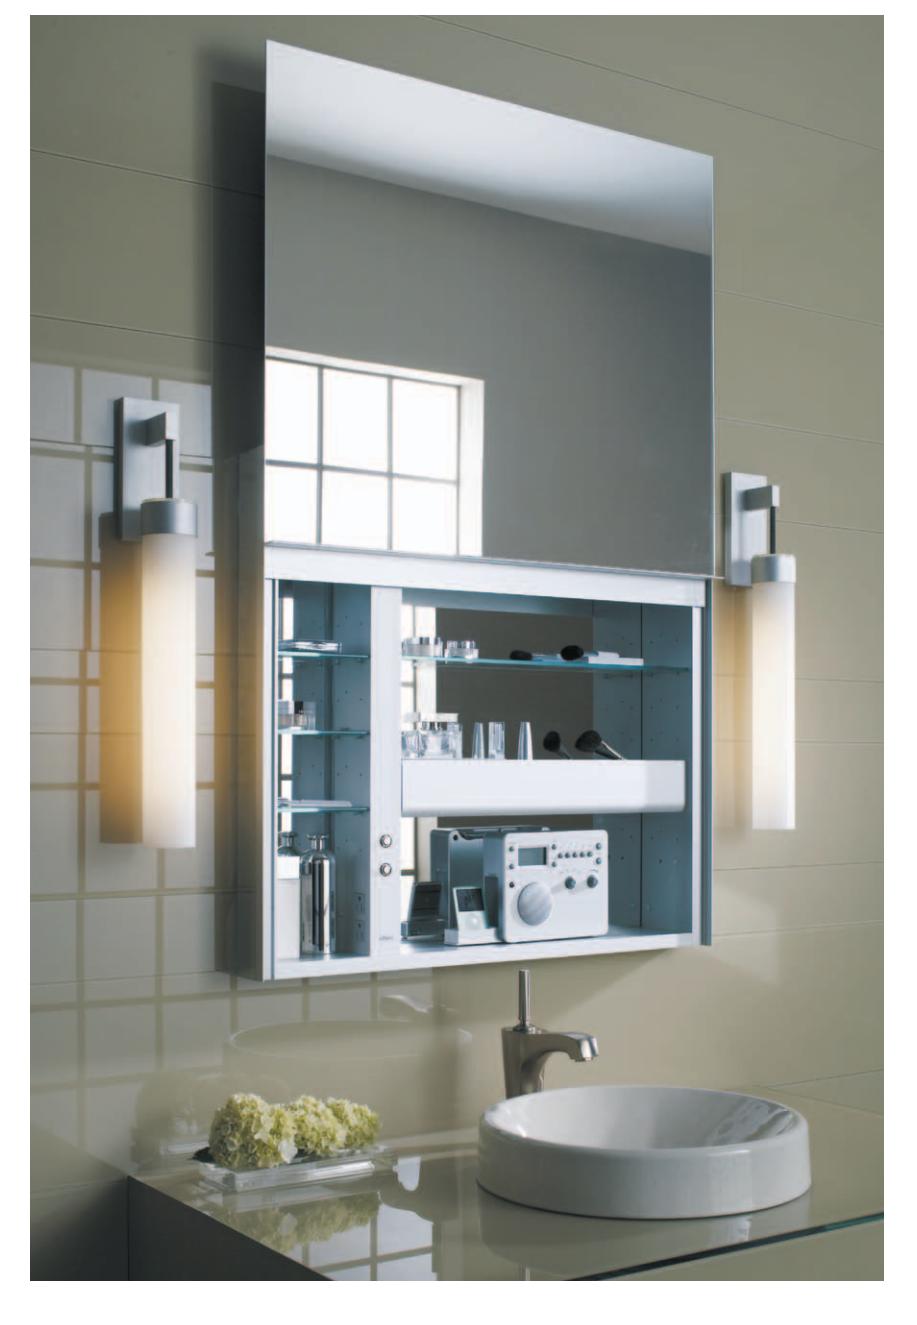
**Medicine-chest designs have** evolved right along with the look and function of most other bathroom features. This sleek unit represents a significant departure from the traditional swing-out-door medicine chest. The mirror slides up to allow access to the shelving inside, eliminating the door-swing arc that can be an awkward nuisance in the ever-space-challenged bathroom. Notice that in keeping with the sophisticated technology, the mirror is frameless, offering an appealingly streamlined and modern look. It also has internal outlets so that electronics can be plugged in while stored in the cabinet. Some sleek cabinets even have LED lights fabricated into the mirror.
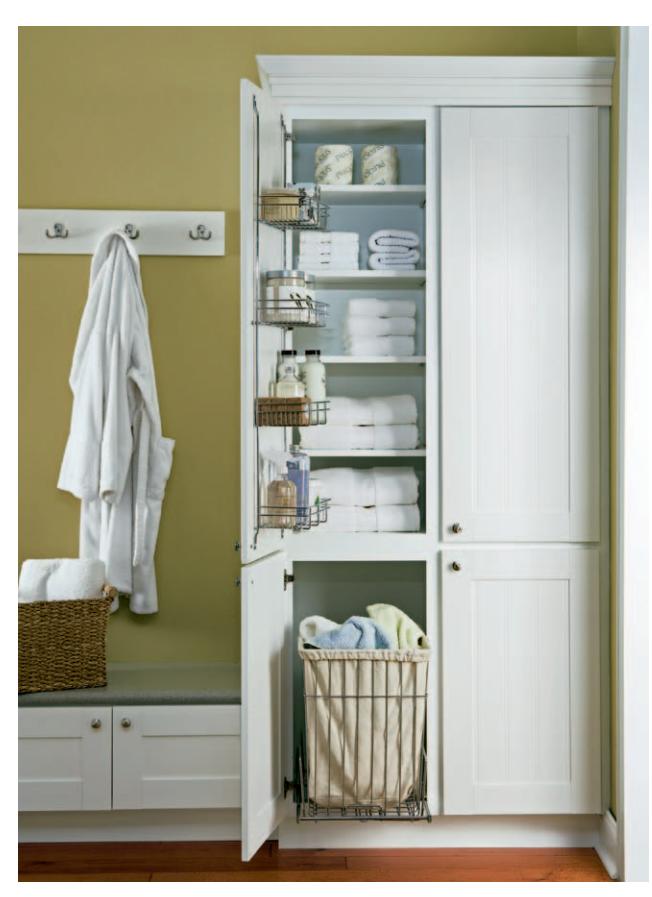
**A linen cabinet** is a freestanding furnishing, but it can take on a built-in appearance if you integrate it with other cabinets and wall trim. Linen cabinets and linen closets can be made more efficient by customizing with features such as door-back shelves and pull-out laundry bins.
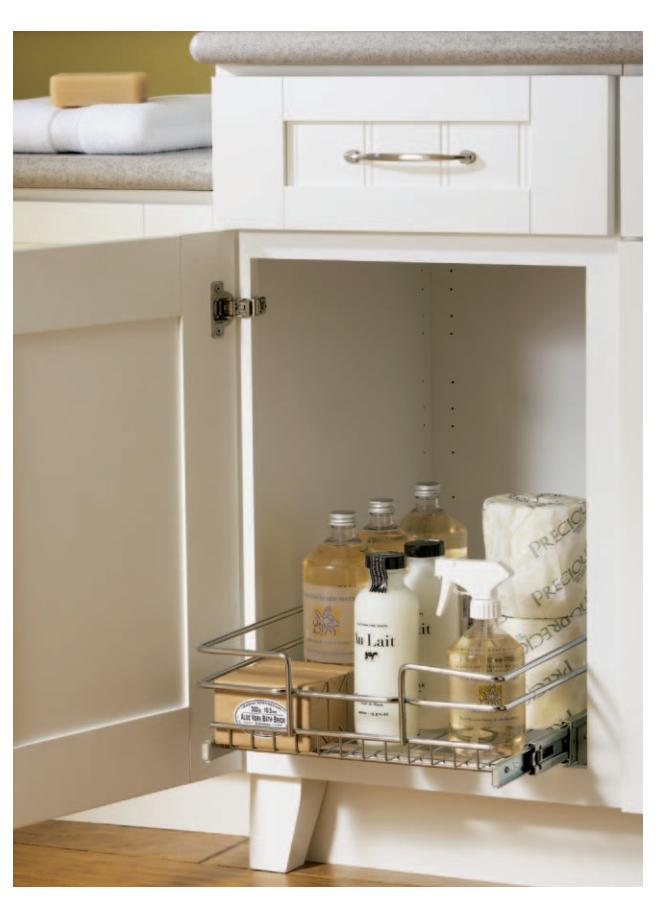
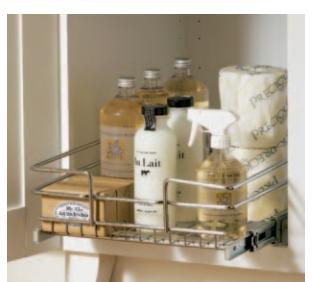
**Slide-out storage racks** are especially useful in base cabinets. Functioning basically as drawers, slide-out racks can be included at the time of purchase or added later.
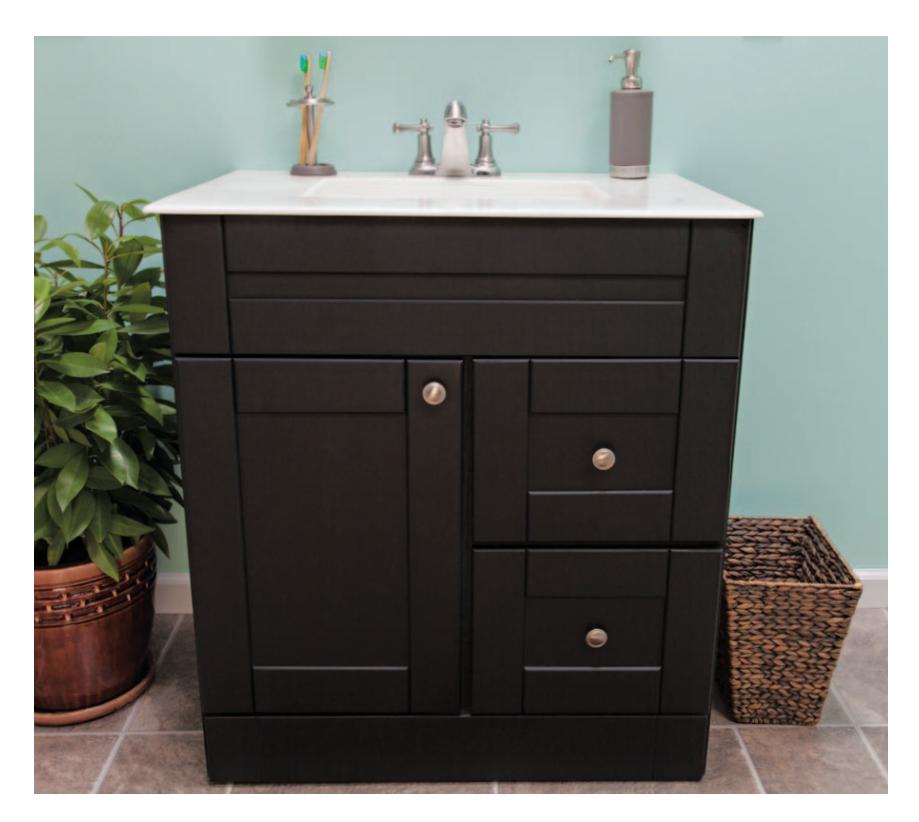
**Drawers are on the rise.** Even in small to medium vanity cabinets, where cabinet drawers traditionally expose only sink traps, supply tubes, and dark, unfriendly space, cabinetmakers are finding ways to design a small drawer or two to provide discreet, clean storage. The combination of a cabinet door to access plumbing and two small drawers breaks the symmetry of a traditional vanity cabinet as well, providing a small design surprise.
### Lighting
Lighting can set the mood of any room. Dim lights and lit candles are perfect for a leisurely soak in the tub. When it comes to shaving or applying makeup, though, bright lights are best.
As with the rest of the house, the bathroom is best served by a combination of general, task, and accent lighting to ensure personal safety, provide ambience, and permit various uses of the space.
**General lighting** usually involves an overhead fixture or fixtures that illuminate the whole room. Natural lighting is considered part of your general lighting.
**Task lighting** provides directed light for specific activities, such as applying makeup or shaving.
**Accent lighting** can be used to highlight decorative points of interest, such as architectural details or artwork.
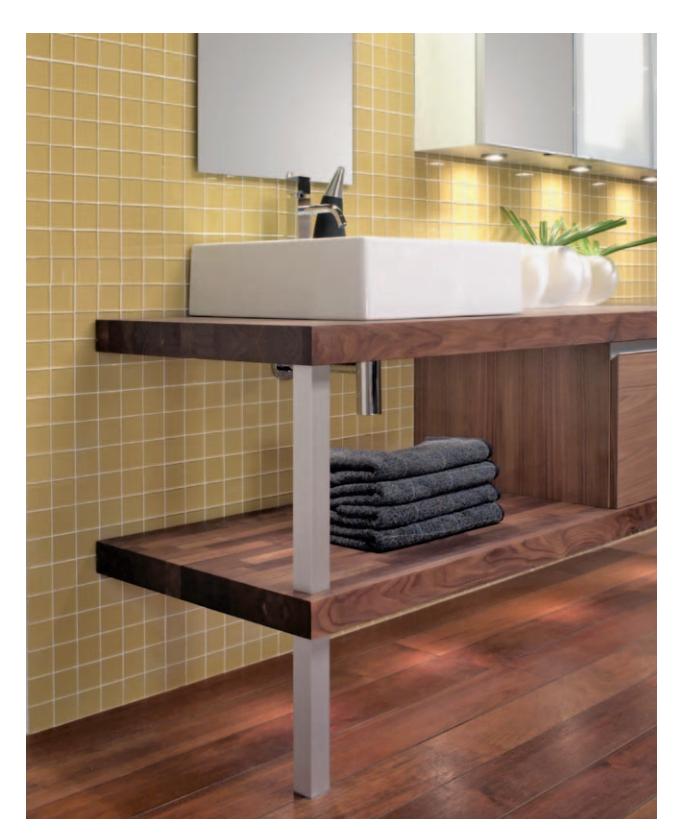
**Most people focus on the major lighting elements** of the bathroom, but don't forget the important accent and task lighting that are so much a part of a thoughtful "layered" lighting approach. These undercabinet puck lights provide moody task lighting that makes personal-care chores easier. The modest light is amplified by the accent wall of tan glass mosaic tiles—both a design and a functional feature.
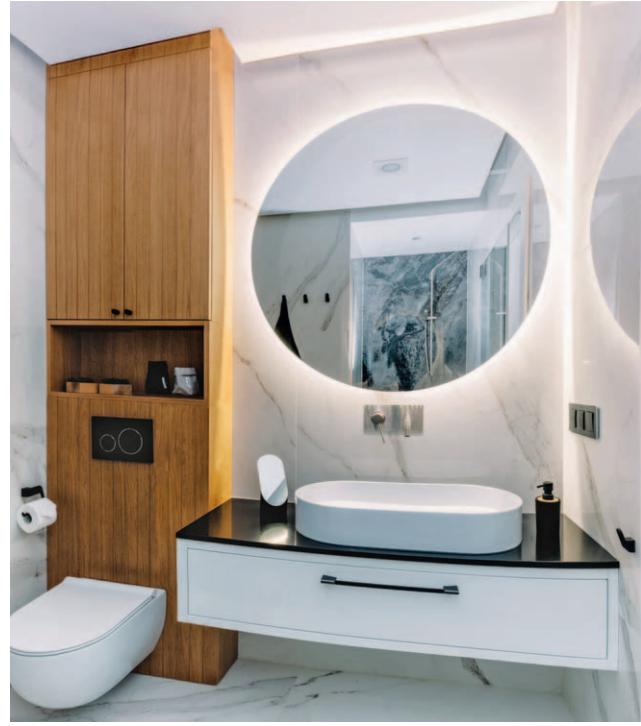
**Behind-the-mirror lighting** has grown popular for its flattering effect and mood-setting glow. Used behind a round mirror, the effect is the same as a ring light on a web cam—it shows your face in sharp and realistic detail. This can be a huge help in applying makeup how and where you want it or shaving precisely around facial hair.
Surface-mounted fixtures are easy to install and available in a variety of styles. Just be sure that all fixtures you choose are moisture-proof and meant for use in a bathroom environment.
**Recessed ceiling fixtures** are set into canisters and have trim kits that are mounted flush with the surface of the ceiling, and some include adjustable heads that allow you to direct the light one way or another. This improves headroom in a small bath.
**Wall-mount fixtures** are common in bathrooms and provide ideal lighting for personal grooming, especially when placed on both sides of a mirror, as well as above.
**Ceiling-mount fixtures** are excellent overall light sources in the small spaces of most bathrooms.
### Heating + Ventilation
Consider room size, the number of windows, and the type of heat in the rest of the house when making decisions about your bathroom heating system. Consult a professional before making final decisions. If your primary heat system is inadequate, you have three basic choices for auxiliary heat in bathrooms.
**Electric heaters** are mounted either by themselves or as part of light, vent, or heating units.
**Heat lamps** use infrared light bulbs to provide radiant heat.
**Radiant floor-heating systems** are installed beneath the flooring and circulate either hot water or electricity.
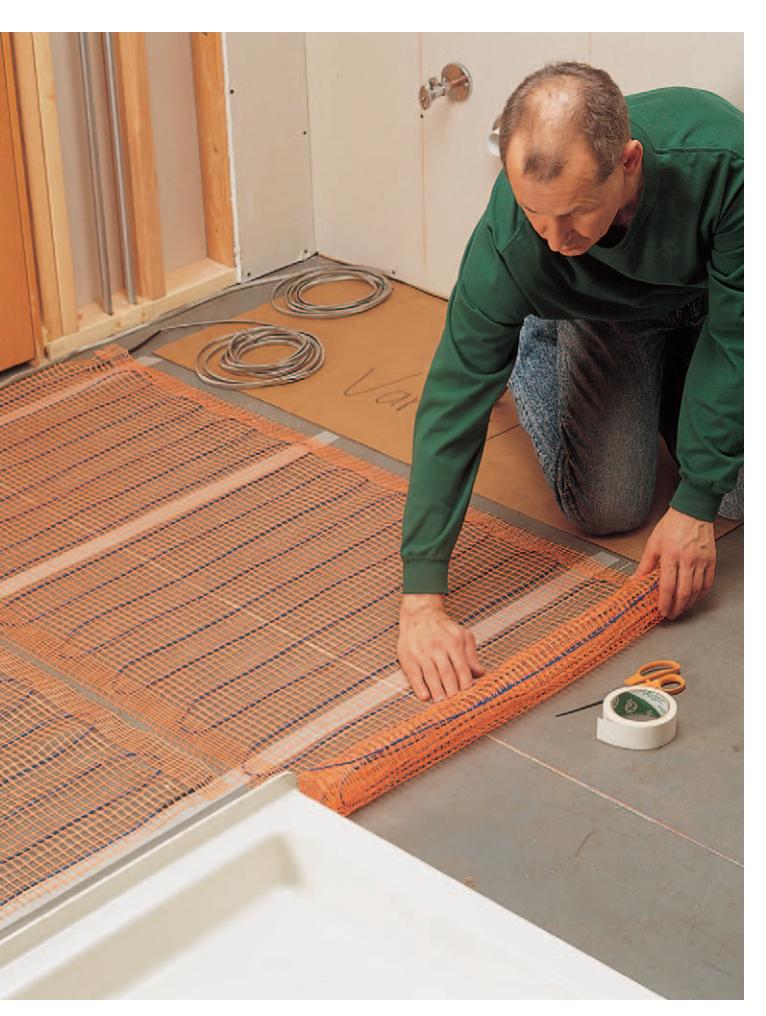
**DIY radiant-heat floor systems** are electric mats installed beneath floor coverings to warm your feet and heat your room.
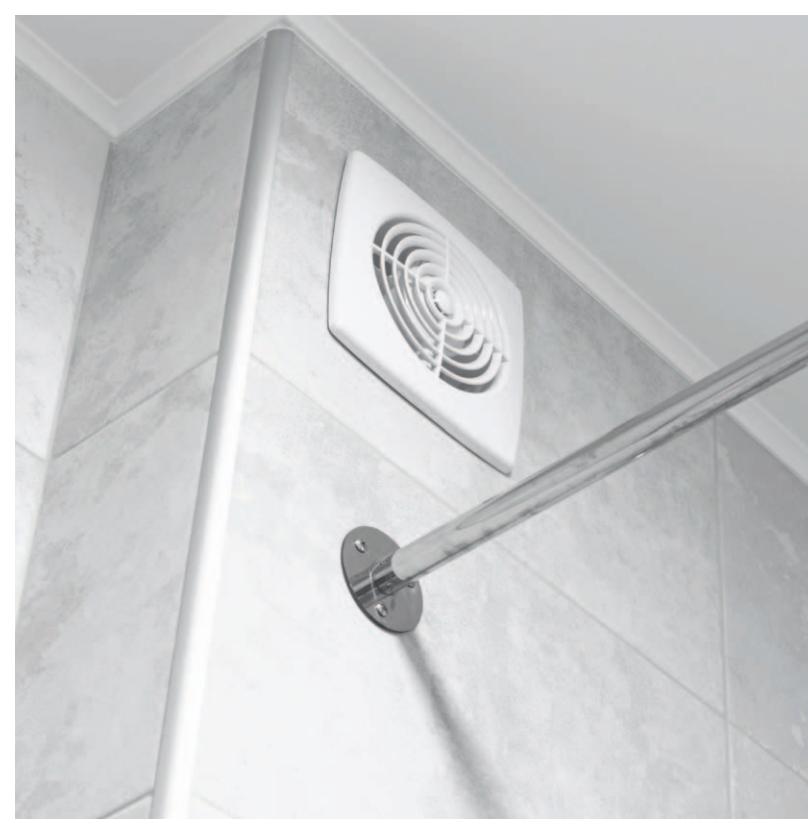
**A bathroom vent fan** equipped with enough CFM power can quickly, quietly, and easily clear the room of steam or stale air. That ensures the space is mold and mildew-free, and a pleasure to use.
Good ventilation protects surfaces from moisture damage, deters mold and mildew, and keeps air fresh. Vents with electric fans (pages 196 to 199) are required by code in any bathroom without windows. The vent must exhaust moist air directly outdoors, not into attics or wall cavities.
Purchase a vent fan that's rated at least 5 cubic feet per minute higher than the square footage of your bathroom. Local building codes may have specific requirements, so check with your building inspector or HVAC contractor before selecting a ventilation unit.
### Walls + Ceilings
If you add, move, replace, or resurface walls in your bathroom, use the best materials for the job. Options include the following.
**Drywall** is adequate for most bathrooms, except for the area around tubs and showers.
**Greenboard** is a drywall with waterproof facing. It has fallen out of use in recent years and may not be allowed by your local code.
**Cement board** is used primarily as an underlayment for ceramic tile although more and more codes are calling for its use in high-moisture areas, such as in a shower or tub surround.
**Glass block** is a decorative building block that has great visual appeal but can't bear loads.
You'll want the wall and ceiling finishes to be easy to maintain. Wall finishes for tub and shower surrounds and behind sinks and toilets should be waterproof.
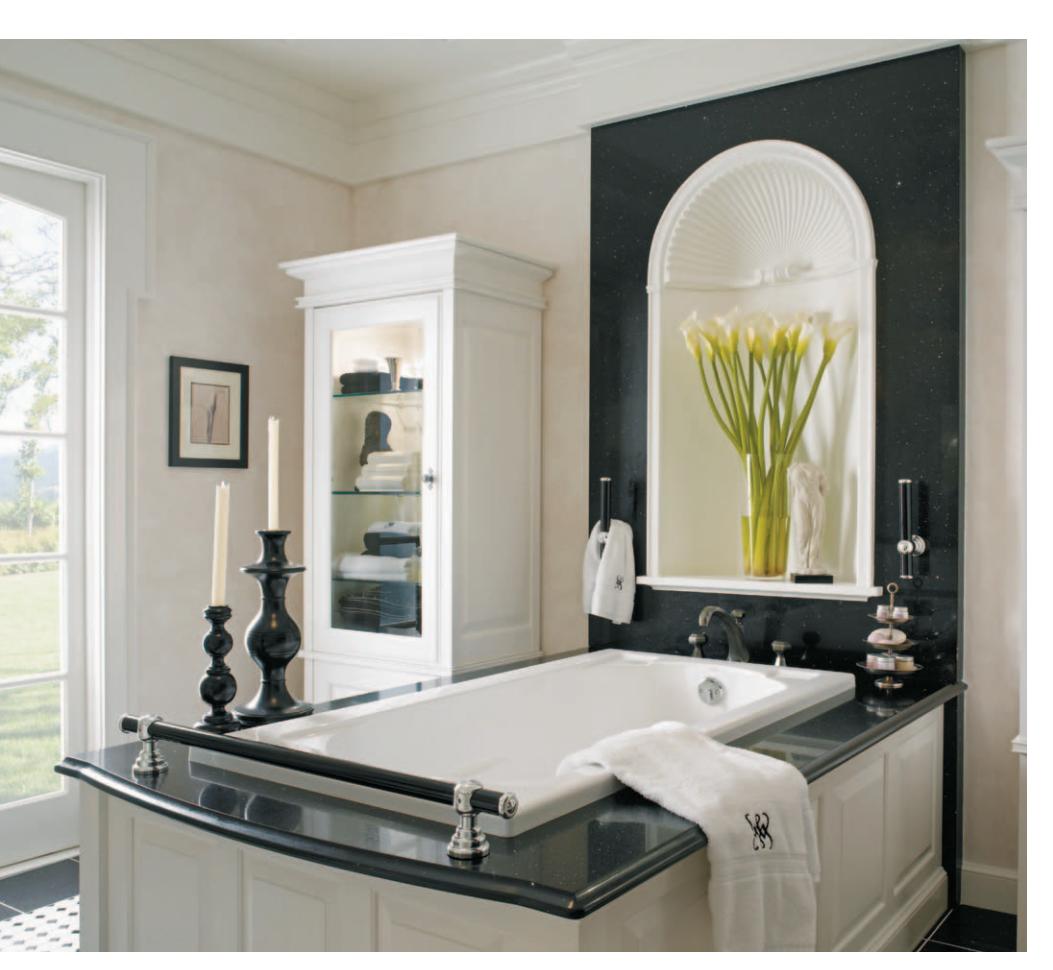
**Solid-surface panels,** such as this black quartz accent surface that matches the tub deck, can make ideal waterproof bathroom wall surfaces.
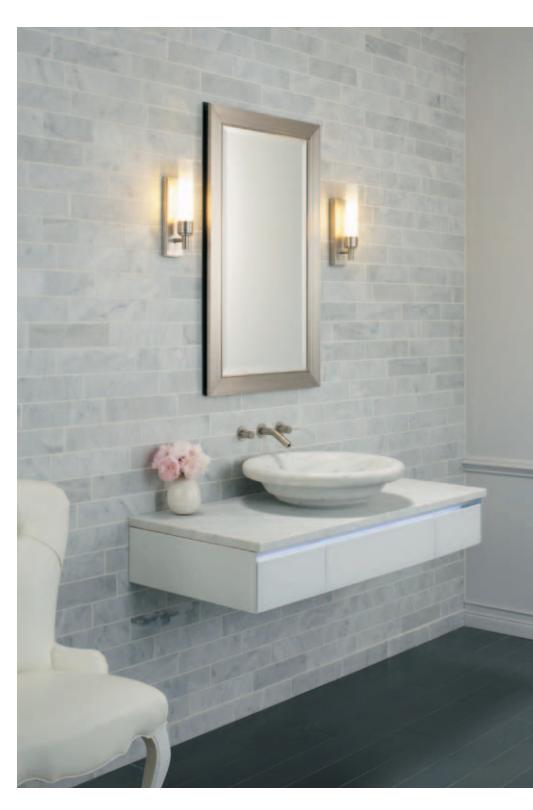
**A marble-tiled wall** is a classic upscale look, and a matching marble counter and vessel sink on top of a wall-hung vanity are a space-saving update to that look.
**Paint finishes** range from flat to glossy (enamel). Glossy finishes are best for areas that will be cleaned often. Latex (water-based) paints are more environmentally friendly than oil-based paints.
**Wallpaper** should be treated to withstand moisture. Choose smooth-textured, solid vinyl or vinyl-coated wallpaper in a bathroom.
**Wall tiles** are durable, easy to clean, and available in hundreds of styles, colors, and materials, including stone, ceramic, glass, and—if you want a really unusual look—metals.
**Solid-surface material** is often used to fashion walls in tub and shower surrounds.
Bathroom ceilings need moisture-resistant finishes. Avoid textured ceilings, which peel in humid conditions and are difficult to clean, repair, or paint.
### Flooring
Bathroom floors should stand up to daily use, frequent cleaning, and moisture.
**Resilient sheet flooring** is inexpensive but is seldom the first choice of professional designers. It is simple to install, easy to clean, seamless, and available in a vast number of colors, patterns, and styles. Resilient sheet products include linoleum, which is incredibly eco-friendly, and vinyl, which is far less so.
**Resilient tile and planks made of vinyl** are easy to install. The latest versions are made to stand up to even the most demanding bathroom conditions. These products are easier to install than ever and include marmoleum, a green option.
**Ceramic tile** is available in three main types: glazed ceramic tile, quarry tile, and water-resistant porcelain tile. Although cleaning issues are created by the grout lines, mosaic sheets of ceramic tile are highly popular.
**Natural stone tile** is a premium flooring material. Granite, marble, and slate are the most common stone products for bathroom floors.
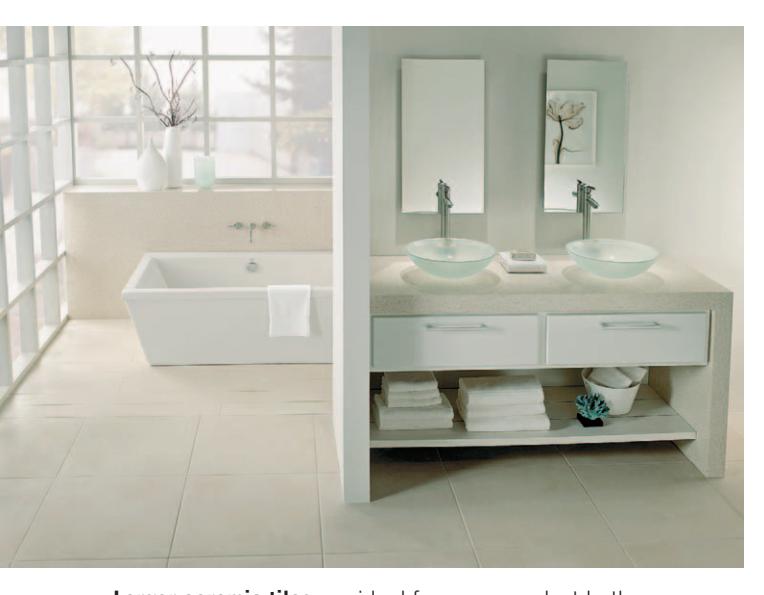
**Larger ceramic tiles** are ideal for more modest bathrooms. Choose a subtle color to complement other surfaces, like the sharp and refined quartz countertops and bathtub half wall here.
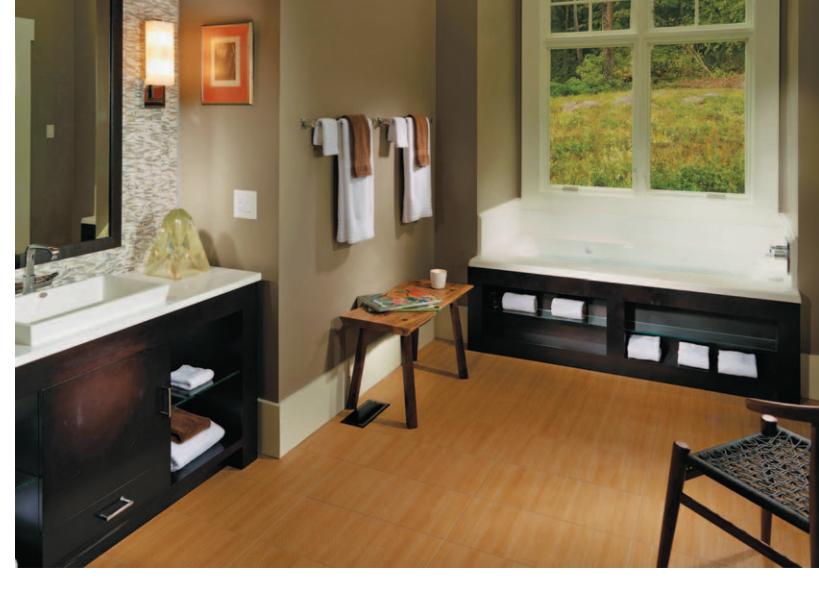
**A faux-wood laminate floor** provides an ideal, durable stage. The star on that stage is a dramatic and luxurious jetted tub tucked into an alcove with a view.
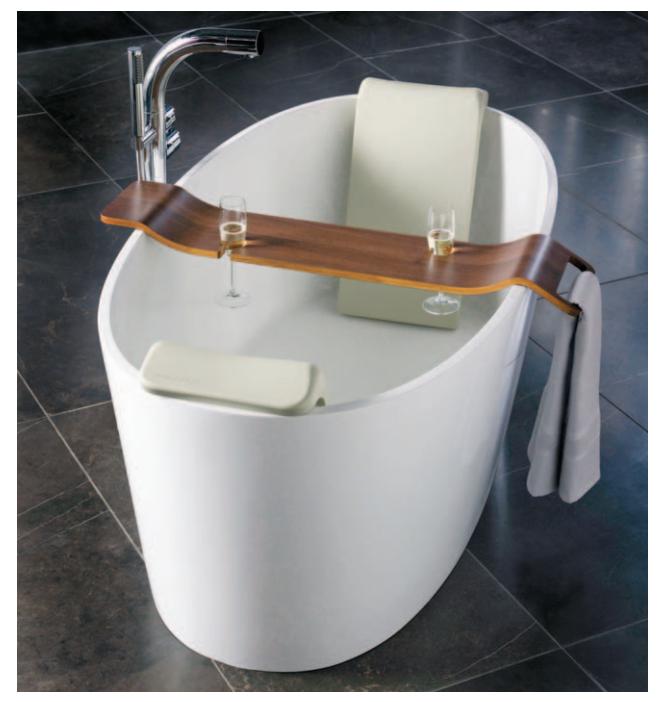
**A dramatic black marble tile floor** helps a simple, elegant, deep freestanding tub pop in this chic bathroom.
**Hardwood floors** are difficult to totally waterproof, so they should be limited to half baths, where moisture will not be a big problem.
**Laminates** offer an easy-to-install flooring option that is water resistant, durable, and available in an amazing selection of surface appearances, from stone tiles to wide wood planks.
The condition of your floor structure may affect the cost of installing new flooring. If the subfloor must be replaced or repaired, more time and money will be required. Consult a professional to assess the state of your subfloor.
## Getting Started
The roadmap to a great bathroom that you'll love using starts at function and heads through form, before arriving at comfort. That trip takes a good deal of planning and step-by-step execution. Don't worry, though. Putting together the ideal bathroom whether it's a shared space for young kids, a powder room used only sparingly, or your own private spa retreat in a master bedroom suite—is easier than you might think.
Use this section as a guide to getting the basics right. They serve as a foundation on which you can add details and accent your bathroom to meet your style preferences. There is also information in this chapter that you need to know to avoid making a mistake or violating code. You'll find insight on how to make sure your bathroom meets modern accessibility standards so that it's useful for everyone who might need to use it, now and in the future.
Take your time, follow codes, and make sure plans are in place before you ever start swinging a sledge hammer or getting rid of old fixtures. That way, you'll ultimately achieve a safe, useful, and attractive bathroom … along with the DIY pride of a job well done!
##### In this chapter:
- Determining Needs
- Designing for Accessibility
- Design Standards
- Drawing Plans
- Codes
- Removal + Demolition: Toilets
- Removal + Demolition: Sinks + Cabinets
- Removal + Demolition: Showers + Tubs
- Building a Wet Wall
## Determining Your Needs
A typical bathroom is divided into three activity areas: the toilet, the sink, and the shower or tub. To create a successful bath design, you need to consider the relationship of these areas, allowing for accessibility and safety. This relationship varies depending on the type of bathroom being renovated: half bath, family bath, or master bath.
**Half baths**, also called powder rooms, are small rooms near common areas of the home. They are designed largely for visitors to use. They can be as small as 20 square feet and are often located near entrances or entertainment areas of a home. It's best to have their doors open into hallways.
Half baths typically feature a toilet and a vanity or pedestal sink finished with smaller fixtures and finer materials. When designed as a guest bath that includes a shower, these rooms require more space and are called "three-quarter baths."
**The family bath** is usually located near the sleeping areas in a home. It is used by more than one family member, and it should provide storage for toiletries, towels, laundry, and cleaning supplies. It features at least one sink, one toilet, and a shower and tub or tub-shower combination.
A larger bathroom allows space for extra features, such as double sinks or separate shower and tub areas. A small family bath may conserve space by combining the tub and shower, incorporating recessed shelving, and featuring space-efficient fixtures and storage cabinets. Finishes and fixtures should be low maintenance and highly durable, such as ceramic tile and enameled fixtures.
Bathrooms for children must be safe for them to use unsupervised and should be easy to adapt as the children grow. Features that make daily hygiene easier and safer for children include single-handle faucets with antiscald guards, adjustable showerheads, safety plugs in receptacles, grab bars, smaller toilets, lowered sinks, and vanities with built-in step stools.
**The master bath** is usually connected to the master bedroom and is a sanctuary for the owners of the house. It is typically quite large and may have separate activity centers containing features such as a jetted tub, shower, toilet partition, and multiple sinks and vanities. It may even feature a sauna or steam room. The fixtures and finishing materials generally feature ceramic, stone, or marble tiles; custom cabinets; and upscale accessories.
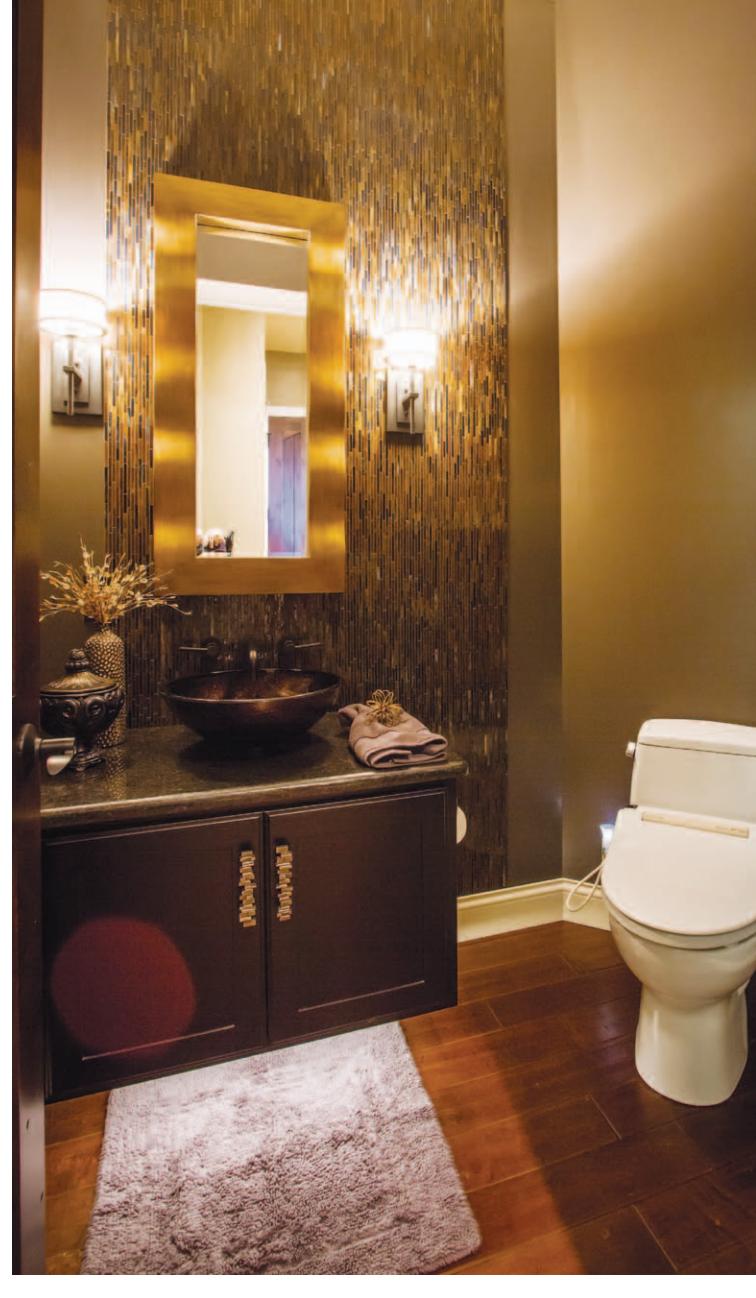
**A half bath need not lack drama.** This small space includes the basics, using a compact wall-mounted vanity to save space. But the inclusion of sumptuous wall materials, high-end flooring, and near-theatrical lighting around a stunning mirror make it a showpiece space in the home.
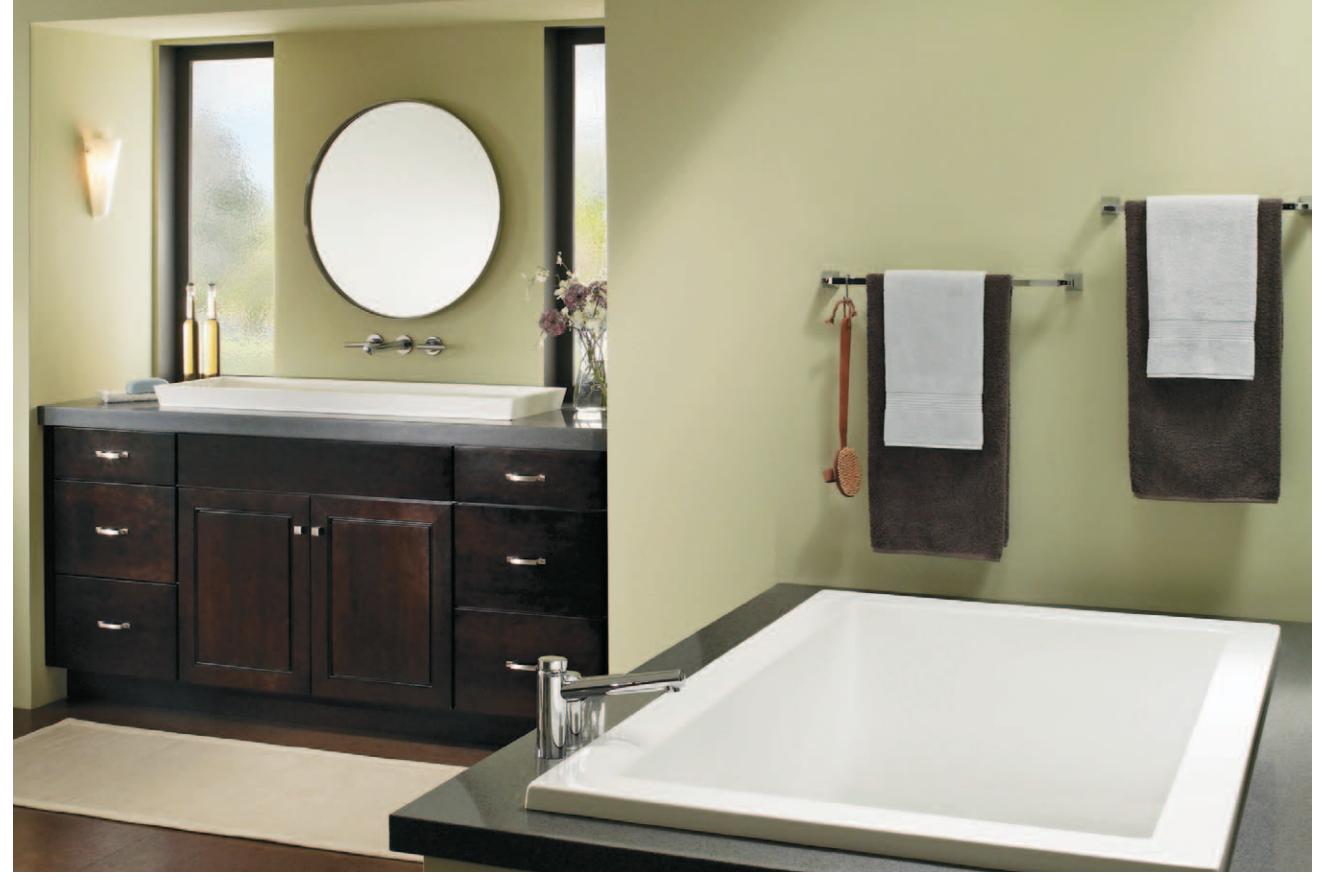
**There's no rule** that says a modest family bath needs to be less than opulent. You can fit a lot into a small space, like this skylight-lit, simple, elegant, and deep drop-in tub.
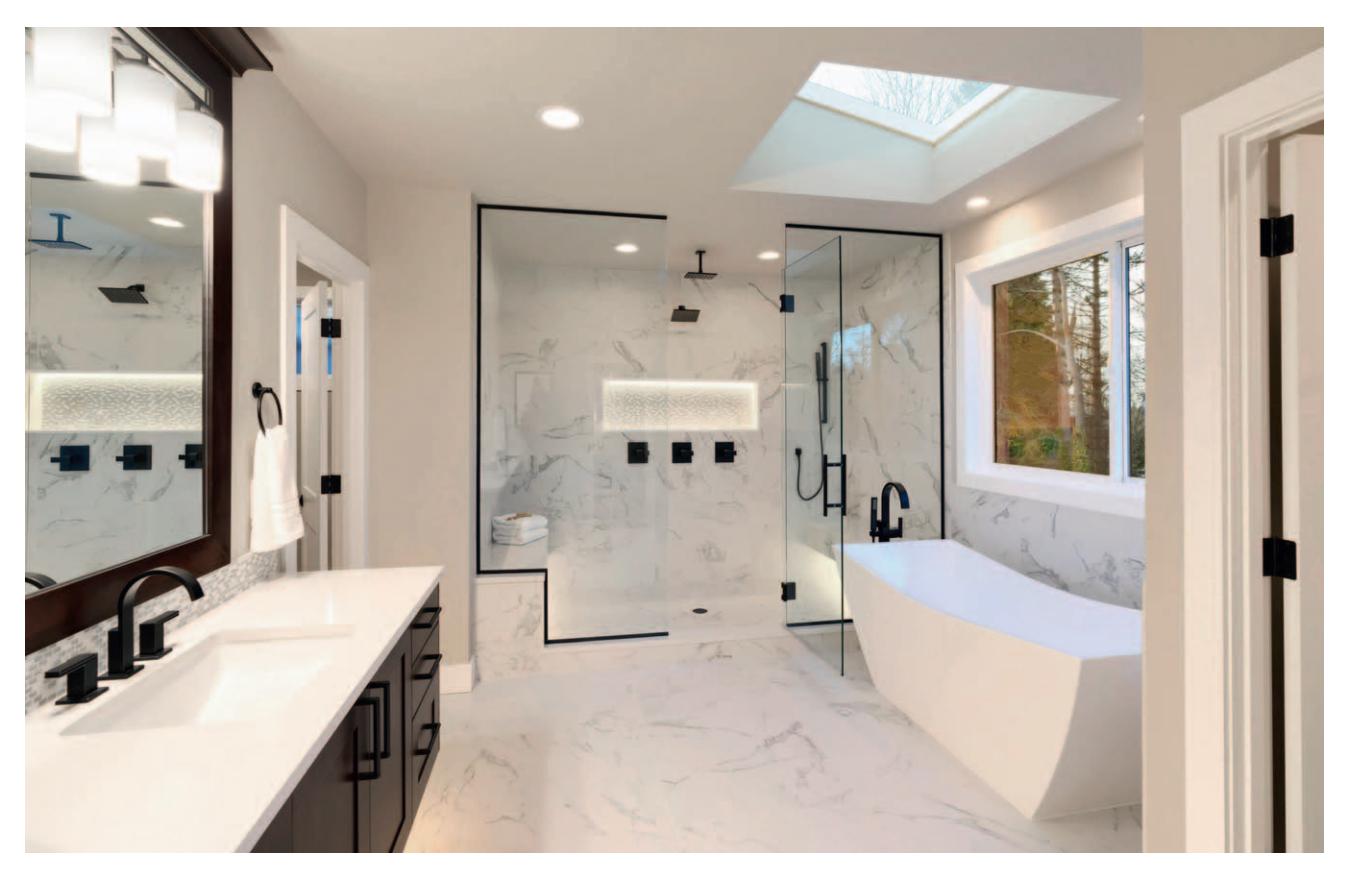
**A master bath** can be a decadent temple to luxurious comfort. This homeowner has focused the design firepower on a large walk-in shower with marble tile surround and multiple showerheads. A room like this is not inexpensive, but it provides a daily experience that makes life more enjoyable.
## Designing for Accessibility
Accessibility has become a key issue not only in the codes that regulate residential bathroom construction but with almost every feature designed for bathrooms. From toilets to faucets to lighting and beyond, manufacturers are responding to an aging population and the need to accommodate all potential users of a home's bathroom.
Designing bathrooms to accommodate the needs of any individual—including those with mobility limitations and even the severely disabled—is at the heart of what is known as universal design. The term was coined by disabled architect Ronald Mace. The goal? In Mace's words, "the design of products and environments to be usable by all people to the greatest extent possible, without the need for adaptation or specialized design." In practice, that translates to turnkey fixtures that work for able-bodied individuals and those who use a wheelchair or walker alike.
More recently, a focus has been placed on accommodating the 78 million baby boomers who are rapidly aging into an incredibly large elderly population. Studies show that these people want to stay in their homes and remain independent as long as possible. The aging-in-place movement has sprung up to facilitate that and to set guidelines for bathroom design specifically to suit elderly users. But in reality, aging in place is a subset of universal design, and it is a difference largely without a distinction. If you take the steps outlined here and select fixtures and features designed for maximum accessibility, your bathroom will be welcoming and user friendly now and as you age, and for anyone who might need to use it.
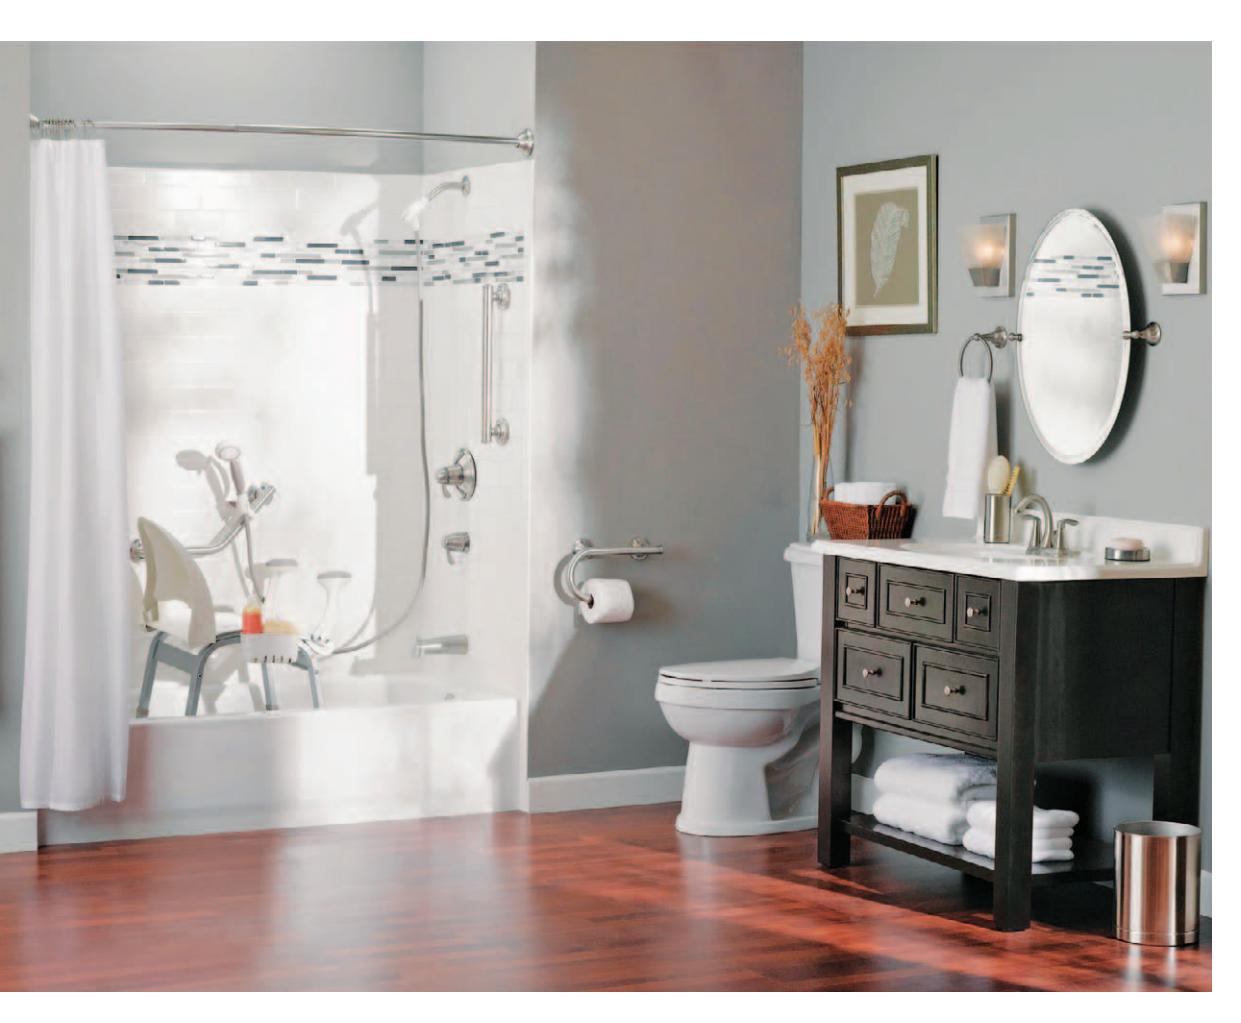
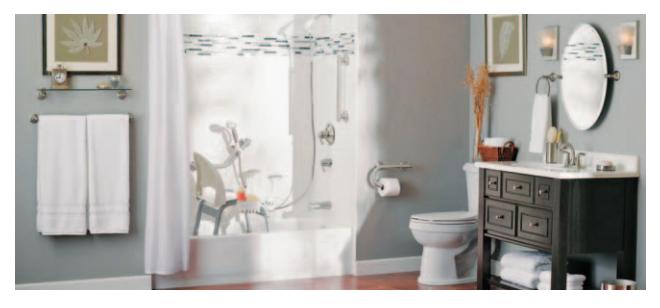
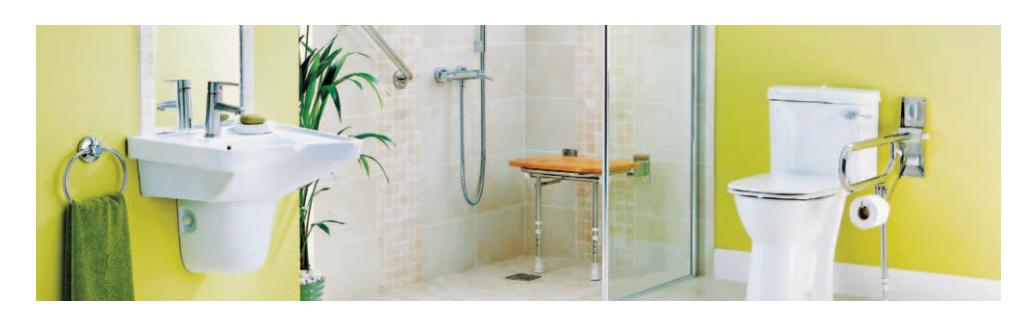
**Aging-in-place bathroom design** often deals with remodeling existing spaces to better suit users with age-related mobility issues. Those who can't stand for the span of a shower can take one while sitting in this specially adapted stool. They can use the ergonomic handheld showerhead with a handle that clips onto a nearby grab bar. Even the toilet-paper holder has been replaced with one that has a grab bar built in.
## Universal Design Standards
Bathroom elements that meet the mandates of universal design are continually being refined by manufacturers as they respond to legislation such as the Americans with Disabilities Act (ADA) and the needs of an aging population. Design style is inevitably a part of the process. Utilitarian features such as grab bars are increasingly crafted with stunning looks and finishes that make them easy to integrate into even the most sophisticated bathroom style.
**Grab bars.** The new rule for grab bars is "dual purpose." Towel racks, toilet-paper holders, and bathroom shelving are all being crafted with integrated grab bars. Not only does this mean buying and installing one fixture in place of two, it means the grab bars are a blended part of the overall look of the bathroom. Even grab bars for showers are seeing style upgrades, with molded finger grips and the same selection of surface finishes found in other fixtures, such as showerheads and faucets.
**Toilets.** The key to making this essential fixture comfortable for every potential user lies in seat height. Manufacturers have come up with a multitude of solutions, including power-lift toilet seats, height adapters, higher-than-normal traditional toilets and those that can be adjusted, and wall-mounted toilets that can installed at any height. Grab bars are essential to assist movement on and off any toilet, so it's fortunate that you can find attractive toilet paper holder–grab bar combinations.
**Faucets.** The first step in making faucets accessible was the use of paddle handles and singlehandle faucets that could easily be manipulated by those lacking dexterity or motor skills. Nowadays, technology is aiding people with coordination and hand-strength difficulties in the form of motionactivated and touch-activated faucets. These make using the faucet as easy as moving a hand. They are also a breeze to install (see page 166).
**Bathtubs.** The standard bathtub-shower combination can be retrofitted to accommodate limited-mobility users with the addition of special stools and handheld showerheads with ergonomic grips. Better yet, consider replacing an existing tub with a walk-in model equipped with a door. These tubs typically have seats at chair height to make the transition into the tub easier. Many also feature jets and heaters to create a luxurious experience. When shopping for a walk-in tub, pay close attention to the contours of the seat and back support. These will be key to how comfortable and supportive the tub is over the course of a nice long soak. Choose a door style that best accommodates the user's preference; available styles open in or out, up or down. The lower the threshold, the better, and the door handle should be easy for the intended user to operate.
Other types of tubs can be made easier to use by locating the controls on the outside edge of the tub or tub deck. This allows the user to fill the tub without leaning over and possibly losing balance.

### Understanding Aging in Place
The aging-in-place movement shares much with the general universal design trend, the key difference being the focus on the needs of the elderly. As we age, we lose strength in our hands, arms, and legs and often have to deal with nagging chronic injuries associated with aging—arthritis and limited flexibility and mobility chief among those complaints. Many aging-in-place changes are focused on accommodating those conditions and preventing any injury that could shortcircuit independence.
**Lighting.** Older people often deal with diminished vision, so effective lighting is key to making aging-in-place bathrooms safer and more user friendly. This entails a combination of undercabinet and undercounter lighting, baseboard or cove lighting, special shower lights, and more powerful ambient lights on the wall and ceiling to dispel any visually confusing shadows.
**Nonslip surfaces.** Falls are the number-one cause of elderly immobilization and can have serious health ramifications. It's essential that tubs, floors, and shower stalls have truly nonslip surfaces that maintain traction even when wet. This means a slip-resistant glaze or texture on any bathroom flooring, and decals or slip-preventing strips in bathtubshower combinations.
**Showers.** The two areas of continuing development in terms of universal-design showers are the shower pan and the fixtures. Low-threshold, walk-in showers were the ideal a few years ago (often equipped with ramps for wheelchairs), allowing anyone with strength and balance issues to easily step into a shower stall. That idea has evolved into true curbless showers that are on the same level as the surrounding floor. Although installing a curbless shower was once a major custom construction project, you can now buy a kit with a relatively streamlined and simple installation process (see page 94). Grab bars remain an essential addition to any shower enclosure, and the increasing variety of designs and finishes virtually guarantees you can match grab-bar finish to that of the shower controls and showerhead.
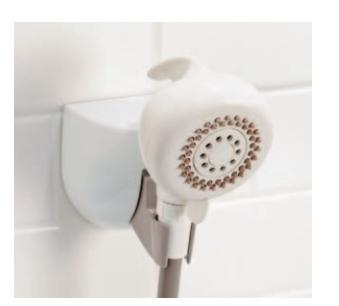
Showerheads themselves have been made more accessible by mounting handheld styles on slide bars so that the height can be adjusted to suit any user, and the showerhead itself can be removed as needed. Nonslip ergonomic grips are making handheld
showerheads even easier to use for people with motor-skill and grip limitations.
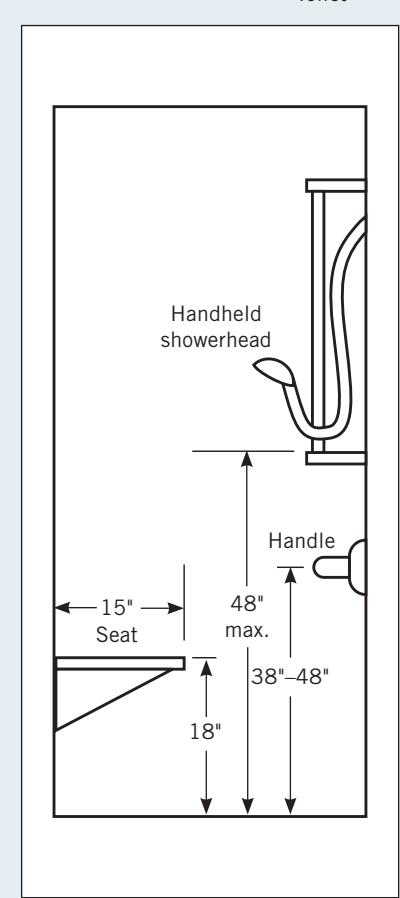
Most modern shower enclosures—whether onepiece prefab units or those built from the shower pan up—include some sort of seat. Fold-down seats are easy to retrofit into an existing shower, but many showers now include built-in or molded shower seats. Either way, the seat should be 18 inches high and at least 15 inches deep. Shower antiscald devices are also a wise addition to any shower to protect all users from burns.
**Sinks and vanities.** More and more wall-mounted sinks and vanities are being offered at retail. These ensure that bathroom users with wheelchairs can roll under the sink to wash their hands or brush their teeth. Many wall-mounted sinks come with attractive aprons to conceal plumbing. Roll-out vanity cabinets can be used as storage accents, replacing the undersink space in traditional vanities.
**Doors and doorways.** Bathroom doorways should be 32 to 36 inches wide to allow passage of a wheelchair. Shower doors should open out, or both ways, to ensure user safety.
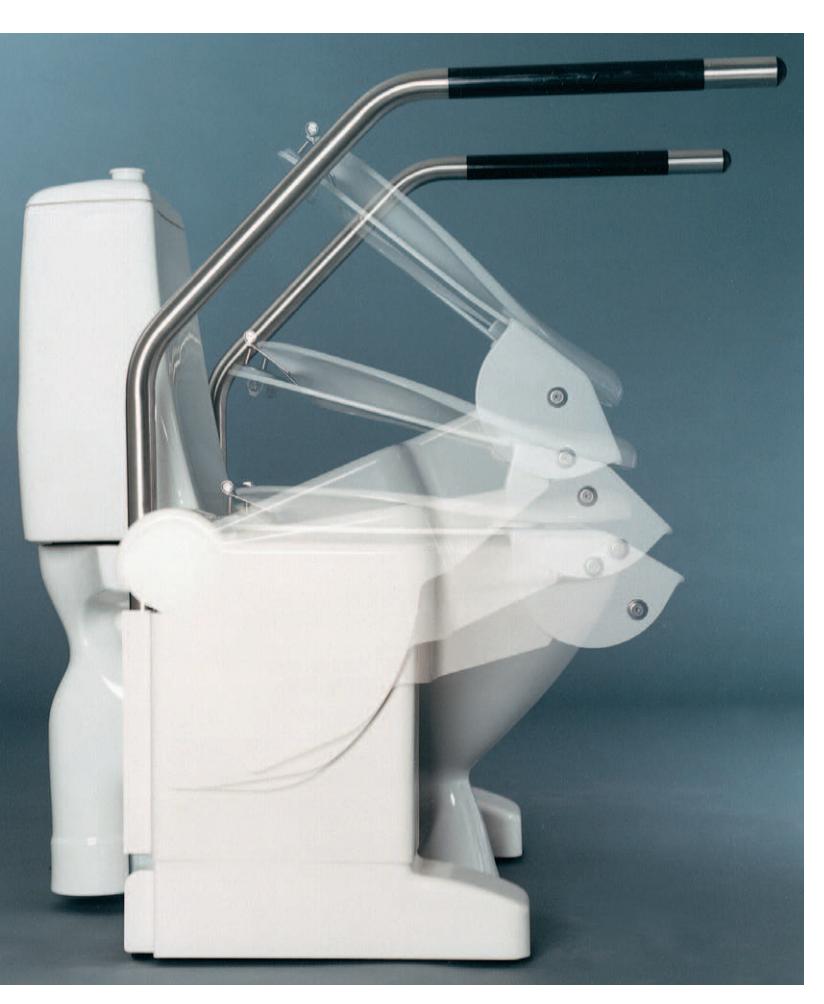
**Power lifts** make toilet use easier for people with limited leg or joint strength.
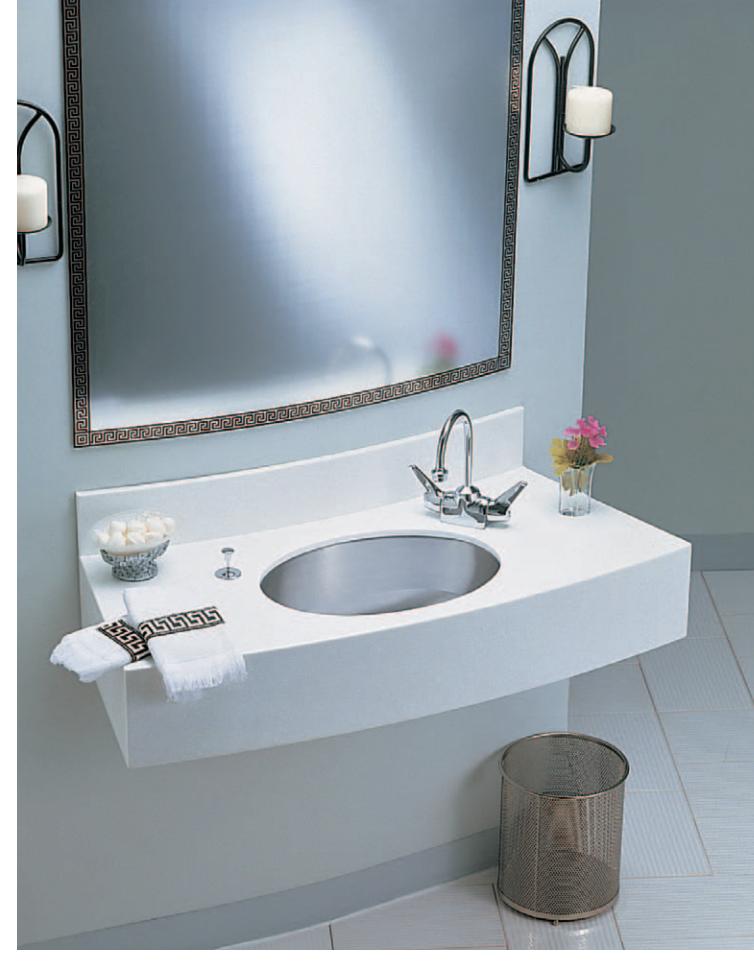
**A side-mounted faucet** is easier to reach on this wheelchairaccessible, roll-under, wall-mounted sink.
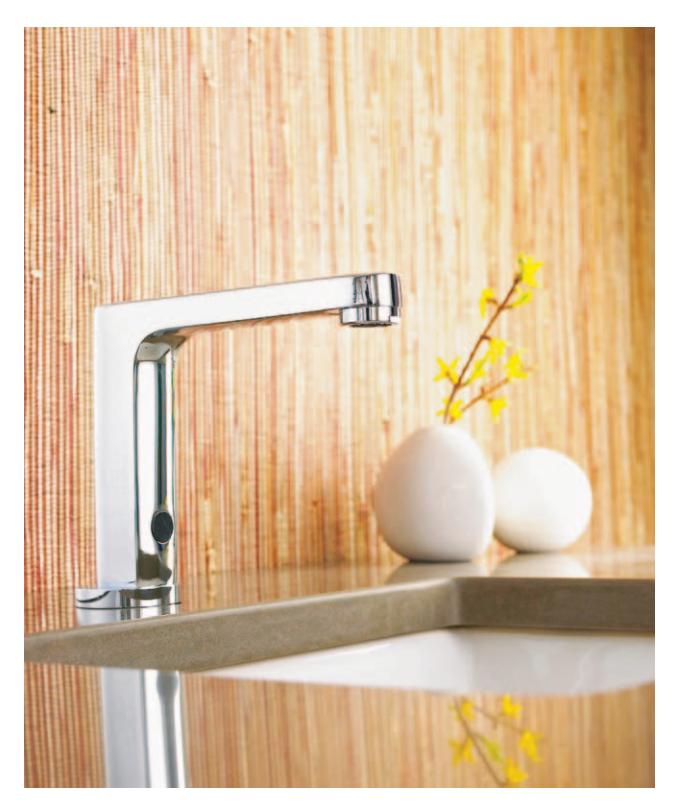
**A motion-sensing faucet** is not only easier for the elderly and children to use but helps stop the spread of disease.
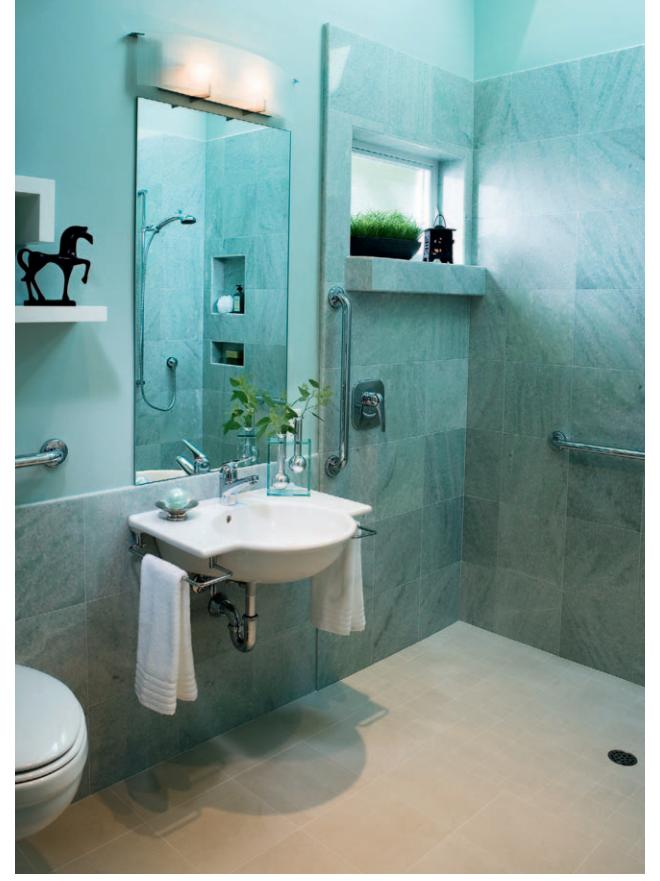
**This bathroom sacrifices nothing to style** but is completely accessible, with a roll-in curbless shower, roll-under sink with handy side ledges, and sturdy grab bars everywhere they might be needed.
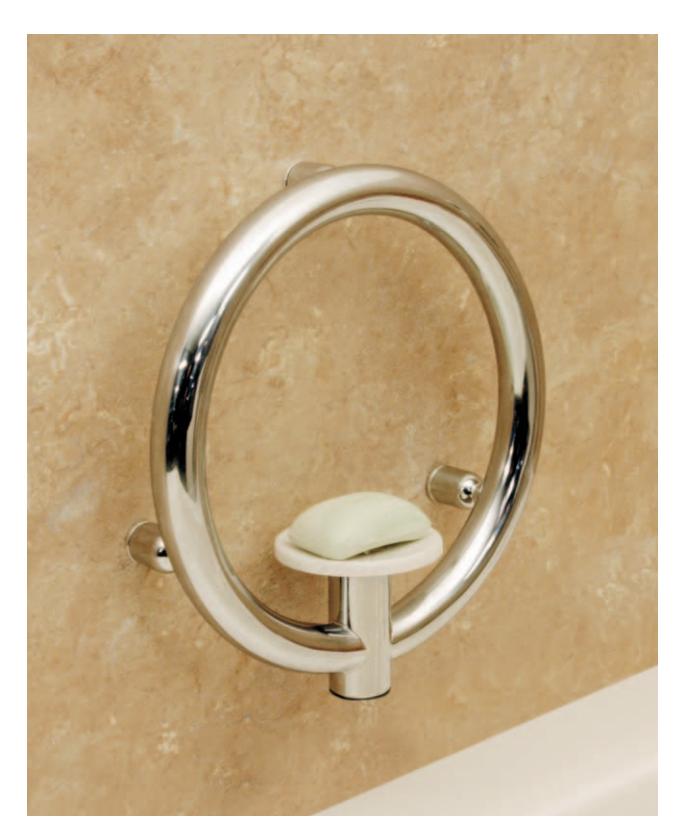
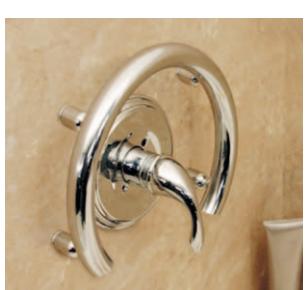
**A simple soap dish** becomes a useful tub side grab bar featuring an elegant circular shape.
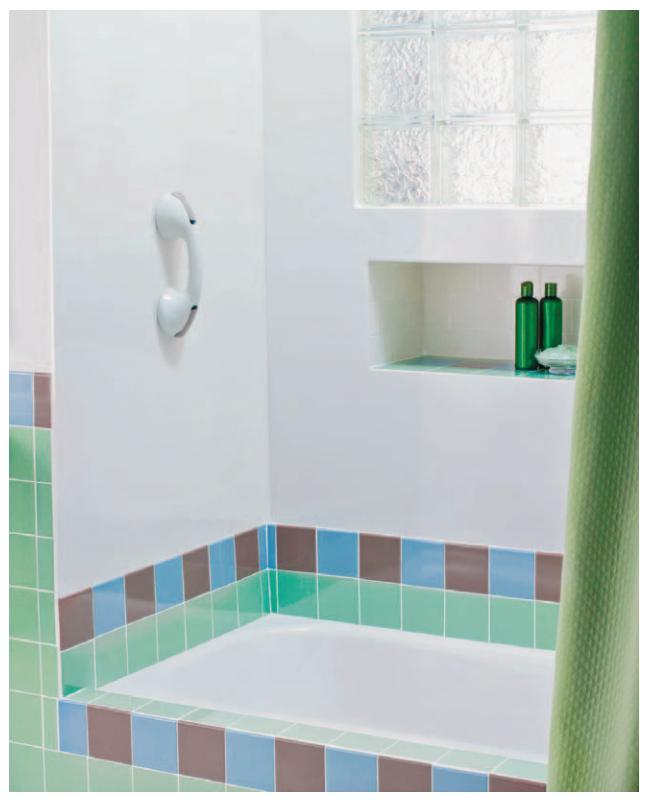
**This innovative grab bar** uses suction to hold to just about any bathroom surface, and it can be released and repositioned as needed with a click of the gray release tabs on either end.
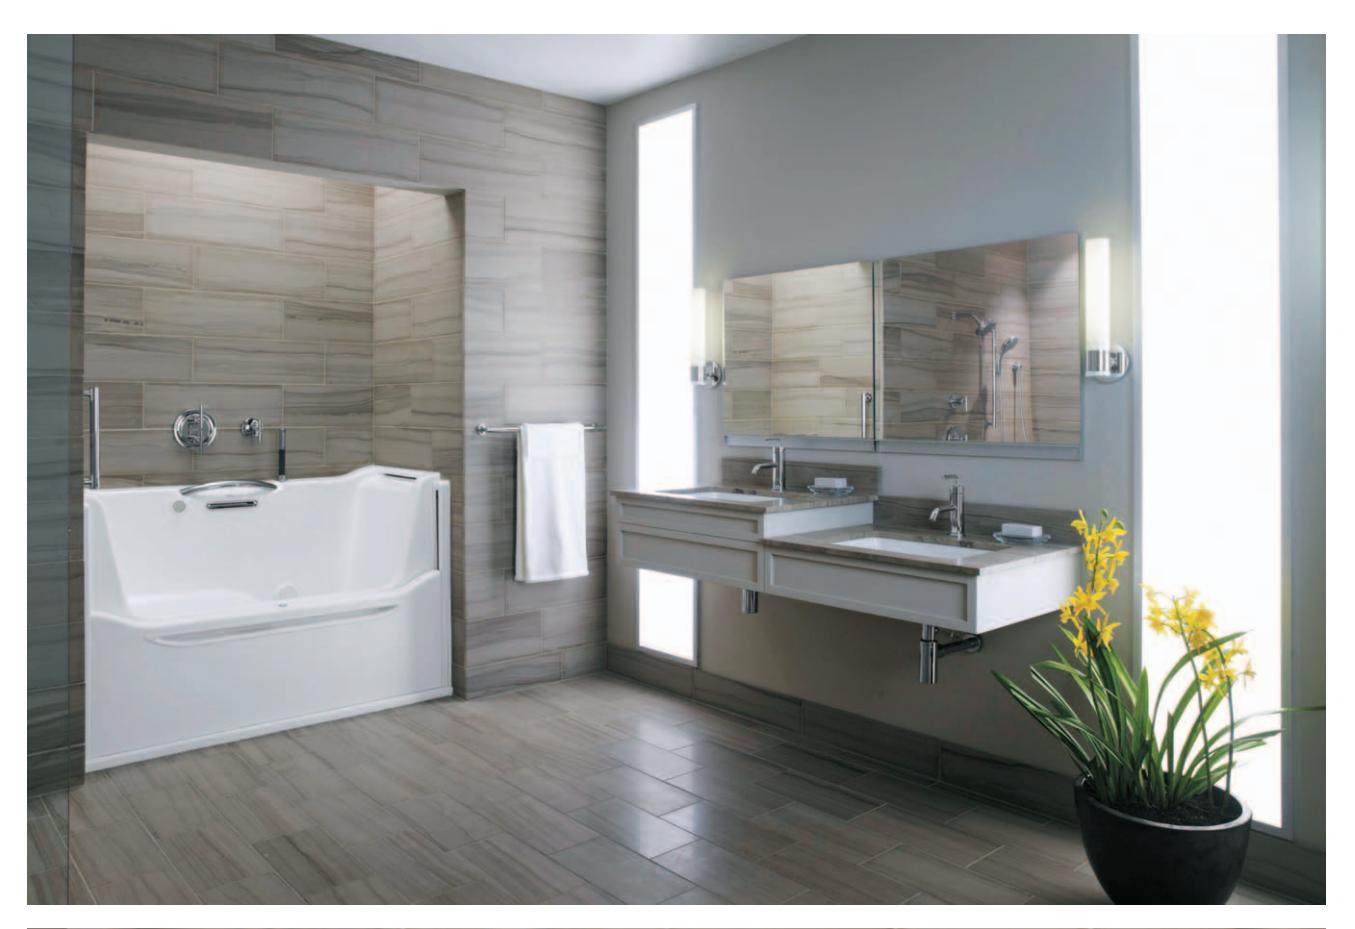
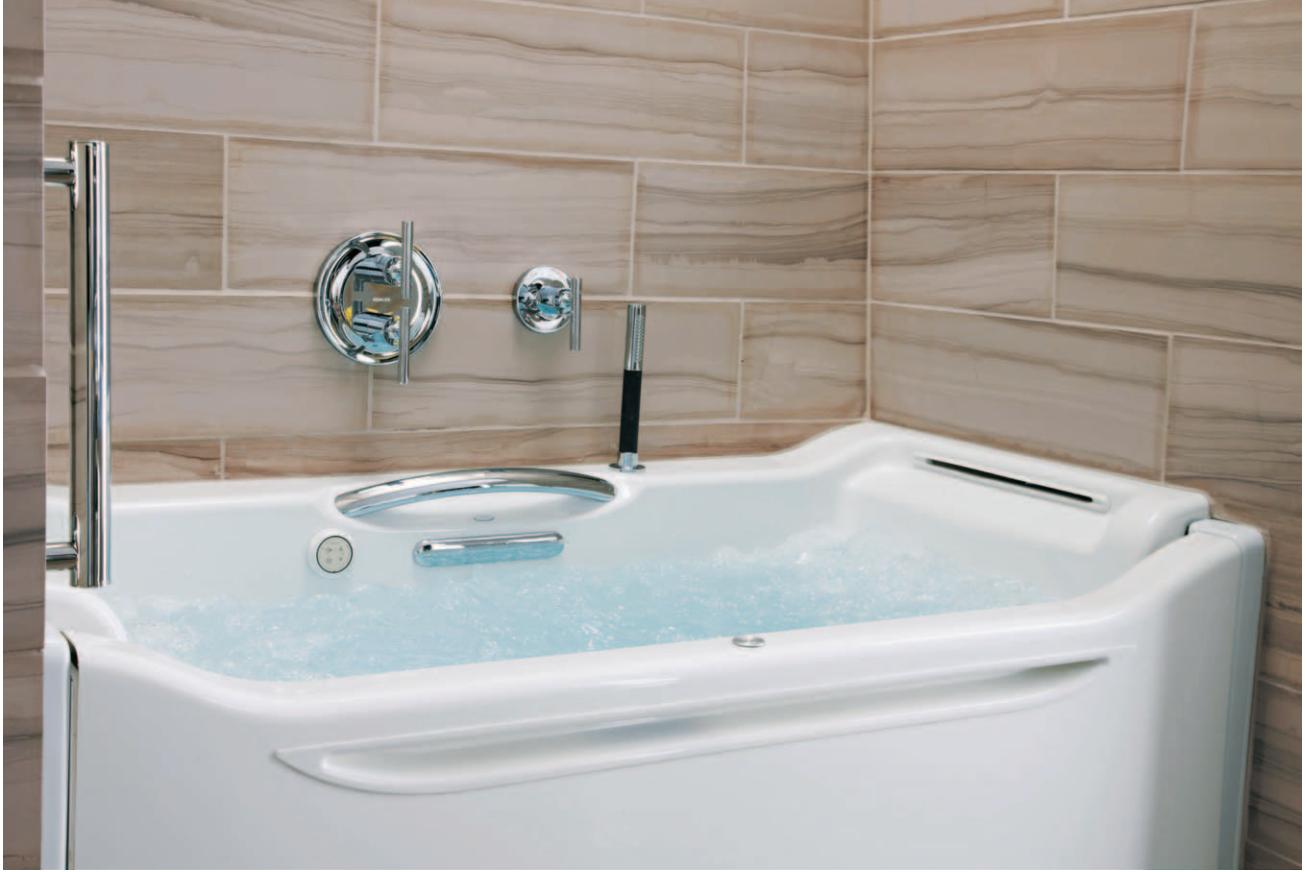
**This alcove tub** features a chair-height seat and a slide-down front wall. To take a bath, the user simply sits on the seat, swings their legs over, and pulls the wall up. The tub offers many amenities, including simple-to-use controls, a heater, and jets.
## Design Standards
Once you've drawn up your plan and created a materials list, you'll need to have them reviewed by your local building department. Getting approval early in the process can save you time and expense later. To help ensure success, here are some design standards for you to follow.
The National Kitchen and Bath Association (NKBA) publishes a list of bathroom design standards to help people plan rooms that are safe and accessible to all users (see Resources, page 252).
Your bathroom probably won't conform to all of the recommended standards, but they can help guide your overall plan. What your plan must include is everything prescribed by the local building codes, including plumbing and wiring codes.
## Bathroom Design Standards
Codes and permits are necessary to ensure safety in any remodel. They're not the most fun to focus on—not like choosing just the right floor covering or deciding between granite and marble countertops—but they are important.
- Plan doorways with a clear floor space equal to the door's width on the push side and greater than the door's width on the pull side.
- Design toilet enclosures with at least 36" × 66" of space; include a pocket door or a door that swings out toward the rest of the bathroom.
- Install toilet-paper holders approximately 26" above the floor, toward the front of the toilet bowl if possible.
- Place fixtures so faucets are accessible from outside the tub or shower. Add antiscald devices to tub and sink faucets (they are required for shower faucets).
- Avoid steps around showers and tubs, if possible.
- Fit showers and tubs with safety rails and grab bars.
- Install shower doors so they swing open into the bathroom, not the shower.
- Use tempered glass or another type of safety glass for all glass doors and partitions.
- Include storage for soap, towels, and other items near the shower, located 15" to 48" above the floor. These should be accessible to a person in the shower or tub.
- Provide natural-light openings equal to at least 10% of the floor area in the room.
- Illuminate all activity centers in the bathroom with task and ambient lighting.
- Provide a minimum clearance of 15" from the centerline of sinks to any sidewalls. Double-bowl sinks should have 30" clearance between bowls from centerline to centerline.
- Provide access panels for all electrical, plumbing, and HVAC systems connections.
- Include a ventilation fan that exchanges air at a rate of at least 8 air changes per hour.
- Choose countertops and other surfaces with edges that are smoothed, clipped, or radiused.
**NOTE:** Clear floor spaces within the bathroom can overlap.
## Recommended Clearances
A bathroom should be planned with enough approach space and clearance room to allow a wheelchair or walker user to enter and turn around easily. The guidelines for approach spaces (patterned areas) and clearances shown here include some ADA guidelines and recommendations from universal-design specialists.
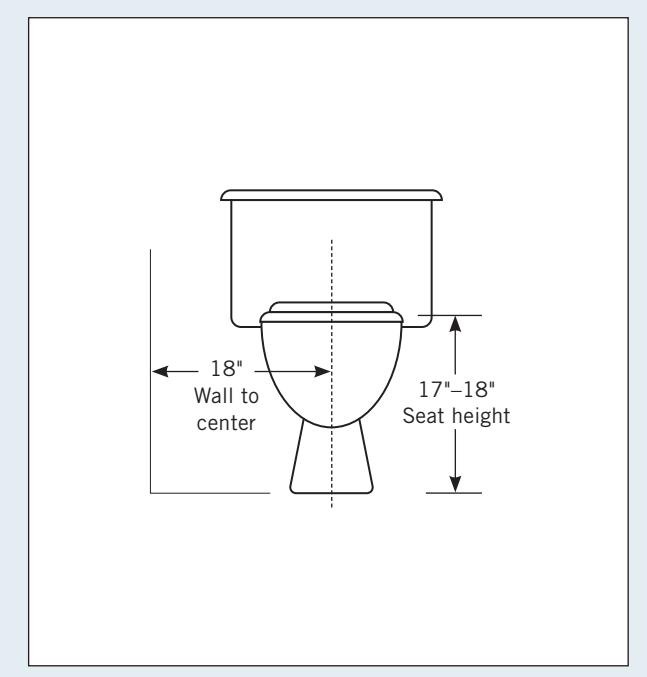
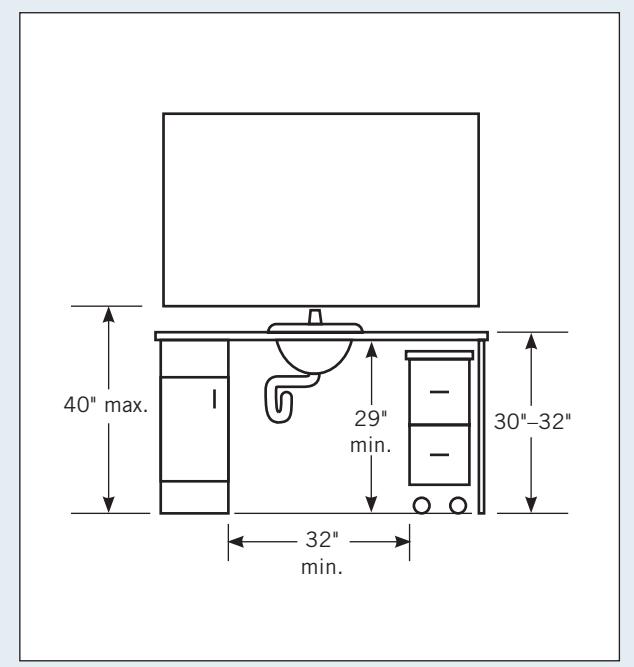
Toilet Sink + Vanity
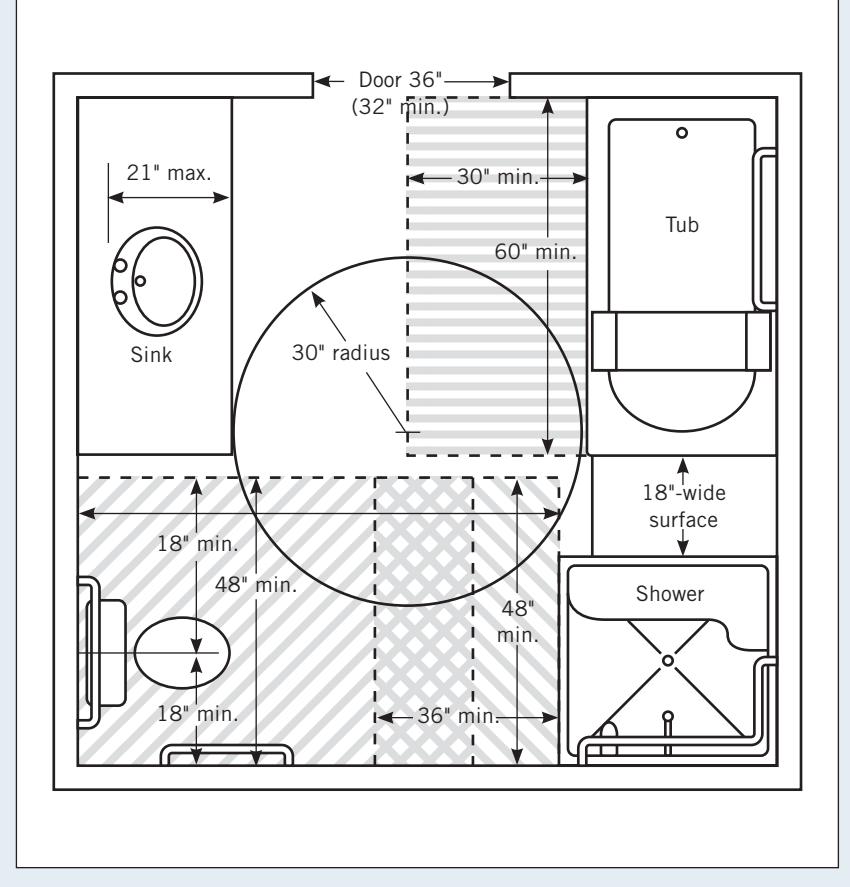
Shower Floor Plan

## Building Codes for Bathrooms
The following are some of the most common building codes for bathrooms. Contact your local building department for a list of all codes enforced in your area. Local codes may differ.
- The minimum ceiling height in bathrooms is 7'. (Minimum floor area is determined by clearances around fixtures.)
- Sinks must be at least 4" from side walls and have 21" of clearance in front. Sinks must be spaced 4" away from neighboring sinks and toilets and 4" away from bathtubs. Center of sink drain rough-in should be 18" from the floor, and stub outs should be 24" from the floor.
- Toilets must be centered 15" from side walls and tubs, with 21" clearance in front. New and replacement toilets must be low-flow models (no more than 1.6 gal. per flush). Toilet water supply stub out should be 6" above floor; center of toilet flange should be 12" from wall.
- Shower stalls must be at least 30" × 30", with 24" of clearance in front of shower openings. (An ideal minimum is 34" × 36".)
- Faucets for showers and combination tub-showers must be equipped with antiscald devices.
- Minimum supply-line diameter for bathroom sink or most toilets is 3⁄8", although standard practice and many local codes call for minimum 1⁄2" supply pipes.
- A ¾"-diameter supply-line must be used to supply two or more fixtures.
- Waste and drain lines must slope downward ¼" per foot toward the main DWV stack to aid flow and prevent blockage.
- Each bathroom must be wired with at least one 20-amp circuit for GFCI-protected receptacles and one 15-amp (minimum) circuit for light fixtures and vent fans without heating elements.
- All receptacles must be GFCI protected.
- There must be at least one permanent light fixture controlled by a wall switch.
- Wall switches must be at least 60" away from bathtubs and showers.
- Toilet, shower, vanity, and other bathroom compartments must have adequate lighting.
- Light fixtures over bathtubs and showers must be vaporproof, with a UL rating for wet areas.
- Vanity light fixtures with built-in electrical receptacles are prohibited. Most local codes do allow medicine chests with integral outlets, although they must be GFCI. Always check local codes before installing one.
- Jetted tub motors must be powered by dedicated GFCI-protected circuits. Switches for jetted tubs must be located out of reach of the tub.
- Bathroom vent ducts must terminate no less than 10' horizontally or 3' vertically above skylights.
***NOTE:** Codes for accessible bathrooms may differ.
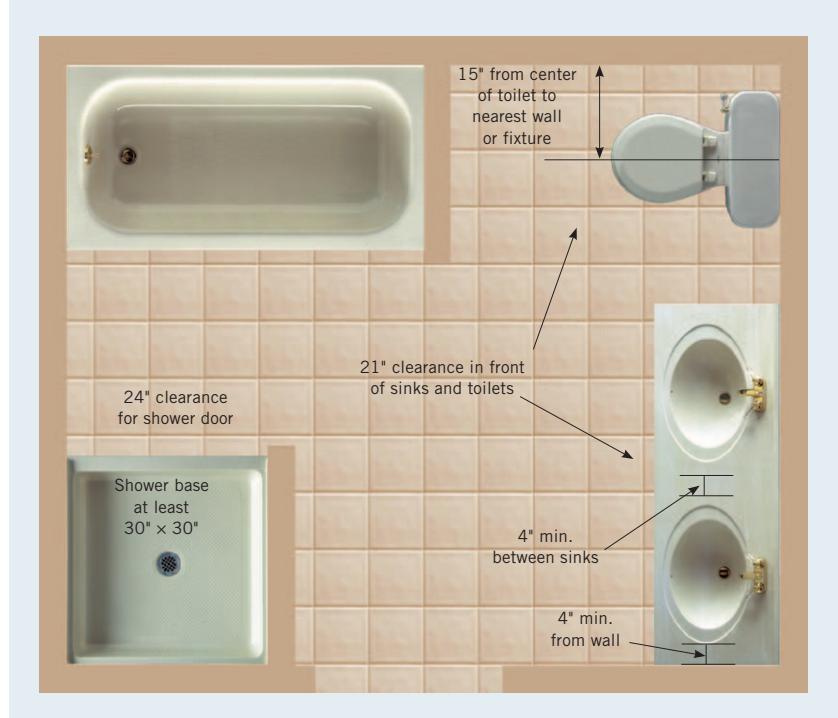
**Follow minimum clearance and size guidelines** when planning locations of bathroom fixtures. Easy access to fixtures is fundamental to creating a bathroom that is comfortable, safe, and easy to use.
## Drawing Plans
If your new bathroom involves a layout change or expansion, you'll find it helpful—and possibly required by the local building department—to create floor plans and elevation drawings. A floor plan illustrates an overhead view, while an elevation drawing illustrates a face-on view. Your drawings will be the basis for obtaining permits, negotiating contracts with tradespeople, and ordering products.
To begin, make a rough sketch of the existing floor plan. Measure and record the size and location of all existing fixtures and mechanicals from a fixed point. Sketch an elevation of each wall.
Use these rough sketches to draft a precise scale drawing of your existing floor plan. You can now sketch variations of your new bathroom using the scale drawing of the floor plan as a guide.
Use the overall dimensions of your new floor plan to sketch elevation options. In the end, the elevations and floor plans must agree. As an alternative, you can use your preliminary measurements to create floor plans digitally, using one of the plan-design software packages available.
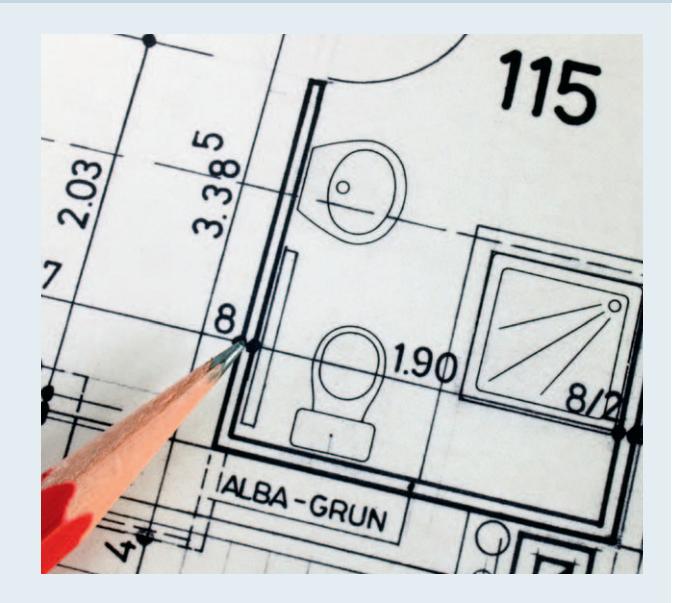
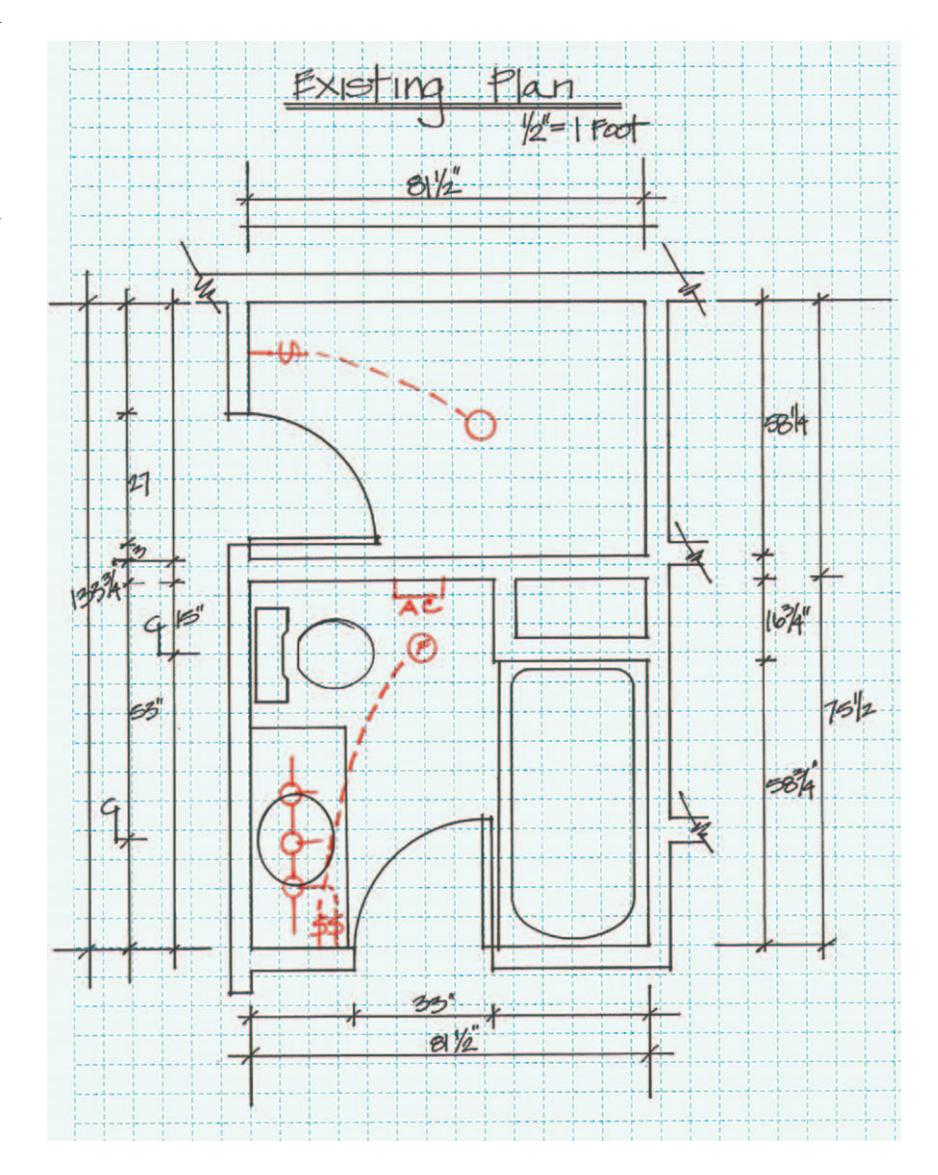
**The existing floor-plan draft** should contain dimension lines noting the accurate measurements of the space, including the location of all existing fixtures. This draft also shows the location of electrical circuits. It is the starting point for your remodeled bathroom plan.
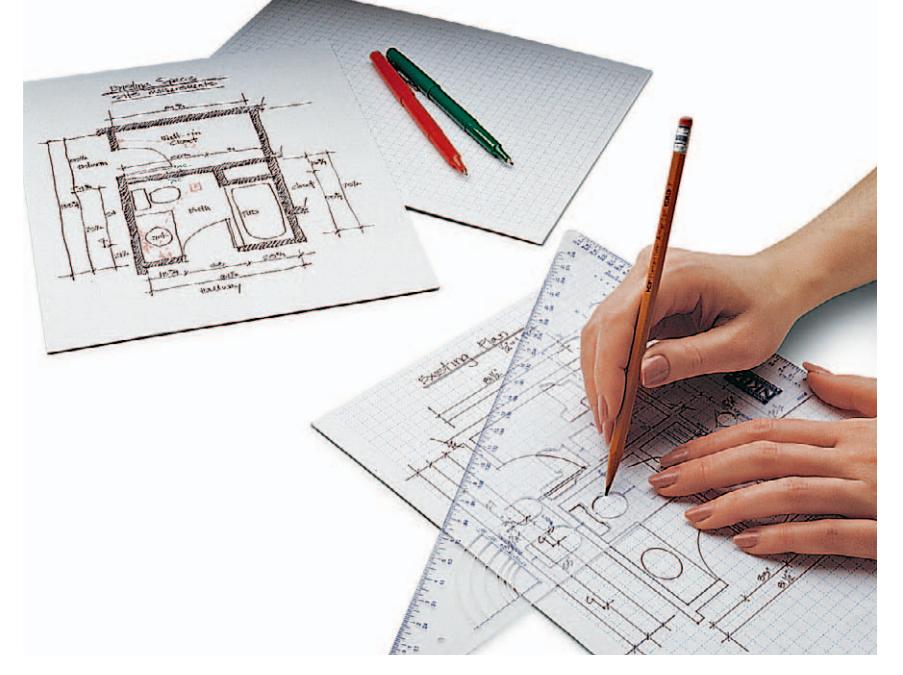
**A scale drawing** shows everything in accurate proportion. After measuring the dimensions of your existing bathroom, draft a floor plan, including any adjoining space that could be used for expansion of the layout (such as the storage closet shown on next page). The normal scale for bathroom plans is ½" = 1'.

## New Bathroom Floor-Plan Samples
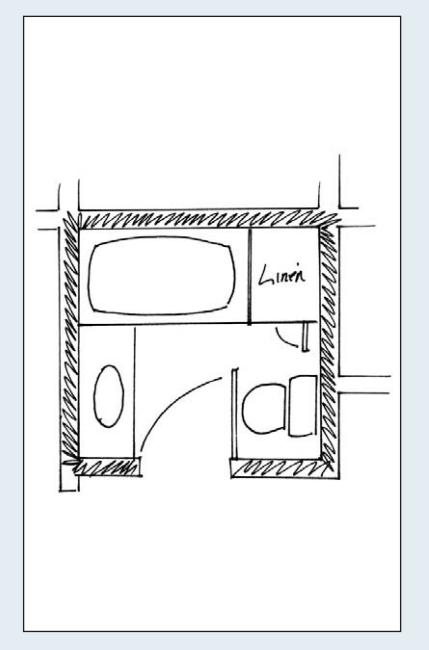
**Option A:** This floor-plan option of the draft on the opposite page shows a layout change within the existing space. The sink and vanity stay in the same place, but the tub and toilet have been switched. There is room to add a linen cabinet, but the space is still very cramped.
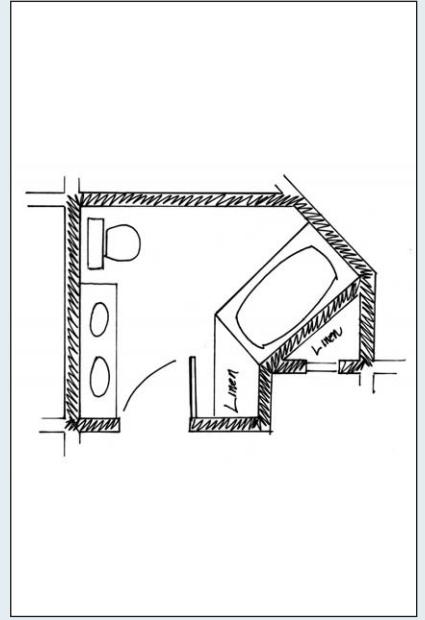
**Option B:** This option explores expanding the room and experimenting with some interesting angles. There is now plenty of floor space for two people, plus room for a double vanity and a large linen cabinet for increased storage.
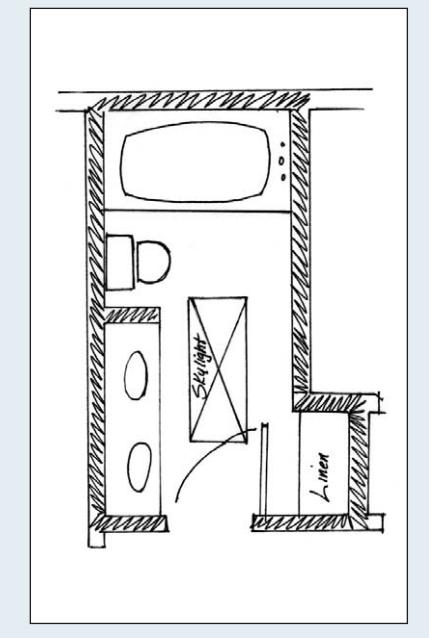
**Option C:** The existing room is expanded by annexing the adjacent closet. There's plenty of floor space, a double vanity, and a built-in linen cabinet. This plan has the practical benefits of Option B but is less expensive to build.

## Bathroom Elevation Options
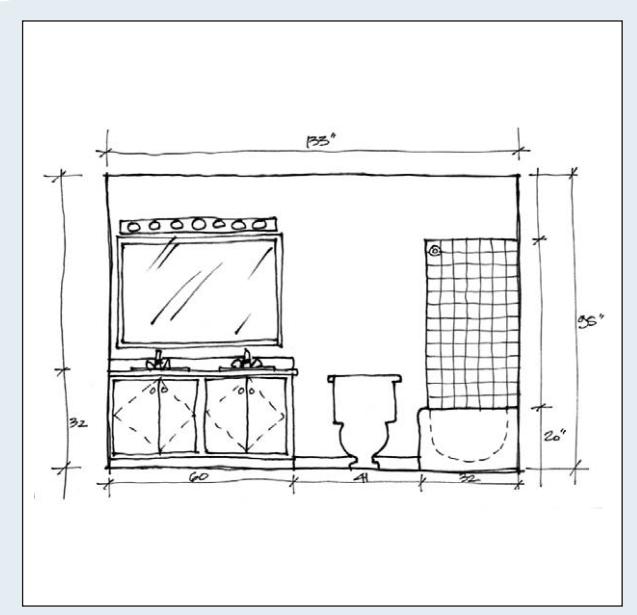
**Option A:** This elevation shows a simple arrangement with a standard mirror and light fixture. It also shows ceramic tile in the shower area, ending just above the shower curtain.
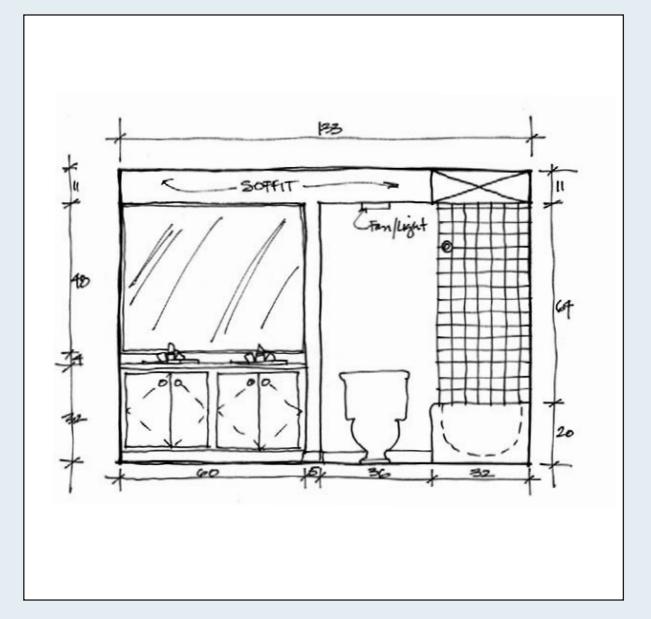
**Option B:** This variation shows a custom mirror framed in by a partition wall and a soffit that runs above the vanity, toilet, and tub. Lights are recessed in the soffit.
## Sample Plumbing Layouts
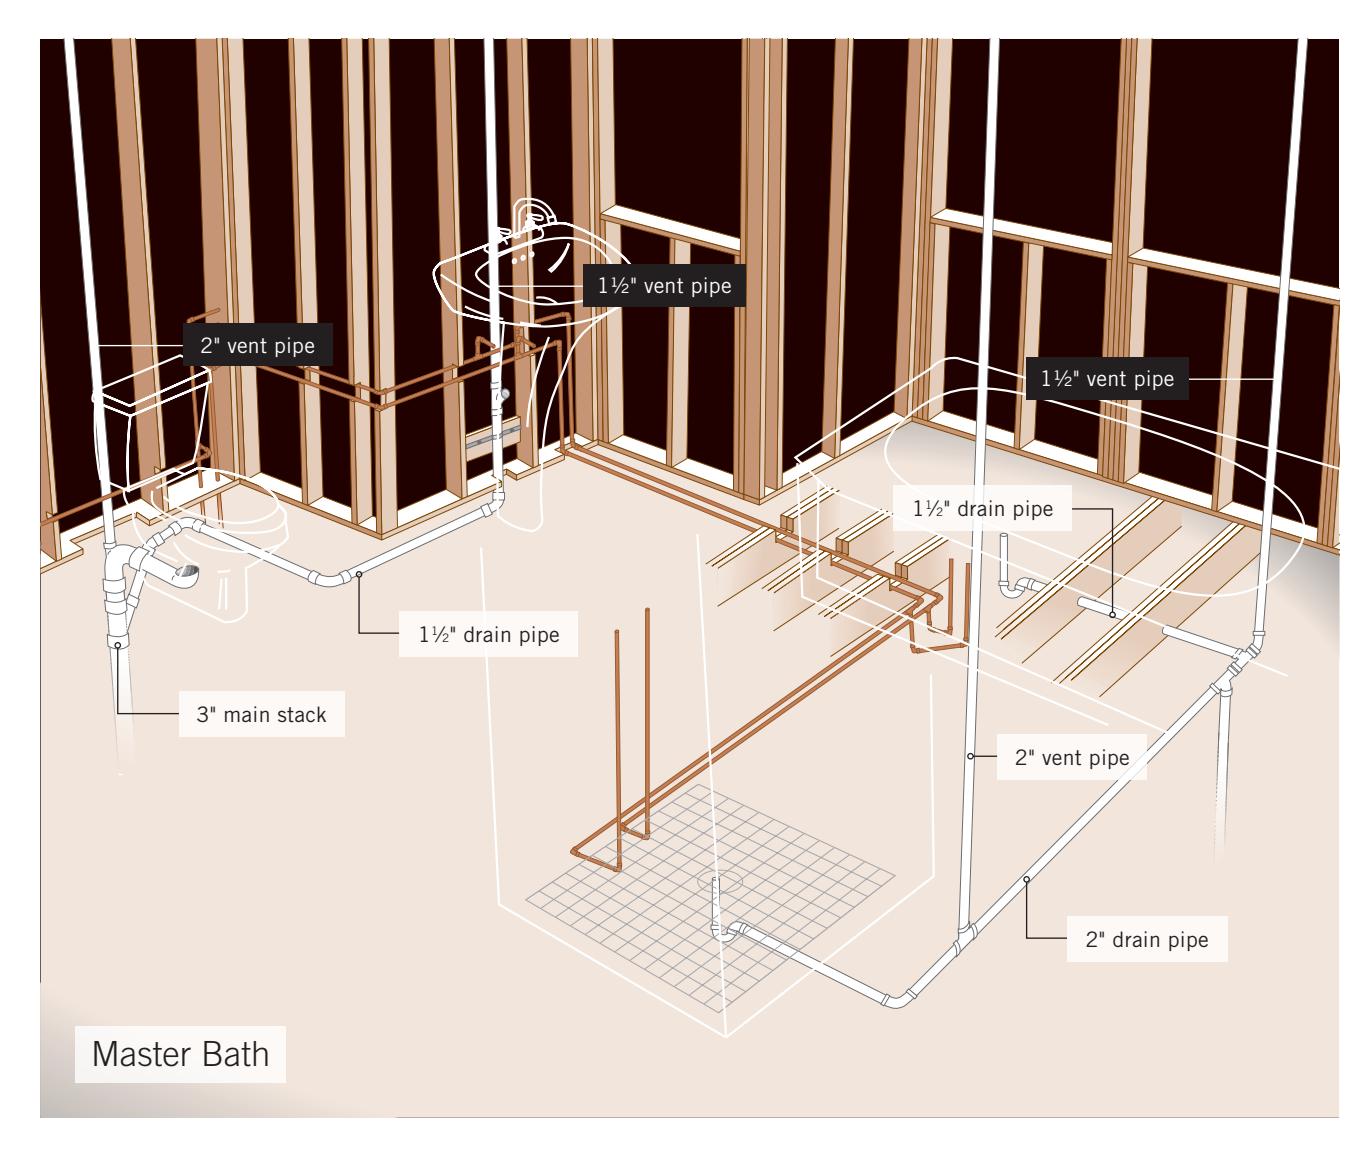
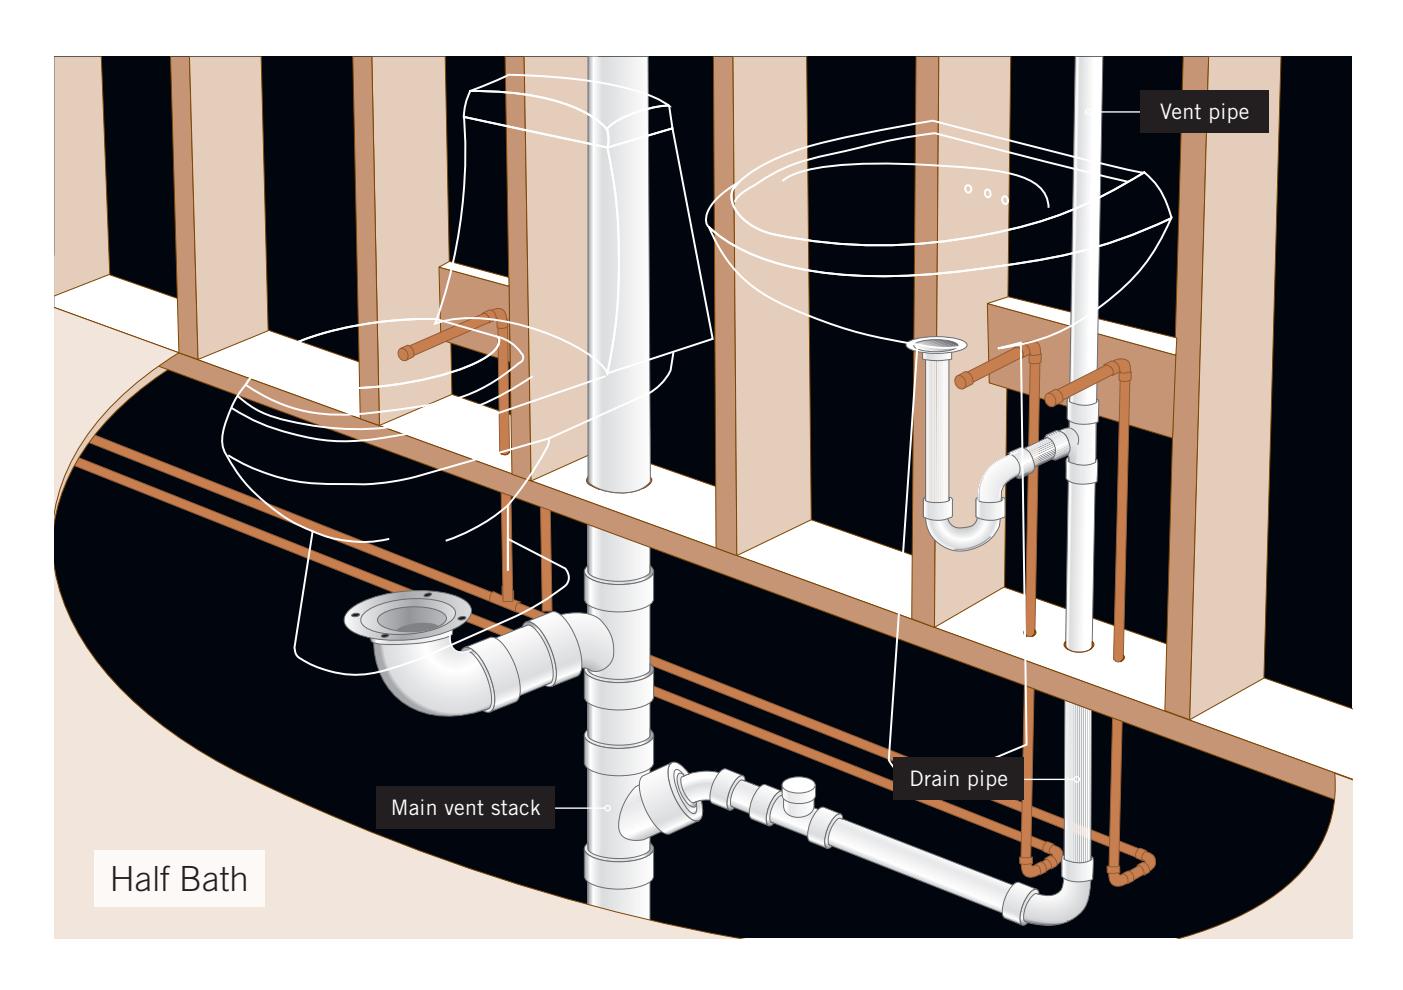
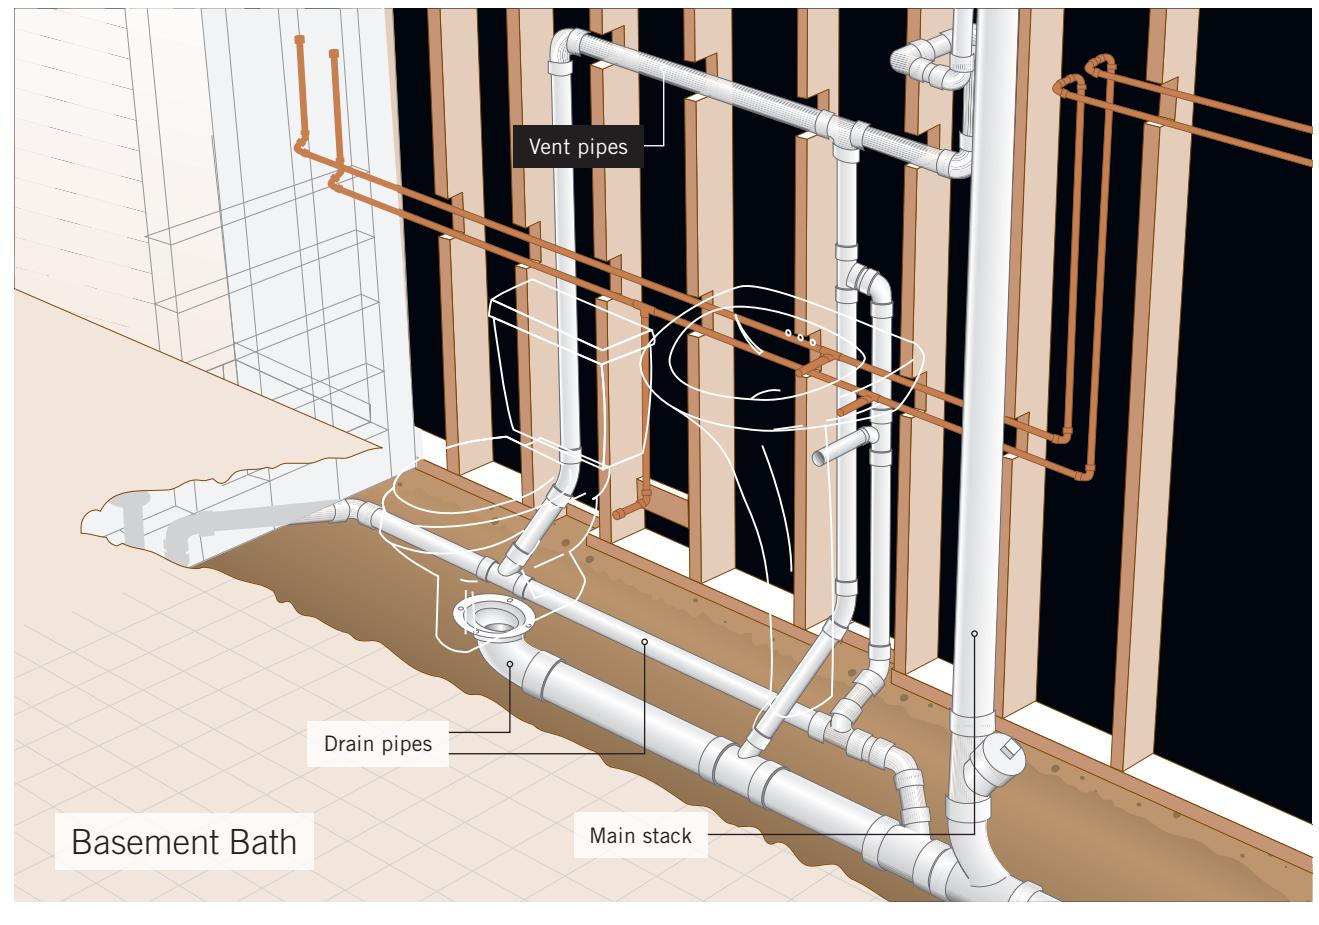
These three-dimensional illustrations show how various fixtures, and different bathroom arrangements, are plumbed. This is for perspective; you can find more information on precise measurements and code requirements on page 49. However, 3D renderings such as these allow the homeowner to see how the space works, and how all the elements in the room relate to the space and to one another. These types of illustrations are a good way to detect any trouble spots in a new bathroom or remodeling project.
You need to be only modestly comfortable with computer technology to take advantage of one of the many 3D home-design software packages available. Any of them will allow you to produce these types of renderings of your own space. However, investing in design software makes the most sense if you plan on tackling other projects throughout the home in the future. Some of these products include the ability to render outdoor structures as well, which can be a big help if you think you'll ever want to modify or add a deck, patio, or other outdoor structure.
## Removal + Demolition: Toilets
The toilet is the first fixture to be removed in most remodeling projects. Loosening corroded or rusted nuts and bolts is the most difficult part of the process.
Old toilets that will not be reinstalled may be broken up into small, easily managed pieces using a sledgehammer. Disconnect the toilet and cover it with a heavy blanket before breaking it. Wear eye protection, long sleeves, and heavy gloves during the demolition.
### Tools + Materials
Adjustable wrench
Ratchet wrench and sockets
Screwdriver
Sponge
Rag
Drop cloth
Putty knife
Eye and ear protection
Basin wrench
Work gloves
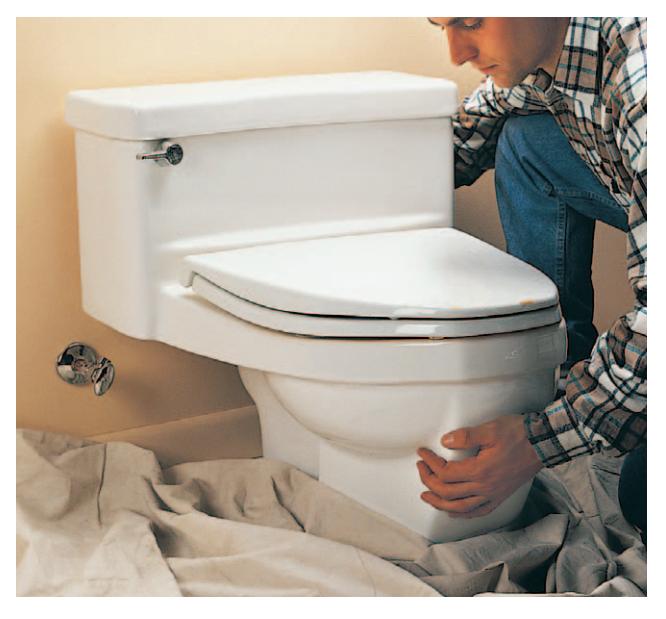
**Most toilets are fragile** and should be removed during full remodeling projects, even if you do not plan to replace them. Always use care when handling any fixture made of china or porcelain.
### Tips for Removing Toilets
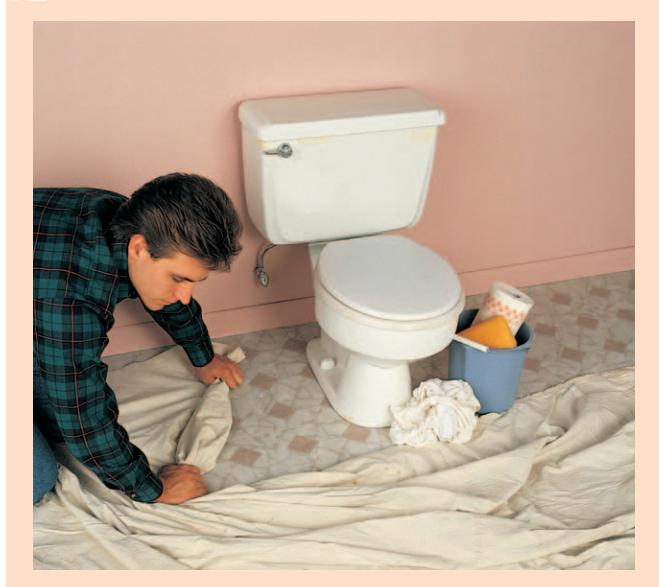
**Protect your floor** with a drop cloth when removing the toilet if you plan to keep the original floor covering. Residue from the wax ring seal between the bottom of the toilet and the toilet flange is very difficult to remove from floor coverings.
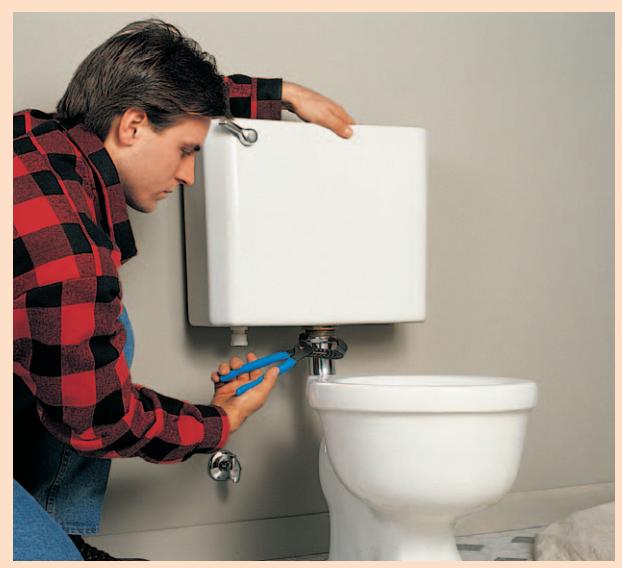
Disconnect any pipes between a wall-mounted toilet tank and the bowl after turning off the water supply and emptying the tank. Older toilets often have a metal elbow that connects the tank to the bowl. Set 2 × 4 braces below the tank before detaching it from the wall.

### How to Remove a Toilet + Wax Ring
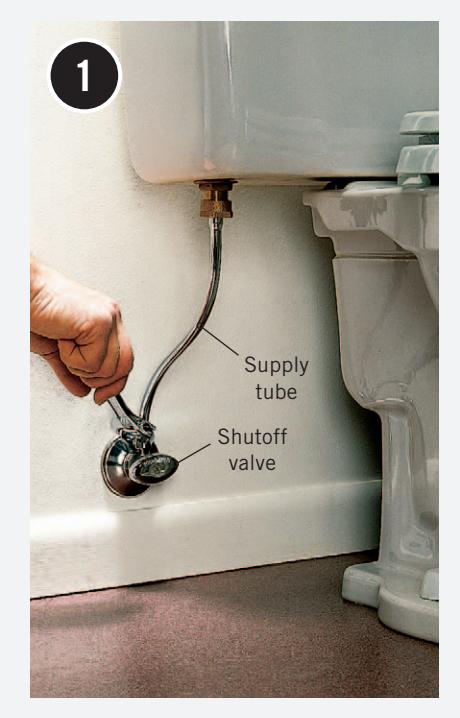
**Turn off the water,** then flush the toilet to empty the tank. Use a sponge to remove the remaining water in the tank and bowl. Disconnect the supply tube with an adjustable wrench.
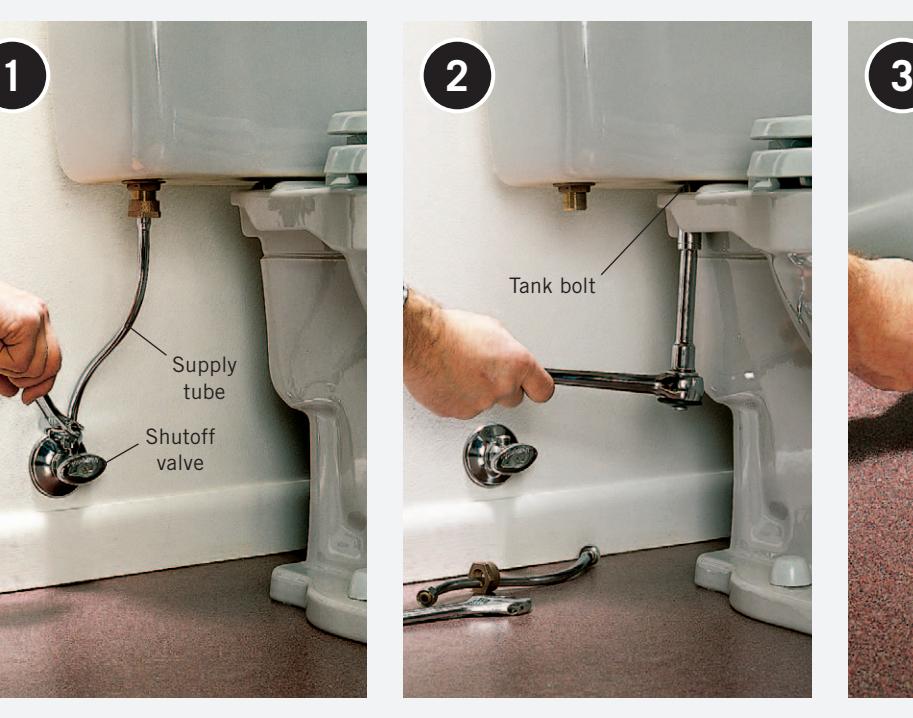
**Remove the nuts** from the tank bolts with a ratchet wrench. Carefully remove the tank and set it aside.
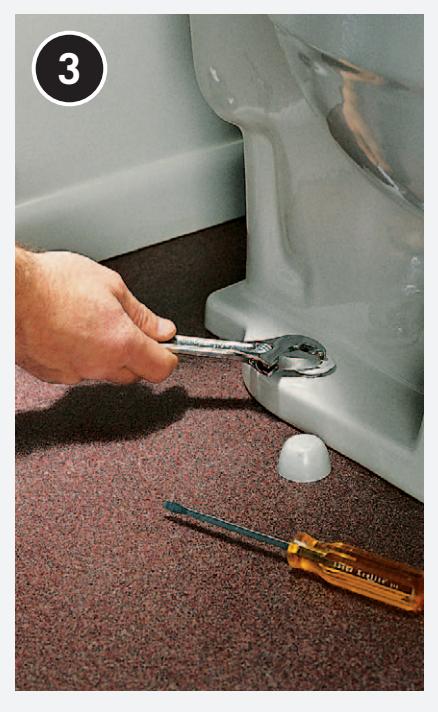
**Pry off the floor-bolt trim caps** at the base of the toilet, then remove the floor nuts with an adjustable wrench.
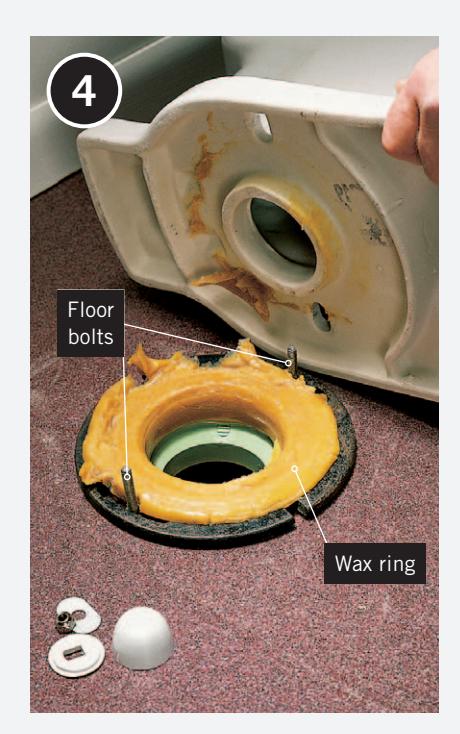
**Straddle the toilet** and rock the bowl from side to side until the seal breaks. Carefully lift the toilet off the floor bolts and set it on its side. A small amount of water may spill from the toilet trap.
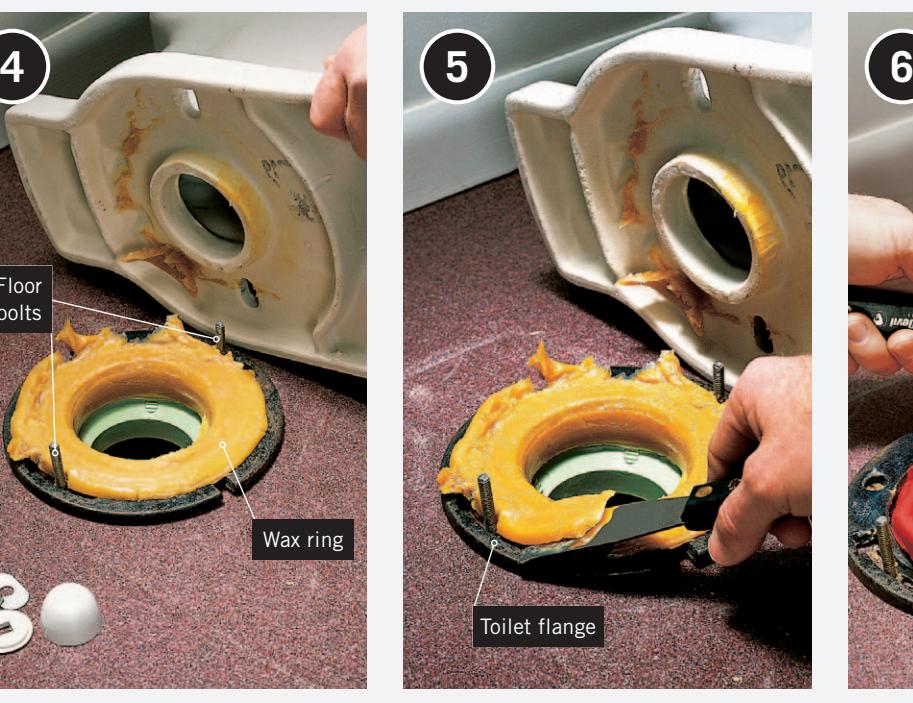
**Remove the old wax** from the toilet flange in the floor. Plug the drain opening with a damp rag to prevent sewer gases from rising into the house.
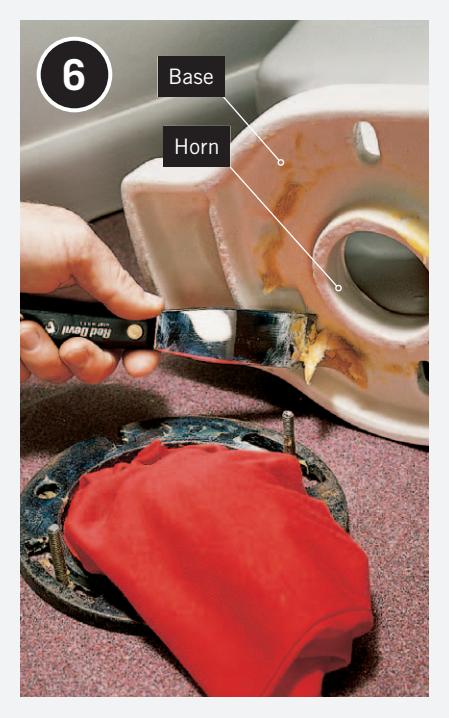
**If the old toilet will be reused,** clean the old wax and putty from the horn and the base of the toilet.
## Removal + Demolition: Sinks + Cabinets
Replacing bathroom sinks, countertops, and cabinets is a quick and relatively inexpensive way to give your bathroom a fresh, new look.
First, disconnect the plumbing, then remove the sink basin or integral sink-countertop unit. Next, take out any remaining countertops. Finally, remove the cabinets and vanities.
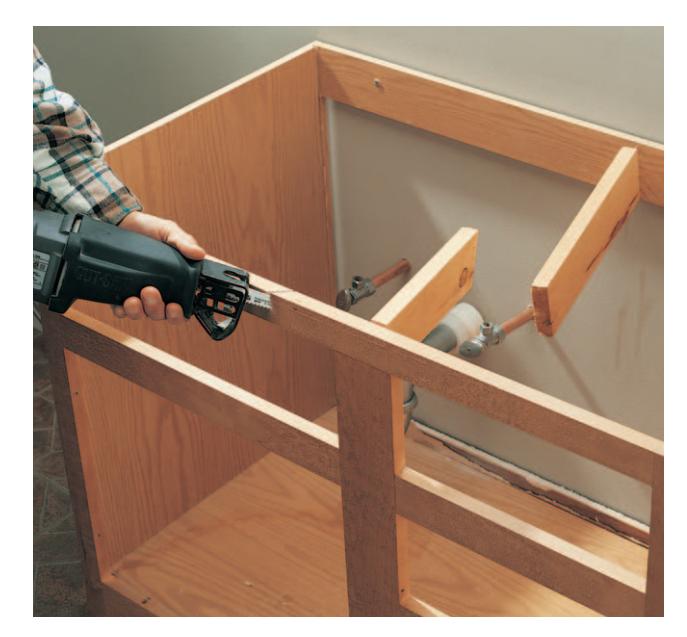
**Cut apart cabinets and vanities** to simplify their removal and disposal. A reciprocating saw or jigsaw works well for this job. Wear eye protection.
### TOOLS + MATERIALS
Bucket
Utility knife
Screwdriver
Basin wrench
Adjustable wrench
Channel pliers
Reciprocating saw
Hacksaw or pipe cutter
Flat pry bar
Work gloves
Eye and ear protection

### How to Disconnect Sink Plumbing
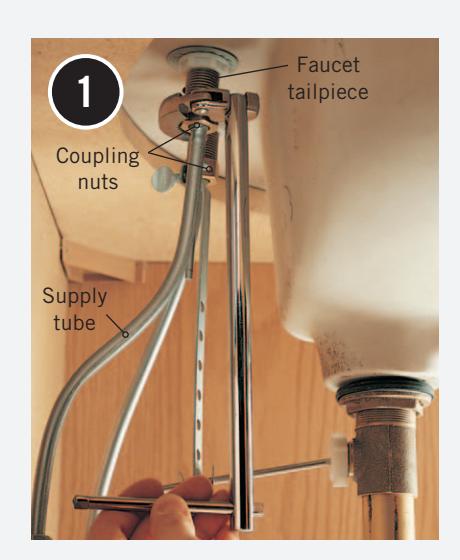
**Turn off the shutoff valves,** then remove the coupling nuts that connect the supply tube to the faucet tailpieces using a basin wrench. If the supply tubes are soldered, cut them above the shutoff valves.
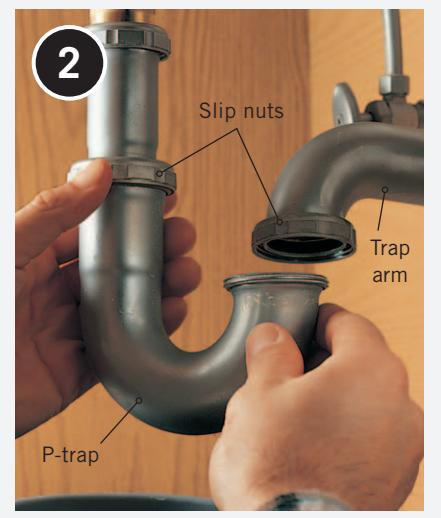
With a bucket beneath, remove the P-trap by loosening the slip nuts at both ends. If the nuts will not turn, cut out the drain trap with a hacksaw. When prying or cutting, take care to avoid damaging the trap arm that runs into the wall.
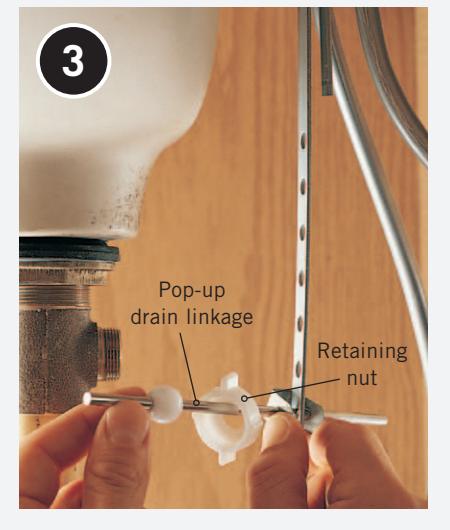
**Disconnect the pop-up drain linkage** from the tailpiece of the sink drain by unscrewing the retaining nut.
### TIPS FOR REMOVING SINKS
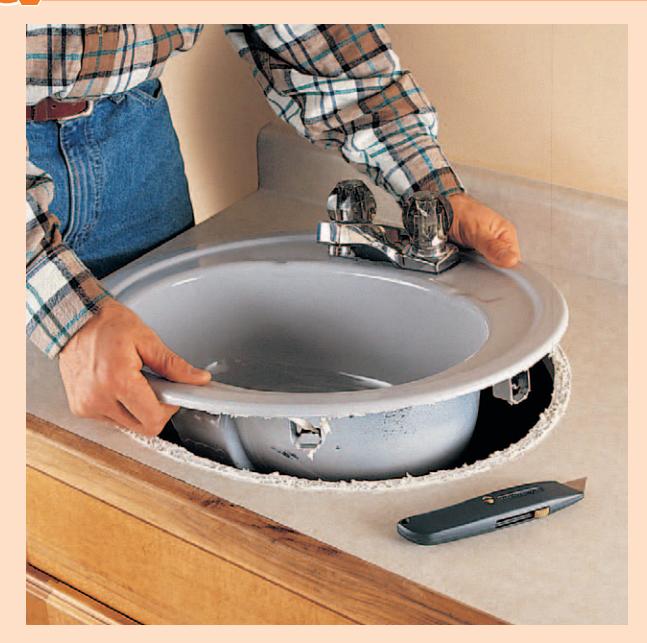
**Self-rimming sink:** Disconnect the plumbing, then slice through any caulking or sealant between the sink rim and the countertop using a utility knife. Lift the sink off the countertop.
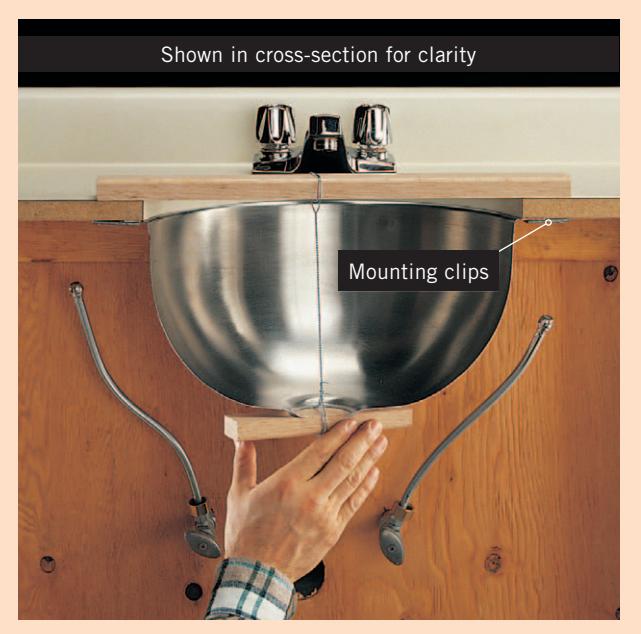
**Undermount sink:** Disconnect the plumbing, including the drain tailpiece. To support the sink, tie wire around a piece of scrap wood and set the wood across the sink opening. Thread the wire down through the drain hole and attach it to another scrap of wood. Twist the wire until taut, then detach the mounting clips. Slice through any caulking, slowly loosen the wire, then remove the sink.
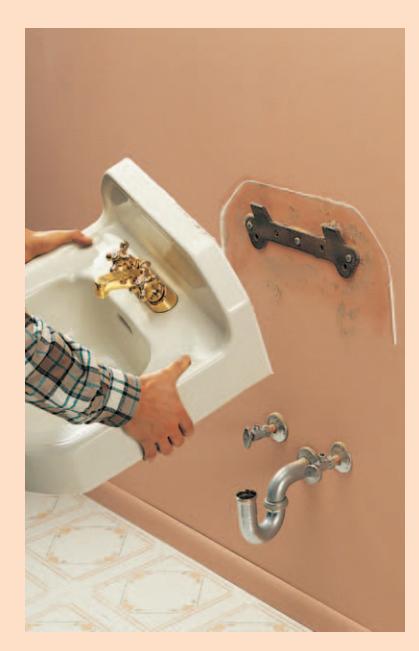
**Wall-mounted sink:** Disconnect the plumbing, slice through any caulk or sealant, then lift the sink off the wall brackets. For models attached with lag screws, wedge 2 × 4s between the sink and floor to support it while the screws are removed.
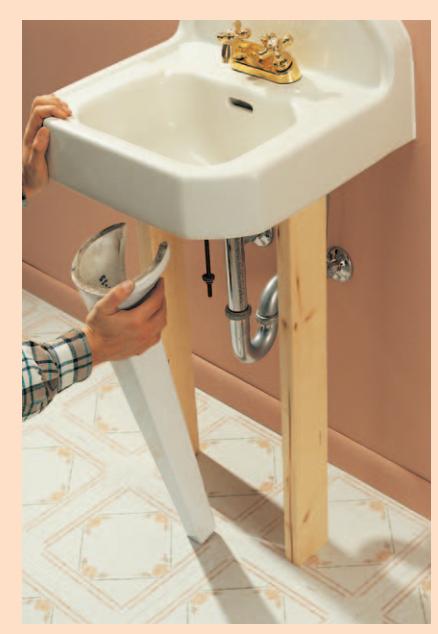
**Pedestal sink:** Disconnect the plumbing. If the sink and pedestal are bolted together, disconnect them. Remove the pedestal first, supporting the sink from below with 2 × 4s. Lift the sink off the wall brackets (photo, left).
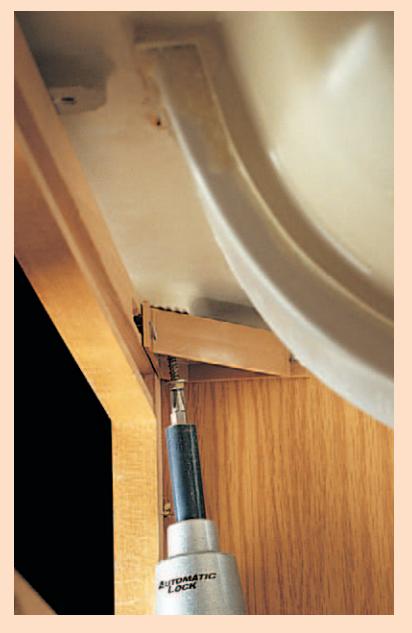
**Integral sink-countertop:** Disconnect the plumbing, then detach the mounting hardware underneath the countertop. Slice through any caulk or sealant between the countertop and wall and between the countertop and vanity. Lift the sink-countertop unit off the vanity.
## Removal + Demolition: Showers + Tubs
Bathtubs and showers are heavy and bulky fixtures, so they pose special problems for removal. Unless the tub or shower has unique salvage value, cut or break the unit into pieces for easy removal and disposal. This technique allows one person to handle most of the disposal chores. Always wear eye protection and heavy gloves when cutting or breaking apart fixtures.
For most tubs and showers, you need to remove at least 6 inches of wall surface around the tub or shower pan to gain access to fasteners holding it to the wall studs. Maneuvering a tub out of an alcove is also easier when the wall surfaces are removed. If you are replacing the entire wall surface, do all the demolition work before removing the tub.
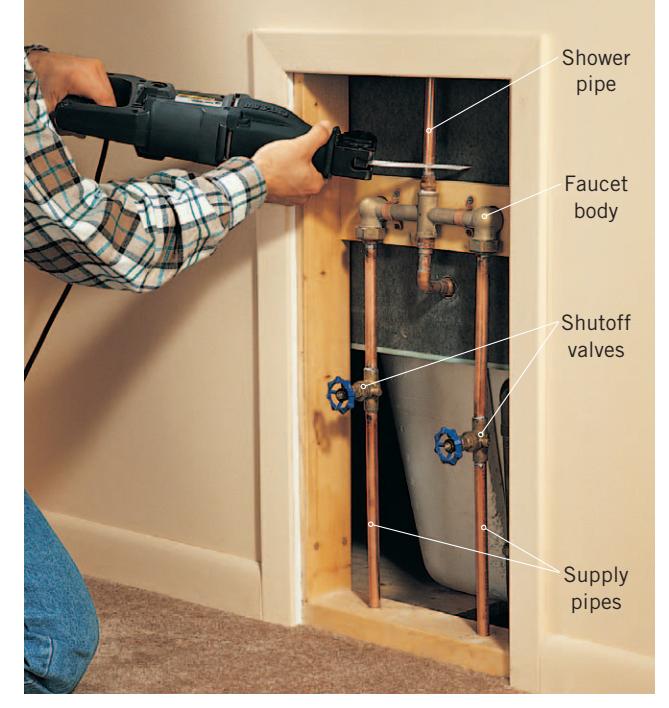
**Disconnect the faucet** through the access panel, usually located on the wall surface behind or next to the tub faucet and drain. (If the tub does not have an access panel, add one.) Turn off the shutoff valves, then cut the shower pipe above the faucet body. Disconnect or cut off the supply pipes above the shutoff valves.
### TOOLS + MATERIALS
Reciprocating saw
Hacksaw
Wrecking bar
Wire cutter
2 × 4 or 1 × 4 lumber
Channel pliers
Adjustable wrench
Hammer
Eye and ear protection
Rag
Screwdriver
Flat pry bar
Masonry chisel
Utility knife
Work gloves

### How to Remove Handles + Spouts
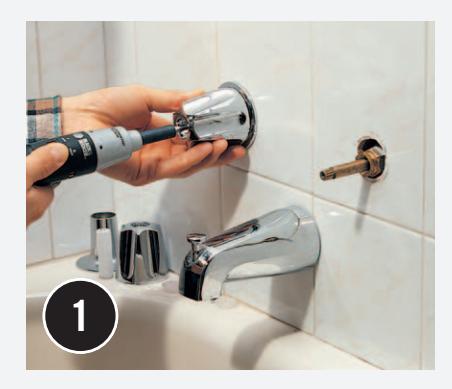
**Shut off the water supply,** then remove the faucet handles by prying off the covers and unscrewing the mounting screws.
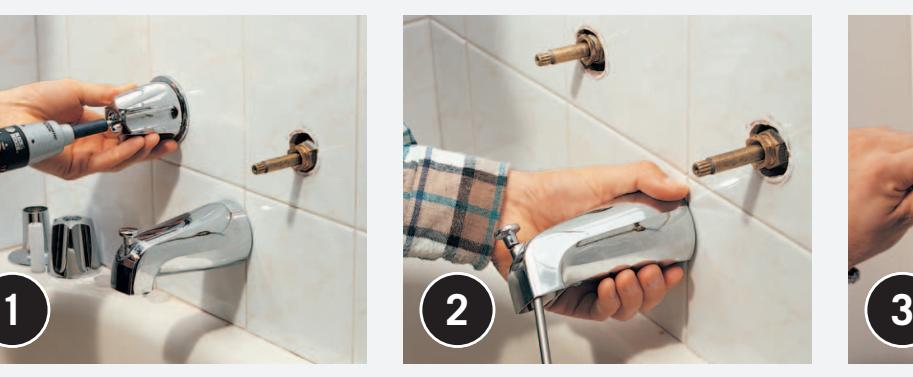
**Remove the tub spout** by inserting a screwdriver into the spout and twisting counterclockwise until it unscrews from the stub-out that extends from the wall plumbing.
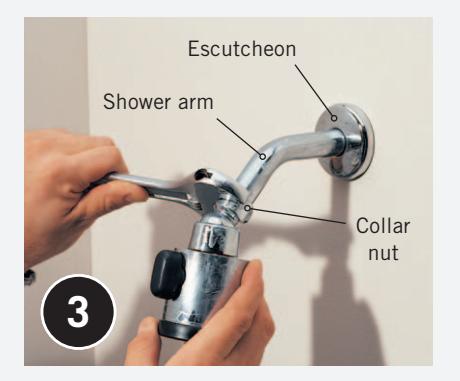
**Unscrew the collar nut** to remove the showerhead. Loosen the escutcheon, then twist the shower arm counterclockwise to unscrew it from the wall plumbing.
### How to Disconnect Drain Plumbing
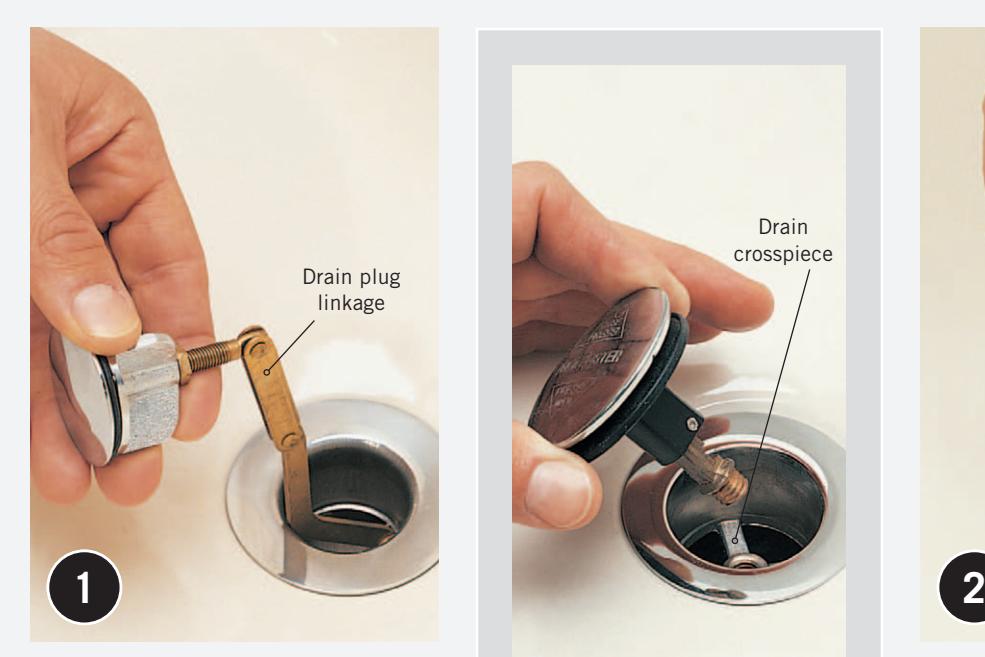
**Remove the drain plug.** Most bathtub plugs are connected to drain-plug linkage that is lifted out along with the plug.
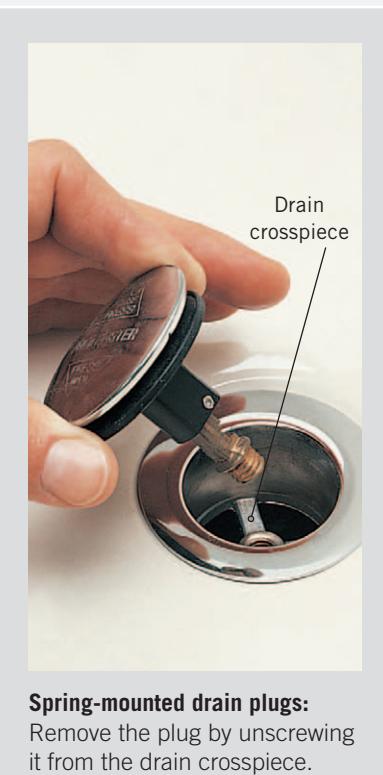
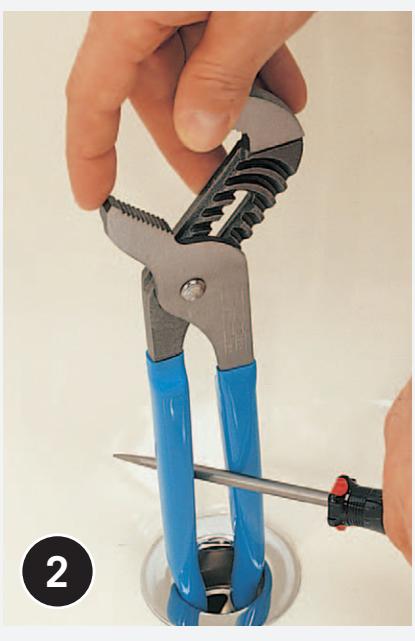
**Disconnect the drain assembly** from the tub by inserting a pair of pliers into the drain opening and turning the crosspiece counterclockwise. Insert a long screwdriver between the handles and use it to twist the pliers.
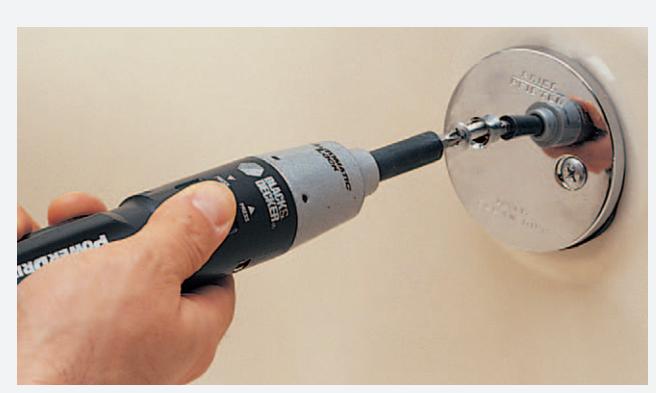.")
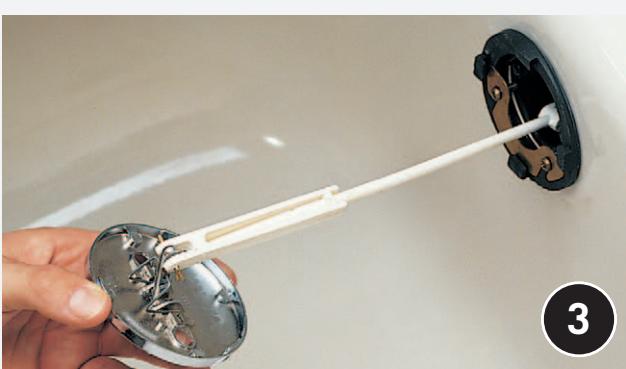.")
**Remove the screws** in the overflow coverplate (top photo). Remove the coverplate along with any attached drain plug (bottom photo).
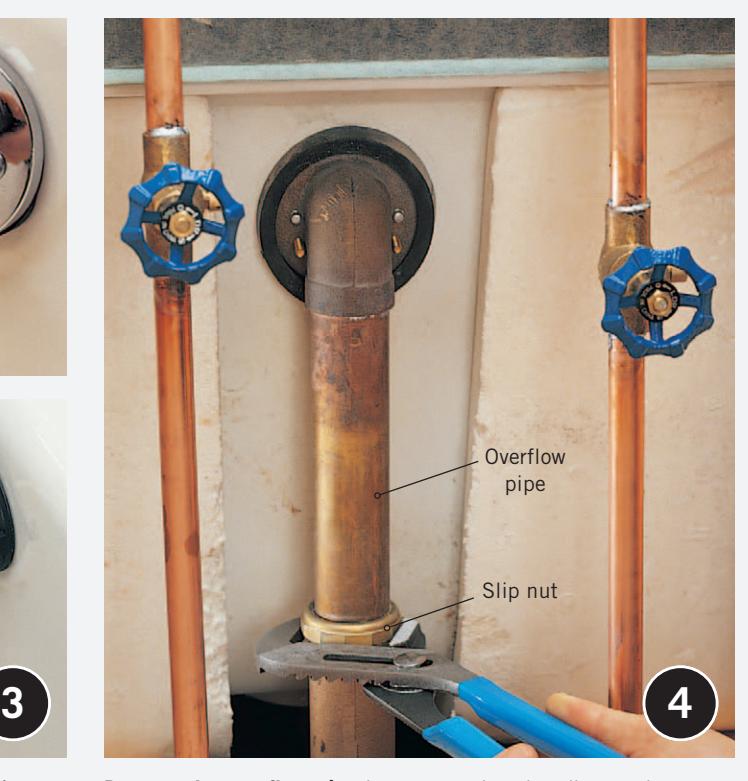
**Remove the overflow pipe** by unscrewing the slip nut that holds it to the rest of the drain assembly, then lift out the pipe. Stuff a rag into the waste pipe after the overflow pipe is removed to keep debris from entering the trap.

### How to Remove a Shower Stall
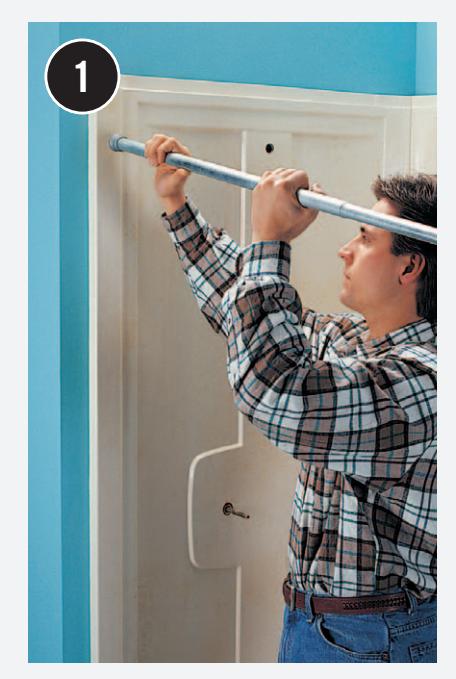
**After disconnecting the faucet handles, spout, and showerhead,** remove the shower curtain rod or shower door, molding or trim, and any other accessories.
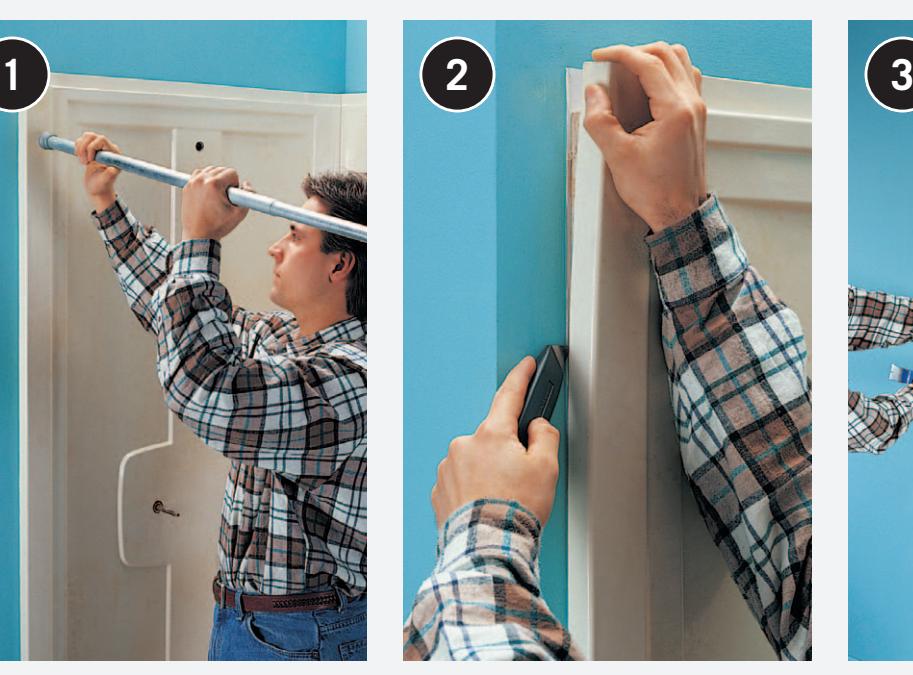
**Slice the caulking** around each shower panel using a utility knife. Remove any screws holding the panels together.
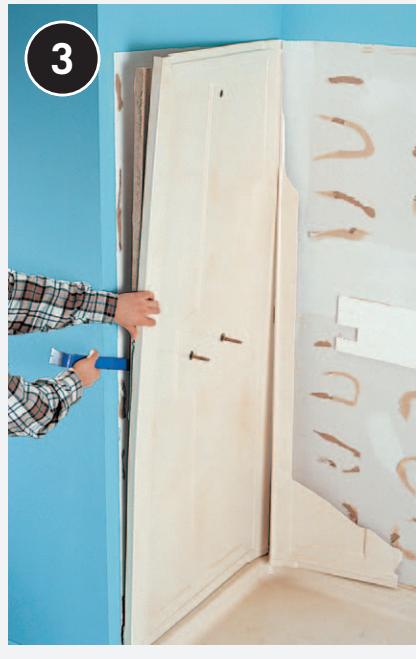
**Pry shower panels away from the wall** using a flat pry bar. If the panels are still intact, cut them into small pieces for easier disposal using a jigsaw or a sharp utility knife.
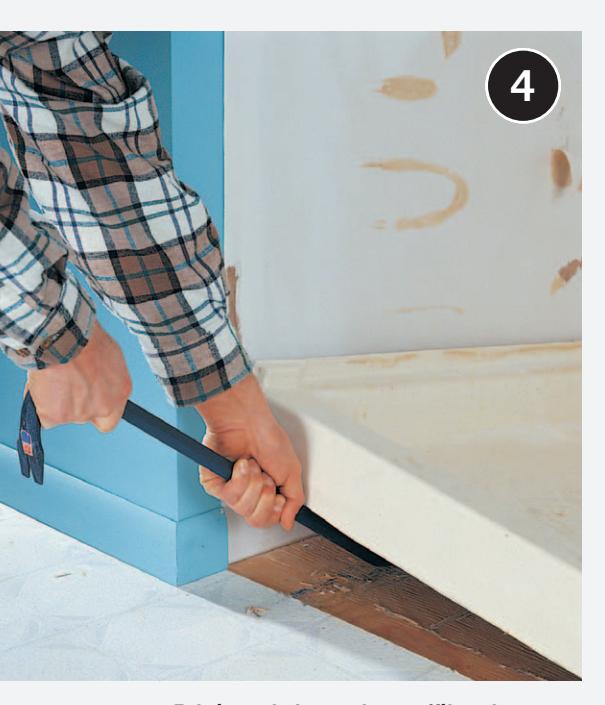
**Fabricated shower bases (fiberglass or plastic):** Slice the caulking between the base and the floor, then unscrew any fasteners holding the base to the wall studs. Pry the base from the floor with a wrecking bar.
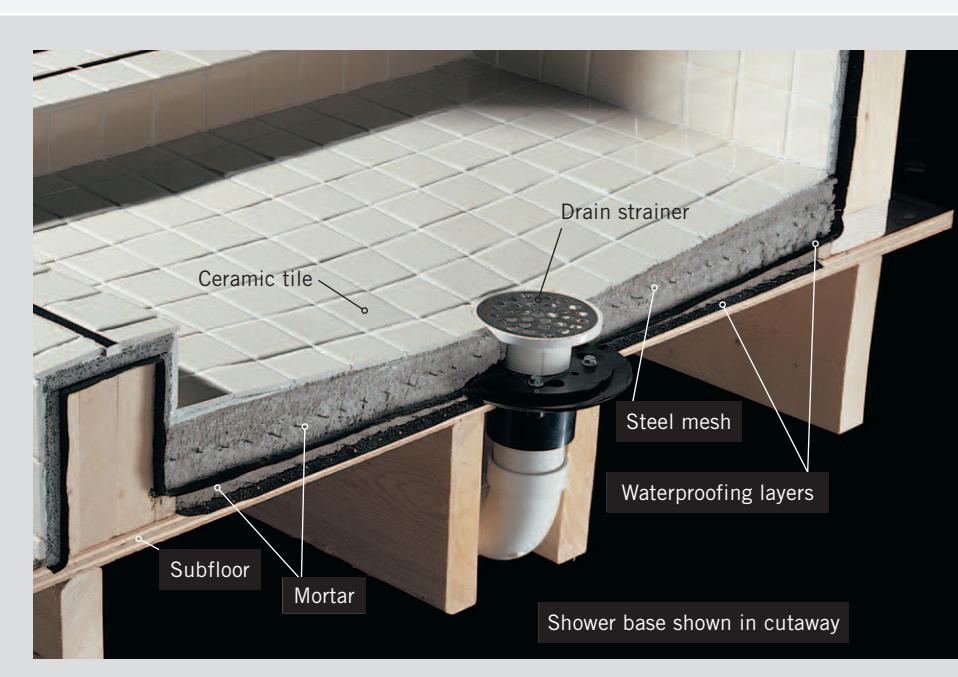
**Ceramic-tile shower base:** Remove the drain strainer, and then stuff a rag into the drain opening. Wearing protective equipment, break apart a section of tile with a hammer and masonry chisel. Cut through any steel-mesh reinforcement using a wire cutter. Continue knocking tile and mortar loose until the waterproofing layers are exposed, then scrape off the layers with a long-handled floor scraper.
### How to Remove a Bathtub
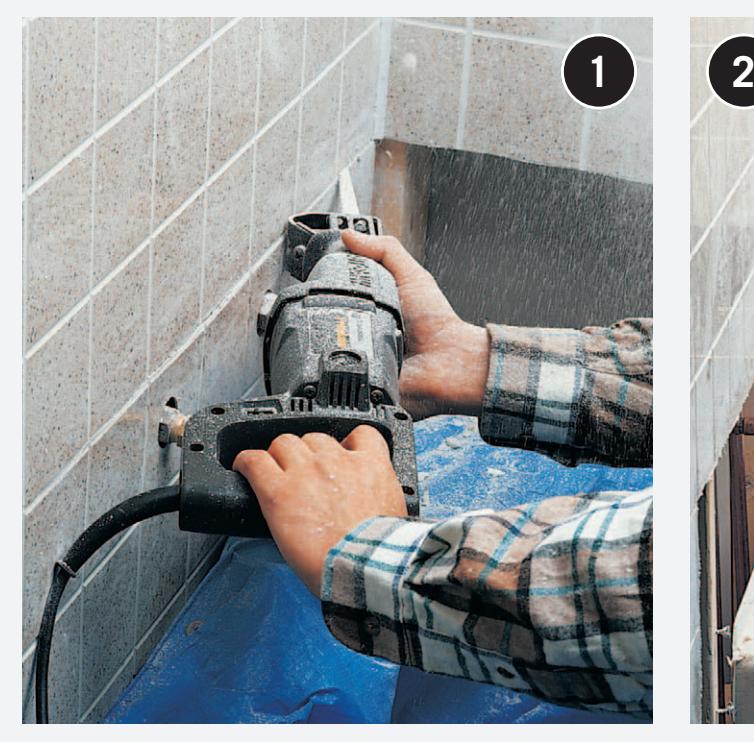
**Use a reciprocating saw** to cut away at least 6" of the wall surface above the tub on all sides. Before cutting into a wall, be sure faucet handles, spouts, and drains are all disconnected. Wear a mask and eye protection.
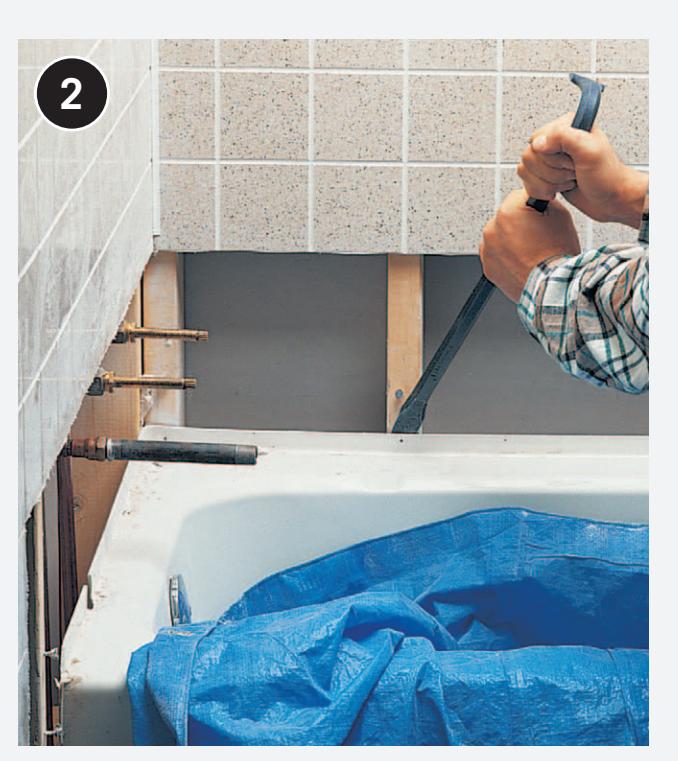
**Remove the fasteners** that hold the tub flanges to the wall studs, then use a wrecking bar or a piece of 2 × 4 to pry the bathtub loose.
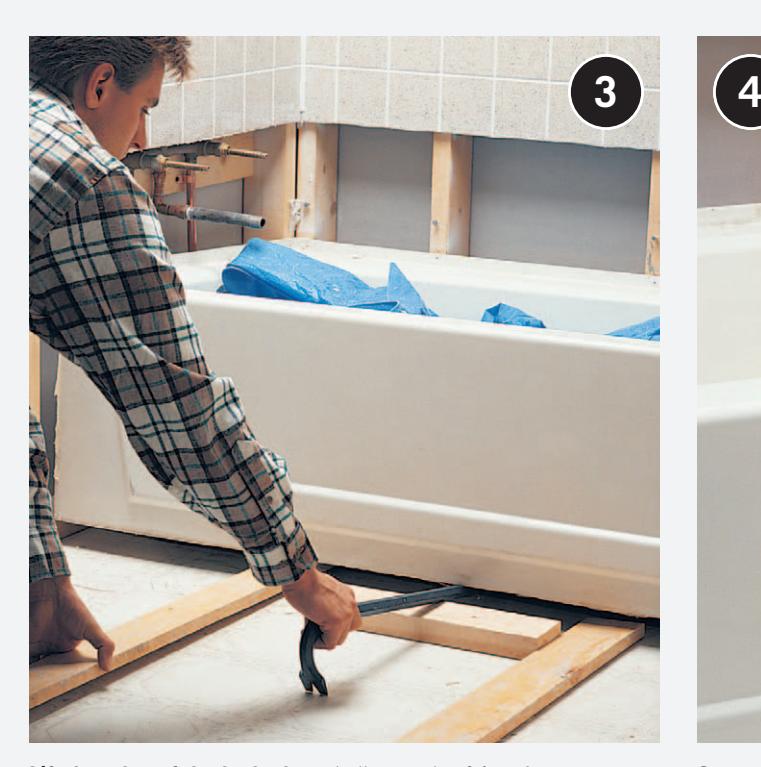
**Lift the edge of the bathtub** and slip a pair of 1 × 4 runners beneath the tub apron. Pull the tub away from the wall using the runners as skids. Have helpers when removing steel and cast-iron tubs.
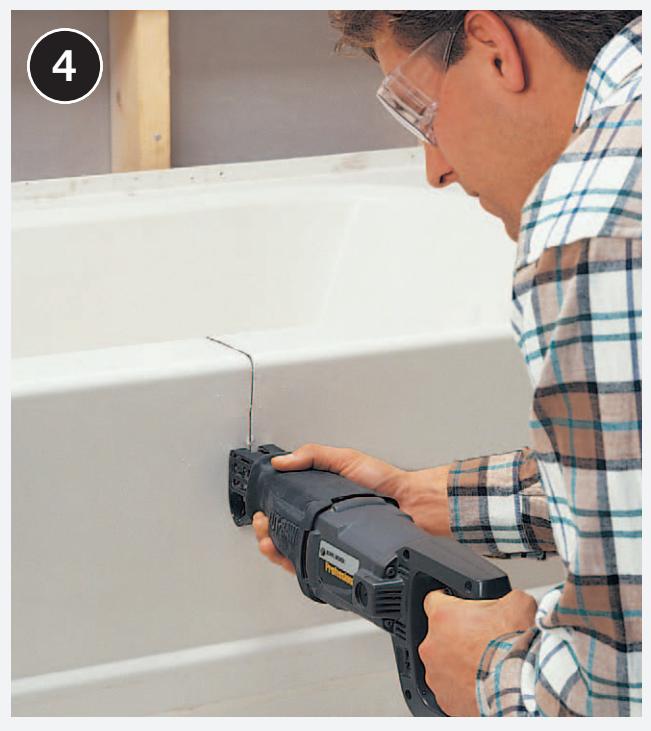
**Cut or break the bathtub** into small pieces for easy disposal. Fiberglass, reinforced polymer, and pressed-steel tubs can be cut with a reciprocating saw. Cast-iron and steel tubs should be carried out.
## Building a Wet Wall
A wet wall is simply a wall that contains plumbing for water supply and drainage. To accommodate the drain and vent pipes, which range from $1frac{1}{2}$ to 3 inches in diameter for branch lines, the wall framing needs to be built with $2times 6$ or larger dimensional lumber. You can also attach furring strips (usually $2times 2$) to the edges of $2times 4$ framing to increase wall thickness. The chart on the next page describes how deeply you are allowed to notch wall-framing members under various load conditions, as well as the maximum-diameter holes you may drill for running plumbing and wiring.
Building a new wet wall or converting an existing wall to house new plumbing requires a building permit and an onsite inspection once all of the hookups are made. Do not install any wall coverings until after your plumbing and wiring have been inspected and approved.
### TOOLS + MATERIALS
| Hole saw | Circular saw | Jigsaw |
| :------------------------ | :------------------------ | :---------------------------- |
| Wrecking bar or pry bar | Basic plumbing tools | Drill/driver |
| Reciprocating saw | Caulk gun | Protective plates |
| Adhesive | Plumbing pipes
and hangers | Hammer |
| Dust mask | 8d finish or casing nails | Eye and ear protection |
| Masking tape | | |
| FIXTURE | WSFU | MIN. BRANCH SUPPLY LINE SIZE |
|-------------------|------|------------------------------|
| Toilet | 2.5 | 1/2" |
| Bath sink | 2 | 1/2" |
| Shower (per head) | 2 | 1/2" |
| Bathtub | 4 | 1/2" |
| Dishwasher | 1.5 | 1/2" |
| Kitchen Sink | 1.5 | 1/2" |
| Clothes Washer | 4 | 1/2" |
| Utility Sink | 1.5 | 1/2" |
| Sillcock | 2.5 | 1/2" |
**To determine the size** of water supply distribution that feed branch lines, add up the Water Supply Fixture Units (WSFU) for your home and find the number on the chart above.
### WATER-DISTRIBUTION PIPE SIZING
The following table shows the maximum allowable length (in feet) for water distribution pipes based on street service pressure and pipe sizes.
| STREET SERVICE | BUILDING SUPPLY + BRANCHES | 40 | 60 | 80 | 100 | 150 | 200 |
|----------------|----------------------------|----|----|----|-----|-----|-----|
| 30–45 psi | | | | | | | |
| ¾" | ½" | 6 | 5 | 4 | 3 | 2 | 1 |
| ¾" | ¾" | 16 | 16 | 14 | 12 | 9 | 6 |
| ¾" | 1" | 29 | 25 | 23 | 21 | 17 | 15 |
| 1" | 1" | 36 | 31 | 27 | 25 | 20 | 17 |
| ¾" | 1¼" | 36 | 33 | 31 | 28 | 24 | 23 |
| 1" | 1¼" | 54 | 47 | 42 | 38 | 32 | 28 |
| 1½" | 1¼" | 78 | 68 | 57 | 48 | 38 | 32 |
| 1" | 1½" | 85 | 84 | 79 | 65 | 56 | 48 |
| 1½" | 1½" | 150| 124| 105| 91 | 70 | 57 |
| 2" | 1½" | 151| 129| 129| 110 | 80 | 64 |
| 46–60 psi | | | | | | | |
| ¾" | ½" | 7 | 7 | 6 | 5 | 4 | 3 |
| ¾" | ¾" | 20 | 20 | 19 | 17 | 14 | 11 |
| ¾" | 1" | 39 | 39 | 36 | 33 | 28 | 23 |
| 1" | 1" | 39 | 39 | 39 | 36 | 30 | 25 |
| ¾" | 1¼" | 39 | 39 | 39 | 39 | 39 | 39 |
| 1" | 1¼" | 78 | 78 | 76 | 67 | 52 | 44 |
| 1½" | 1¼" | 78 | 78 | 78 | 78 | 66 | 52 |
| 1" | 1½" | 85 | 85 | 85 | 85 | 85 | 85 |
| 1½" | 1½" | 151| 151| 151| 151 | 128 | 105 |
| 2" | 1½" | 151| 151| 151| 151 | 150 | 117 |
| Over 60 psi | | | | | | | |
| ¾" | ½" | 7 | 7 | 7 | 6 | 5 | 4 |
| ¾" | ¾" | 20 | 20 | 20 | 20 | 17 | 13 |
| ¾" | 1" | 39 | 39 | 39 | 39 | 35 | 30 |
| 1" | 1" | 39 | 39 | 39 | 39 | 38 | 32 |
| ¾" | 1¼" | 39 | 39 | 39 | 39 | 39 | 39 |
| 1" | 1¼" | 78 | 78 | 78 | 78 | 74 | 62 |
| 1½" | 1¼" | 78 | 78 | 78 | 78 | 78 | 74 |
| 1" | 1½" | 85 | 85 | 85 | 85 | 85 | 85 |
| 1½" | 1½" | 151| 151| 151| 151 | 151 | 151 |
| 2" | 1½" | 151| 151| 151| 151 | 151 | 151 |

#### REQUIREMENTS FOR HOLES AND NOTCHES
The International Building Code specifies limits on notches and holes in framing members; local codes follow that guidance. Consult local codes before altering any framing member. In any case, use nailing plates on the framing member edges for any pipes closer than 1 1/4" from the edge.
Notches covered by nailing plates were preferred for metal or PVC pipes, but PEX can easily be run through stud, joist, and plate holes. The code uses the term "depth" for what most homeowners think of as "width" (studs are installed edges out).
* Stud in exterior or load-bearing wall: No more than 25% of the stud's depth. Examples of maximum notch size:
* $2 times 4: 7/8"$
* $2 times 6: 1 3/8"$
* Stud in non-load-bearing wall: No more than 40% of the stud's depth. Examples of maximum notch size:
* $2 times 4: 1 3/8"$
* $2 times 6: 2 1/5"$
##### Holes
Holes in studs shouldn't exceed 60% of stud depth, the hole must not be closer than 5/8" to an edge, and should not be located in a stud with a notch. A hole made in an exterior stud and exceeding 40% of stud depth requires a sister stud (doubling the stud). If two pipes are run through the same stud, the holes should be stacked, not side by side. Examples of maximum hole diameter:
* $2 times 4: 2"$ (int) / $1 3/8"$ (ext)
* $2 times 6: 3 1/8"$ (int) / $2 1/5"$ (ext)
Joists are a special case and have their own specific requirements.
* Notches should not be more than 1/2 joist depth (width).
* Holes should not be more than 1/3 joist depth and should not be closer than 2" from an edge or anywhere in the middle 1/3 of the joist's span.

### PIPE SUPPORT REQUIREMENTS
| MATERIAL | JOINTS | HORIZONTAL | VERTICAL |
|--------------------------|--------------------------------|----------------------------------------------------------|-------------------------------------------------------------------------------|
| Cast Iron Hub-and-Spigot | Lead-and-oakum | 5' (except 10' where
10' pipe is installed) | Base and each floor,
not to exceed 15' |
| Cast Iron Hub-and-Spigot | Compression | Every other joint, unless more than 4', then every joint | Base and each floor,
not to exceed 15' |
| Cast Iron Hubless | Shielded coupling | Every other joint, unless more than 4', then every joint | Base and each floor,
not to exceed 15' |
| Copper | Soldered, threaded, mechanical | 1½" or smaller: 6'
2" or larger: 10' | Each floor,
not to exceed 10' |
| Steel (gas) | Threaded or welded | ½": 6'
¾" or 1": 8'
1¼" up: 10' | ½": 6'
¾" or 1": 8'
1¼" every floor level |
| PVC | Solvent cement | All sizes: 4'
allow for expansion every 30' | Base and each story; provided mid-story guides; allow for expansion every 30' |
| CPVC | Solvent cement | Less than 1": 3'
1¼" or larger: 4' | Base and each story;
provided mid-story guides |
| PEX | Mechanical | Less than 1": 32"
1¼" or larger: 4' | Base and each story; provided mid-story guides; allow for expansion every 30' |

### How to Build + Plumb a Wet Wall
**Clear the work area.** If you are remodeling an existing wall to contain plumbing for a new bathroom, you'll need to completely remove the wall coverings so you can fur out the wall studs. This project requires a building permit and at least one onsite inspection. Shut off power at the main service panel before cutting into walls.
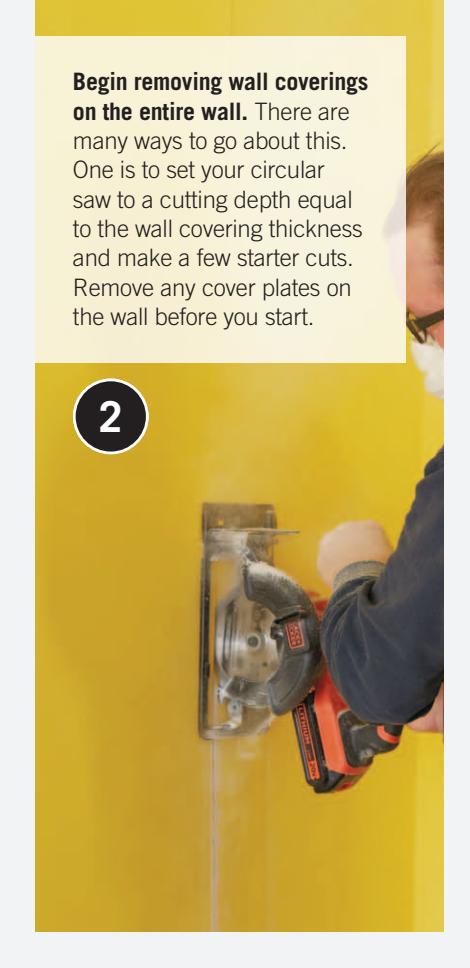
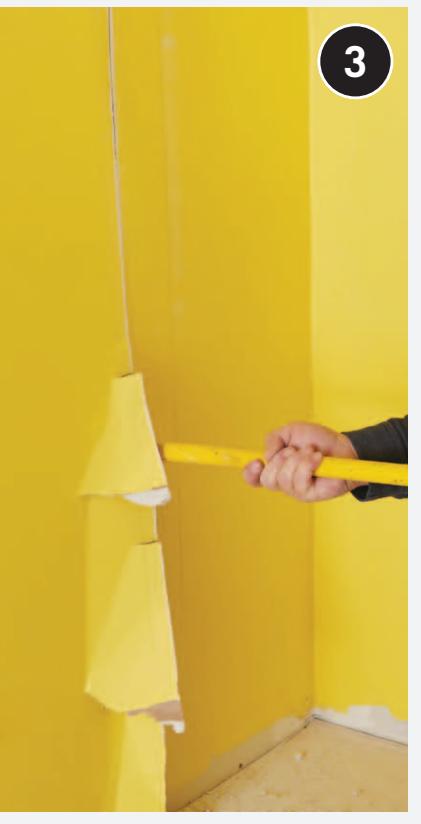
**Next, use a wrecking bar** to pry the wallcovering loose. Work in sections that are large, but manageable. Discard the material you remove immediately.
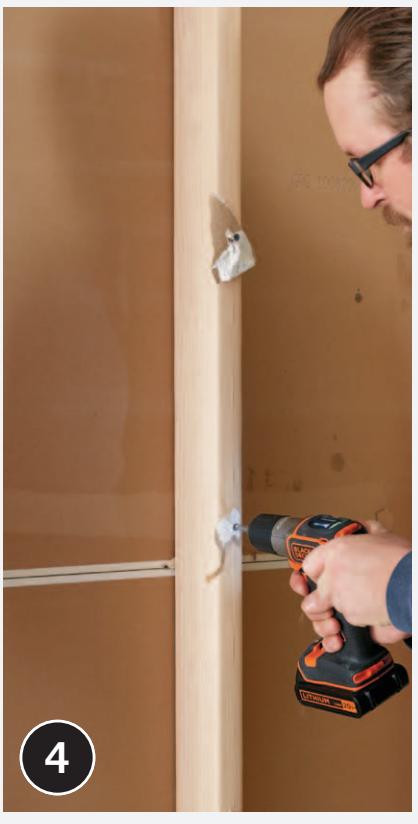
**Remove old drywall screws or nails** that remain in the wall-framing members.
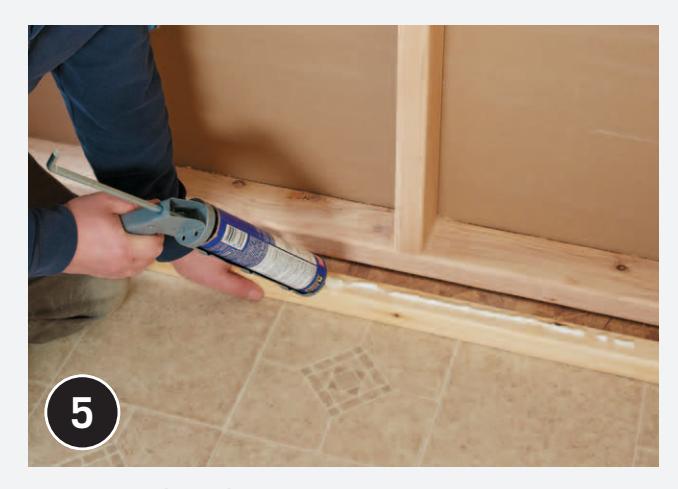
**Cut 2 × 2 furring strips to length.** Start with the sole plate of the wall. Apply a bead of construction adhesive to the 2 × 2.
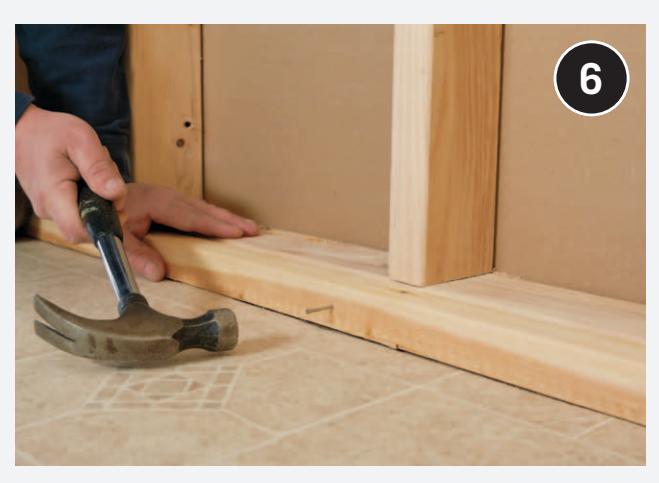
**Attach the furring strips to the wall-framing members** with 8d finish or casing nails. Drive a nail every 12 to 16".
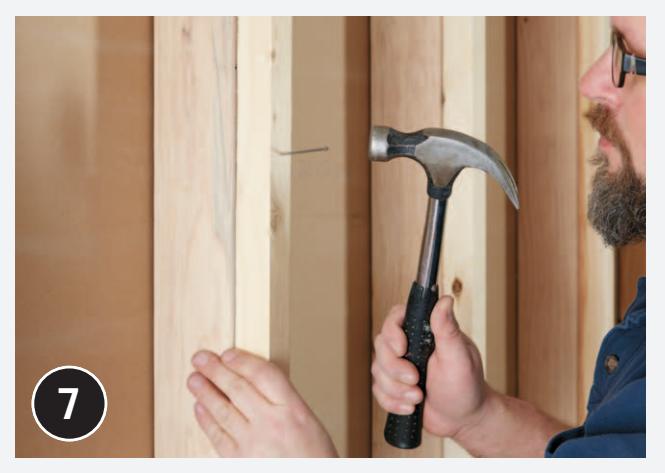
**Install the vertical furring strips next,** using nails and construction adhesive. Finally, attach furring strips to the wall cap plate. Reroute wiring in the wall according to your plan. If you are keeping receptacles or switches in the same place, you'll still need to move the boxes forward in the wall cavity so the edges will be flush with the new wall surface.
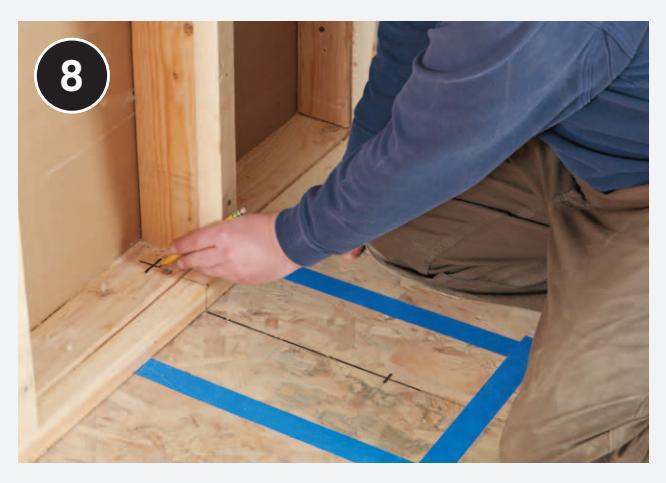
**If you are installing a drain for a tub or shower,** mark out the location of the drain on the subfloor. Remove floor coverings first. Mark a centerpoint for the drainage pipe onto the sole plate. The pipe should align with the location for the drain trap. If your plan calls for it, drill additional holes for fixture drains, such as the wall sink stub-out being installed in this wall.
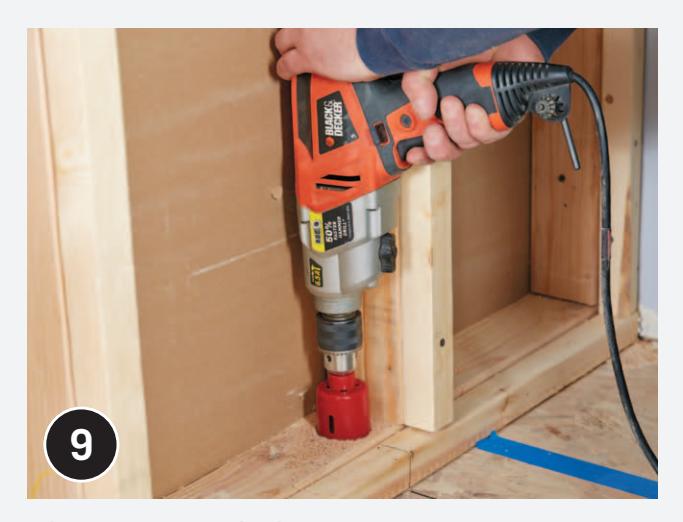
**Drill holes for the drain pipes** using a hole saw that's slightly larger than the outside diameter of the new pipe. In most cases, a 2"-diameter pipe is adequate for this type of branch drain, so a 2 1/2" hole saw is a good choice.
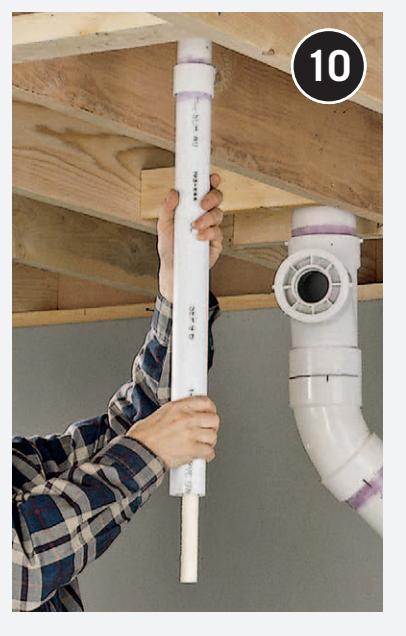
**Feed sections of drain pipe up through the holes** in the sole plate and floor (if you are tying in to the plumbing on the floor below—the easiest way to tap into the existing plumbing system). Connect the drain line to a drainage stack, maintaining a slope of at least 1/4" per 1'. It is always a good idea to include a cleanout on the new branch line.
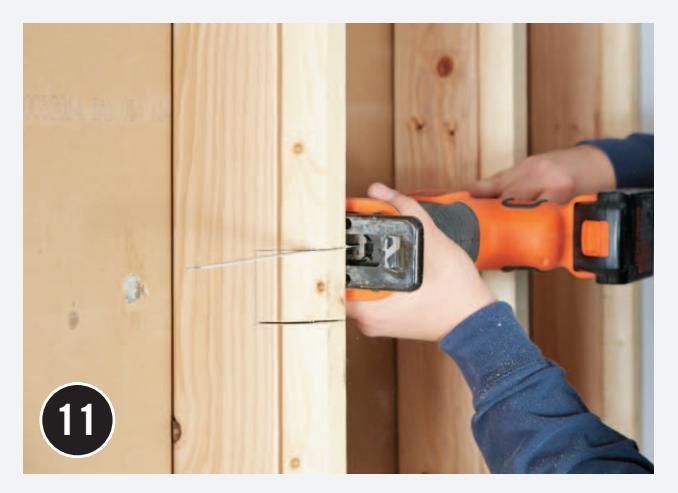
**Cut notches in the wall-framing members** to hold the horizontal plumbing in the drain lines. In some instances, a hole will work better than a notch. Check the chart on page 63.
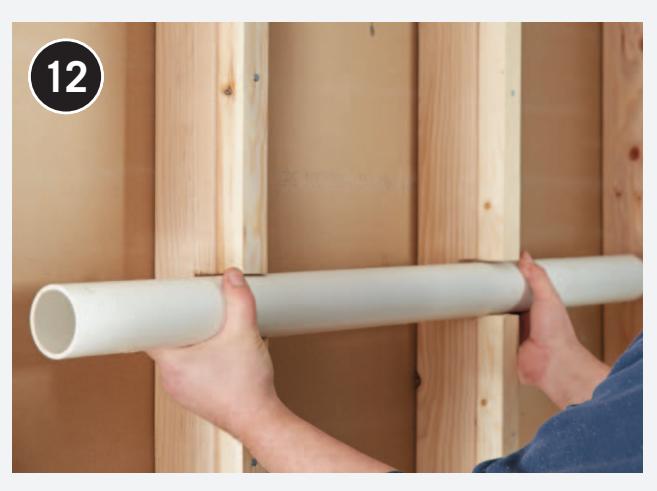
Cutting horizontal drain lines to length and setting them into notches.
**Cut the horizontal lines to length** and set them into the notches. You can hold them in place with tape if they don't stay put.
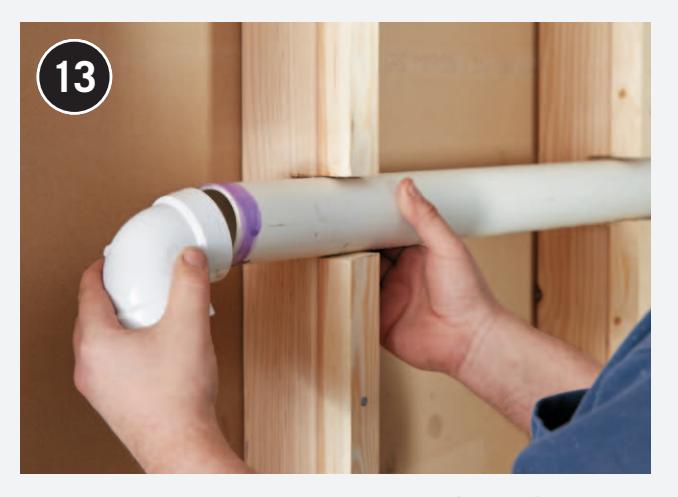
Attaching a 90-degree elbow and T-fitting to a horizontal drain line for vent and drain connections.
**Attach a 90° elbow to the end of the new horizontal line** so it aligns with the drain pipe coming up through the floor. The other end of horizontal pipe is fitted with a T-fitting so the vent line can be extended up through the cap plate and ceiling.
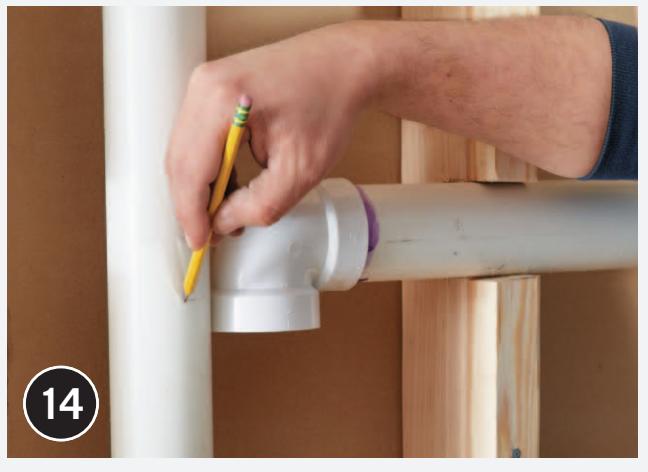
Marking vertical drain pipes for cutting to join horizontal fittings, prior to cementing.
**With the drain pipes seated in the fitting below the floor** (but not cemented), mark the free ends of the vertical pipes for cutting at the points where they will join the fittings on the horizontal line. Dry-fit this union. Do not cement yet.
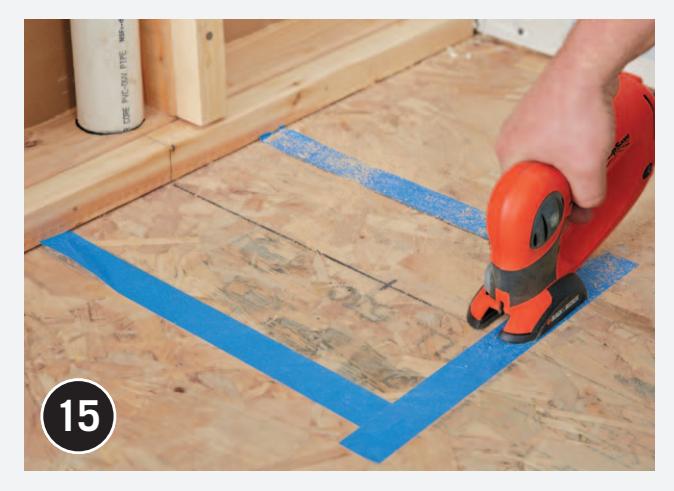
Cutting a section of subfloor with a jigsaw to create an opening for drain installation.
**Remove the subfloor** in the section you've laid out for the drain. Cut with a jigsaw, using a starter hole if you need to. If you've planned the drain location wisely it will not fall over a floor joist.
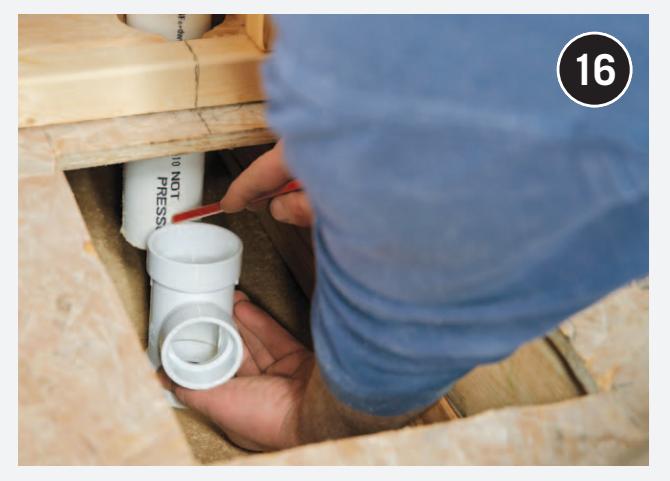
Reaching into a subfloor hole to mark a vertical pipe for cutting to accept a T-fitting.
**Reach into the hole in the subfloor** and mark the vertical pipe for cutting to accept a T-fitting. The tee should have a slight sweep downward. Normally, the open end of the tee is sized for a 1½"-diameter drain tube to run from the vertical drain line to the drain trap.
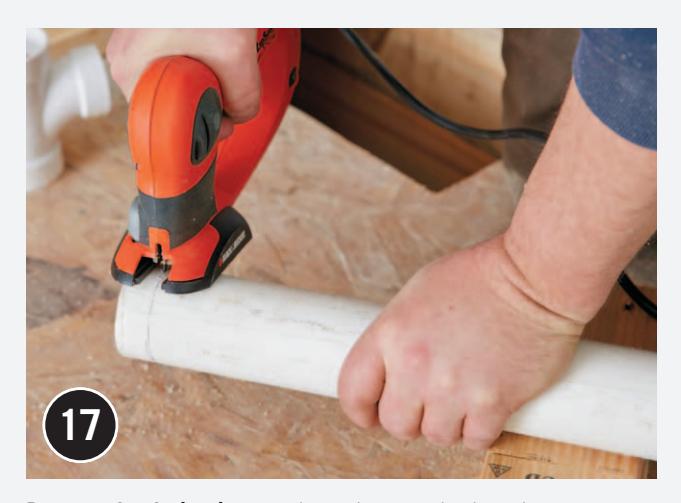
Removing and cutting drain pipes to the marked lengths.
**Remove the drain pipes** and cut them to the lengths you've marked.
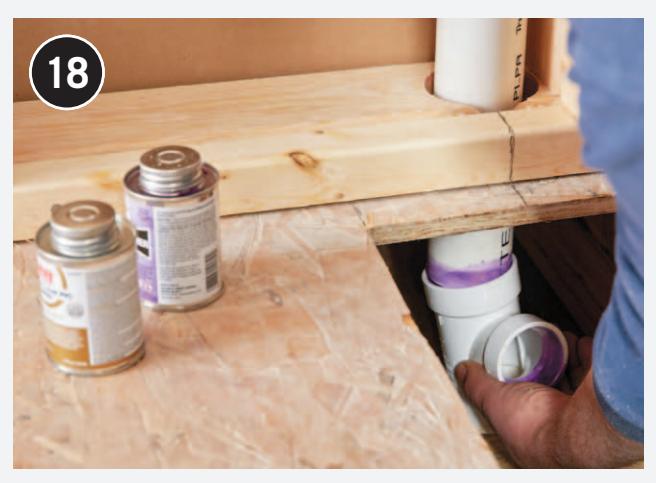
Cementing a reducing tee into the tub drain line, ensuring correct orientation and alignment.
**Cement the reducing tee into the drain line for the tub,** making sure to orient the sweep correctly and to align the opening with the drain-trap location.
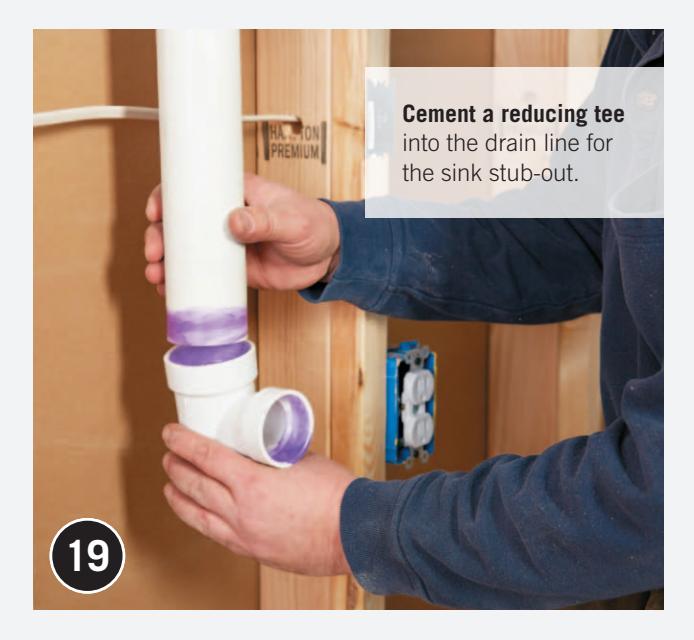
Cementing drain lines into the drain fittings from below the floor, connecting to the main drain stack.
**Cement the drain lines into the drain fittings from below.** Solvent-cement the branch drain line components on the floor below, tying the line into the main drain stack or another large branch drain.
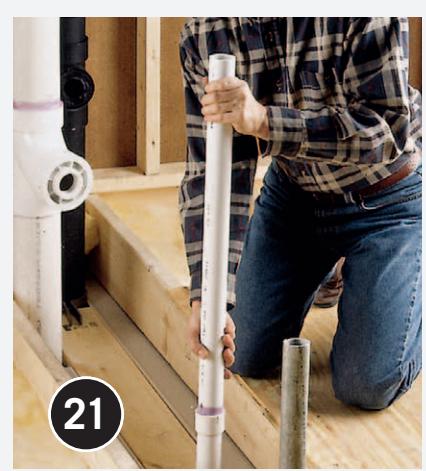
Connecting a vent pipe from the wet wall to another vent line in the attic or through the roof.
**Connect the vent pipe** from the wet wall with another vent line in the attic or, if you prefer, run it out through the roof and flash and cover it according to your local plumbing codes.
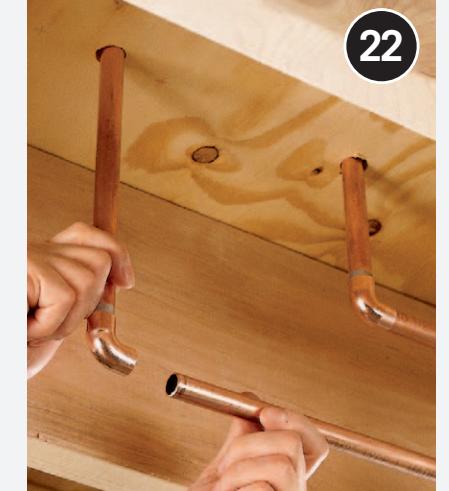
Installing cold and hot water supply lines, connecting from the floor below.
**Install cold and hot water-supply lines,** connecting from the floor below.
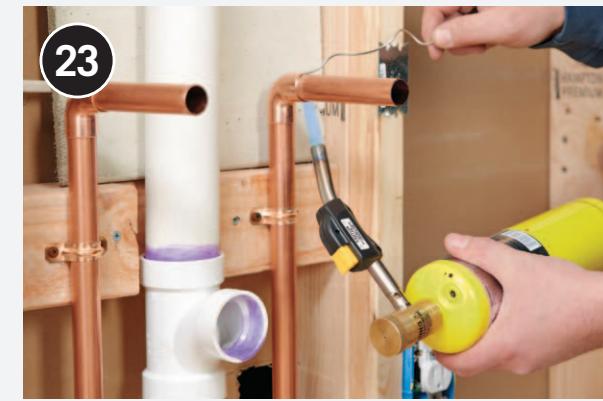
Soldering supply stub-outs onto new water lines and installing protective metal plates on wall studs.
**Solder supply stub-outs** onto the new water lines. Install protective metal plates on the wall studs to cover pipe (and electrical cable) penetrations. Have your work inspected and, when approved, you may go ahead and install wall coverings.
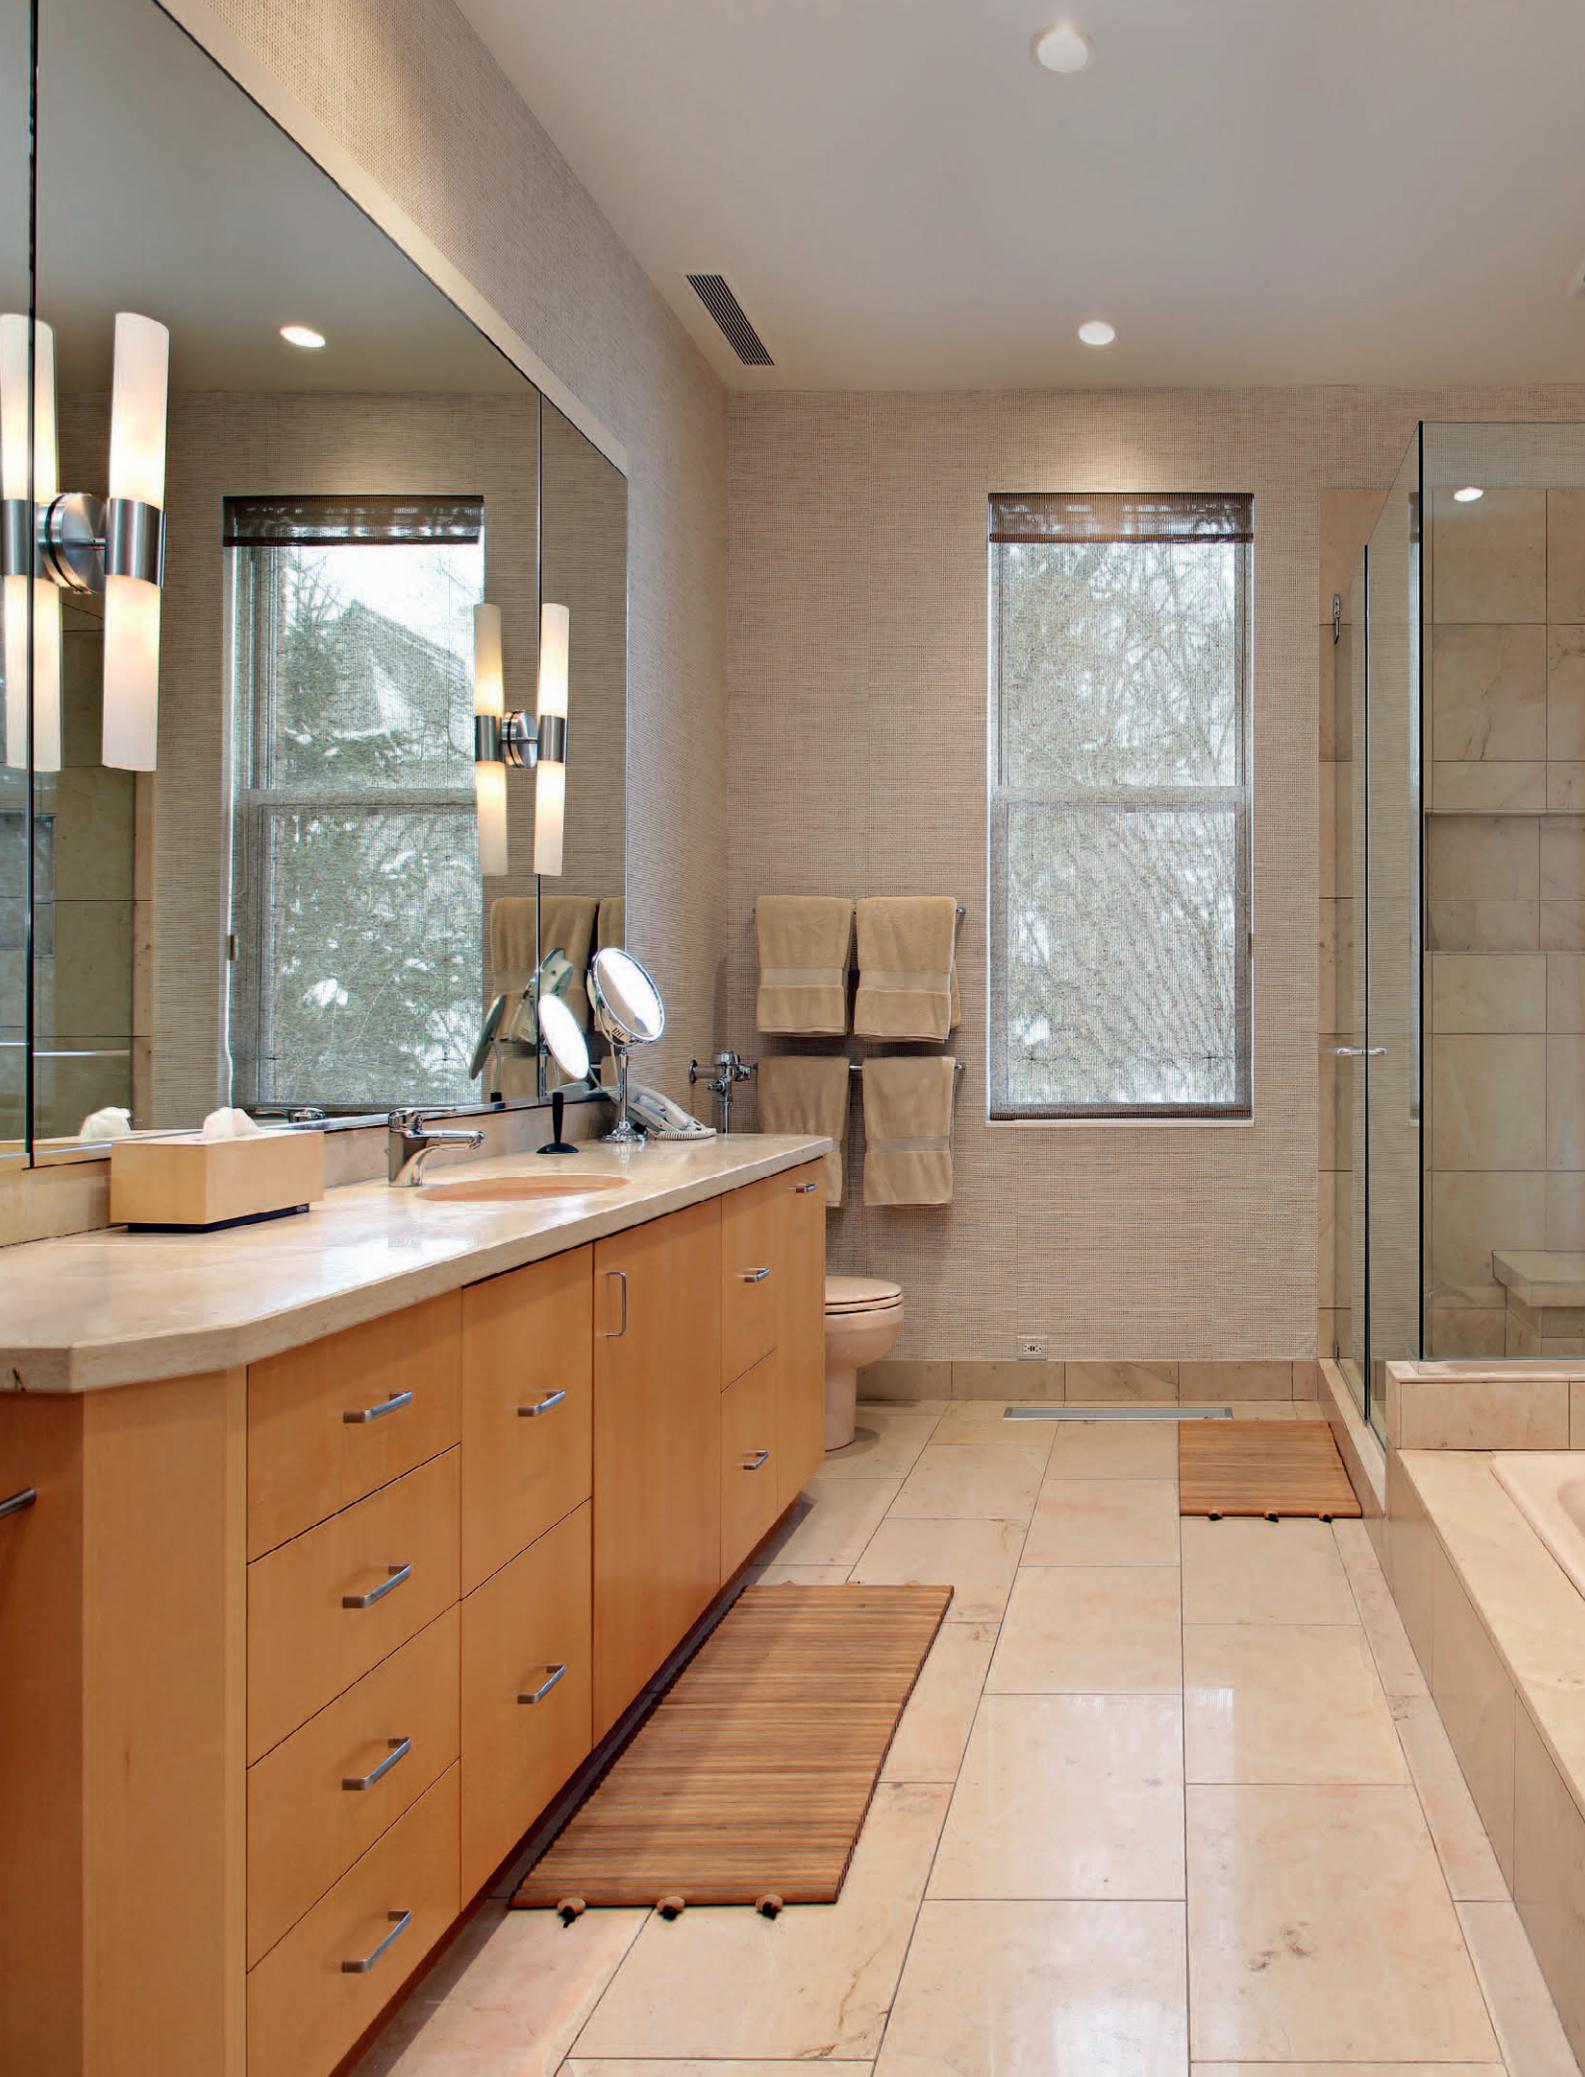
Full-page diagram or illustration related to plumbing installation.
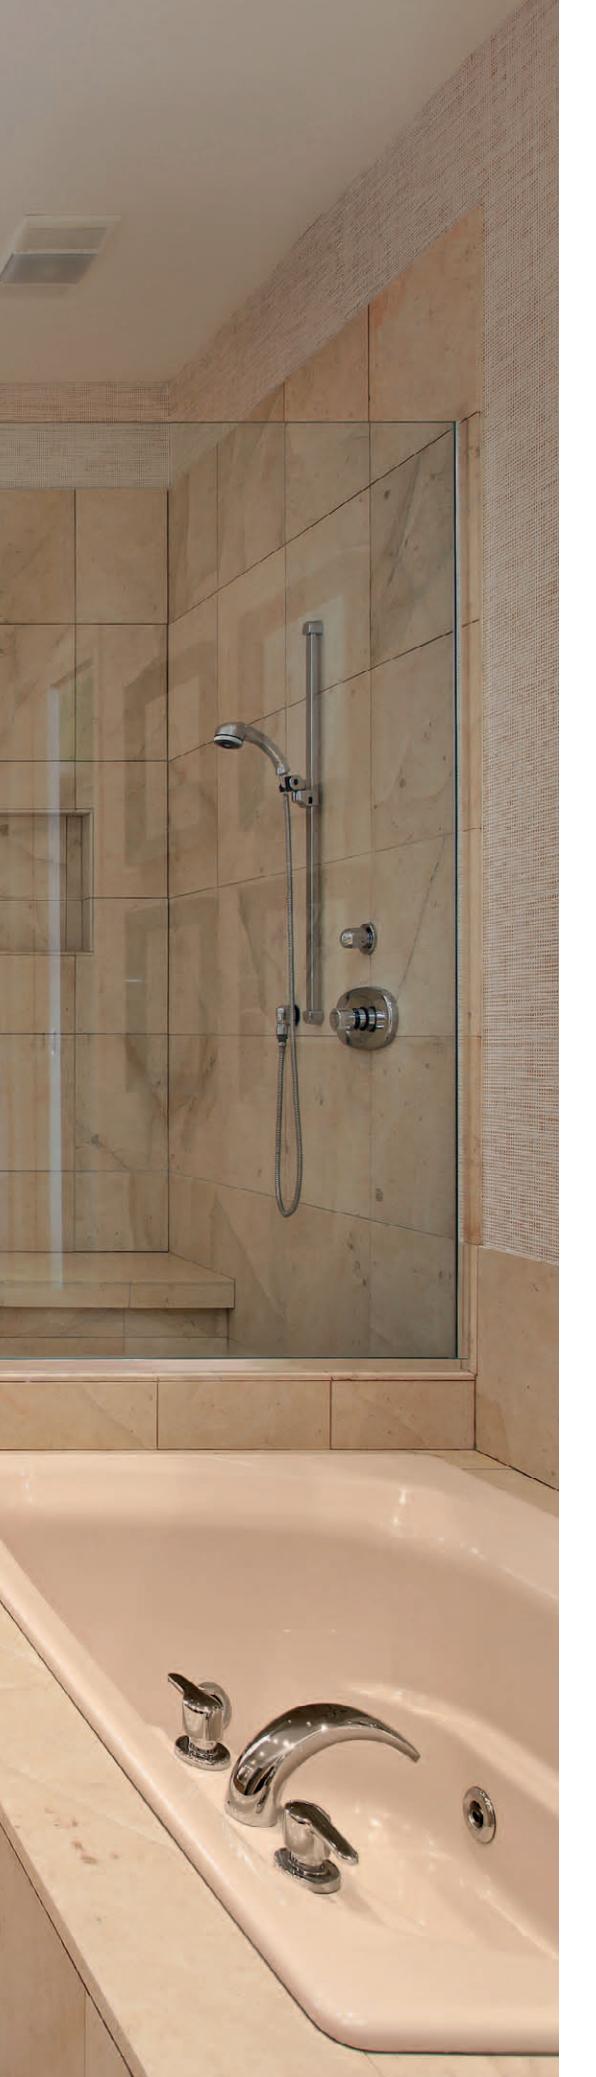
Diagram or illustration related to showers and bathtubs.
## Showers + Bathtubs
Bathtubs and showers continue to evolve as the showpieces of a bathroom. Even smaller bathrooms can feature walk-in showers and jetted bathtubs. Luxury is available for every space and every type of bathroom, so there's no excuse to have anything less.
Nowadays, the jetted tubs that were once only for the wealthy few are available in compact sizes and every style imaginable. Stuck with an alcove space? Not to worry; there is a jetted tub or soaking style available to fit. Not sure about your floor plan? Turn to freestanding models that can reasonably be placed just about anywhere in the room that plumbing and drain lines can be run.
Showers, though, are where homeowners can really go over the top. Walk-in showers that are basically a room-within-a-room are now fairly standard. The trend is toward the seamless look and ease-of-use of curbless showers, which can include multiple showerheads, steam features, and even Bluetooth tech for those who like that shower with tunes. Of course, if you want an easier installation, you can still find upscale amenities in something like a compact neo-angle shower kit or small curb shower kit with enclosure panels.
The trick in any case is to carefully and thoroughly plan out the positioning, plumbing, and details of new or replacement bathtubs or showers. That won't be too much of a challenge with the help of the information in this chapter.
#### In this chapter:
- Installing Showers
- Shower Enclosure Kits
- Curbed Shower Base
- Wet Rooms + Curbless Showers
- Alcove Bathtubs
- 3-Piece Tub Surrounds
- Drop-In Bathtubs
- Freestanding Bathtubs
- Sliding Bathtub-Shower Doors
- Jetted Bathtubs
- Bathtub + Shower Fittings
- Adding a Shower to a Bathtub
## Installing Showers
You can build a shower just about anywhere there's a 30-inch square spot of real estate in the bathroom. The main decision is always going to be whether you want to use a completely prefabricated enclosure or build one from the base up. In either case, making the enclosure watertight will be your prime consideration. Water-resistant cement board is the standard for prefab panels and enclosures, but manufacturers sometimes recommend specific products be used. Local building codes may also designate different techniques, such as using a waterproof membrane between the studs and the backer material.
The type of shower pan or base is an even more complicated issue. These days, many homeowners are opting for linear "trench" drains that sit level with the floor. They allow you to install a completely curbless shower floor.
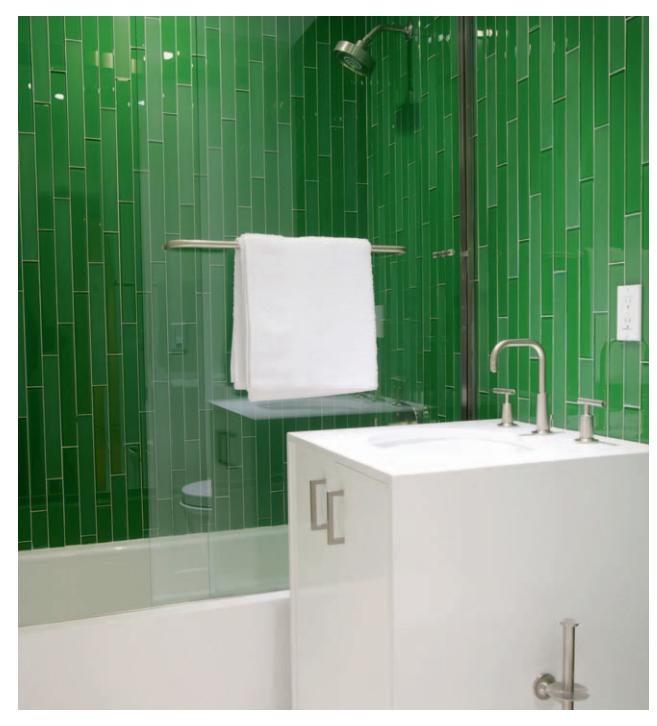
Modern bathroom featuring green glass tile in a tub-shower combination.
**Glass tile** is regularly replacing ceramic tile as the surface of choice in shower and bath remodeling projects. It's not hard to see why. The tile reflects light in a room that relies on illumination, is easy to clean, and comes in a stunning variety of jaw-dropping colors, like the green that energizes this tub-shower combo. It's a blast of color in an otherwise sedate, pure white guest bath.
### Antiscald Valves
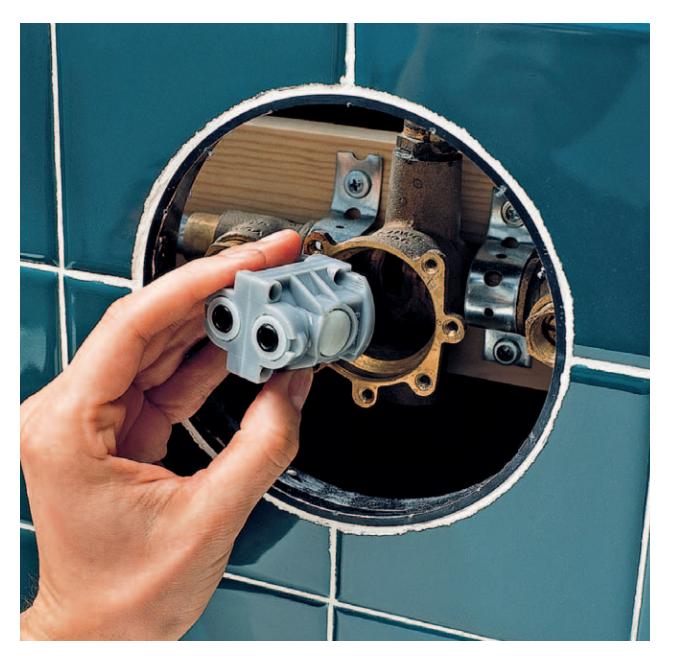
Diagram illustrating the internal components and function of an antiscald valve.
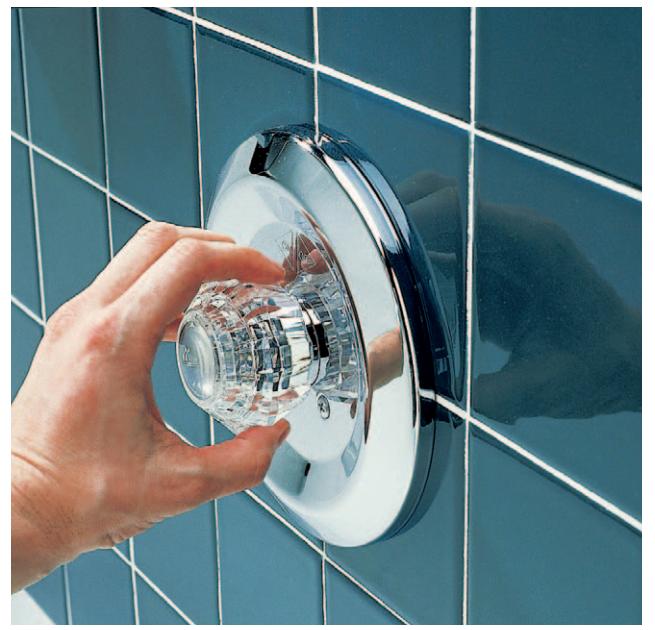
Close-up view of an antiscald valve installed within a shower faucet assembly.
**Antiscald valves** are safety devices that protect against sudden water temperature changes. They are required by most building codes for faucets in showers and combination tub-showers. Once installed, faucets with antiscald valves look like standard faucets.
## Anatomy of a Shower
Shower stalls are available in many different sizes and styles, but the basic elements are the same. Most shower stalls have a shower alcove, a supply system, and a drain system.
**Shower alcove:** The alcove is the frame for the stall, with 2 × 6 walls built to fit around a shower pan and blocking to secure the plumbing. The pan—in most cases—sets into a mortar bed for support, and water-resistant drywall or cement board covers the alcove walls.
**The supply system:** The shower arm extends from the wall, where an elbow fitting connects it to the shower pipe. The pipe runs up from the faucet, which is fed by the hot and cold water supplies.
**The drain system:** The drain cover attaches to the drain tailpiece. A rubber gasket on the tailpiece slips over the drain pipe, leading to the P-trap and the branch drain.
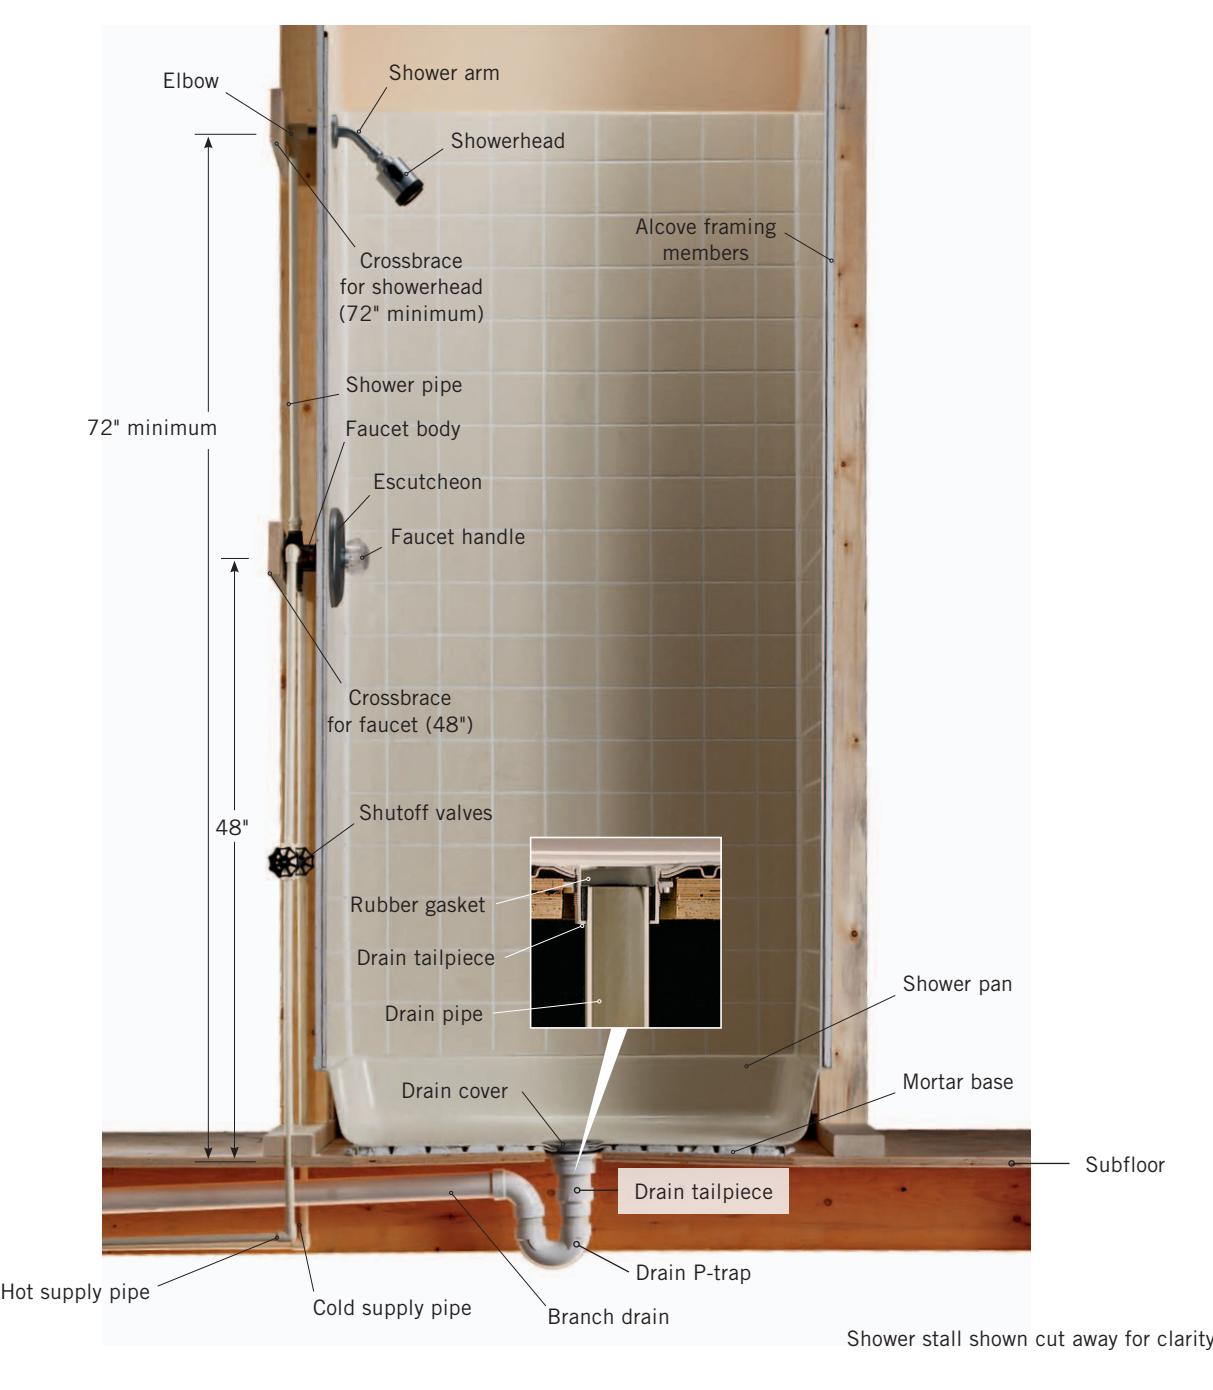
Detailed diagram showing the anatomy of a shower stall, including the alcove, supply system, and drain system components.
## Shower-Enclosure Kits
The fastest and easiest way to create a new shower in your bathroom is to frame in the stall area with lumber and cement board and then install a shower-enclosure kit. Typically consisting of three fiberglass or plastic walls, these enclosure kits snap together at the corners and nestle inside the flanges of the shower pan to create nearly foolproof mechanical seals. Often the walls are formed with shelves, soap holders, and other conveniences.
If you are on a tight budget, you can find extremely inexpensive kits to keep costs down. You can even create your own custom enclosure using waterproof beadboard panels and snap-together connectors. Or, you can invest in a higher-grade kit made from thicker material that will last much longer. Some kits are sold with the receptor (and perhaps even the door) included. The kit shown here is designed to be attached directly to wall studs, but others require a backer wall for support. The panels are attached to the backer with high-tack panel adhesive.
### TOOLS + MATERIALS
Tape measure
Pencil
Hammer
Carpenter's square
Screwdrivers
Deck screws
Pipe wrench
Hacksaw
Masking tape
Silicone caulk
Caulk gun
Panel adhesive
Silicone sealant
Thinset mortar
Level
Strap wrench
Trowel
Lumber
Adjustable wrench
Shower enclosure kit
Pliers
Drill/driver
Center punch
Shower door
Showerhead
Faucet
File
Utility knife
Jigsaw or hole saw
Plumbing supplies
Eye protection
Work gloves
#### Paneled shower surrounds are
inexpensive and easy to install. Designed for alcove installations, they often are sold with matching shower pans (called receptors). Some include molded-in accessories, such as shelves or soap dishes. High-end versions include tiled sections, faux tile, and faux stone panels, and some even include matching fixtures, controls, and built-in grab bars.
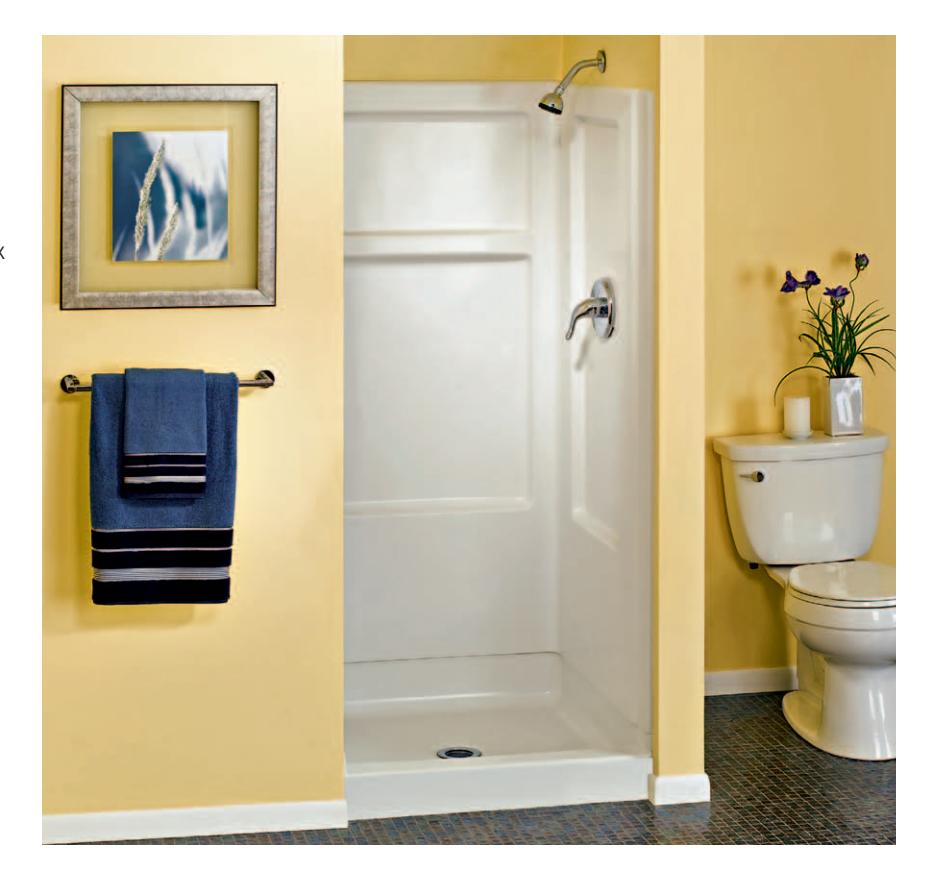
Example of a paneled shower surround kit with molded-in shelves and soap dishes, designed for alcove installation.

Diagram or illustration related to shower enclosure installation steps.
### How to Install a Shower Enclosure
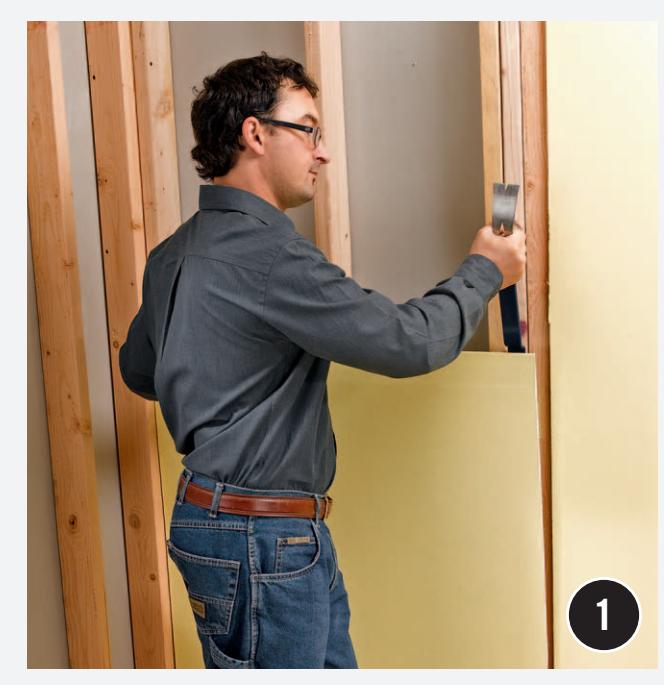
Marking the precise location of a new shower enclosure, including new walls, on the floor and existing walls.
**Mark out the location of the shower,** including any new walls, on the floor and walls. Most kits can be installed over wallboard, but you can usually achieve a more professional-looking wall finish if you remove the wall covering and floor covering in the installation area. Dispose of the materials immediately and thoroughly clean the area.
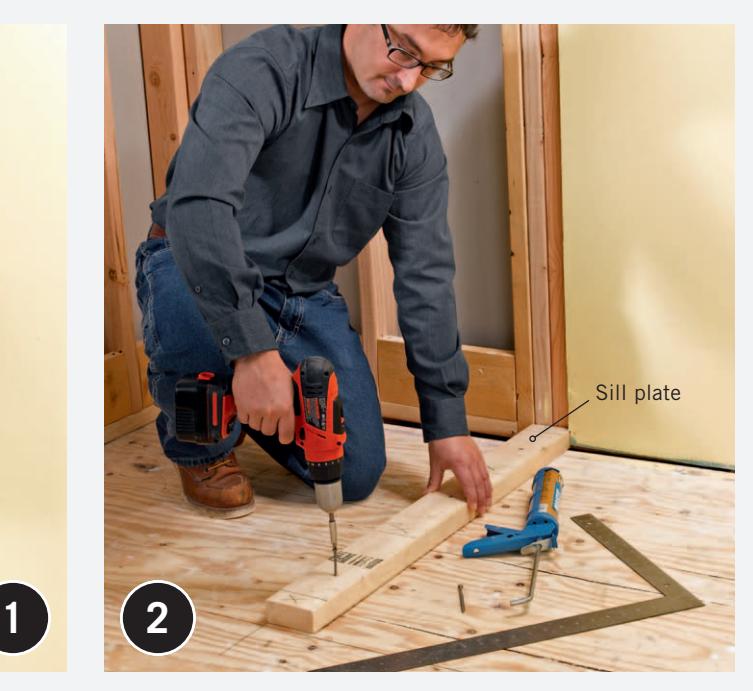
Laying out stud and plumbing locations on a new wood sill plate and cap plate for a shower alcove wall.
**If you are adding a wall to create the alcove,** lay out the locations for the studs and plumbing on the new wood sill plate. Also lay out the stud locations on the cap plate that will be attached to the ceiling. Refer to the kit instructions for exact locations and dimensions of studs. Attach the sill plate to the floor with deck screws and panel adhesive, making sure it is square to the back wall and the correct distance from the side wall.
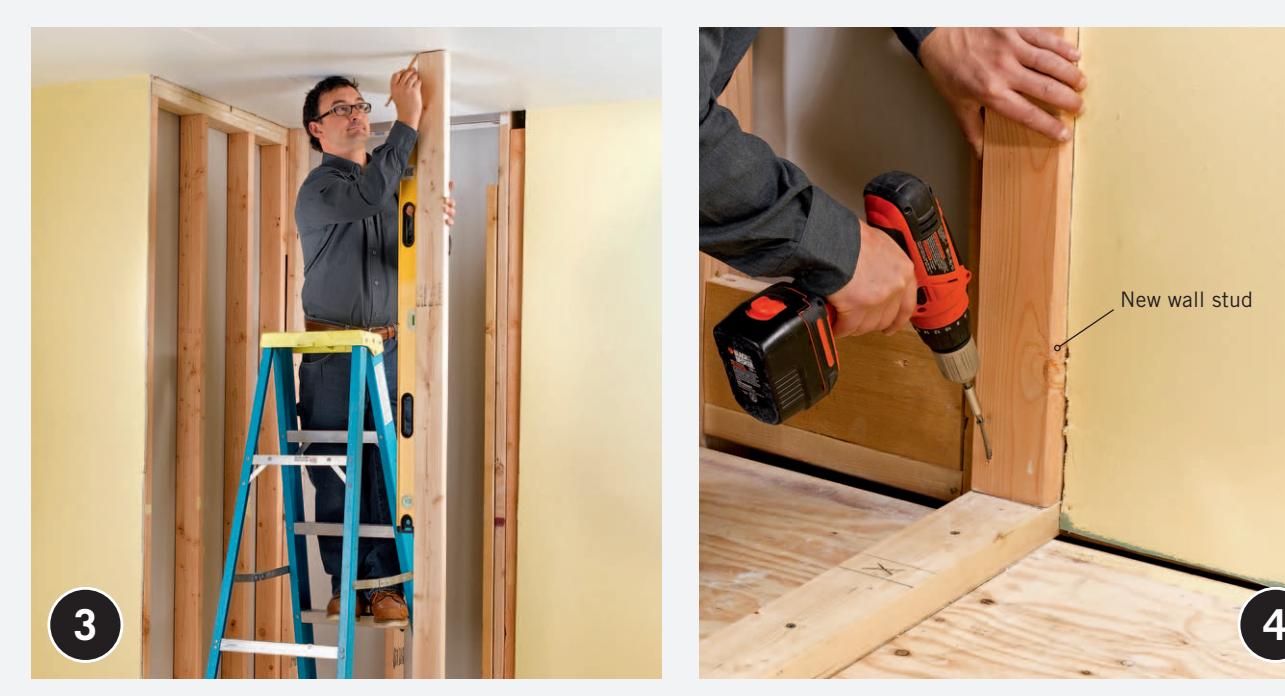
Using a straight 2x4 and level to accurately mark and align the cap plate on the ceiling above the sill plate.
**Align a straight 2 × 4** right next to the sill plate and make a mark on the ceiling. Use a level to extend that line directly above the sill plate. Attach the cap plate at that point.
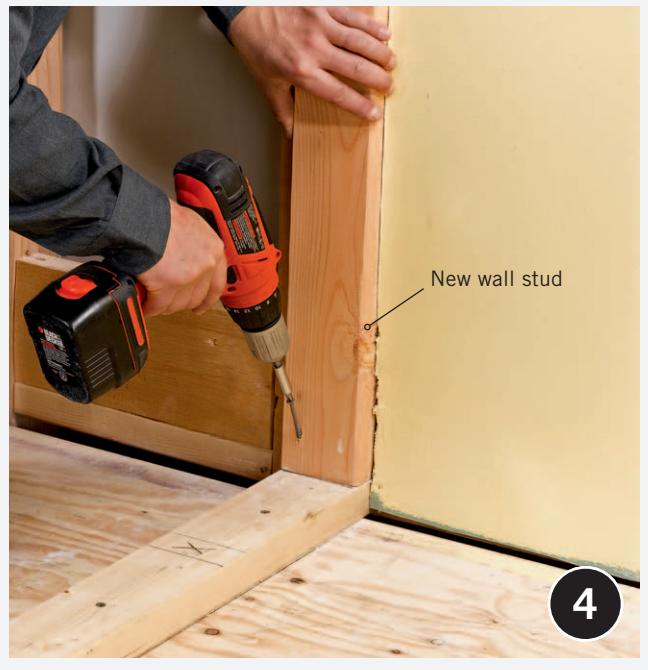
Installing 2x4 studs for the shower alcove wall, ensuring each stud is plumb before attaching.
**Install the 2 × 4 studs** at the outlined locations. Check with a level to make sure each stud is plumb and then attach them by driving deck screws toenail style into the sill plate and cap plate.
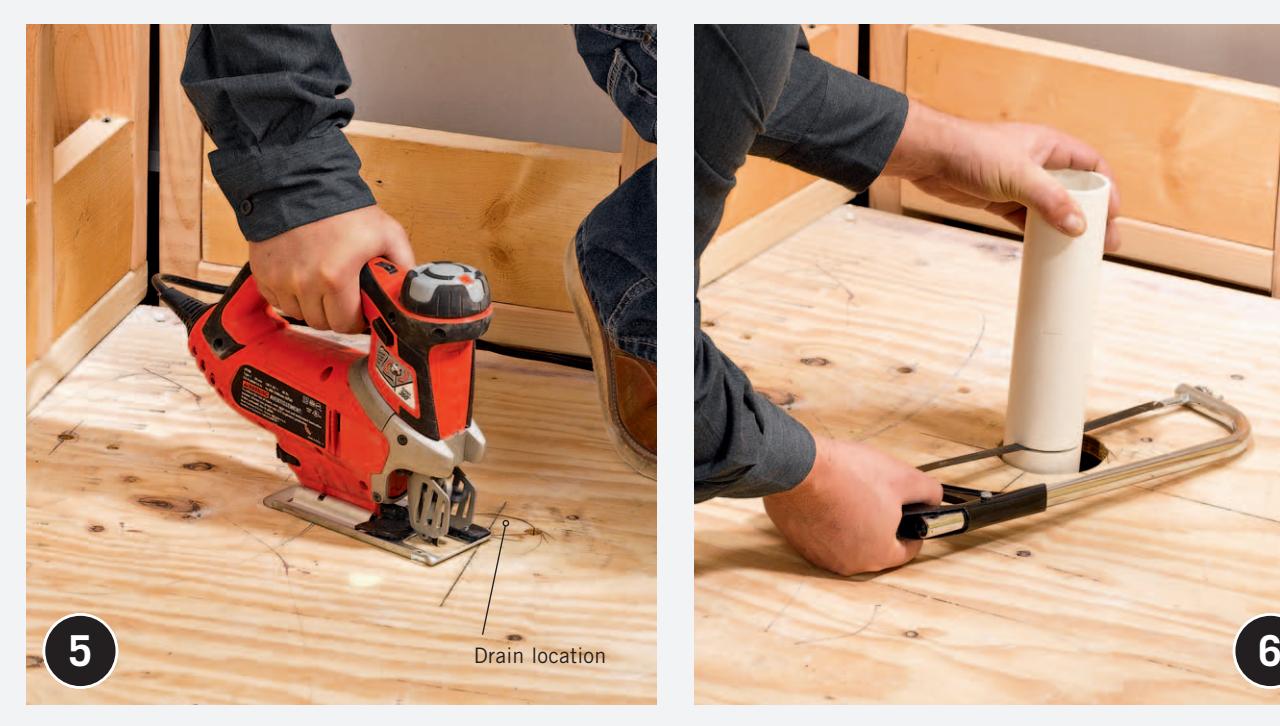
Cutting an access hole in the floor for the drain and drilling openings in the sill plate of the wet wall for supply pipes.
**Cut an access hole in the floor for the drain,** according to the installation-manual instructions. Drill openings in the sill plate of the wet wall (the new wall in this project) for the supply pipes, also according to the instructions.
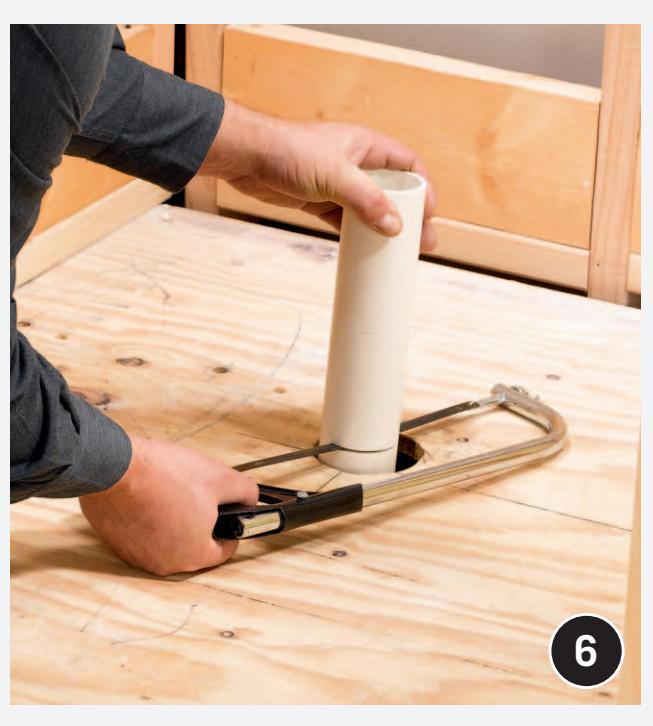
Installing a drain pipe and branch line, then trimming the drain pipe flush with the floor.
**Install a drain pipe and branch line** and then trim the drain pipe flush with the floor. If you are not experienced with plumbing, hire a plumber to install the new drain line.
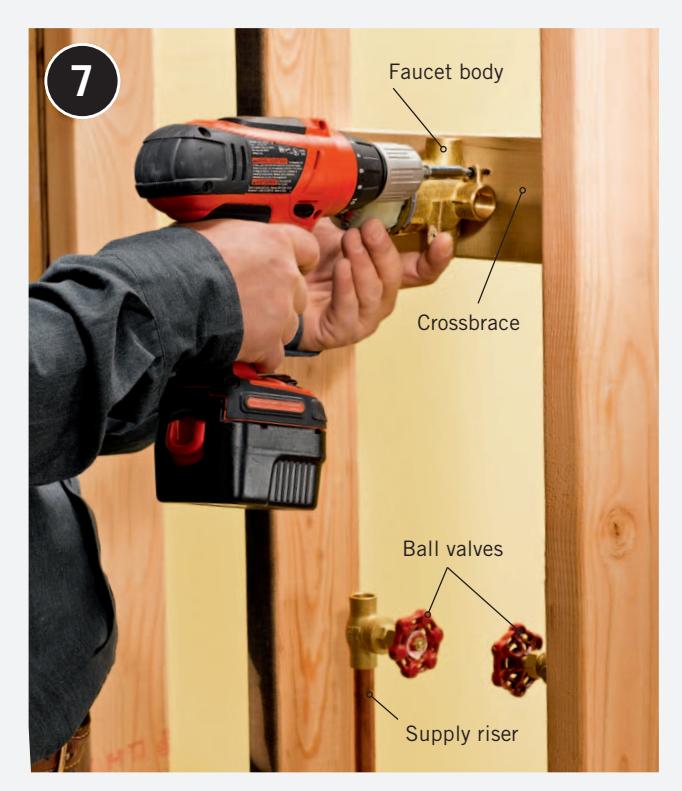
Installing new supply risers and crossbraces between studs in the wet wall for mounting the faucet body and shower arm.
**Install new supply risers as directed** in the instruction manual (again, have a plumber do this if necessary). Also install crossbraces between the studs in the wet wall for mounting the faucet body and shower arm.
**NOTE:** Some local codes require that you use gate valve shutoffs, not ball valves.
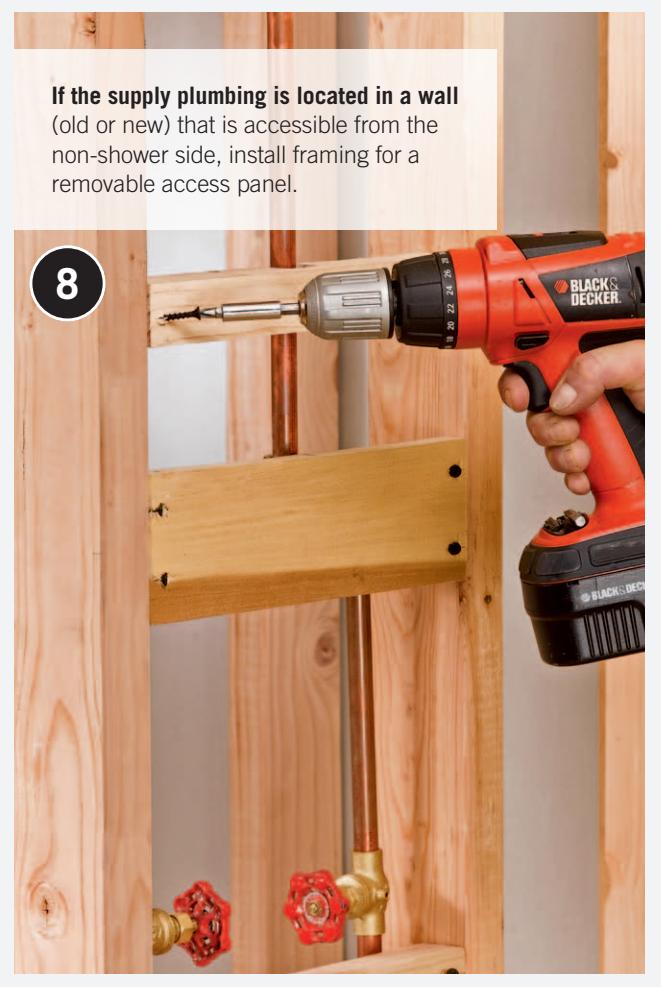
Diagram showing the installed supply risers and crossbraces within the wet wall framing.
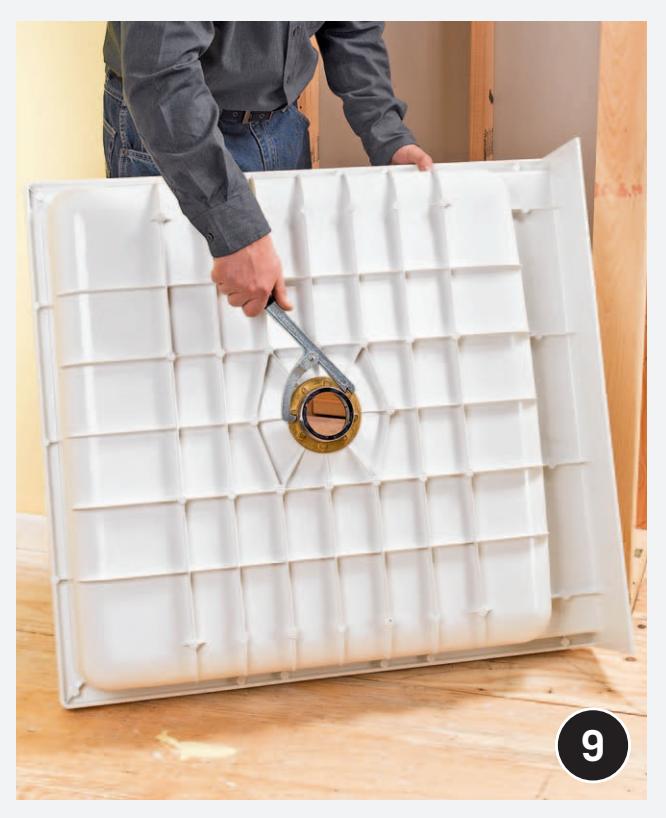
Attaching the drain tailpiece to the underside of a shower pan using an adjustable spud wrench.
**Attach the drain tailpiece** that came with your shower pan to the underside of the unit, following the manufacturer's instructions precisely. Here, an adjustable spud wrench is being used to tighten the tailpiece.
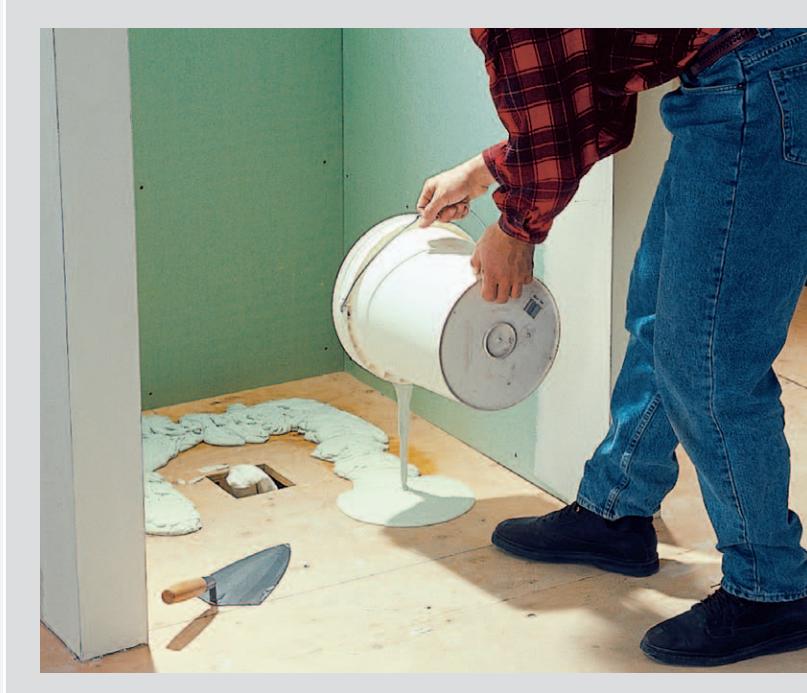
Close-up view of an adjustable spud wrench being used to tighten a drain tailpiece on a shower pan.
**OPTION:** If the floor is uneven, use liquid floor leveler. Allow it to cure and then use thinset mortar to set the receptor (pan) for the enclosure kit.
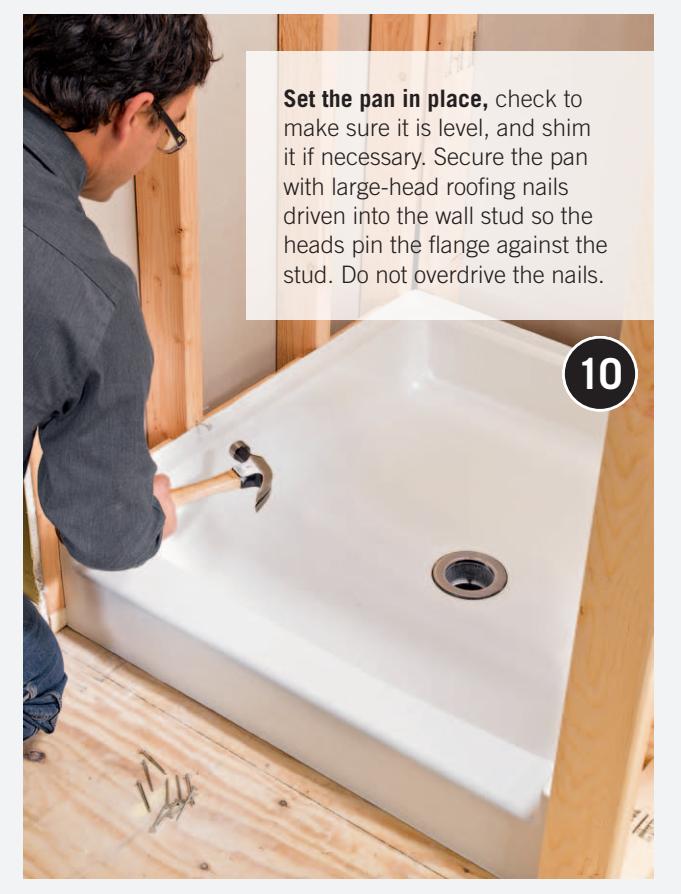
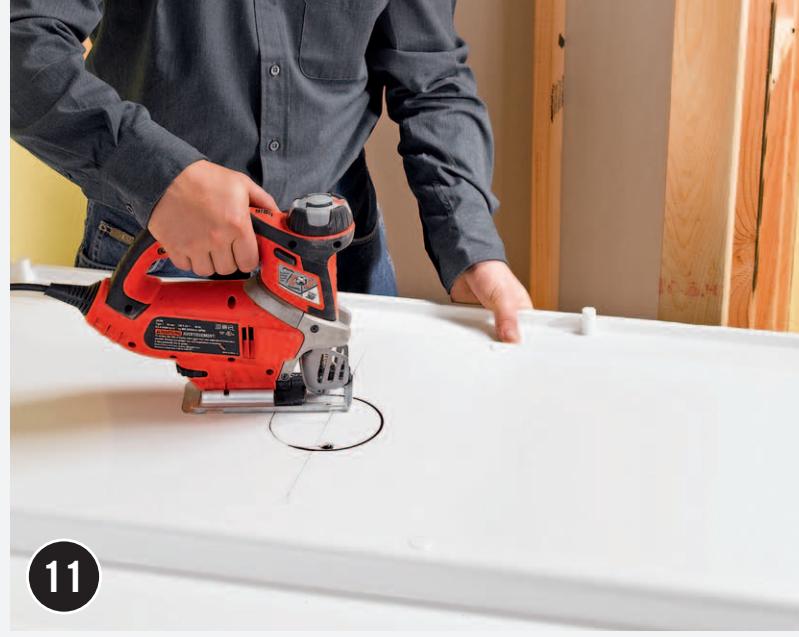
**Lay out the locations for the valve hole or holes** in the end wall panel that will be installed on the wet wall. Check your installation instructions. Some kits come with a template marked on the packaging carton. Cut the access hole with a hole saw and drill or with a jigsaw and fine-tooth blade. If using a jigsaw, orient the panel so the good surface is facing down.
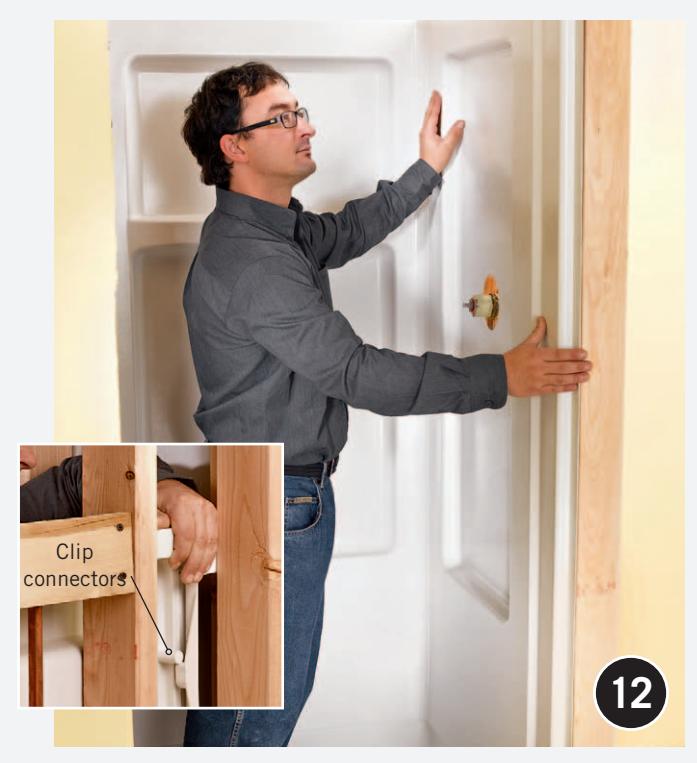
**Position the back wall** so there is a slight gap (about 1 ⁄32") between the bottom of the panel and the rim of the pan—set a few small spacers on the rim if need be. Tack a pair of roofing nails above the top of the back panel to hold it in place (or use duct tape). Position both end walls and test the fits. Make clip connections between panels (inset) if your kit uses them.
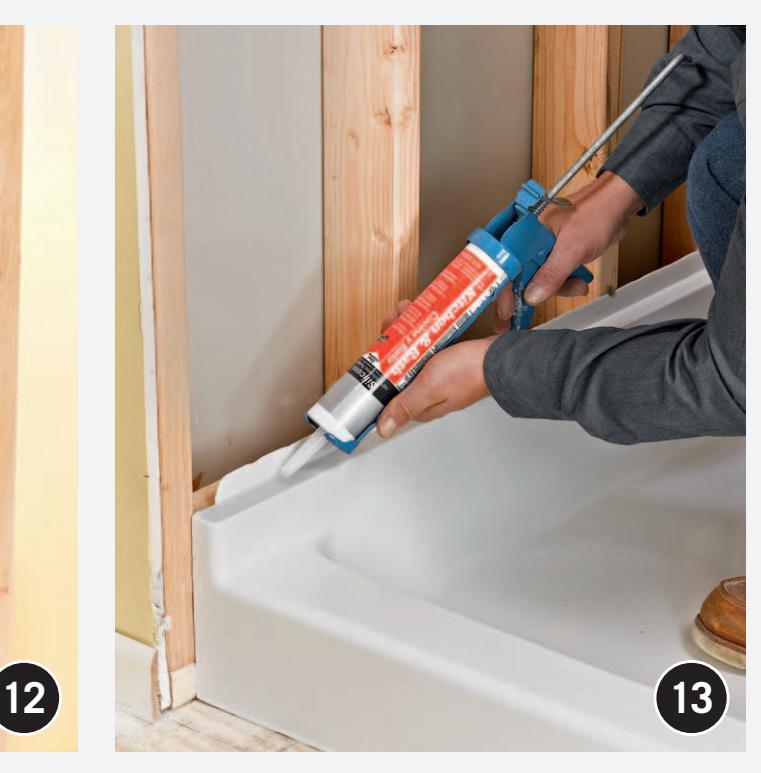
**Remove the end walls** so you can prepare the installation area for them. If your kit recommends panel adhesive, apply it to the wall or studs. In the kit shown here, only a small bead of silicone sealant on the pan flange is required.
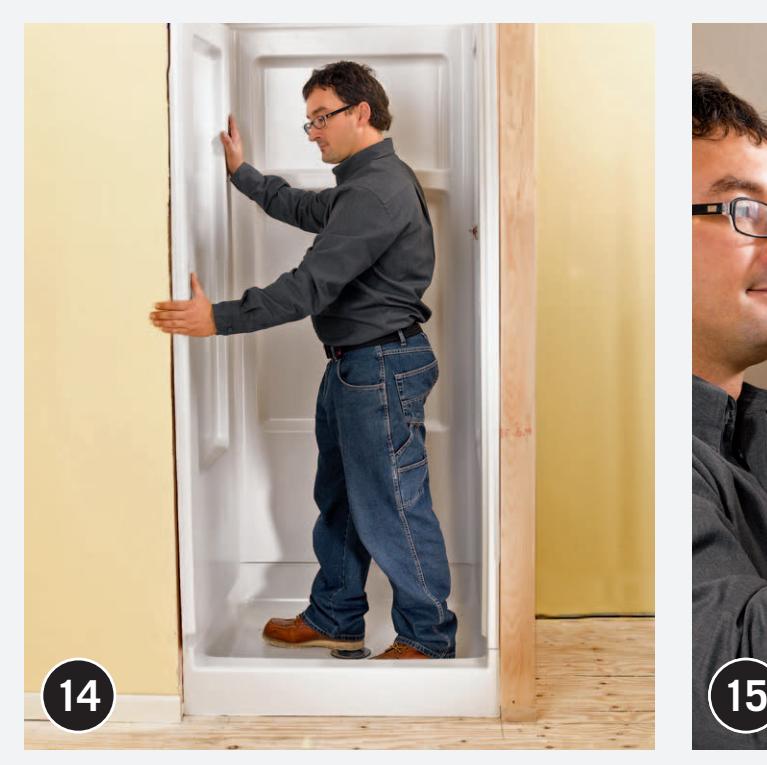
**Reinstall the end panels,** permanently clipping them to the back panel according to the kit manufacturer's instructions. Make sure the front edges of the end panels are flush with the front of the pan.
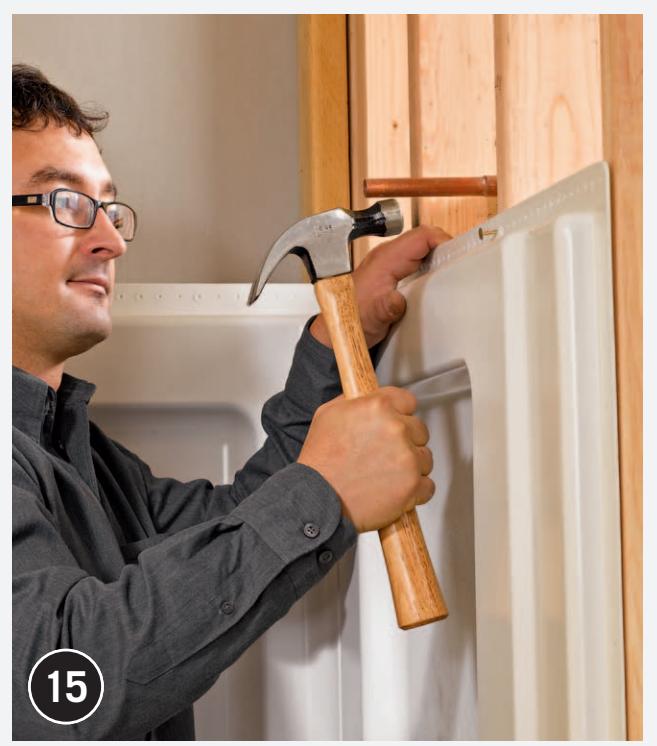
**Once the panels are positioned correctly** and snapped together, fasten them to the wall studs. If the panels have predrilled nail holes, drive roofing nails through them at each stud at the panel tops and every 4 to 6" along vertical surfaces.
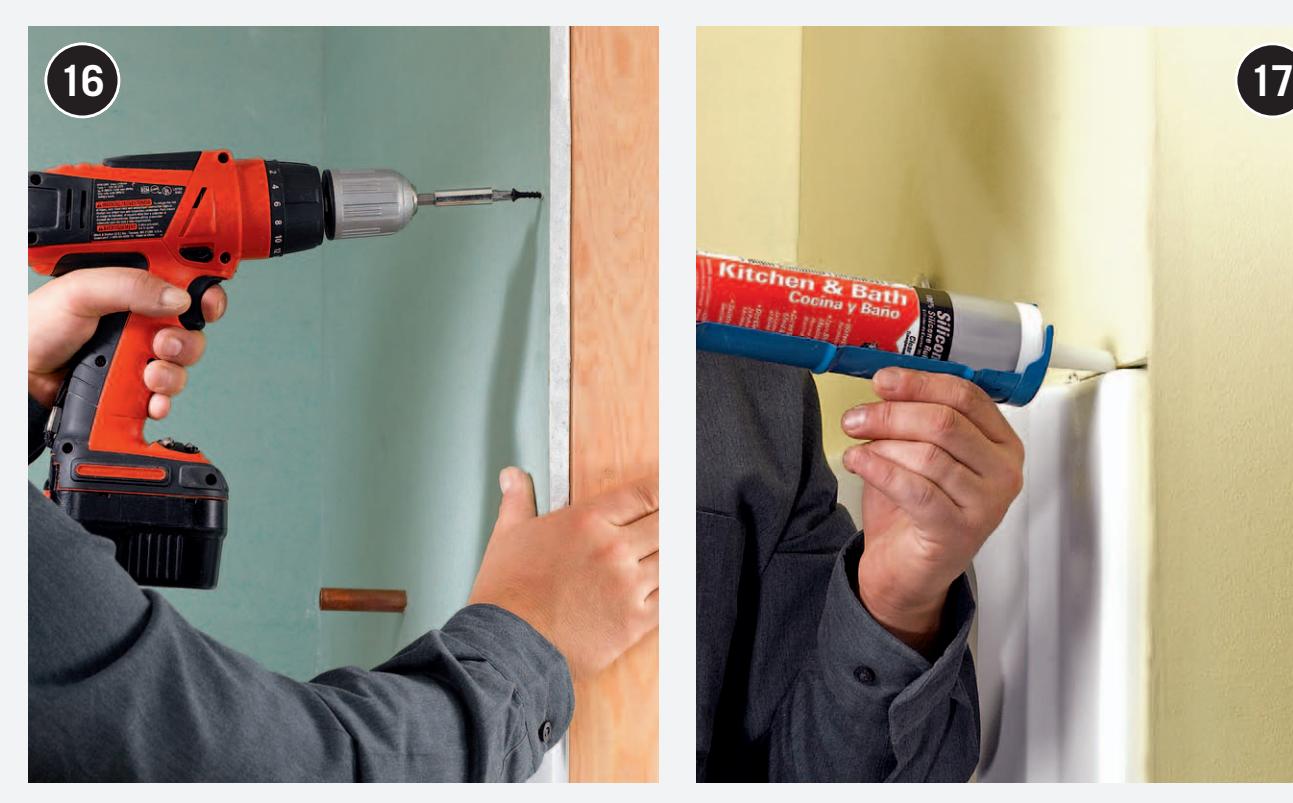
**Install wall-covering material** above the enclosure panels and anywhere else it is needed. Use cement board, and maintain a gap of ¼" between the shoulders of the top panel flanges and the wall covering.
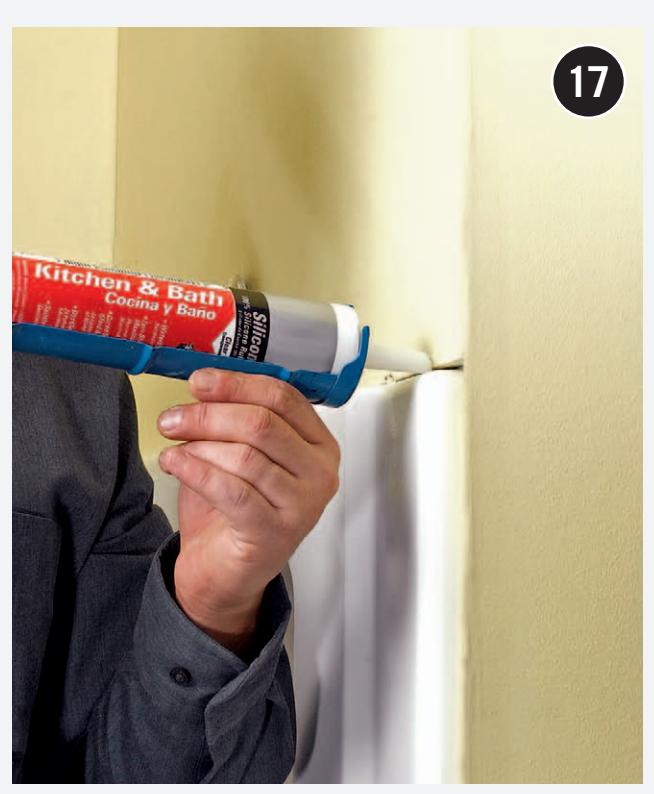
**Finish the walls** and then caulk between the enclosure panels and the wall coverings with silicone caulk.
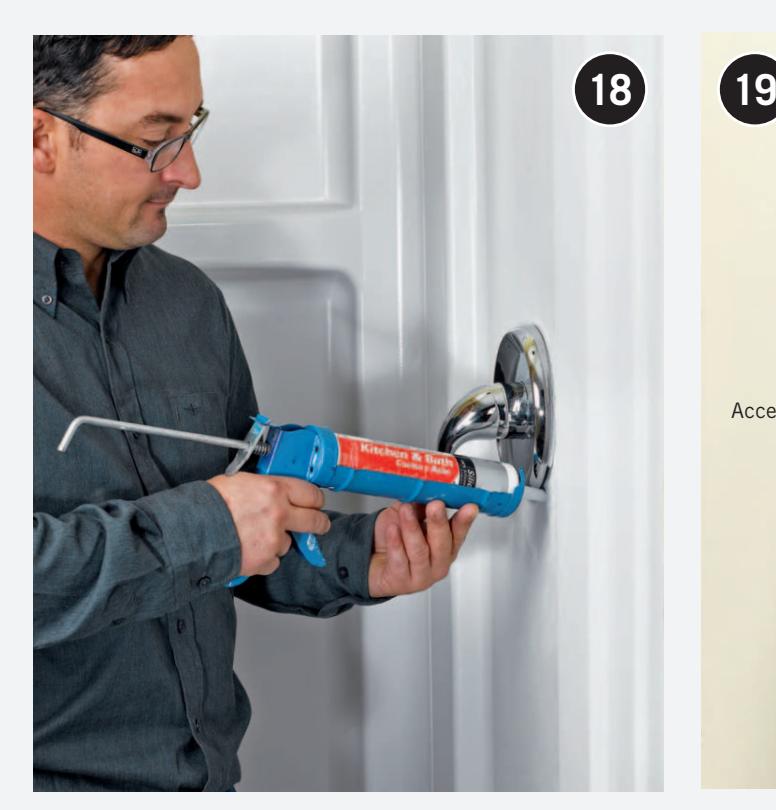
**Install the faucet handles and escutcheon** and caulk around the escutcheon plate. Install the shower-arm escutcheon and showerhead. Add a shower door.
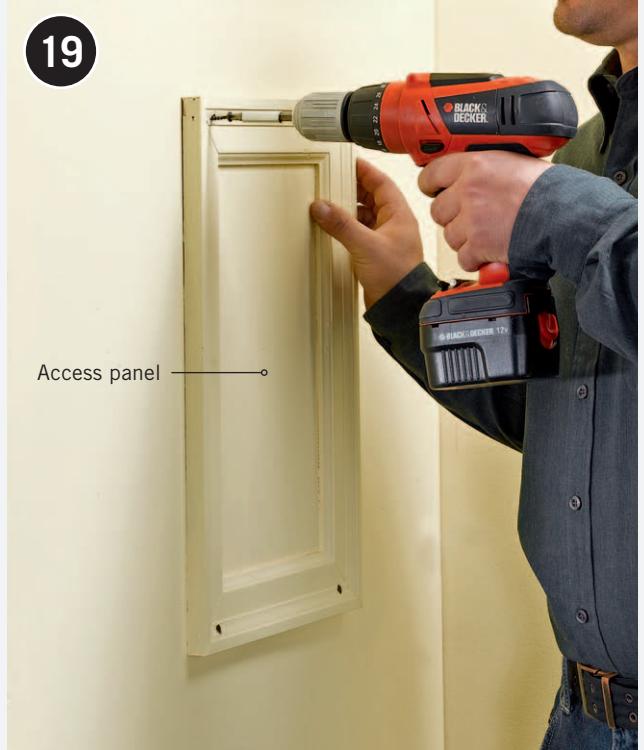
**Make an access panel** and attach it at the framed opening created in step 8. A piece of ¼" plywood framed with mitered case molding and painted to match the wall is one idea for access-panel covers.
## Neo-Angle Showers
Whether you're making a half-bath more useful, or simply want to add a step-in shower in place of an undersized tub in a small bathroom, the solution is the same—a neo-angle shower. Using a minimum of floor space by fitting into a corner, this type of shower fits a lot of style and usefulness in a tiny footprint. Neo-angle showers are offered in looks from conventional to ultramodern, as basic one-head showers, or more upscale versions with multiple heads and other luxury options. No matter what, you'll find one that suits both your budget and your bathroom style.
In any case, most neo-angle showers are sold as all-in-one packages. The kit here includes the shower pan, three wall pieces (two flat panels and a corner shelf-connector unit), and the glass panels and frames for the sliding door. Some kits include more panels, but the basic construction is the same. All connectors and hardware are included. Some budget kits, however, don't include everything you'll need for installation. Read the instructions closely, unbox and check the parts that are included and that everything that was supposed to be supplied is there, and then shop for any additional pieces you'll need before you begin the project.
The key to smooth neo-angle shower installation is making sure the wall panels, frames, and shower pan fit squarely in the corners and against existing walls. Walls that are out of square or not perfectly flat can complicate this job, so time spent correcting faulty wall surfaces, will be time well spent.
This project requires diligent and careful sealing of the joints using silicone caulk and silicone sealant. Don't rush this step; it's crucial to achieving a workable, leak-free shower.
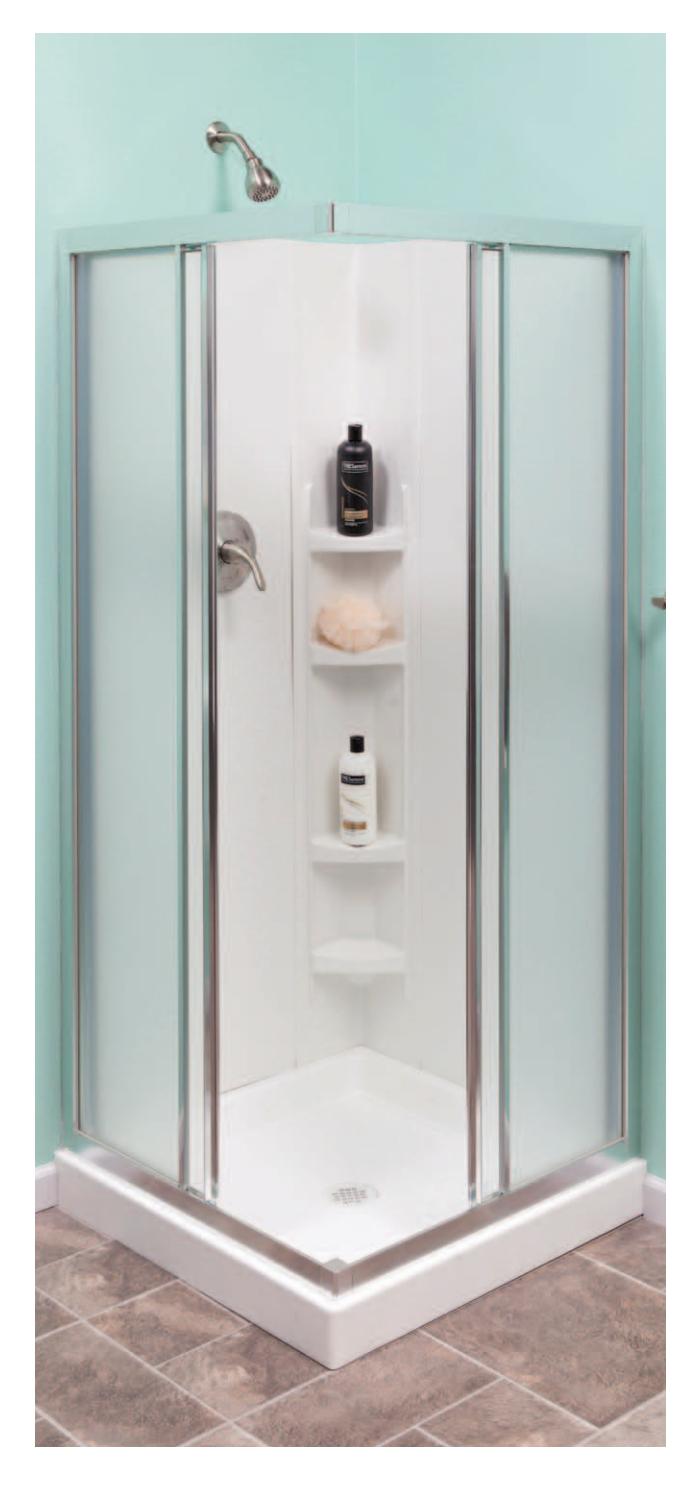
### TOOLS + MATERIALS
* Neo-angle shower kit with shower pan
* Tape measure
* Pencil or marker
* 4' level
* Straightedge
* Utility knife
* Silicone sealant
* Wall (panel) adhesive
* Siliconized latex caulk
* Caulk gun
* Carpenter's square
* Hammer
* Center punch
* Phillips screwdriver
* Masking tape
* Mineral spirits
* Clean cloths
* Plastic wall anchors
* Eye protection
* Work gloves
* Drill with bits and hole saw

### How to Install a Neo-Angle Shower
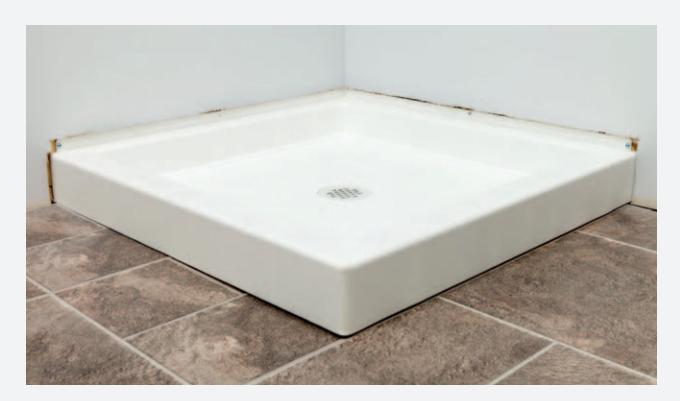
**Prepare the floor drain** and install a prefabricated shower pan in the corner of the room, following the instructions on pages 74 and 75. Make sure the outside diameter of the drain pipe matches the requirements of the shower pan. The shower pan must sit perfectly level on the floor and tight against the wall studs on the two adjoining walls for the installation to proceed smoothly.
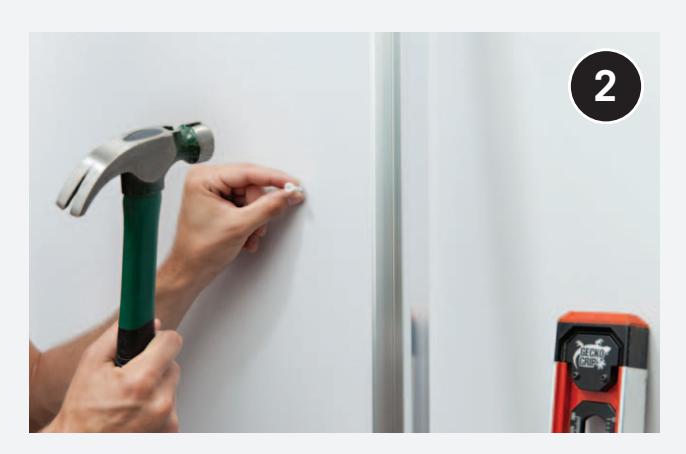
**Drill holes** and drive plastic wall anchors for the metal shower channels. The plastic wall anchors are included in most shower kits.
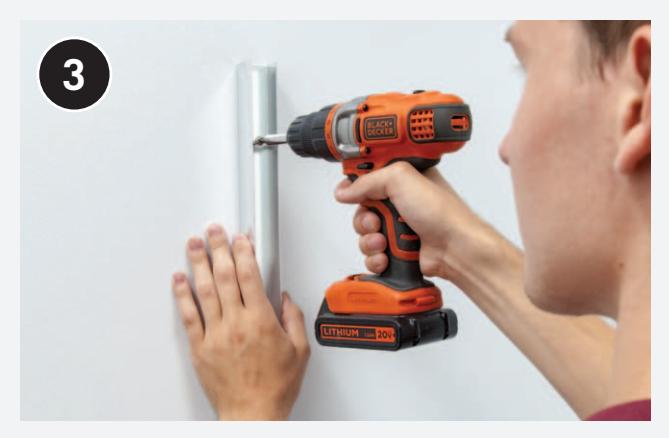
**Position the wall channels in place** and secure them to the wall with mounting screws driven through the mounting holes
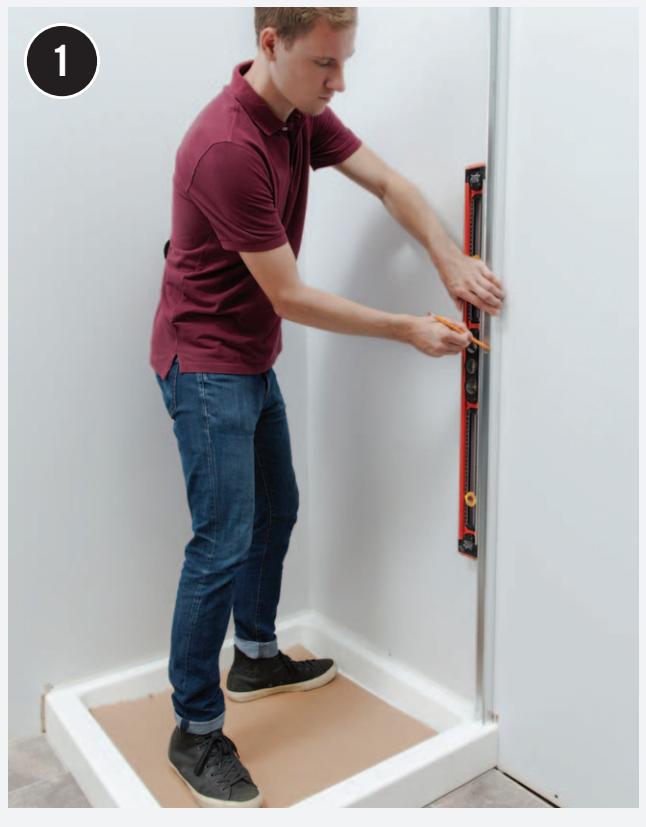
**Draw centerlines** along the top of the outer thresholds of the shower pan. Position one of the metal wall channels vertically against the wall, so the bottom edge is centered on the centerline. Use a level to adjust the wall channel for plumb, then mark the mounting-hole locations on the wall through the holes in the wall channel.
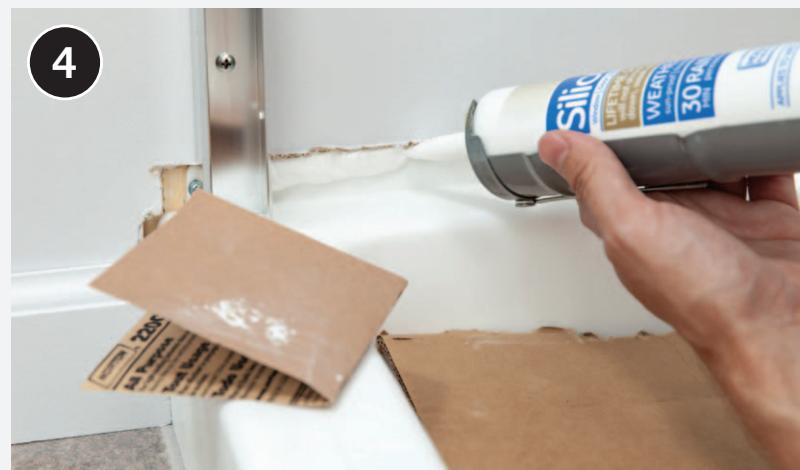
**Fill the gaps** between the shower base and the wall with siliconized caulk. Install the other wall channel in the same way, and seal the remaining gap between the shower pan and the wall. Lightly sand the top face of the shower pan curbs with the sandpaper included in the kit. This will create a better bonding surface when you seal the pan at the end of the project. and into the wall anchors.
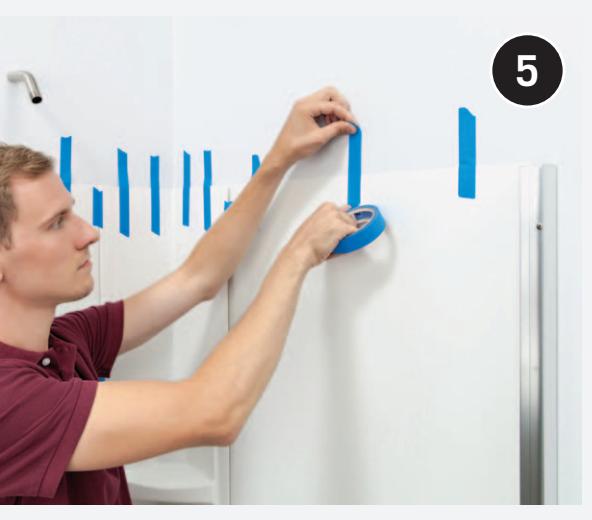
**Prepare the walls** in the manner recommended by the manufacturer. Test-fit the side panels and the corner panel by taping them in place with painter's tape, with the shiny side of the panels facing out. The wall panels should butt against the wall channels and rest flat against the shower-pan curbs. If the wall panels don't line up correctly, the wall channels are out of plumb or the shower pan is not level. The corner panel should slightly overlap the side wall panels, by about ½". Trim if the overlap is greater.
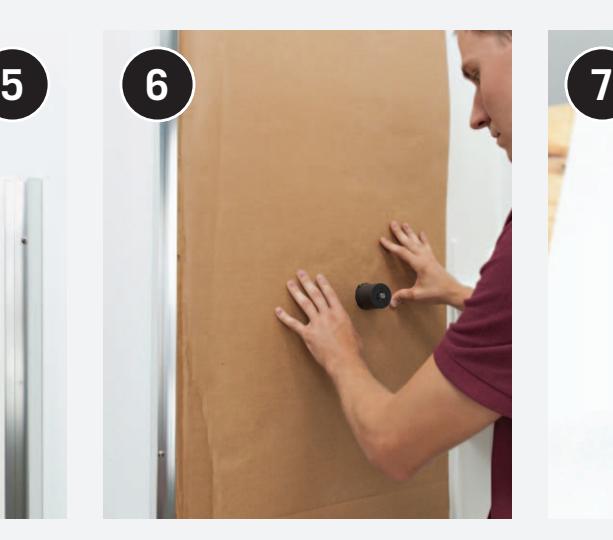
**To prepare the side wall** that will contain the plumbing fixtures, cut a cardboard template to the same size as the wall panel and place the template against the wall. Mark the location of the shower and faucet on the template. Make an X on the cardboard for reference. Remove the cardboard template, then use a utility knife to cut away openings for the plumbing stub-outs on the template. Test-fit the cardboard template against the wall, making sure the plumbing pipes fit correctly.
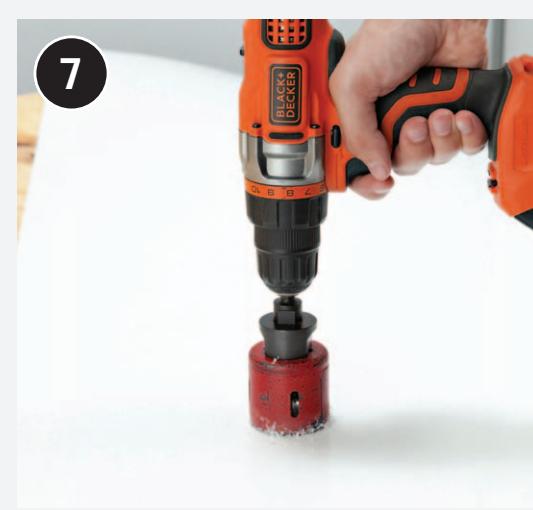
**Use the template** to mark the opening on the wall panel that will hold the shower plumbing fixtures, then use an appropriately sized hole saw to cut openings in the wall panel. Make sure to align the wall panel correctly when marking: the shiny side will face into the shower.
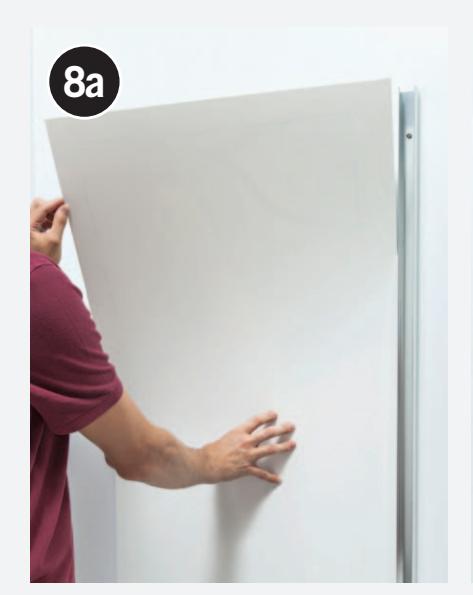
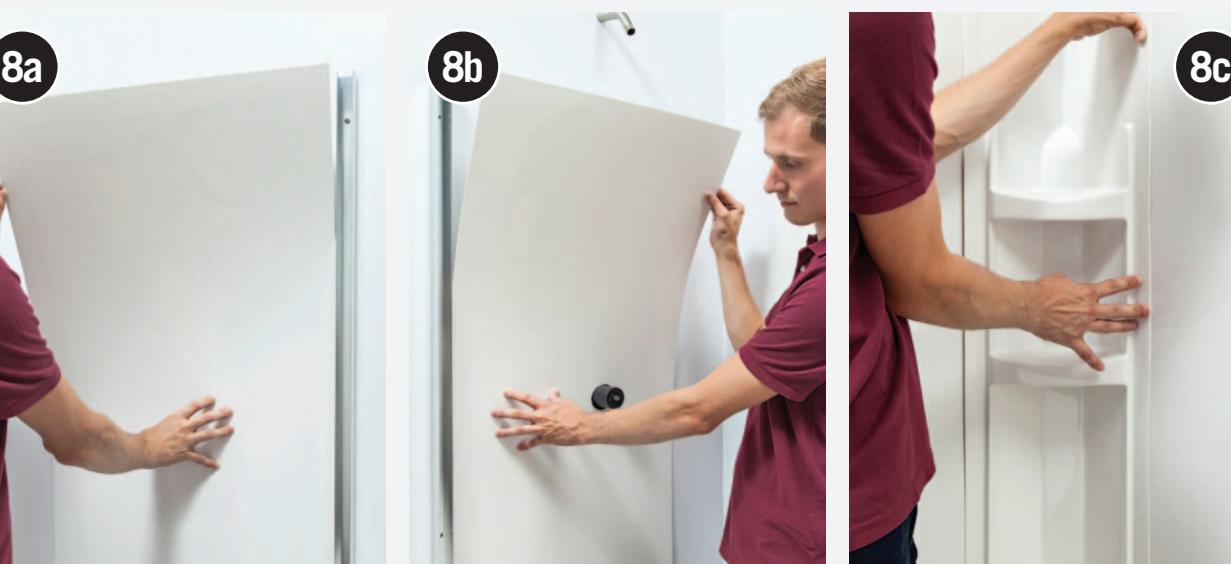
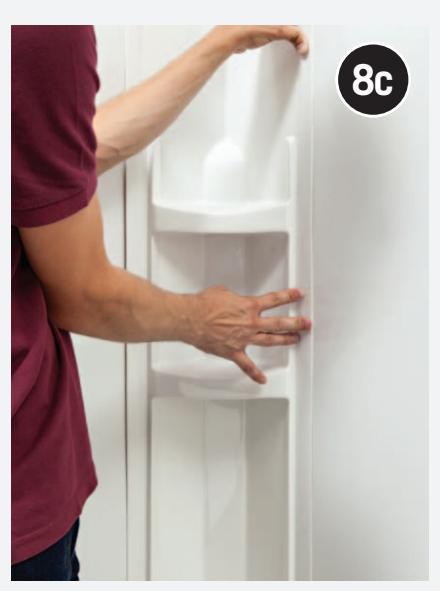
**Beginning with the panel without plumbing cutouts,** spread a continuous ¼" bead of panel adhesive along the back, no closer than 2" to the edges. Leave gaps at the ends, so air can escape when pressing the panels against the wall. Also apply an S-shaped continuous bead to the center of the panel. Position the panel against the wall so the bottom rests firmly against the shower-pan curb and side edges are against the wall channel and the corner of the room. Press the panel against the wall firmly, and smooth it with even hand pressure until the panel is perfectly flat. Repeat with the wall that has plumbing cutouts, applying panel adhesive around the cutouts. Finally, apply panel adhesive to the back of the corner panel and press it into place. (Some shower models may have a connecting rod that joins the corner panel to the shower-pan unit.) Clean off adhesive squeeze-out with a rag moistened with mineral spirits.
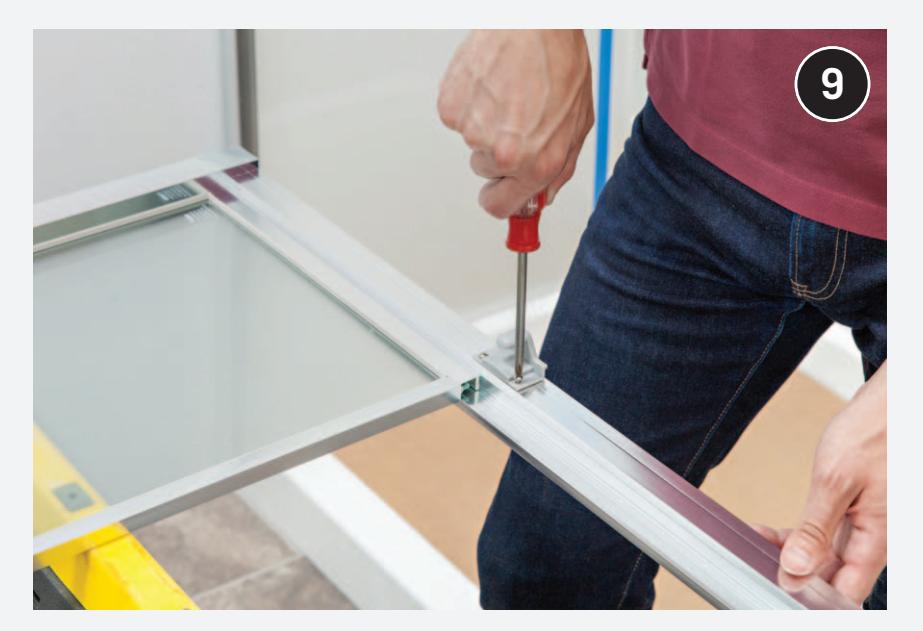
**Following the kit instructions,** begin assembling the doorframes. With our kit, the first step is to attach the center guide to the bottom rail using the screws included with the kit.
**Stand the sliding door panels upright** so the hanging brackets are at the top. Install the rollers on the same side of the door panels as the door stops.
**Most shower kits** have both stationary glass panels and sliding panels. Begin by installing the first stationary panel by inserting it into the wall channel so the roller channel at the side of the top rail is facing inside the shower stall. Now insert the sliding door panel on this side, so that the rollers engage the roller channel inside the top rail. Repeat this step with the opposite-side stationary panel and sliding door panel. Secure the top and bottom rails of the glass panels to the side channels and to one another using the corner connectors included with the kit.
**Install the seal strips** on the back of both sliding door panels, as per the kit instructions. These pliable strips will allow the door to form a watertight seal against the stationary panels.
**Make small adjustments** to the entire assembly to center it on the top face of the shower pan curbs. Once positioned correctly, so that the entire unit is plumb and the bottoms of the stationary panels are flat and level on the shower pan, drill holes in the frame through the adjustment holes in the glass frames, and secure the unit to the wall channels with the provided screws. Test the doors and, if necessary, make small adjustments by loosening and then reattaching the roller screws at the top of the doors. Allow the shower unit to sit in place for 12 hours before beginning the waterproofing step.
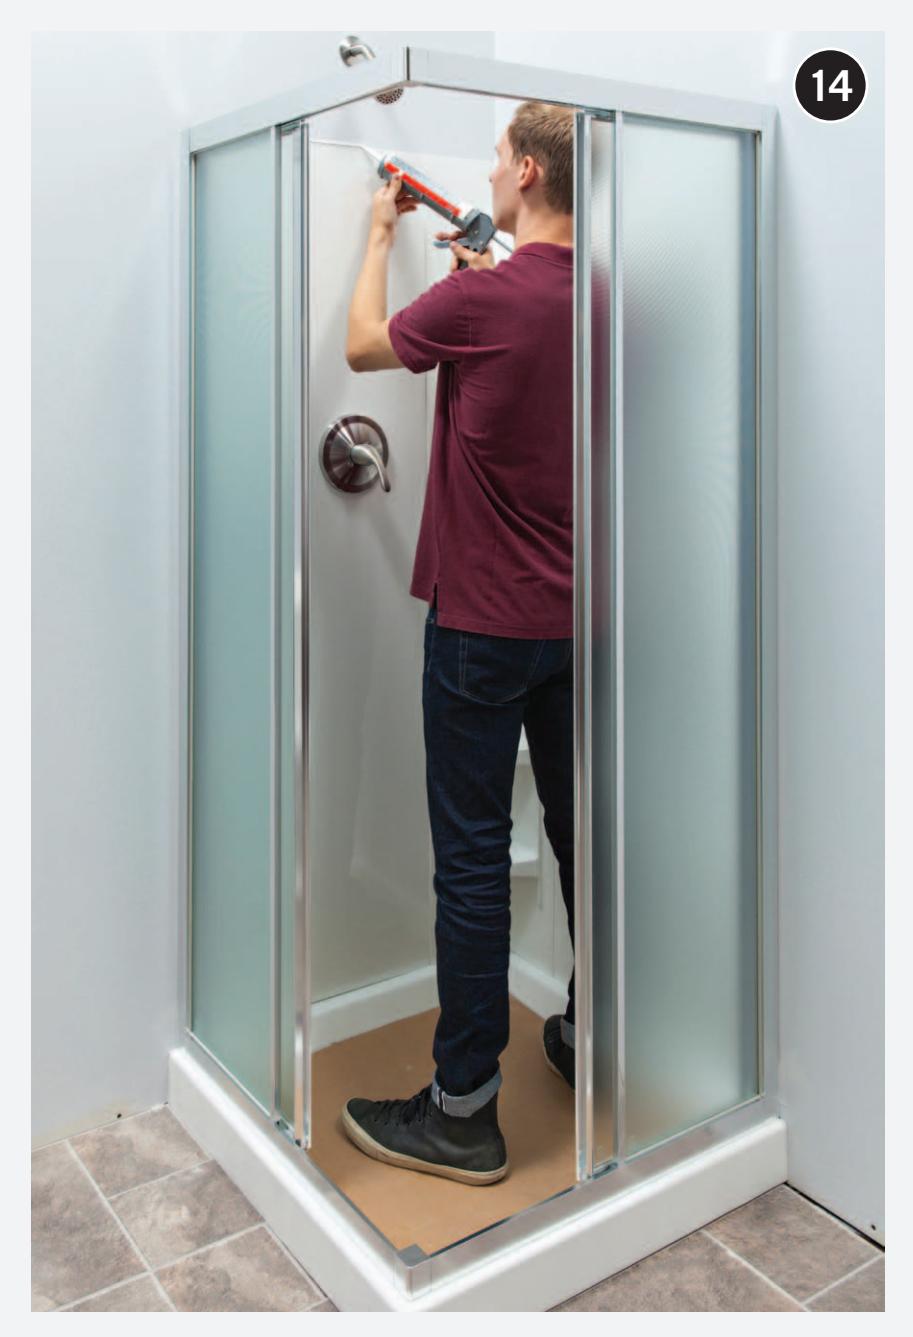
## Waterproofing the Shower
Waterproofing the shower will require the use of two different but similar-sounding products: siliconized latex caulk and silicone sealant. First, apply caulk to the seams between the wall panels and corner panel, between the wall panels and the metal wall channels, the seam where the wall panels and corner panel meet the shower pan, and along the tops of the wall panels. Apply silicone sealant to the heads of all screws in the upright panel frames. From inside the shower, apply silicone sealant along the seams where the bottom rails lay on the shower pan curb and along the bottoms of the wall channels and glass panel upright frames. Also apply silicone sealant around the center guide. Apply silicone sealant around the joint where the bottom rails butt up against the bottom connector. Finally, apply sealant to the heads of any exposed screws.
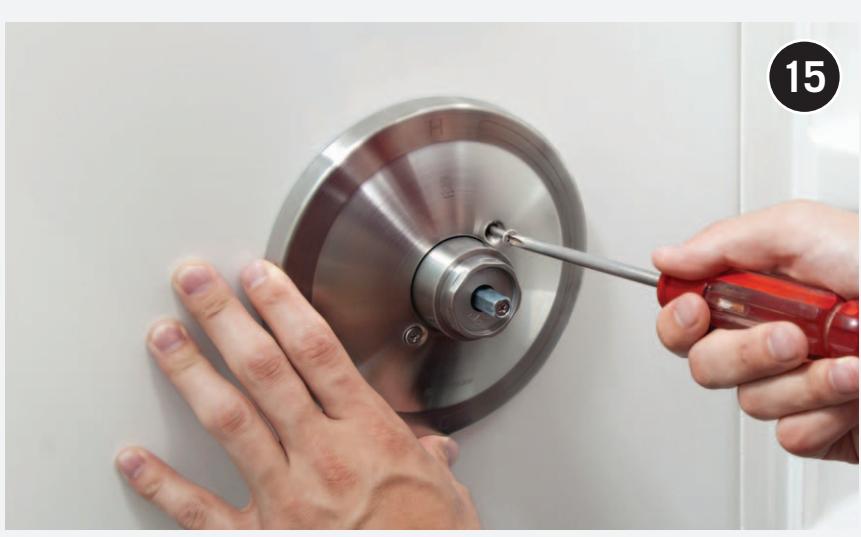
## Let Caulked and Sealed Seams Dry Completely
To complete your shower, make the plumbing hookups of the shower faucet spray head and the shower valve. Test the shower to check for leaks.