---
title: "NORTHEAST GARDENING: Northeast Gardening"
id: "6438"
type: "page"
slug: "01-northeast-gardening"
published_at: "2026-07-18T04:29:02+00:00"
modified_at: "2026-07-18T16:33:42+00:00"
url: "https://preppers-paradise.com/library/thecompleteguidetonortheastgardening/01-northeast-gardening/"
markdown_url: "https://preppers-paradise.com/library/thecompleteguidetonortheastgardening/01-northeast-gardening.md"
excerpt: "This book offers comprehensive guidance for cultivating a thriving garden in the unique climate of the Northeast region, covering techniques for growing a wide variety of landscape and garden plants."
taxonomy_category:
- "Books"
- "DIY & Home Improvement"
- "Free Teaser"
taxonomy_post_tag:
- "gardening"
- "landscape design"
- "northeast gardening"
- "perennials"
- "pest control"
- "plant care"
- "regional plants"
- "shrubs"
- "trees"
- "vegetable gardening"
---
# NORTHEAST GARDENING: Northeast Gardening
[← NORTHEAST GARDENING](/library/thecompleteguidetonortheastgardening/)
Chapter 1 of 40 · Free teaser
# NORTHEAST GARDENING
Techniques for Growing Landscape & Garden Plants in Maine, New Hampshire, Vermont, New York, western Massachusetts, northern Connecticut, southern Quebec, New Brunswick & eastern Ontario
by Lynn Steiner
{alt="Cover image for Northeast Gardening book"}
## CONTENTS
| ABOUT THIS BOOK. | 7 |
|:--------------------------------------------------------------------------|:----|
| A GARDEN OF YOUR OWN. | 8 |
| **THE BASICS** | 15 |
| Talking the Talk | 16 |
| Zoning In. | 18 |
| Going Underground | 20 |
| Creating a New Garden | 25 |
| The Shady Side of Gardening. | 28 |
| Buying Plants | 30 |
| Staring Plants from Seeds | 30 |
| Getting Plants in the Ground | 34 |
| Plants to Avoid | 35 |
| **THE PLANNING STAGE.** | 37 |
| Make It Your Own | 38 |
| Taking Stock | 40 |
| Establishing Structure. | 44 |
| Making the Most of Small Space. | 50 |
| Gardening Up Front | 52 |
| Going to Pots | 54 |
| **FIT TO EAT** | 61 |
| Planning and Preparing Your Garden. | 62 |
| Deciding What to Grow | 69 |
| Planting Your Garden | 72 |
| Care of Your Vegetable Garden | 78 |
| Reaping the Rewards | 82 |
| Growing Culinary Herbs | 84 |
| **JUST FOR FUN** | 99 |
| Annuals | 100 |
| Perennials | 106 |
| Bulbs | 116 |
| Groundcovers | 122 |
| Ornamental Grasses | 123 |
| Annuals, Perennials, Bulbs, Groundcovers
and Grasses for the Northeast | 128 |
| **CREATING STRUCTURE** | 159 |
| Selecting Shrubs, Vines & Small Trees | 160 |
| Care of Shrubs | 166 |
| Hedges | 171 |
| Vines | 174 |
| Shrubs, Vines and Small Trees for the Northeast | 176 |
| Choosing the Right Tree | 190 |
| Care of Trees | 194 |
| Trees for the Northeast | 198 |
| **TAKING CARE** | **205** |
| Watering Your Garden | 206 |
| Controlling Weeds | 206 |
| Mulching | 210 |
| Fertilizing Your Plants | 212 |
| Composting | 214 |
| What Can Go Wrong | 216 |
| Cultural and Environmental Problems | 217 |
| Troubleshooting Guide | 218 |
| Diseases | 221 |
| Insects | 226 |
| Animal Pests | 233 |
| **RESOURCES** | **236** |
| **INDEX** | **237** |
{alt="Gardener tending to plants"}
{alt="Close-up of a blooming flower"}
{alt="Various garden tools"}
{alt="Garden path with flowers"}
{alt="Vegetable garden with ripe produce"}
{alt="Shrubs and small trees in a landscape"}
{alt="A mature tree in a garden setting"}
{alt="Watering can and garden hose"}
{alt="Compost bin in a backyard"}
{alt="Scenic view of a garden in the Northeast"}
## About this Book
Just like North America is made up of many different types of people, it is also made up of many different plant-growing regions. And just as you can often tell where a person comes from by the way they dress, speak, or act, you can often tell where a plant comes from by the way it looks and how it grows. This book is all about celebrating the region where you live and enjoying the unique gardening opportunities it has to offer.
You'll find many benefits to be reaped from tending a home garden. Not only will you add beauty to your landscape and neighborhood, you will increase the value of your property and improve your quality of life.
Gardening allows you to mix relaxation with beneficial outdoor activity while providing an outlet to relieve stress. When you add vegetables and herbs to your garden, you will also reap the additional health benefits you get from growing your own food.
In addition to providing you with a place to relax and spend time with friends and family, your garden can also help preserve part of your region's plant heritage. When populated with regional plants, your gardens will provide food and habitat for native fauna, especially beneficial insects and birds and butterflies. Native pollinating insects rely on regional plants for food and nectar, and gardens are becoming more and more important in this process as natural plant habitats are lost.
This book is intended for anyone who wants to take a more regional approach to his or her gardening. Maybe you've just purchased your first house and you are looking to spruce it up. Maybe you're finally ready to make the commitment to growing your own food and want to know how to get started. Maybe you're looking to install your first perennial border. Or maybe you've inherited an overgrown landscape and need to know how to get it back in shape.
Whether you garden a tiny city lot or a sprawling country estate, you'll find this book is just what you need to get started and to sharpen your skills. The pages are packed with practical information and hundreds of step-by-step photos to take you through the basic techniques involved in all major aspects of gardening. The information is designed to help you become a responsible and sustainable gardener so you can complement your natural surroundings. Priority is put on choosing the right plant for the right place so you can reduce or eliminate your need for chemical fertilizers, pesticides, and watering, as well as on choosing plants that are beneficial to native pollinating insects and birds.
## A Garden of Your Own
The Northeast and eastern Ontario were once dominated by stately forests, ranging from the dense shade of spruce and firs to deciduous forests featuring maples and other hardwoods. The towering Appalachian Mountains give way to rolling hills and rounded summits, and then to miles of jagged coastline. In between there is a mosaic of plant communities, including wetlands, open sunny grasslands, and lakeshores. All of these habitats provide inspiration for gardeners in this area to celebrate their plant heritage and create special places of their own—places where they feel comfortable, surrounded by plants reflecting their heritage and the people who have come before them.
This region is influenced by both coastal and inland weather patterns, resulting in relatively mild areas and areas that can be quite cold. But all gardeners in the Northeast and eastern Ontario have four distinct seasons to contend with. Each year, the welcome new growth of spring glides into lush summer gardens filled with a brash show of color. Fall brings a more diffused, but just as showy, color palette—one last gasp before the subtlety of winter returns. Gardening heightens our awareness of these seasons and allows us to experience them in all their glory in our own yards.
This region's unique climate, geography, and natural features make it a special place to tend a plot of land.
{alt="A vibrant garden with a variety of plants and flowers"}
{alt="A lush green landscape with trees and rolling hills"}
The climate in this region provides enough natural moisture, sunlight, and summer warmth to support many types of plants. Soils range from clay to loam to sand, and are generally fertile enough to successfully grow a wide variety of plants without a lot of input. Snow cover helps insulate plants so they are able to survive harsh winters.
But this region also provides many challenges for gardeners. At the top of the list are the harsh winter temperatures and a short growing season. Temperatures can dip to 30 or 40 degrees below zero in parts of the region in winter, and the growing season is limited by late spring frosts and early fall cold snaps. This region also receives harsh, drying winds throughout the year that can topple large trees and quickly dry out young plantings. By acknowledging these challenges and choosing plants that tolerate, and even thrive, in these conditions, you will be on your way toward a successful garden.
This book will help you sort through the many plants available and choose the ones that are best suited to your landscape, your growing conditions, and your lifestyle. Plants included in this book were chosen based on their suitability for the climate of the Northeast and eastern Ontario, their availability at local garden centers, and their low maintenance. Many of them are native plants that have evolved in the same growing conditions, and most are resistant to insect and disease problems and adapted to natural rainfall amounts. Many also provide important pollen and food sources for native insects and birds.
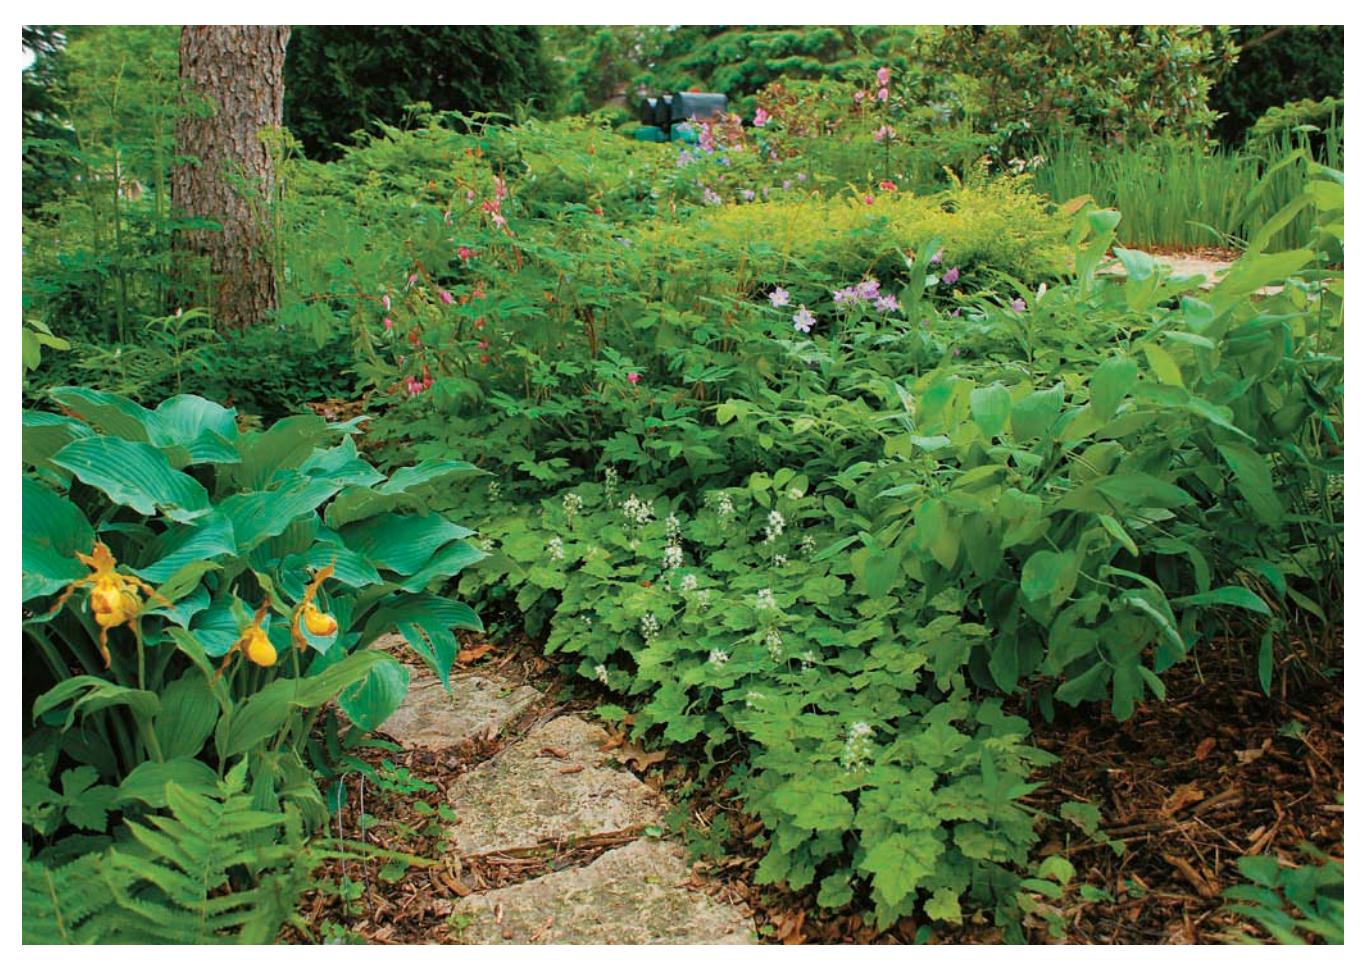
Capitalize on the beauty of the Northeast and eastern Ontario and use native plants to their best advantage. Many native woodland plants make beautiful garden plants. This shade garden includes native yellow lady's slipper, foamflower, wild geranium, and Solomon's seal, interplanted with hostas and bleeding hearts.
{alt="A gardener smiling while working in a garden"}
It's important to have fun in your garden. There are no hard-and-fast rules in gardening. Experiment to learn what works best for you and your lifestyle.
{alt="A bee and a swallowtail butterfly on purple coneflowers"}
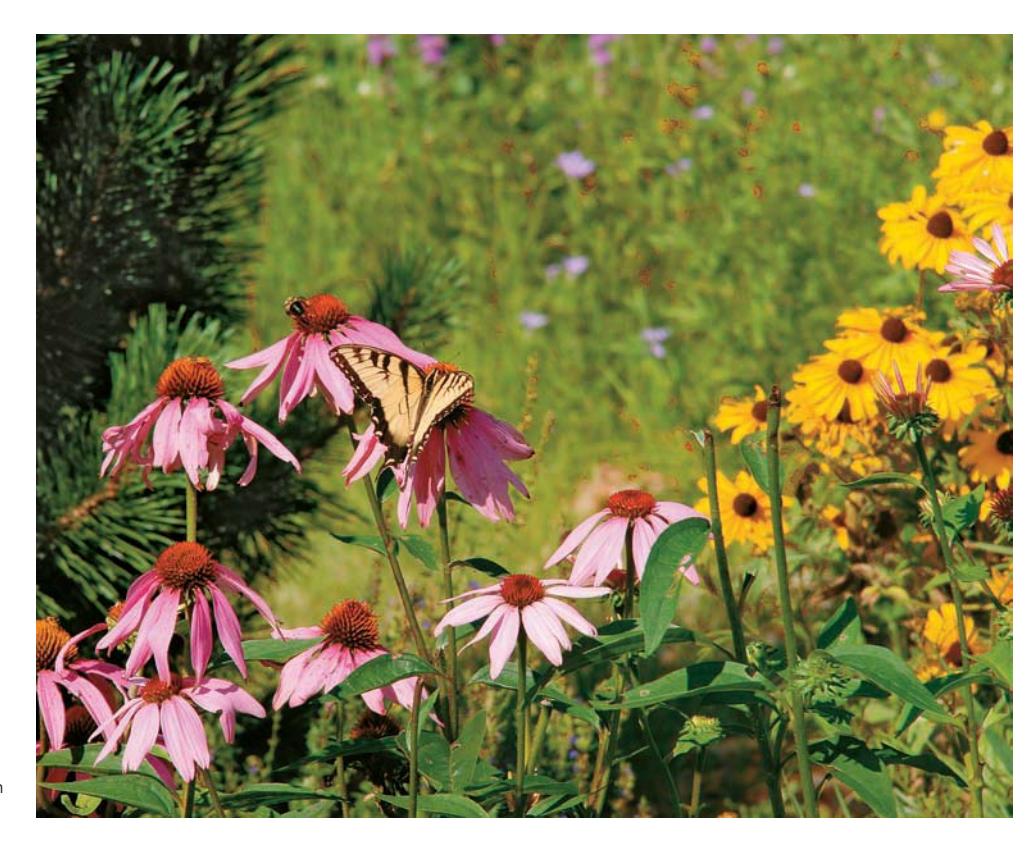
Native pollinating insects rely on regional plants for food and nectar sources, and gardens become more and more important for this as more and more natural areas are lost. Here a bee and a swallowtail butterfly both enjoy purple coneflowers.
{alt="A well-maintained garden with various plants"}
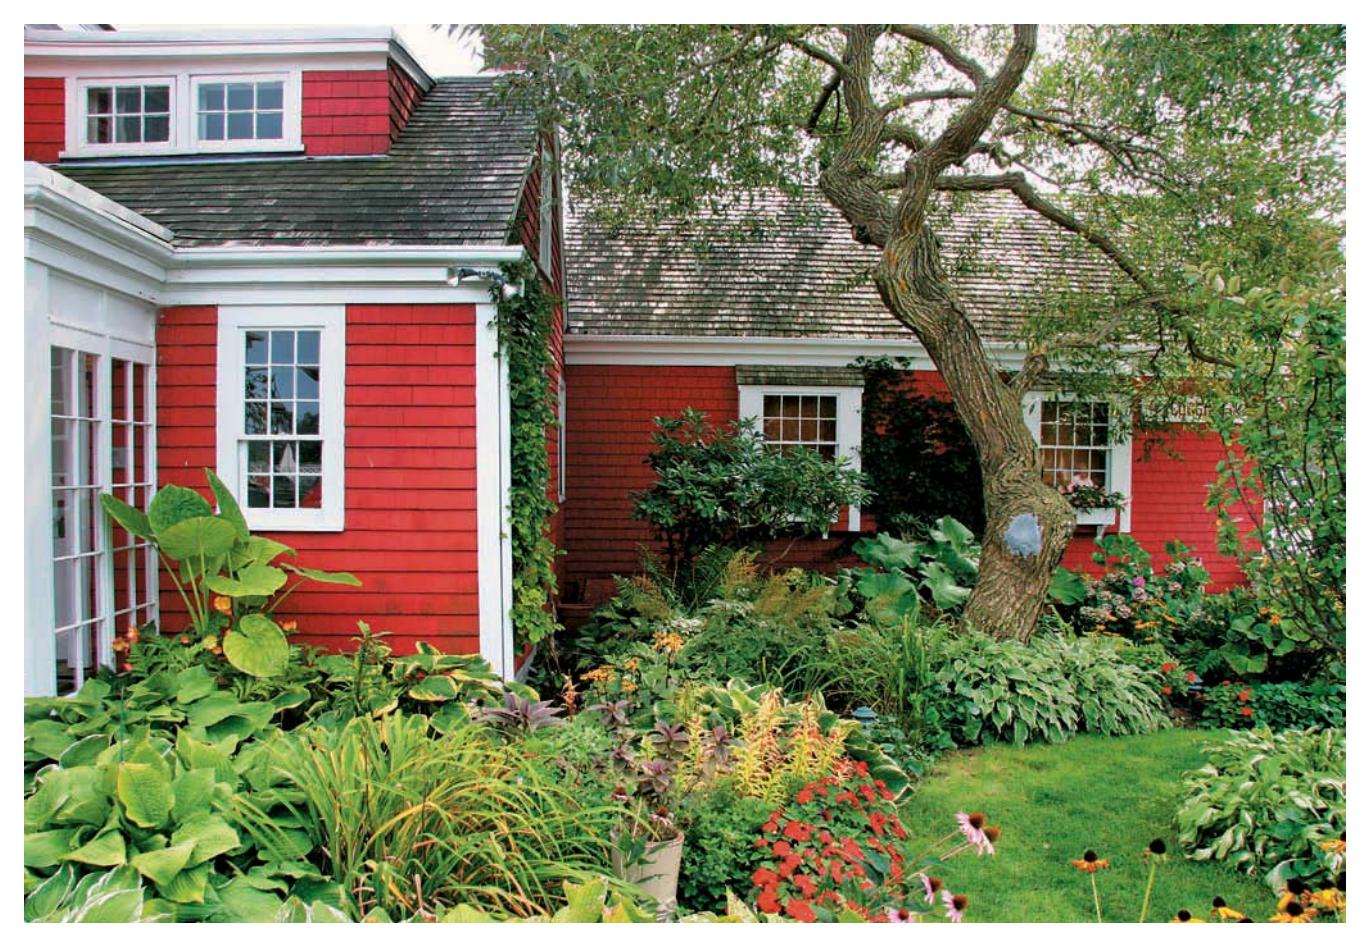
Because your gardens will be filled with plants that are well-adapted to the climate, soil, and temperatures found here, they will be easy to maintain.
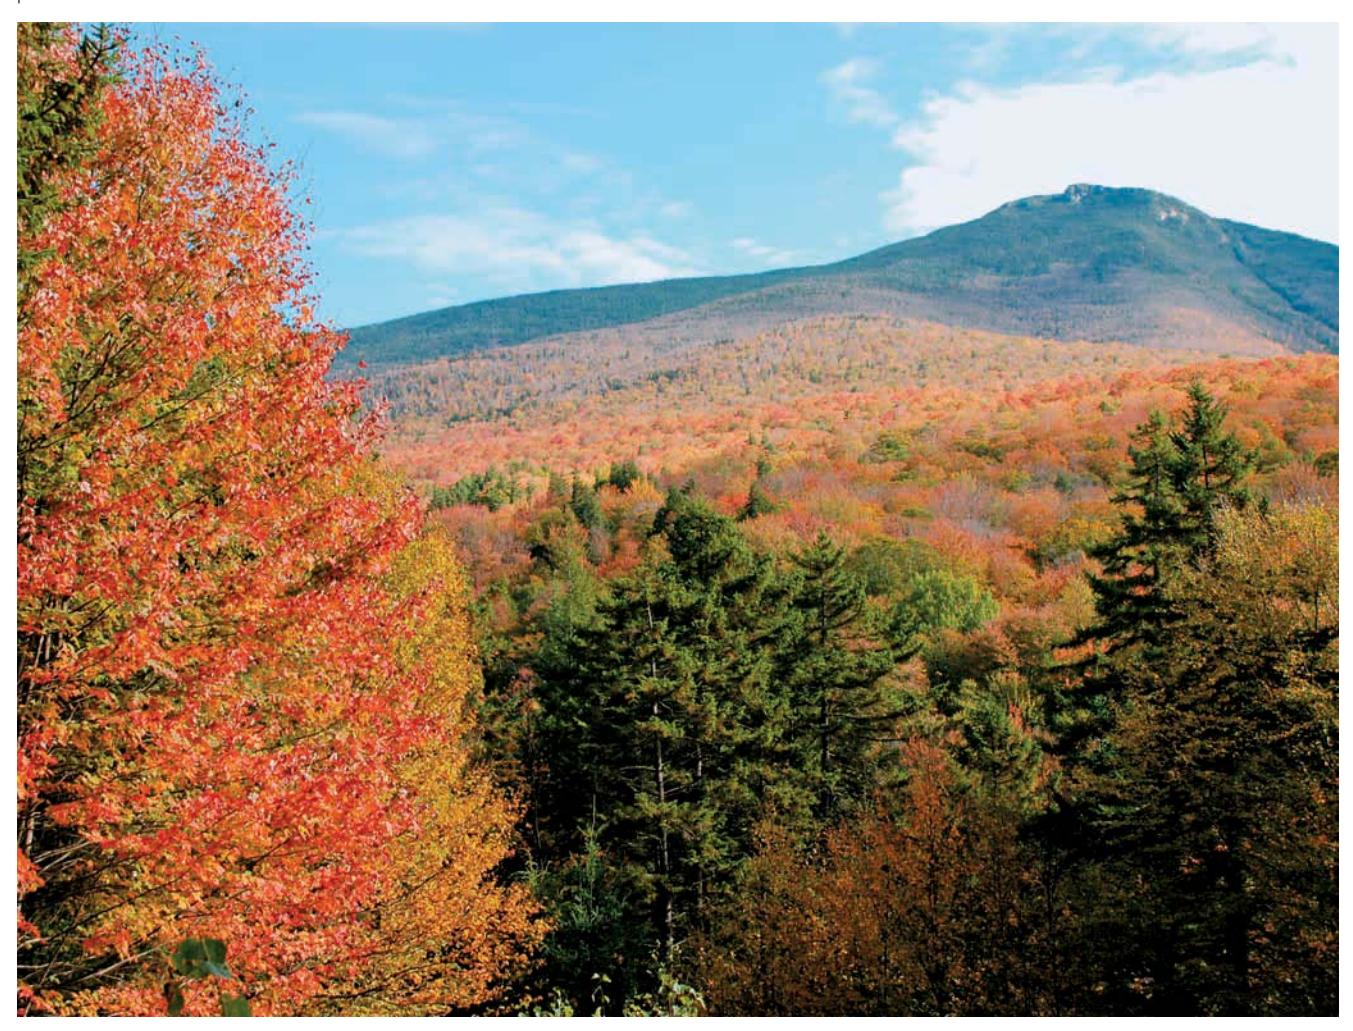
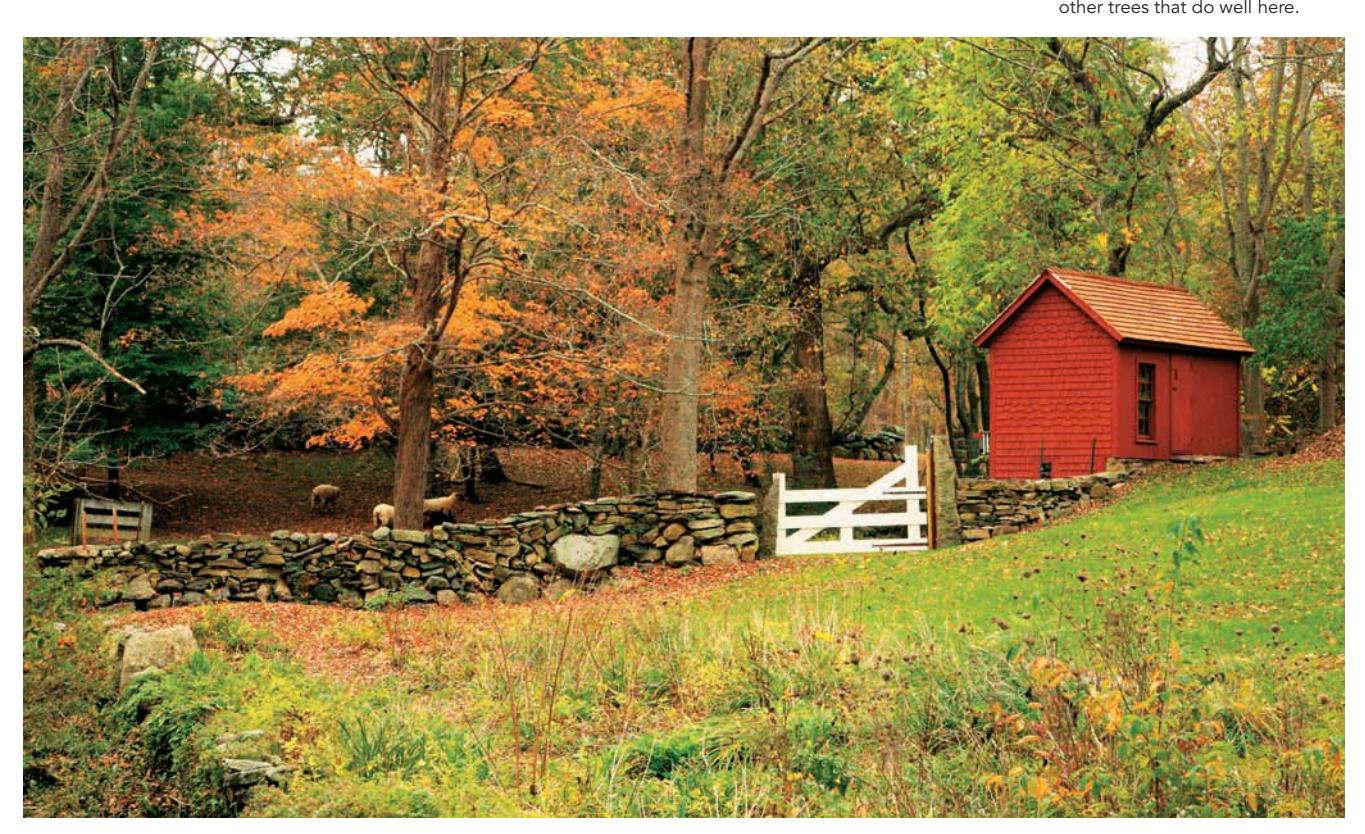
This region boasts beautiful fall color, thanks to the maples and
{alt="Vibrant autumn foliage in a forest"}
{alt="A winter landscape with snow-covered trees and shrubs"}
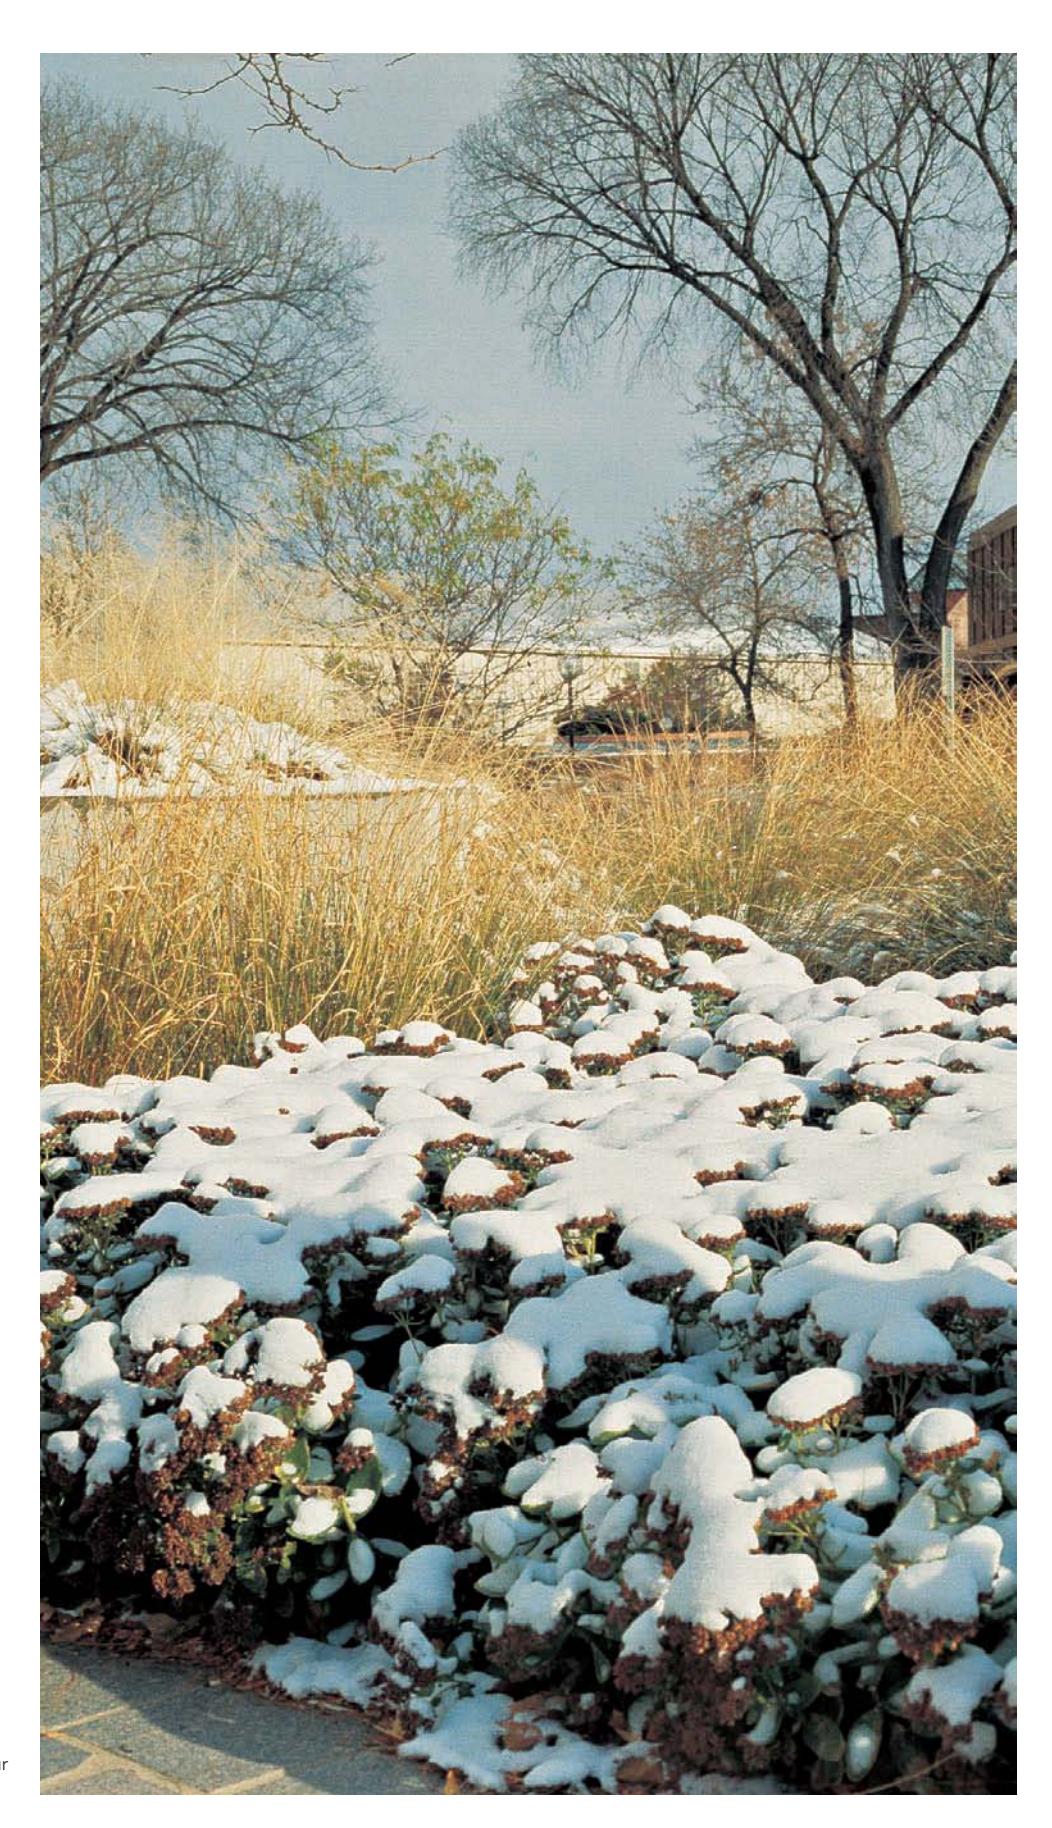
There's no doubt, winters can be long in this region. But that doesn't mean they have to be boring. Use shrubs and trees with interesting bark and colorful, persistent fruits, perennials with showy seed heads, and ornamental grasses to make your landscape attractive year-round.
{alt="A close-up of interesting tree bark in winter"}
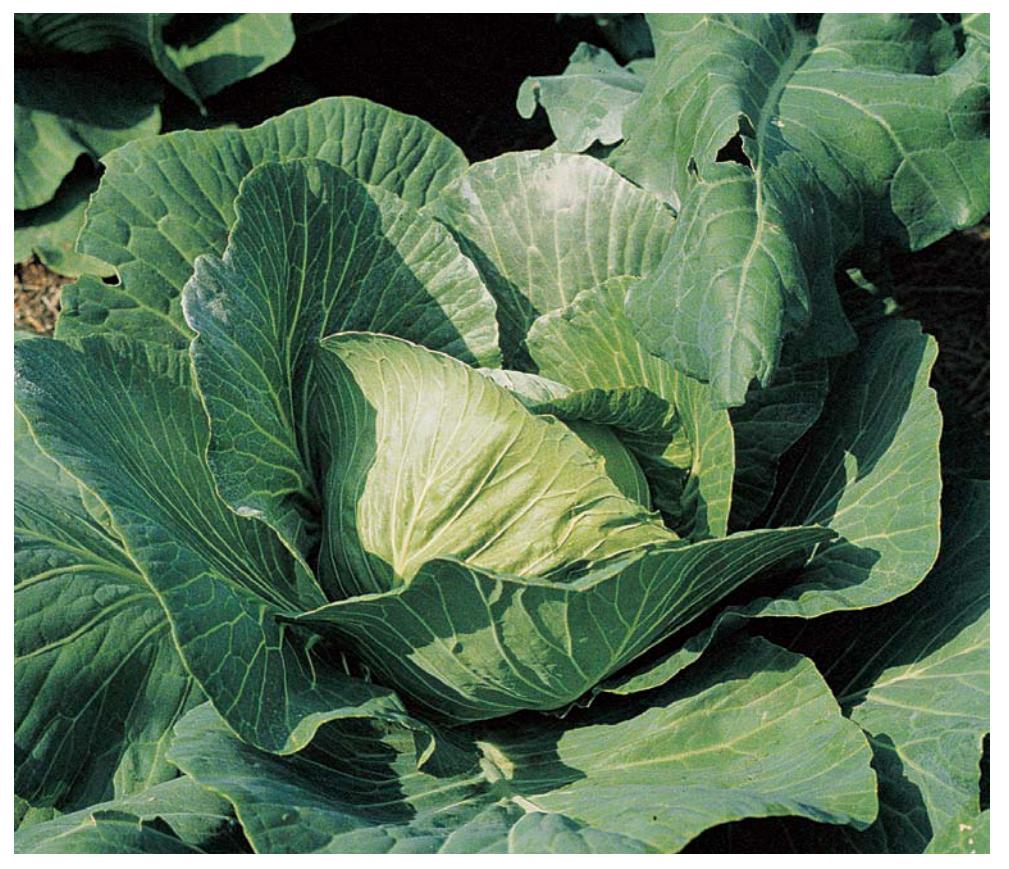
The growing season may be on the short side, but there are still many choices for people who want to grow vegetables and herbs. Cool-season vegetables like cabbage do especially well in this region.
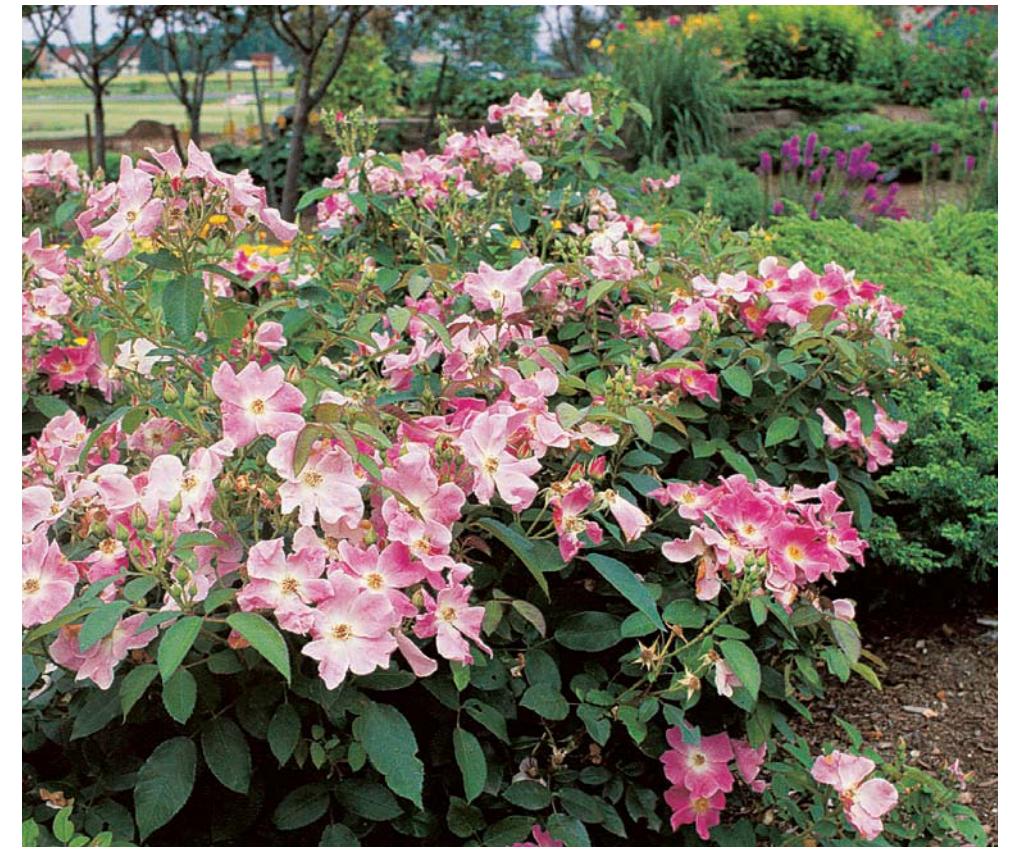
The climate makes it difficult to grow hybrid tea roses, but hardy shrub roses do very well here and are a beautiful alternative.
## THE BASICS
### GETTING OFF TO A STRONG START
Anyone can garden. It may only be a few containers on the deck of your high rise or it may be a large country estate with room for perennial borders, vegetables, and fruit trees. No matter what size your garden is, there are a few basic principles you need to understand to manage it successfully.
This chapter explains some of the basic terminology so you will be able to "talk the talk" when buying plants. You'll get a thorough understanding of the limitations of your climate and your site and learn how to work with what you have. Then you'll learn how to prepare your garden site before you move on to the excitement of choosing which plants to grow and where to grow them.
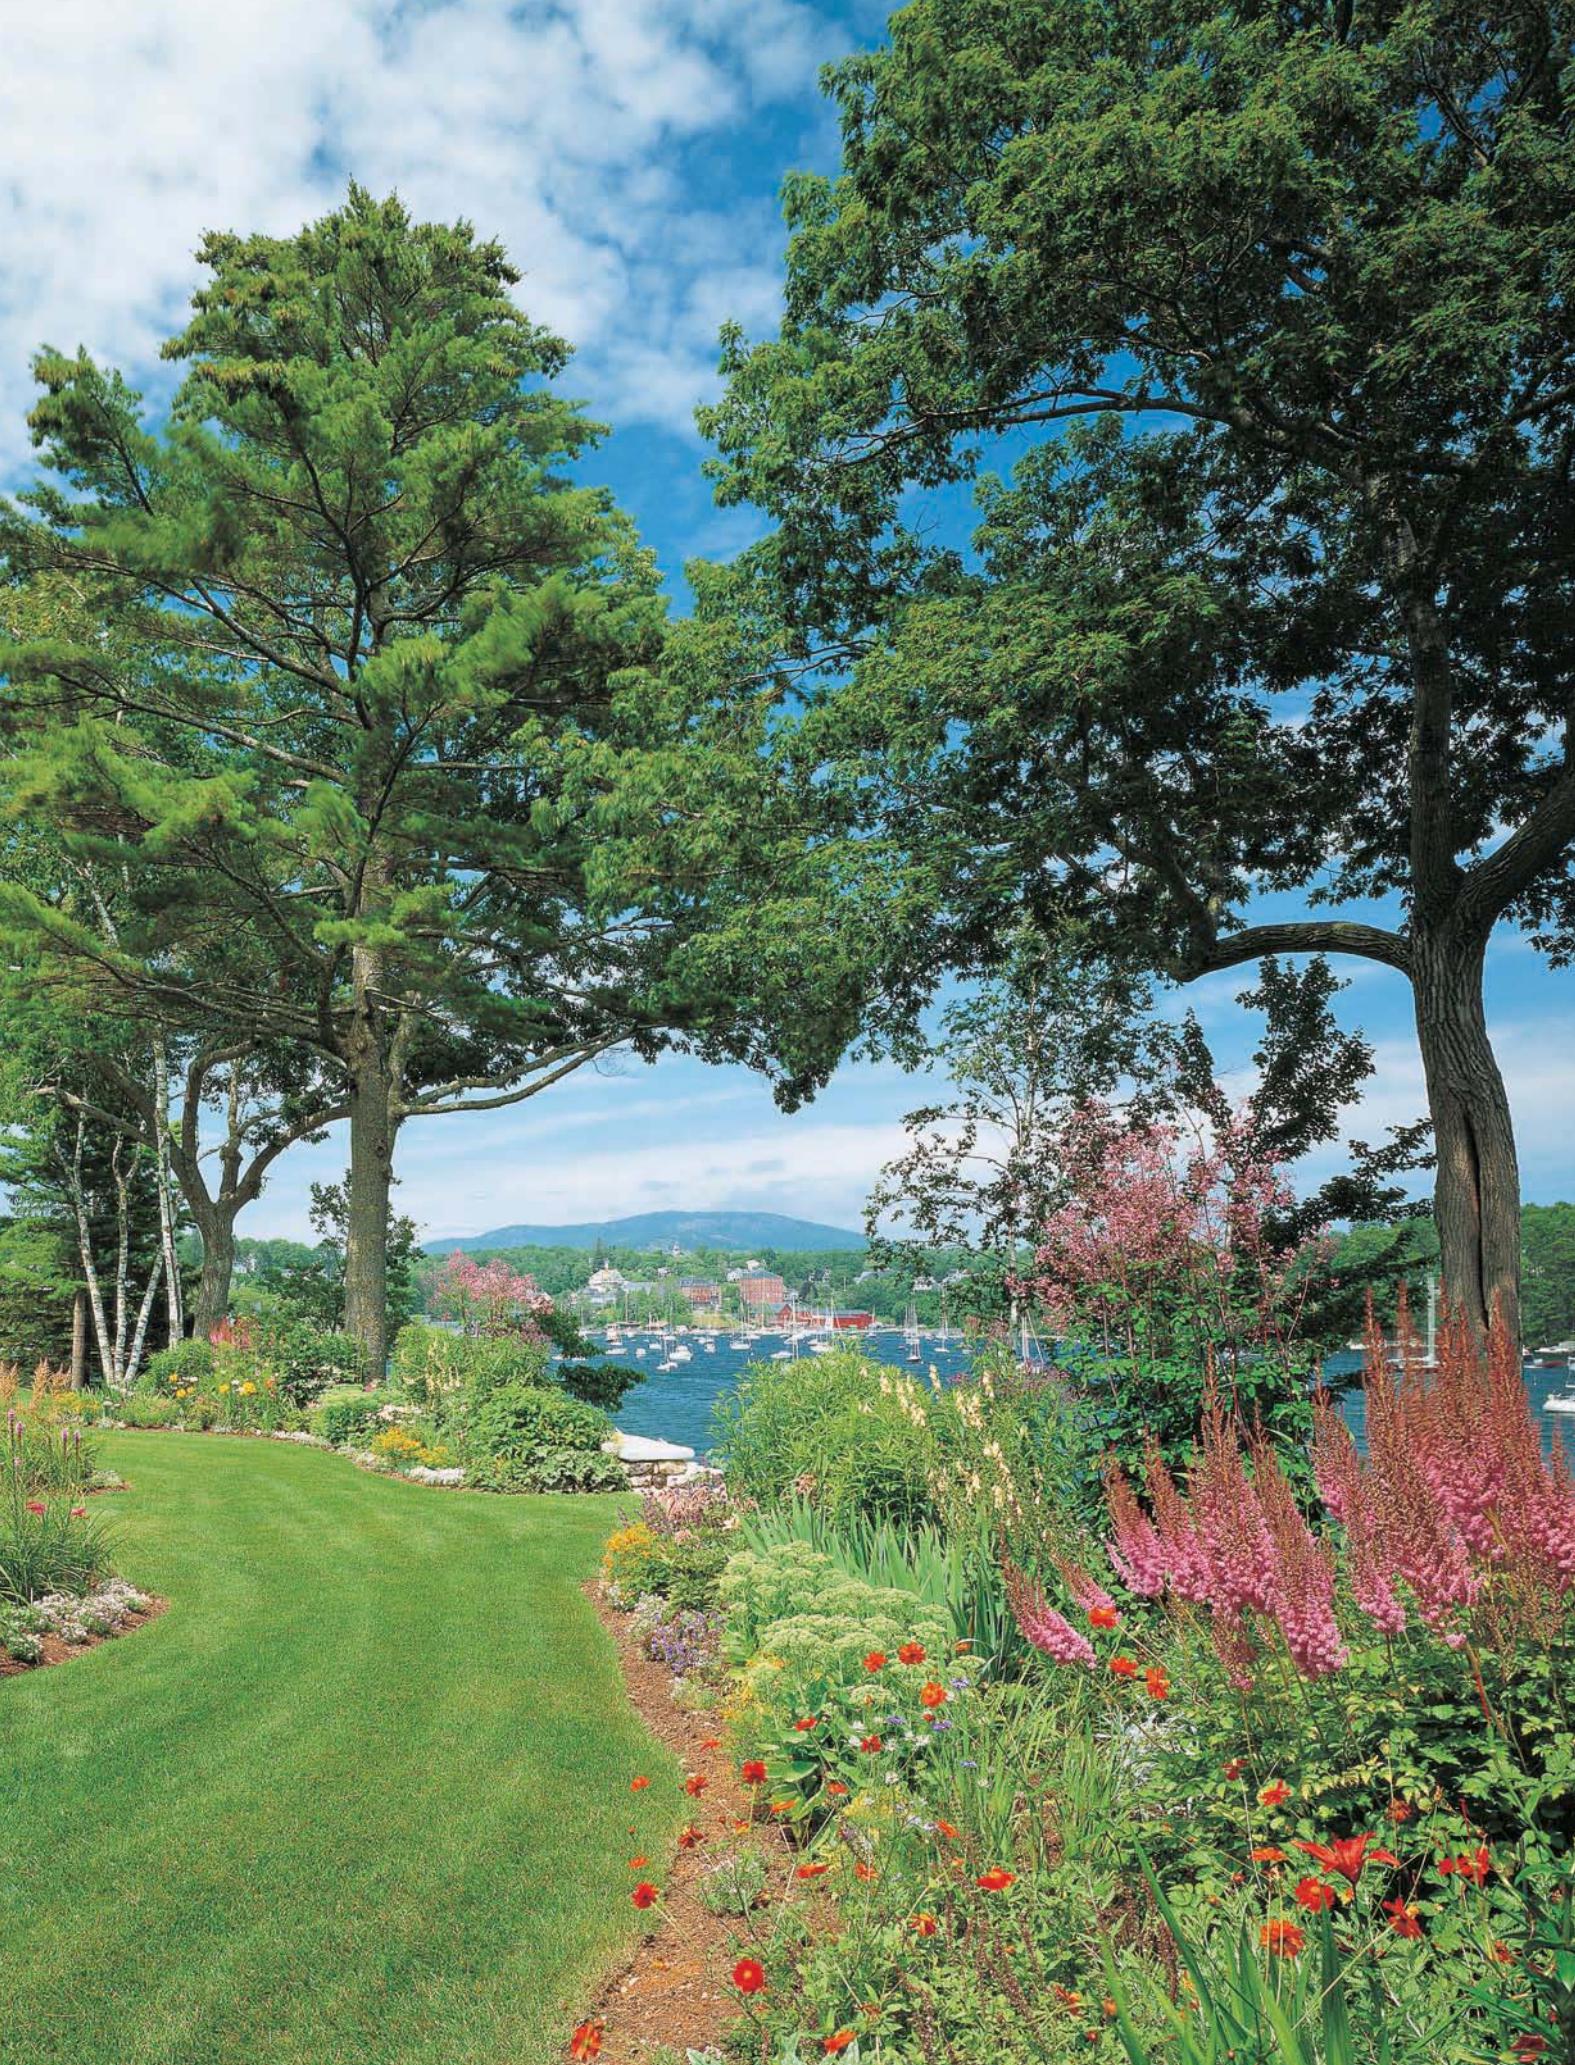
creating a beautiful garden that enhances your property as well as brings you joy as you tend to it. This border includes easy-to-grow plants such as astilbe, sedum, and cosmos.
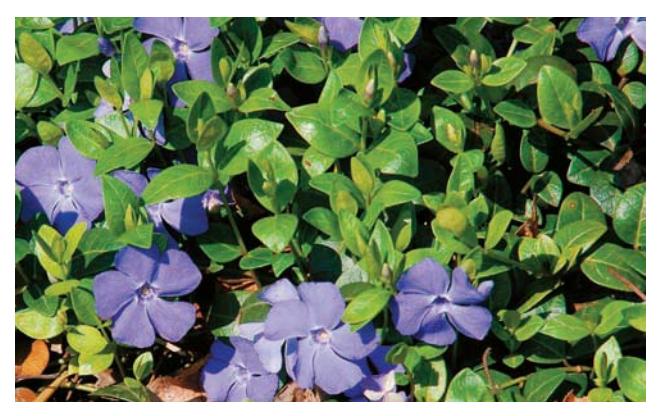
"Vinca" is a common name for this showy garden annual (Catharanthus roseus), top, as well as for an unrelated perennial groundcover (Vinca minor), bottom, that can become invasive in certain situations. A good reason why you can't always rely on common names.
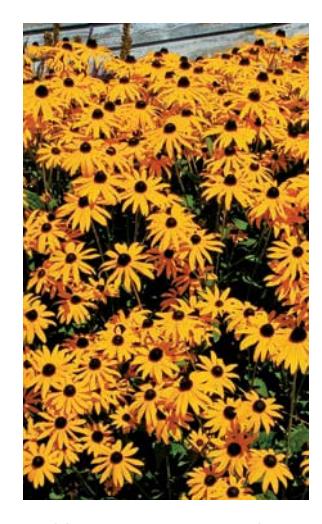
'Goldsturm' is a common cultivar of black-eyed Susan (Rudbeckia fulgida). It is good for gardeners to know cultivar names, since this is how many plants are labeled at garden centers.
### TALKING THE TALK
One of the most confusing things for new gardeners is understanding the lingo. You may feel like you need to learn a whole new language before you can successfully shop for a plant! Here are a few terms that will be helpful to know as you walk the aisles of a garden center or peruse the pages of a seed catalog. You will also find more terminology defined in specific chapters throughout this book.
**Common names** are given to plants by the people who use them. Although they are fun and popular, they can be confusing because they often differ in different areas of the country and several plants may share the same common name.
A better name to learn is the **botanical name**, which consists of two parts: genus and species. This name is Latin, which can make for some interesting pronunciations, but each plant has only one correct botanical name and if you use this name, you can be assured of which plant you are getting.
The first part of the two-part botanical name is the **genus**. It indicates a group of plants with similar characteristics, usually flowering and fruiting parts.
It is followed by the **species**, which more specifically describes the individual plant. The genus name is capitalized and is followed by the lowercased species name. The two words are usually set in italics or underlined, as compared to the common name which is not.
A **cultivar** ("cultivated variety") is a plant set apart because it has one or more traits that distinguish it from the species. It does not occur naturally but rather is maintained by cultivation. A cultivar name should be placed in single quotes and placed behind the species name or before the common name, but it is not always found this way. Sometimes it is used alone and sometimes it is used as a common, name. And sometimes it is indicated by a "cv." in front of it.
A **hybrid** is a plant that originated from a cross between two species. It is set off by a small "x" before the species name. Hybrids are plants that have been manipulated to have the best qualities of each parent. You can have a cultivar of a hybrid.
Other names gardeners may run across include **patent** and **trademark** names. These are similar to common names but they are patented by the breeder and cannot be used for any other plants. These names are indicated by the symbols ™ or ® and they are not set in single quotes.
**Annuals** complete their life cycle in one growing season, usually starting out as seeds in spring and dying when a frost hits or they have set seeds and completed their "mission" on this earth. They may reseed, but generally annuals are replanted every year. Examples of annuals include petunias, marigolds, lettuces, and carrots.
**Perennials** live for more than one growing season, if all goes well, that is! These plants have root systems that survive winters. This term is generally used to describe herbaceous plants, but technically it applies to woody plants as well. Herbaceous perennials have a shorter blooming period than annuals, but they live from year to year. Examples of perennials include hostas, delphiniums, and daylilies, as well as asparagus and sage.
**Biennials** require two growing seasons to complete their life cycle. Typically they grow leaves the first year and then produce flowers the second season. Examples of biennials include foxglove, hollyhock, and sweet William. They are typically sold as second-year plants that will bloom the year you buy them and are often grouped with annuals.
**Herbaceous plants** are those that have soft, succulent, nonwoody stems. Annuals, perennials, bulbs, and grasses are herbaceous. They are in contrast to **woody plants**, which have bark or some other hard tissue that persists from year to year. Woody plants include trees, shrubs, and vines, which all grow in diameter from year to year.
**Hardy** is a relative term. It is generally used to describe plants that can withstand prolonged temperatures at or below freezing without being killed or severely damaged. But in northern areas, hardy can be used to describe plants that survive temperatures below zero or even colder.
**Half-hardy** plants can tolerate long periods of cold weather, but they may be damaged or killed by frost. They often die to the ground in a freeze but then grow back.
**Tender** plants are typically tropical plants that are grown as houseplants or annuals in northern climates. They cannot tolerate temperatures below freezing.
Plants can be **evergreen** or **deciduous**. Deciduous plants lose all their leaves at one point, usually in fall, and get a new set, usually in spring. Evergreen plants have leaves that stay green and grow throughout the year. They are typically thought of as needled conifers such as spruces and pines, but there are also "broad-leaved" evergreen plants such as rhododendrons. Some herbaceous plants also remain evergreen throughout the year. All evergreens have their leaves replaced, it's just not all at once like deciduous plants so it is less noticeable.
**Dioecious** and **monoecious** are terms used to describe where a plant's reproductive parts are found. Plants that have male and female flowers on separate plants are dioecious. Plants that have both flower types on the same plant are monoecious. This is mainly important if you are growing plants that you either want to produce fruits or you don't want to produce fruits. If you want fruits on dioecious plants (i.e. hollies) you need to make sure you plant both male and female plants. If you don't want fruits (i.e. gingko) you want to make sure you only plant a male species.
#### THE NAME GAME
These are all names for the same plant:
- **Common names:** Red maple, rock maple, scarlet maple, soft maple, swamp maple, water maple
- **Species:** Acer rubrum **Cultivar:** 'Franksred'
- **Trademark name:** Red Sunset™
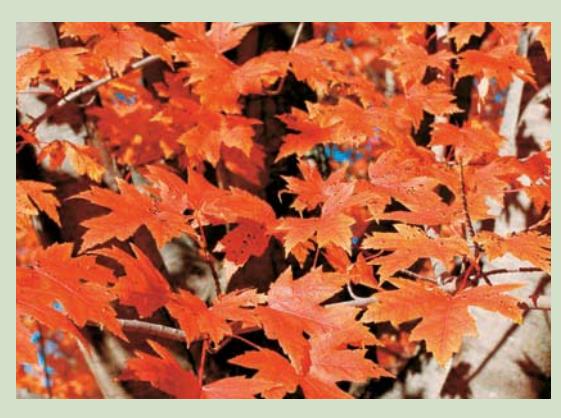
Red Sunset™ maple
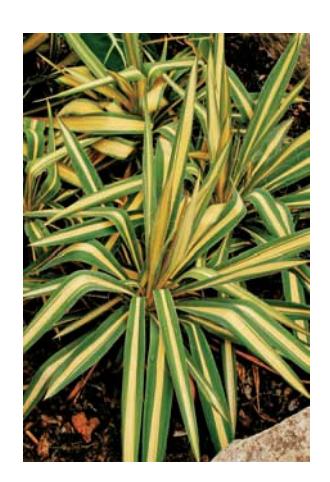
"Variegated" is a term used to describe plants with leaves that are edged, spotted, or blotched with one or more colors, typically white or yellowish but also shades of red and purple. Yucca filamentosa 'Color Guard' is shown here.
### ZONING IN
A very important aspect of successful gardening is understanding your climate and the limitations it puts on your gardening endeavors. The United States Department of Agriculture has developed a plant hardiness zone system that you should use as a starting point for plant selection. It is based on average minimum temperatures in an area. The lower the number of the hardiness zone, the more severe the winter climate.
Within your landscape you will most likely have "microclimates;" areas that are more protected or more exposed. For example, the area along a south-facing building may be protected enough to support plants rated one or even two hardiness zones warmer (higher number) than your overall ranking. And an open, exposed area on the north side of your house may be a zone colder (lower number).
If you will be growing tender annuals and vegetables, you will also want to be aware of your first and last frost dates, which in turn determine the length of your growing season. These dates will help you determine when to sow seeds and plant tender plants outside in spring as well as how late in the season you can plant perennials and woody plants. But don't rely solely on the calendar. Frosts can come earlier in autumn or later in spring.
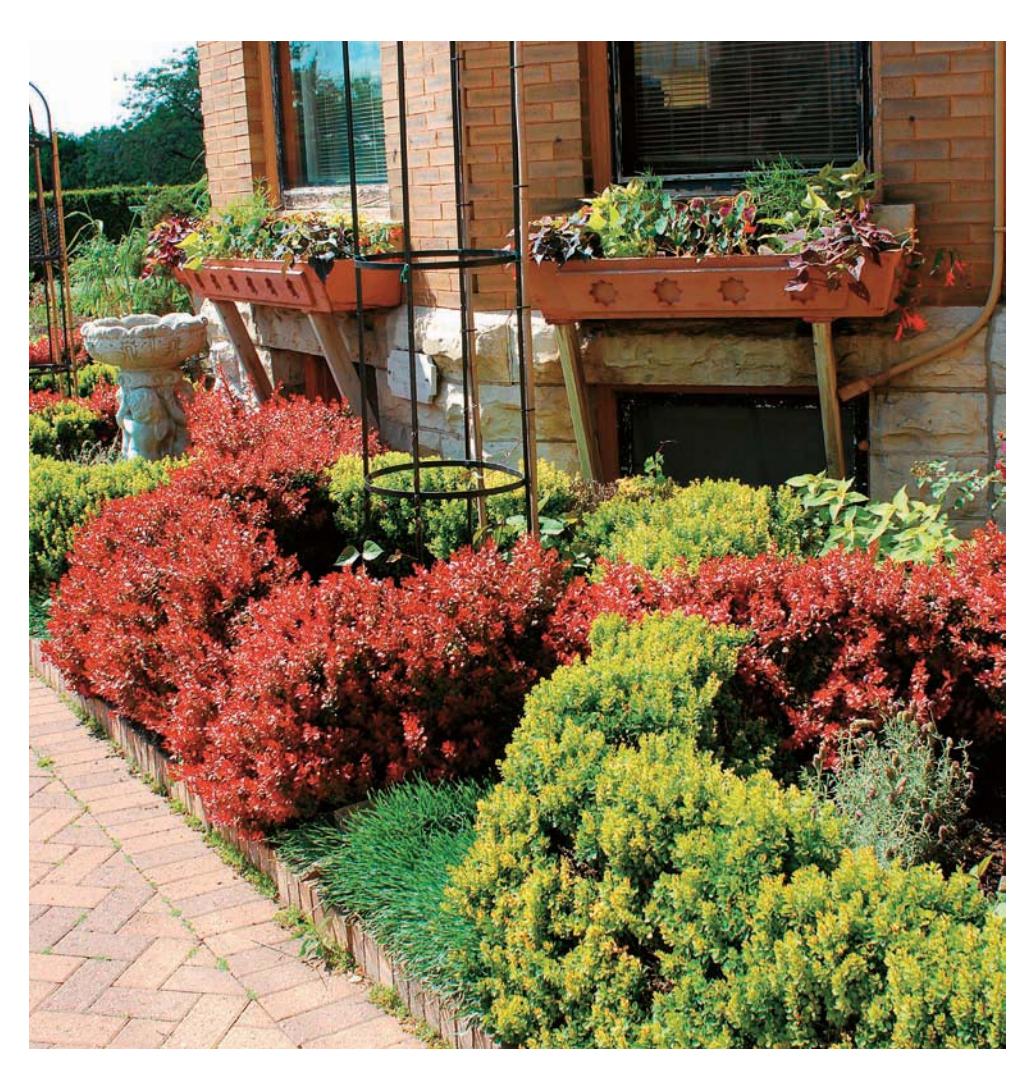
The area along the south side of a building often warms up quite a bit earlier in spring than other areas, so it is a good place to experiment with tender shrubs and other plants that might not normally be hardy in your area.
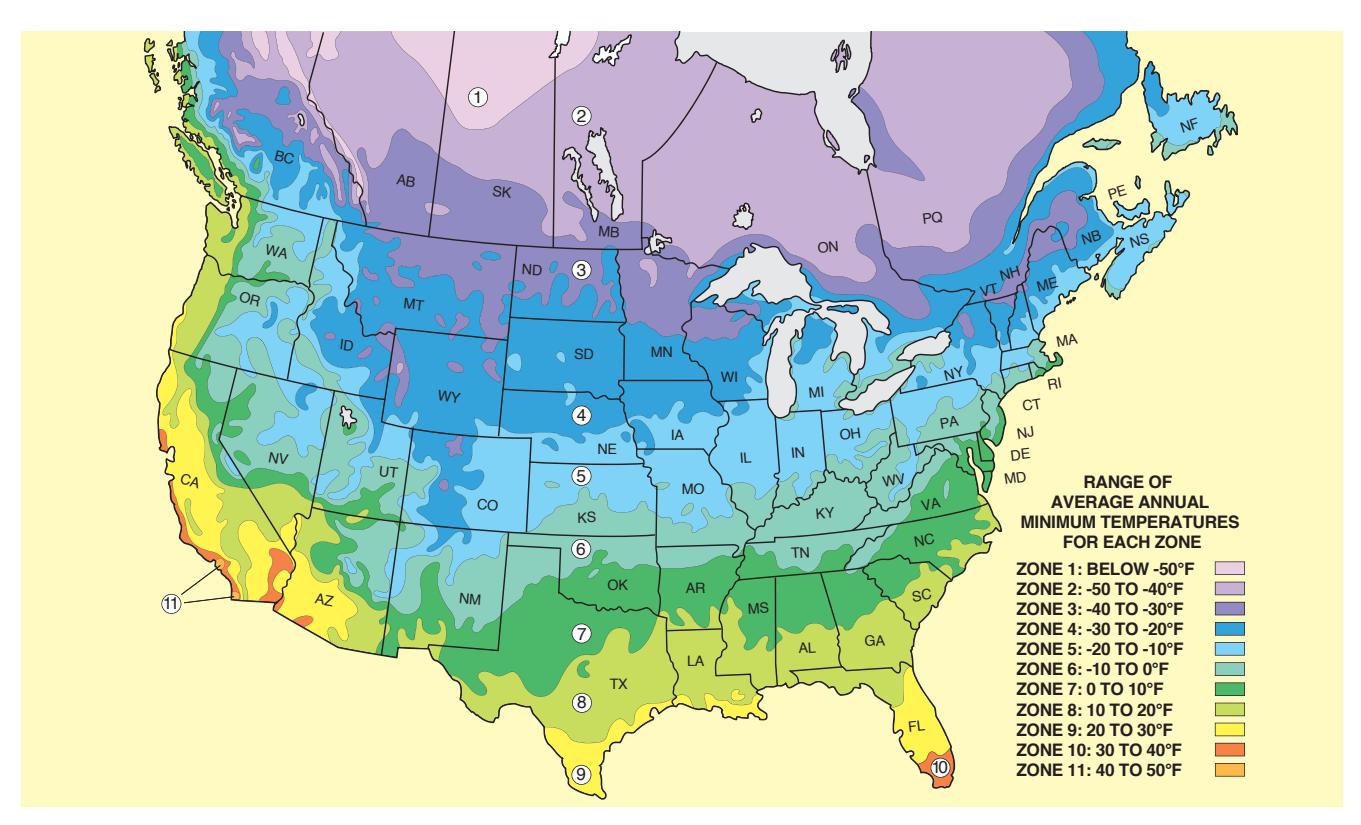
Identify your hardiness zone and use it as a starting point for your plant choices, but do not live and die by your hardiness zone. There are many factors that come into play when it comes to plant survival. Wind, humidity, rainfall amounts, and elevation—as well as age of planting and location in your yard—will affect a plant's ability to survive.
#### FIRST AND LAST FROST DATES
Here are some average last and first frost dates for selected cities in the Northeast and eastern Ontario. Use it as a basis to plan your seed starting and planting. Your state university extension service's website is a good place to get more accurate information for your specific area. They usually have frost dates listed with information on vegetable planting.
| CITY | LAST
FROST DATE | FIRST
FROST DATE |
|-----------------|--------------------|---------------------|
| Syracuse, NY | April 28 | October 13 |
| Albany, NY | May 2 | October 3 |
| Ottawa, ON | May 3 | October 2 |
| Halifax, NS | May 6 | October 20 |
| Springfield, MA | May 10 | September 28 |
| Montreal, QB | May 13 | September 28 |
| Burlington, VT | May 13 | September 28 |
| Quebec, QB | May 13 | September 29 |
| Bangor, ME | May 18 | September 23 |
| Manchester, NH | May 20 | September 21 |
| Portland, ME | May 24 | September 20 |
### GOING UNDERGROUND
## Soil
Nothing is as crucial to gardening success as having good soil. Unfortunately, a lot of people want to skip this less-glamorous step and move right on to the planting part. Fight the urge. The time and effort you put into making your soil the best it can be will really pay off in the long run in terms of healthier plants, more abundant harvests, and less overall maintenance.
### Soil Texture
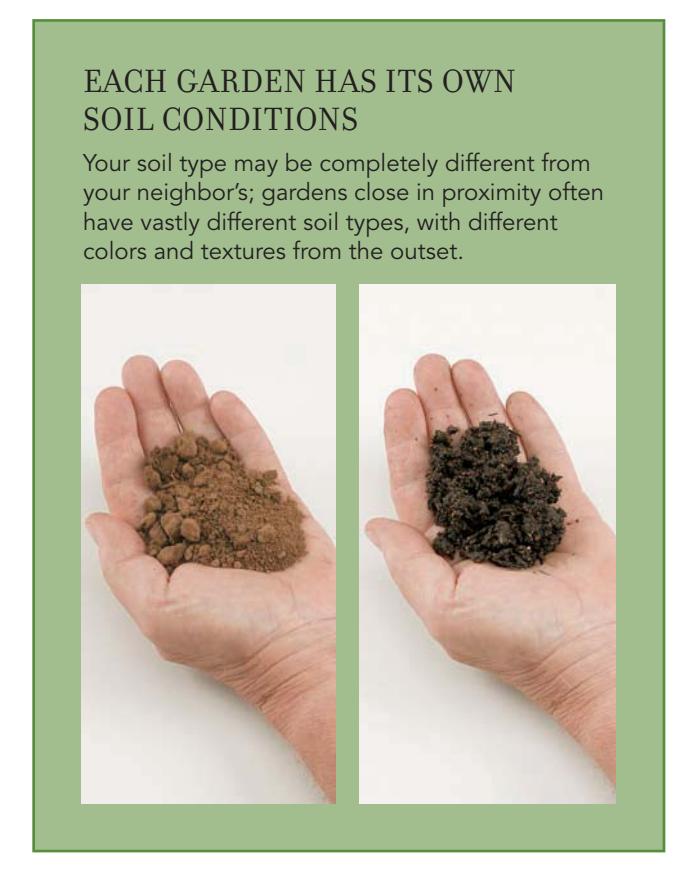
Soils typically have four components—sand, silt, clay, and organic matter. The proportions of these ingredients largely determine the soil texture, which in turn determines other soil properties such as fertility, porosity, and water retention. Heavier soils hold more moisture; sandy soils drain faster.
Sand and silt are the chief sources of minerals required by plants, such as potassium, calcium, and phosphorous. Silt particles are smaller and yield their minerals more readily than sand, making silt soils more fertile than sandy soils. Clay particles are the finest in size and a heavy clay soil has reduced pore spaces between the particles. These smaller spaces make it difficult for water, air, and plant roots to penetrate effectively.
Clay soils generally create the greatest problem for gardeners. They tend to stay cold and wet in spring, delaying planting and reducing seed germination. Heavy soils have poor drainage, which can lead to plants drowning due to lack of oxygen. Plants grown in poorly drained soils develop shallow roots and often the crowns will rot over winter. The best thing you can do to improve heavy soils is to add abundant organic matter. You can also use raised beds (see chapter 3).
A good place to start in understanding your soil is to have it tested by a soil-testing laboratory; check with your local university extension office for labs in your area. A soil test will provide you with information on existing soil texture, pH, and fertility, along with recommendations on what to add to improve it.
Organic matter, also known as humus, is decomposing plant or animal material. It is an important component of soils and must not be overlooked. Organic matter determines a soil's capacity to produce nitrogen, supports the community of soil microorganisms crucial to plant life, and retains bacterial byproducts such as water and carbon dioxide. It also creates a moist, slightly acidic environment critical for the transfer of minerals from soil particles to plants.
### Soil Fertility
Plants require fifteen or so nutrients for growth and survival. The big three—nitrogen, phosphorous, and potassium—are required in substantial quantities and their presence is used to generally define soil fertility.
Nitrogen ensures normal vegetative growth and a healthy green color. Deficiencies result in stunted plants with a yellowish green color. Excess nitrogen causes rank vegetative growth, often at the expense of flowering and a healthy root system. Nitrogen leaches out of soil easily, and as plants grow and remove nitrogen, more needs to be added to the soil. Phosphorus, important to flowering, fruiting and root development, is more stable in soils than nitrogen and doesn't have to be added unless soil tests indicate a deficiency. Potassium is essential for healthy development of roots and stems. It may need to be added to soils where plants are grown continuously.
Micronutrients necessary for healthy plants include magnesium, manganese, calcium, zinc, copper, iron, sulfur, cobalt, sodium, boron, and iodine. Since they are used in small quantities, most soils have enough for normal plant growth. Deficiencies do occur, however.
If your soil test indicates you are significantly lacking in any of these nutrients, you will want to amend your soil before planting. Your test results should tell you what to add to correct the deficiency.
### Soil pH
Soil acidity and alkalinity are measured in terms of pH on a scale from 1 to 14. A 7 on the scale indicates the soil is neutral in pH. Lower than 7, the soil is increasingly acidic; higher than 7, it is increasingly alkaline. Soil pH is important because it affects the availability of nutrients necessary for plant growth. Most nutrients are most soluble at a pH between 6 and 7. That is why most plants grow best in "slightly acidic soil."
Most plants tolerate a range of soil pH, but some survive only within a narrow window. It is important to know what these plants these are and to change the soil pH before planting them, if possible. It is possible to change soil pH after planting, but it's not as easy. You can raise soil pH by adding agricultural lime, calcium, or wood ashes (in moderation). To get the desired slightly acidic soil many plants require, lower the soil pH by adding pine-needle or oak-leaf mulch, organic matter, ground oak leaves, or sulfur (in moderation). Here again, your soil test results will provide you with specific amounts of each to add.
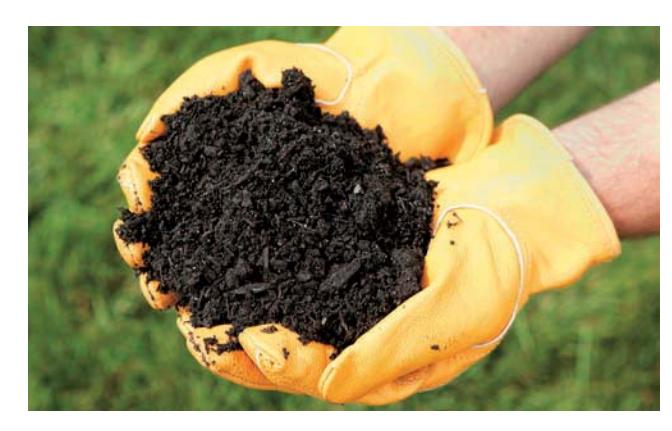
Good garden soil that is loose, friable, and rich in organic matter is the foundation for successful gardening. Take the necessary time to get it right before planting.
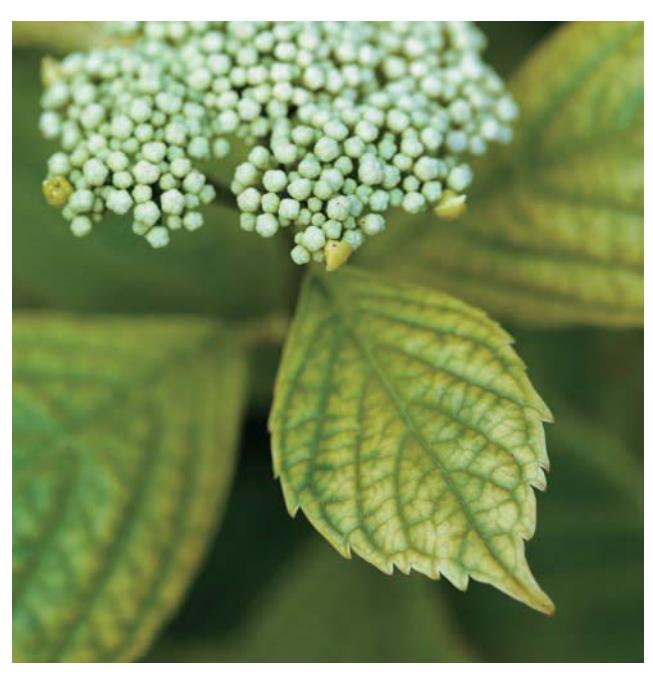
Iron chlorosis, a yellowing of foliage between the leaf veins caused by lack of available iron in the soil, can be a problem in alkaline soils.
#### The Ribbon Test
One way to get a basic idea of your soil texture is to perform a simple ribbon test.
1. Take a handful of soil and dampen it with water until it is moldable, almost like moist putty.
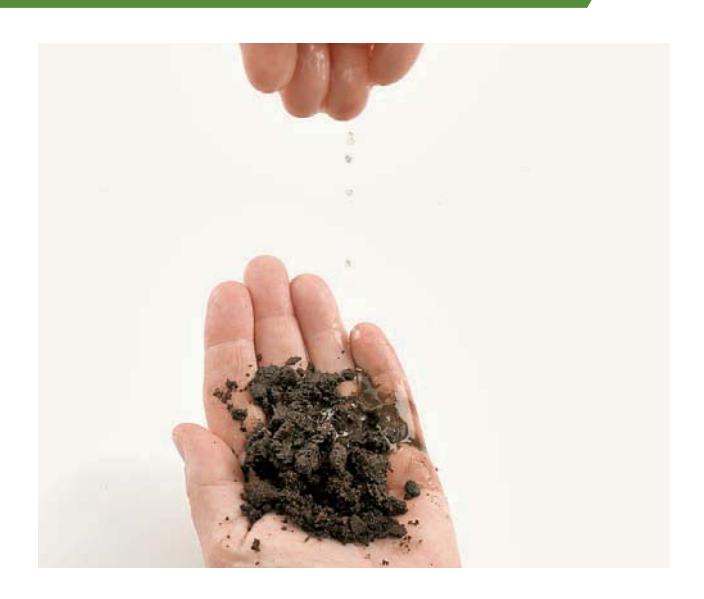
Dampen soil until moldable.
2. Roll the soil into a ball, as if working with cookie dough.
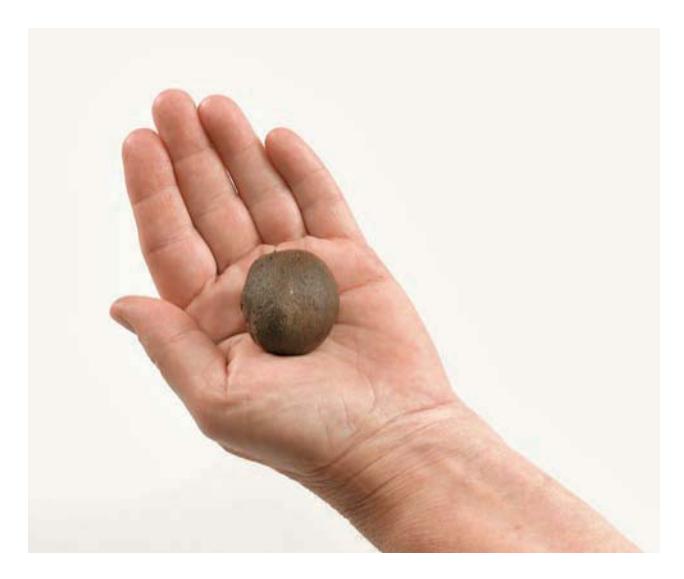
Roll the soil into a ball.
3. Using your thumb and forefinger, gently press the soil until the ball begins to roll out of your closed hand. The ribbon will begin to form, and will eventually break under its own weight. If the soil crumbles and doesn't form a ribbon at all, you have sandy soil.
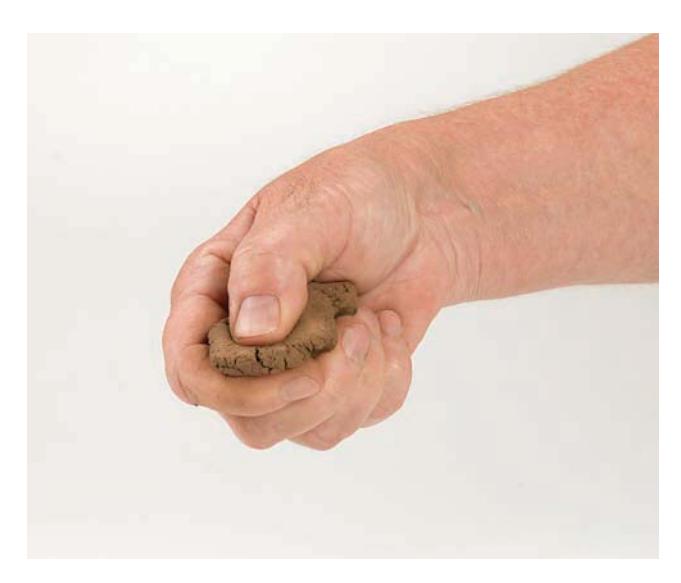
Forming a soil ribbon with thumb and forefinger to test texture.
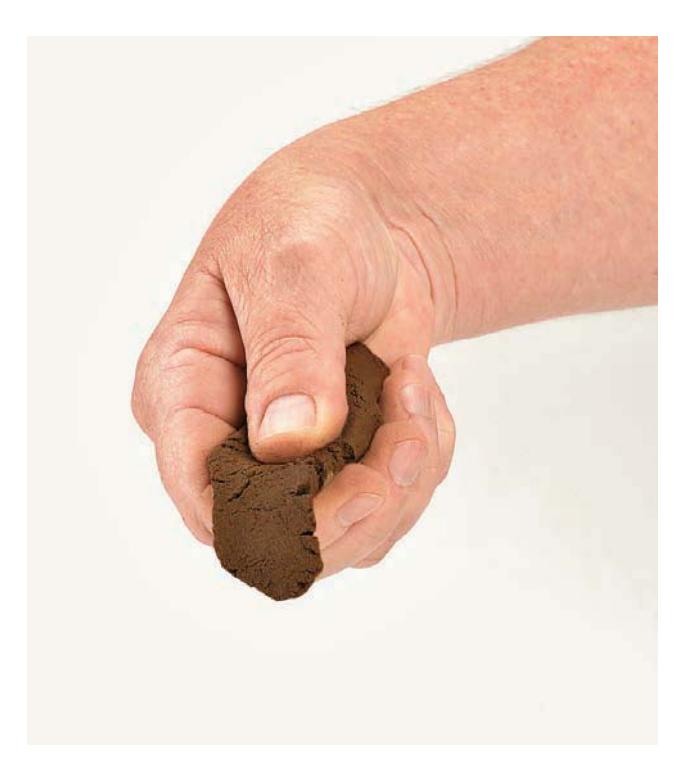
A short soil ribbon indicating silty soil.
4. If a ribbon more than one inch long forms before it breaks, you have silty soil.
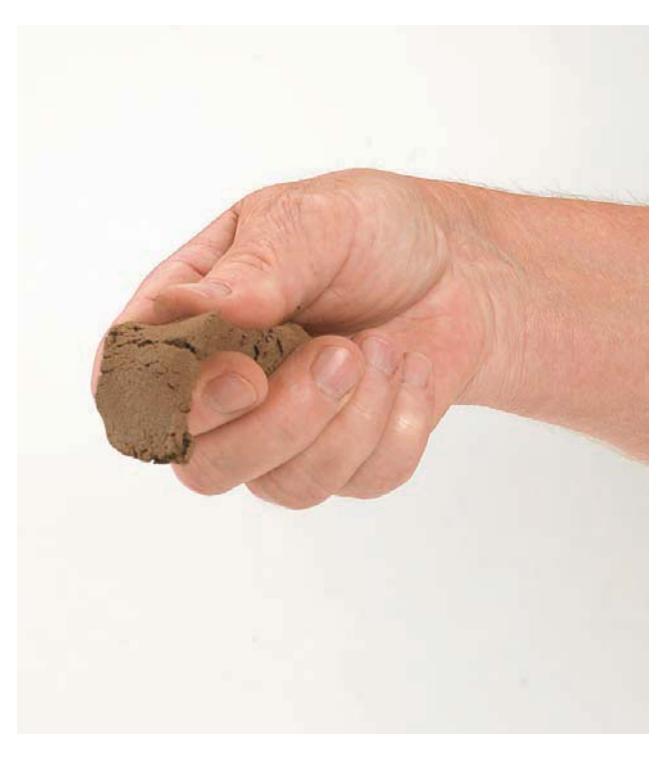
A medium soil ribbon indicating clay soil.
5. If a ribbon 1–2 inches long forms before it breaks, you have clay soil.
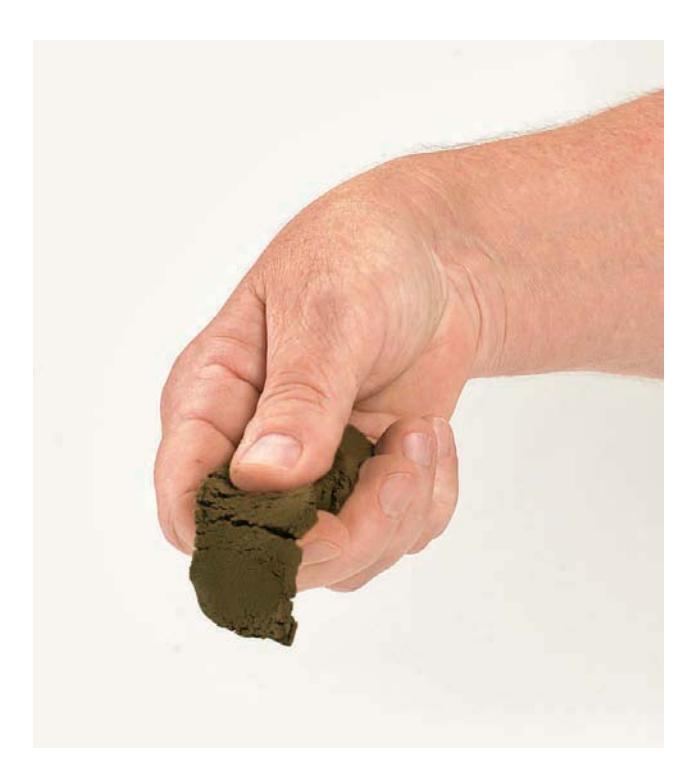
A long soil ribbon indicating very heavy clay soil.
6. If a ribbon greater than 2 inches forms before it breaks, you have very heavy and poorly drained soil. It will not be suitable for a garden without some major amendments.
A very long soil ribbon indicating poorly drained, heavy soil.
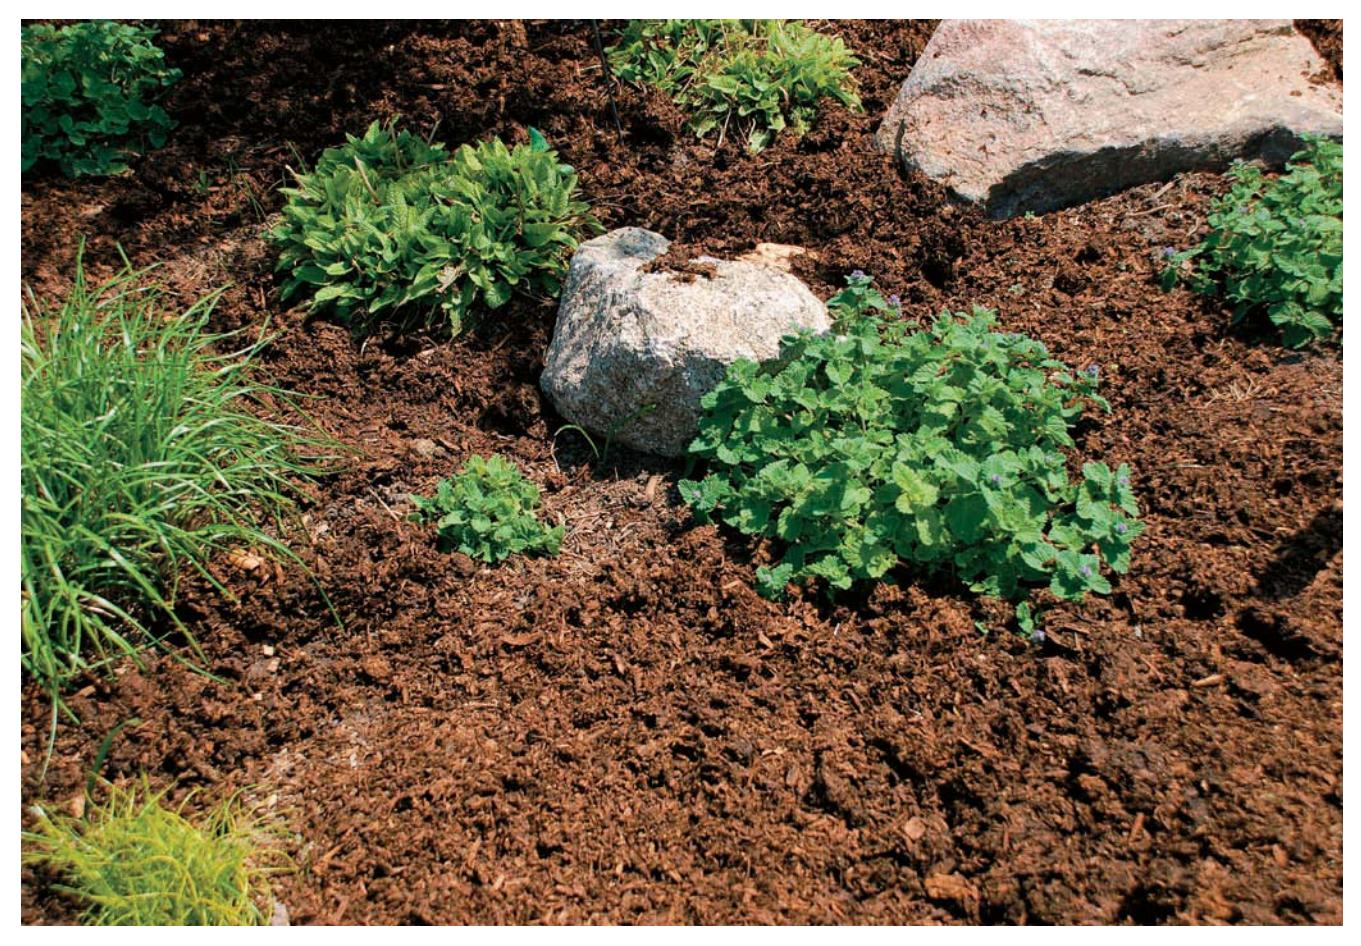
Adding a layer of compost to an established garden bed.
### Improving Your Soil
A big part of successful gardening is choosing plants that are well suited to your existing soil texture, pH, and moisture conditions. However, if your soil is deficient or has been drastically changed by construction or other factors, do all you can to improve it before planting.
Adding organic matter is the key to improving soil texture, fertility, and pH. Organic matter increases the aeration of clay soils and improves the moisture and nutrient retention of sandy soils. It adds valuable nutrients at a slow and steady pace, and it has a buffering effect on soil pH, helping to keep it in a desirable range.
The best source of organic matter for gardeners is compost. (For information on how to make compost, see chapter 7.) Other good sources of organic matter are composted manure and chopped straw and hay. Avoid using peat-based products as soil amendments. Not only are they expensive and not very effective, but the process of extracting peat from bogs is environmentally harmful to these natural habitats.
As with other amendments, the easiest time to add organic matter is before planting a bed. Loosen the soil with a spade or digging fork to a depth of at least 10 to 12 inches—more if possible. Spread a layer of compost or composted manure 2 to 4 inches deep over the entire bed. Use a fork to mix it thoroughly into your soil. If your soil is very heavy (high in clay), add 2 inches of sharp builder's sand along with the compost or manure. Sand alone will only make matters worse, but when it is added with organic matter to heavy soil, it does help loosen the soil.
## Creating a New Garden
Gardens fall into two basic categories: beds and borders. Freestanding island beds are intended to be viewed from all sides, so the tallest plants usually go in the middle and the smaller ones around the edges. However, don't be afraid to plant some taller "see through" plants around the outside. Beds are often in some sort of relaxed circular shape, but they can be square or rectangular. They can also be attached to a patio or found along a driveway or sidewalk.
Borders are designed to be viewed mainly from one side. They can have straight or curved edges and they can even turn corners. They are most effective when they have some sort of backdrop to set the plants off. This can come in the form of a fence, wall, or a row of taller, darker plants. Borders can be made up of all the same class of plant (i.e. perennial border, shrub border) or they can be mixed borders, containing perennials, annuals, bulbs, grasses, shrubs, roses, and small trees. Some people even include vegetables and herbs in mixed borders. Because of the diversity of their plants, mixed borders tend to look better year-round than gardens made up of only one plant type.
### Protecting Large Trees
Be careful when preparing a new garden under a large tree. Disturb the soil as little as possible because digging can damage the tree's active surface roots. If you will be installing a garden right under a tree's canopy, it is best to dig an individual planting hole for each plant and add organic matter to the hole as needed, rather than till or dig up the entire area.
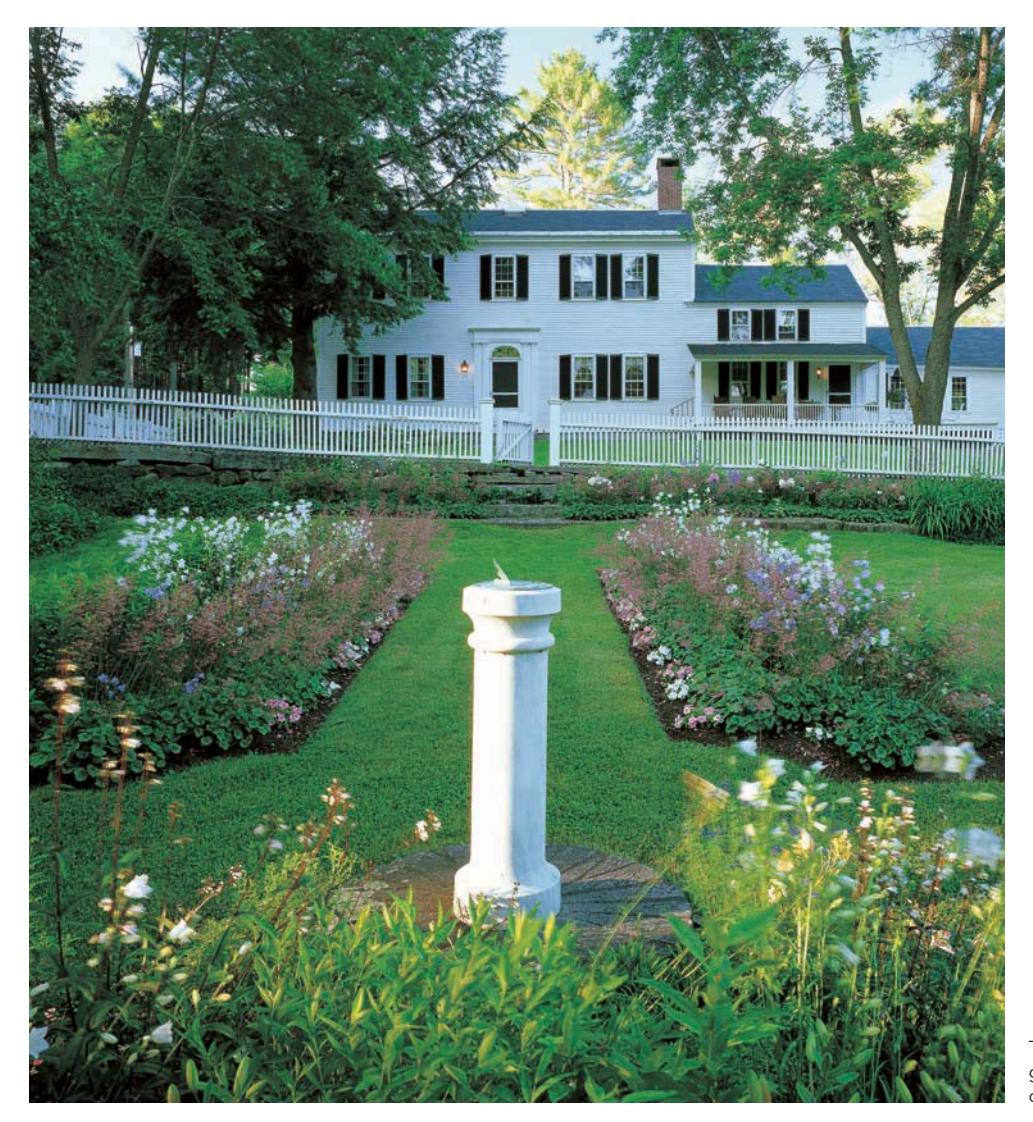
Symmetrical island garden beds in a formal front yard setting.
### Creating a New Garden Bed
Chances are there is already something growing where you want to install your new garden. And chances are it's not desirable vegetation. As tempting as it is, do not just jump right in and start planting, figuring it will be easy to just pull the weeds as you go. Proper site preparation is the key to success. Take the time to get rid of existing vegetation and improve the soil before you start putting plants in the ground. This preparation will pay significant dividends.
#### 1. Use a Garden Hose
Use a sun-warmed garden hose to lay out your proposed garden, following the topography of the site. Most gardens look best with gentle curves rather than straight lines.
#### 2. Remove Existing Vegetation
There are several ways to get rid of existing vegetation. Which way you choose depends on how much time you have and how you feel about using herbicides.
**Option 1:** The most natural way to create a new garden bed is to dig it up manually. Just be sure to get rid of all the existing plant roots. Even tiny pieces of tough perennial-weed roots can grow into big bad weeds in no time. A major disadvantage with this method is that you lose substantial amounts of topsoil. To avoid this, if you have the time, you can simply turn the sod over and allow it to decay on site. This will take at least one growing season.
### OPTION 2
You can also smother the existing vegetation with about 6 inches of organic mulch such as straw, shredded bark, or compost. Mow closely in spring, cover with a thick layer of newspaper (ten sheets or so) and the organic mulch, and let it stand all summer. Replenish the mulch in fall, and by the next spring your garden should be ready for planting. This method works best on lawn areas rather than areas with lots of deep-rooted perennial weeds.
### OPTION 3
If you don't have a year to prepare the soil or the manual method doesn't appeal to you, you can use a nonselective glycophosphate-based herbicide such as Roundup, which kills tops and roots of herbaceous plants. If you follow directions exactly, aim carefully, and use only when necessary, these products should kill unwanted plants without causing undue harm to the environment. Allow at least 2 weeks for all the vegetation to die after spraying. Tough perennial weeds may require a second application.
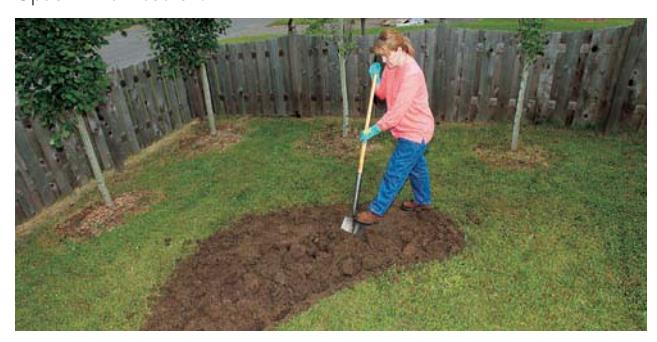
Option 1: Turn sod over
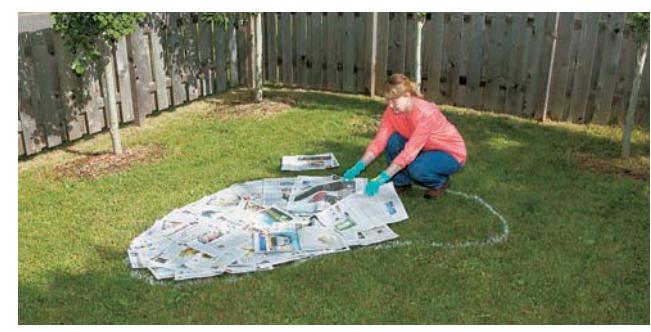
Option 2: Smother vegetation
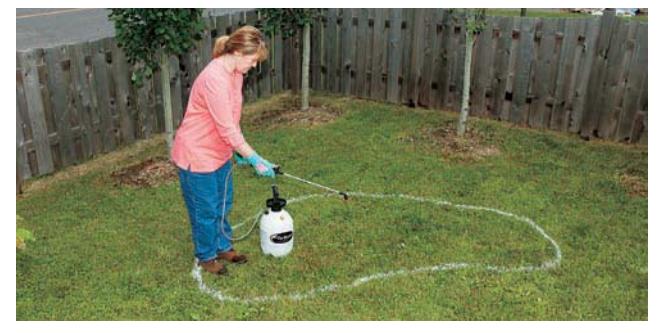
Option 3: Spray with herbicide
## 3 TURN IN SOIL AMENDMENTS
Once the existing vegetation is dead or removed, turn the soil by hand or with a tiller, and add soil amendments. Do not use a tiller without killing all existing vegetation first—it may look like you've created a bare planting area, but all you've done is ground the roots into smaller pieces that will sprout into more plants than you started with. Even after multiple tillings spaced weeks apart, you'll be haunted by these root pieces.
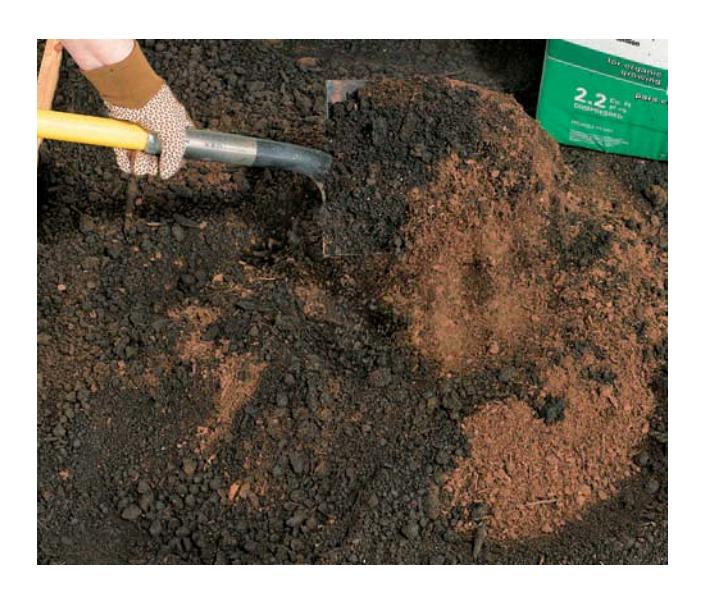
Turning in soil amendments with a tiller
## 4 EDGE THE GARDEN
Install edging to keep lawn grasses from invading your garden. The best option is to install a barrier of some type. When it comes to barriers, it's worth paying more for a quality material. Metal edging buried 4 inches or more into the soil effectively keeps turf from sneaking in. If you go with black plastic edging, use contractor grade to avoid having to replace it in a few years.
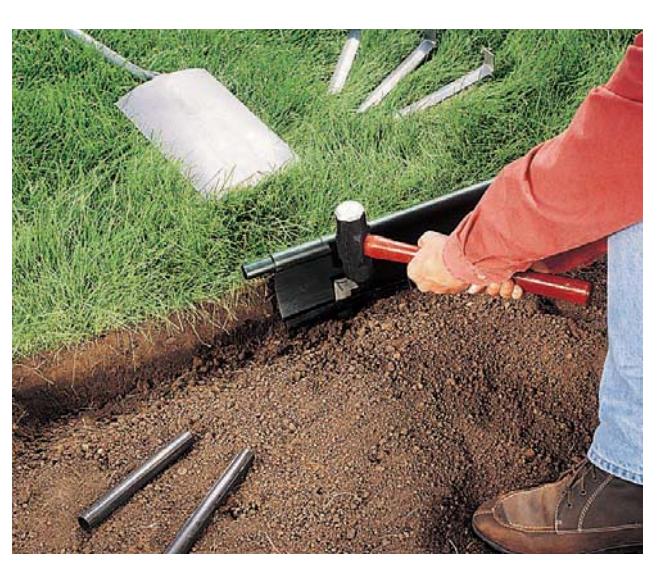
Installing garden edging
## 5 COVER THE NEW GARDEN WITH MULCH
Mulching your new garden will not only help keep the weeds from settling in, it will also help maintain soil moisture and prevent the soil from washing away until you can get the plants established. Cover the entire prepared garden bed with 2 to 3 inches of an organic mulch such as shredded bark, pine bark nuggets, cocoa bean hulls, and shredded leaves. Avoid using grass clippings; they tend to mat down and become smelly. For information on how much mulch to buy, see chapter 7.
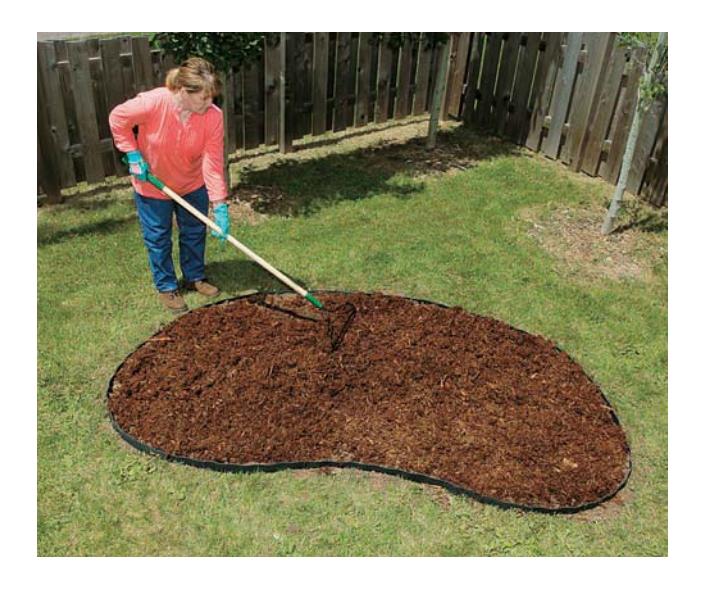
Mulching a newly prepared garden bed
### THE SHADY SIDE OF GARDENING
Sunlight is one of the basic requirements for plant survival, but some plants require less than others. Obviously your gardening life will be easier if you choose plants that will thrive in the available sunlight. If possible, observe your proposed garden site at various times of the growing season to determine your available sunlight and then choose plants appropriate for the amount of light your garden gets. Keep in mind that if your garden is large, you may have multiple sunlight levels within the space.
In most cases, shade levels are out of the gardener's control. However, corrective actions like removing a few large tree limbs can bring a heavily shaded area into partial shade, thereby greatly expanding your plant choices. You can also plant shade trees that will eventually increase the amount of shade you have if you wish to plant shade-loving plants in the future.
To some gardeners, shade is a place where grass won't grow and flower choices are limited to impatiens and hostas. Not true! Unless you are growing food crops (vegetables, herbs, fruits), shade is not always a bad thing. First of all, where would you rather be on a hot, sunny summer afternoon? Pulling weeds in a sunny border or taking respite under the canopy of large shade trees? And lower light levels mean fewer weeds—another definite advantage to shade gardening. Best of all, a shade garden or a planting of groundcovers means you can give up the impossible struggle to grow lawn in shady areas.
Dappled shade is produced under open-canopied trees, where there is a moving pattern of sunlight and shade throughout most of the day. Many shade- and sun-loving plants will do fine in this type of light.
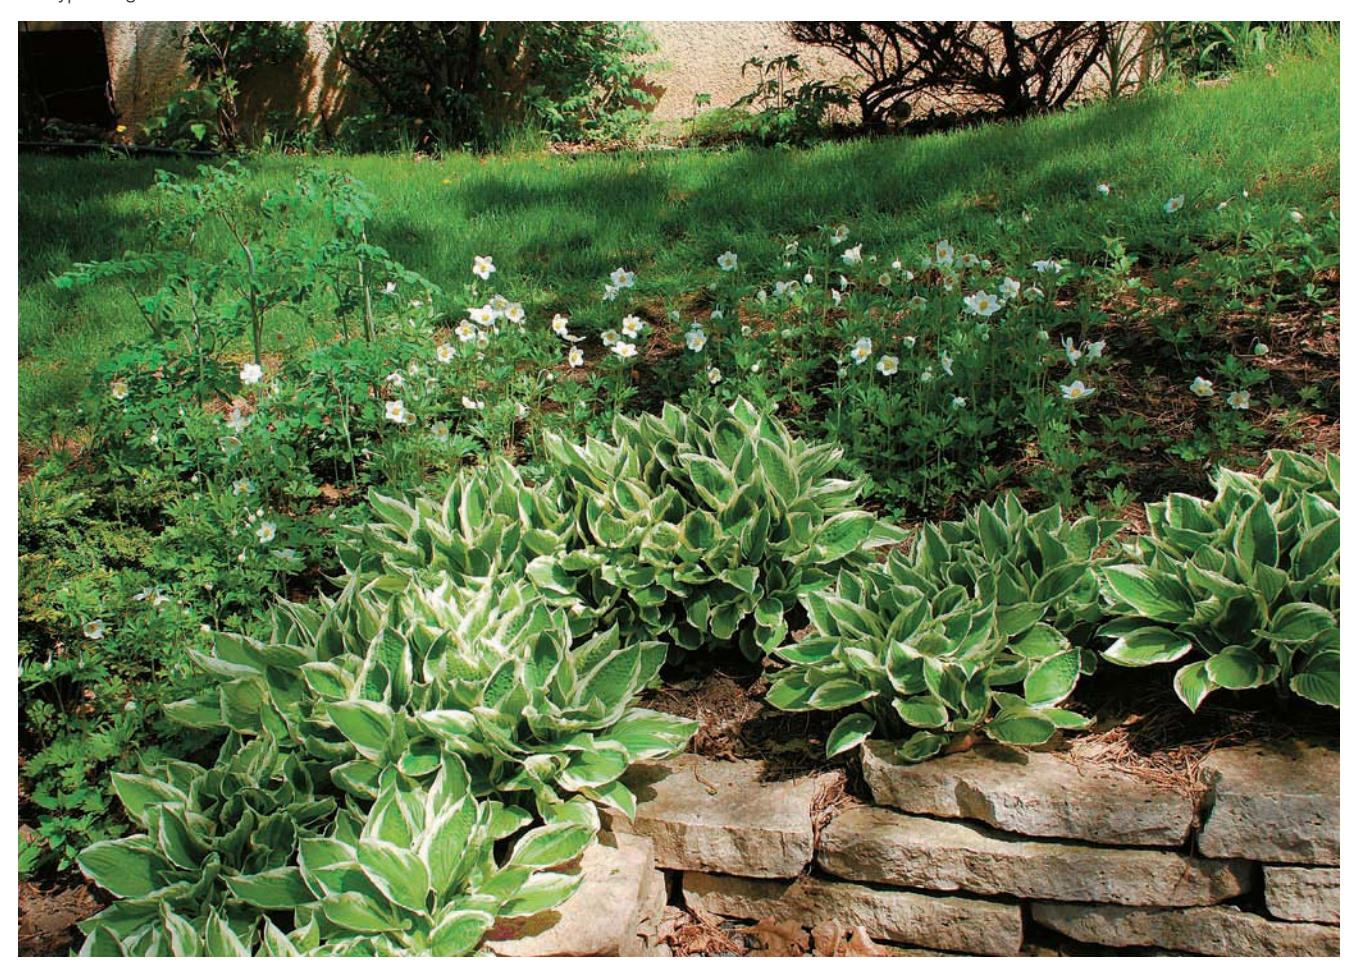
Garden area with dappled shade under trees
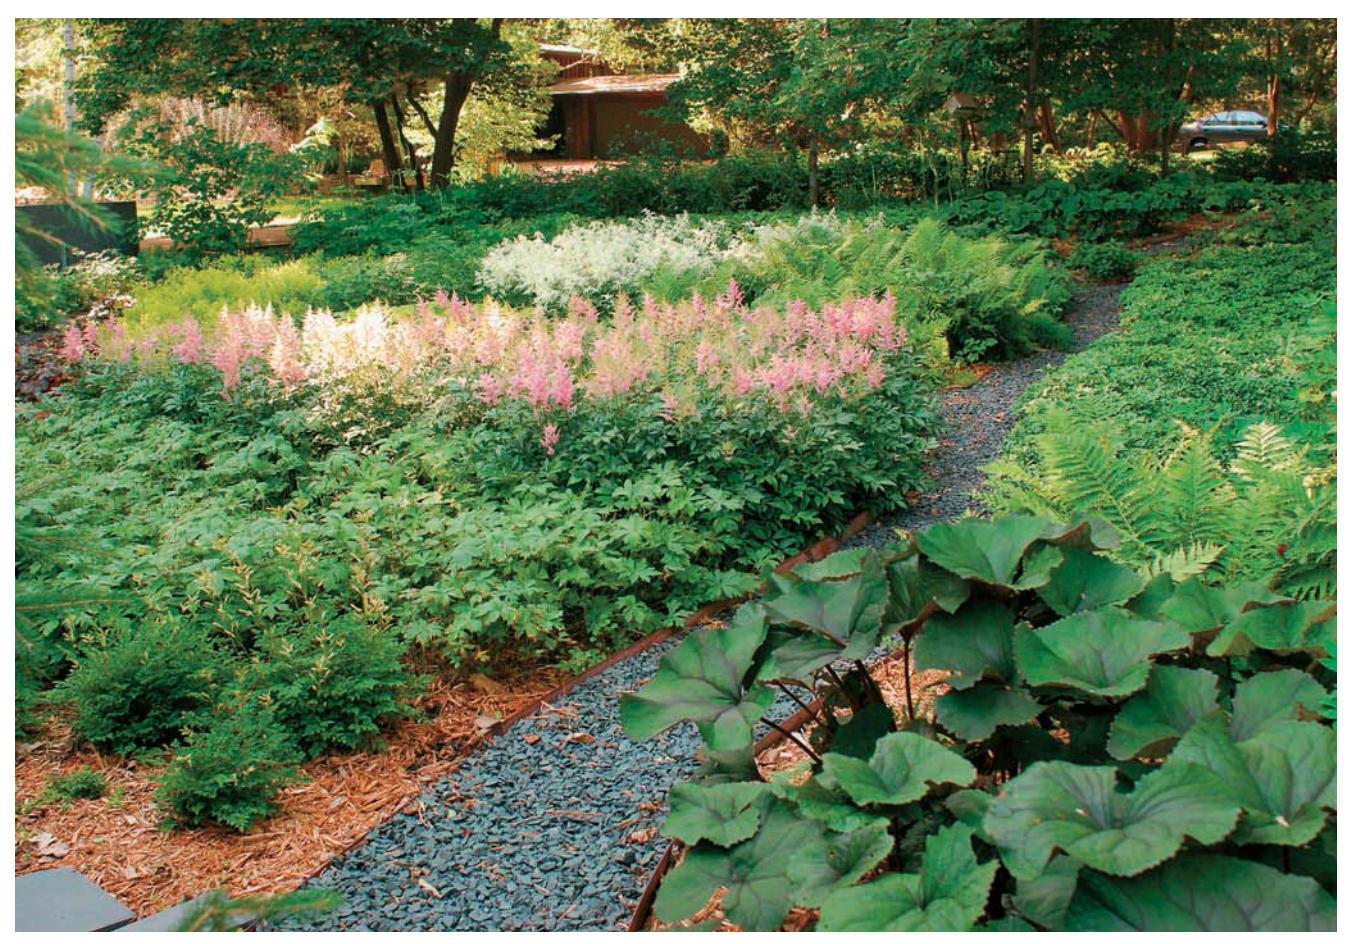
Diagram illustrating different levels of sunlight and shade in a garden
The degrees of sunlight and shade change with the growing season. "Full sun" is found in areas with no overhead obstructions where plants will receive six hours or more of direct sun. "Light shade" areas receive bright to full sun for all but a few hours each day. There may be a partial canopy of trees overhead, but they do not shade the area for very long. Areas with bright light or sun for about half the day are called "partial shade" or "medium shade." Most shade plants will do fine in light or partial shade, especially if the sun is morning sun. "Full shade" (also called "dense shade") areas are shaded for most of the day, often under a full canopy of trees, and are suitable for only the most shade-tolerant plants.
Although shade gardens can be formal, the natural growth habits of most shade plants lend them to a more informal setting. Rather than concentrate on individual plants, think in terms of large groupings, allowing flowers and groundcovers to spread and to form natural drifts whenever possible.
#### DESIGN CONSIDERATIONS FOR A SHADE GARDEN
- When it comes to laying out a shade garden, simplicity, rather than ostentation, is the key. Textures, shapes, and shades of green play important roles—usually more important than flowers.
- Create points of interest to contrast with the sea of summer green by using embellishments such as sculptures, bird baths, or containers of shade-tolerant annuals.
- Take a cue from nature and design your shade garden in layers, with trees as the ceiling, shrubs and small trees creating walls of structure, and groundcovers and perennials forming the carpet.
Bare-root woody plant specimen
Container-grown woody plant specimen
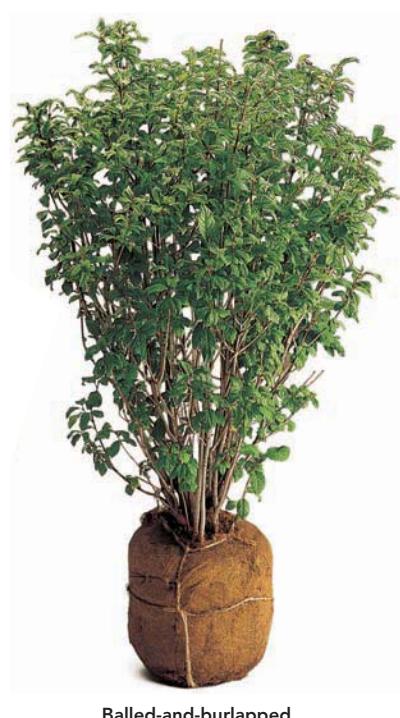
Balled-and-burlapped woody plant specimen
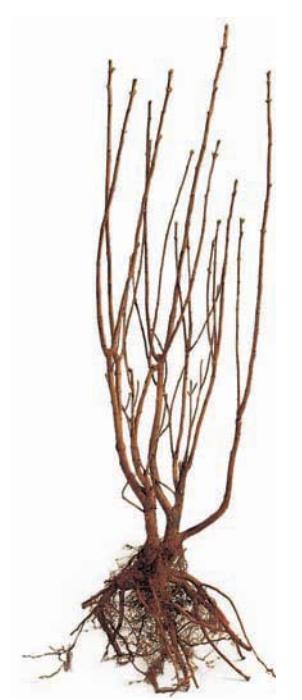
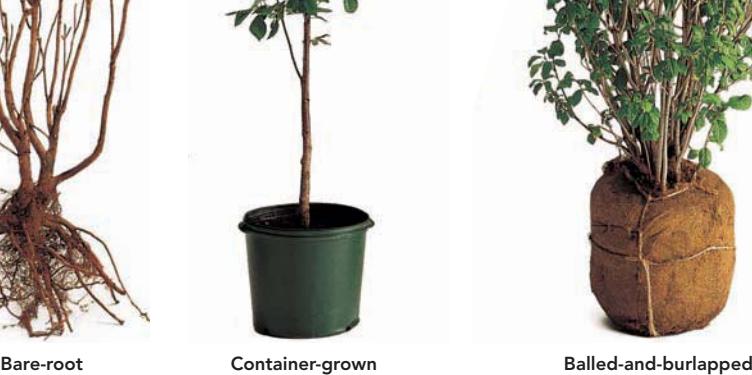
Woody plants are available for sale as bare-root, container-grown, or balled-and-burlapped specimens. Bare-root plants (left) are the most economical, but they must be planted during the dormant season, before growth begins. Container-grown plants (center) can be planted anytime during the growing season, as long as you can provide ample water. Balled-and-burlapped specimens (right) are the most expensive way to go, but they are usually larger in size and will fill out a garden quicker.
### BUYING PLANTS
Selecting plants for your garden is definitely one of the most fun aspects of gardening. But you should also be practical in your approach. It's a little like furnishing a house: some plants will serve a function and some will be more for accent, but they should all tie together so the end result is a well-designed, functioning "room."
Most annuals and vegetables are sold in cell packs of six to nine plants. Perennials are usually sold in individual pots, which can range in size from 4 inches
up to 2 gallons or more. Obviously the larger the container, the larger the root system and the quicker you will get to your desired effect. Many times a perennial in a larger container can be divided into several smaller plants, providing you with more plants for your dollar.
If you can afford it, potted plants are the best way to go with perennials and woody plants. Container plants become established quickly and give you a better looking garden sooner. Your best success will come from plants with a well-established root system. For perennials and ornamental grasses, go with a container size of at least 4 inches; larger if your budget allows. Shrubs and trees should obviously be in containers proportionate to their size.
If cost is a concern or if you are planting a lot of one species such as a hedge or a groundcover, consider using bare-root plants or plugs if you can find them. Plugs are small, cone-shaped pots, usually about 2 inches in diameter and about 5 inches long. They are often sold in six- or nine-packs like annuals. Plugs usually establish themselves rather quickly and do just as well as container plants in the long run. Shrubs and even some trees are available bare-root (without soil) in spring.
### STARTING PLANTS FROM SEEDS
Starting your own seeds opens the door to a wide range of species you won't find at local nurseries. It can also save you money. Instead of buying three small pots of your favorite annual, you can buy a pack of seeds for about one-third of the price and get more plants than you can find room for. If properly stored in cool, dry conditions (the refrigerator works fine), many seeds will last 2 years or even more, stretching your investment even farther.
Seeds that germinate and grow quickly can be sown directly outdoors. But many annuals and vegetables require a longer period of time to reach flowering or fruiting and need to be started indoors. Indoor seed starting is a rewarding endeavor, but it does require some specific equipment and space.
Adequate light is crucial to success. Winter sun is usually not strong enough to produce healthy seedlings. You'll need to provide artificial light in the form of an inexpensive shop-light fixture holding two 40-watt fluorescent tubes. Suspend the fixture over a bench or table, making sure you can raise and lower the lights as needed as the plants grow.
You'll also need containers, seed-starting medium, and, of course, seeds. Seeds should be ordered or purchased in late winter. Some seeds need to be sown by mid-January to have garden-sized blooming plants by mid-May. On the other hand, seeds sown too early result in leggy (tall and weak-stemmed) plants that don't transplant well. Your seed packet will list how many weeks to start the seeds before your last frost date.
#### ORDERING BY MAIL
Mail-order shopping is convenient and provides you with a larger selection of plants. Here are some tips for success:
- Order from a reputable nursery that has a refund or replacement process.
- With perennial plants, order from a nursery with the same climate as you have.
- Order early for a better selection.
- Specify a shipping date so plants don't arrive before you are ready to plant them.
- Unpack plants as soon as they arrive and examine them carefully for any problems.
- Plant as soon as possible after receiving plants. This exception is bare-root plants, which should be soaked in a bucket of water at least an hour before planting.
Make sure any plant you bring home from the nursery has a plant tag in it. This tag provides valuable information you will need for planting. Some gardeners also like to place the tag near their newly planted plant so they can differentiate it from weeds.
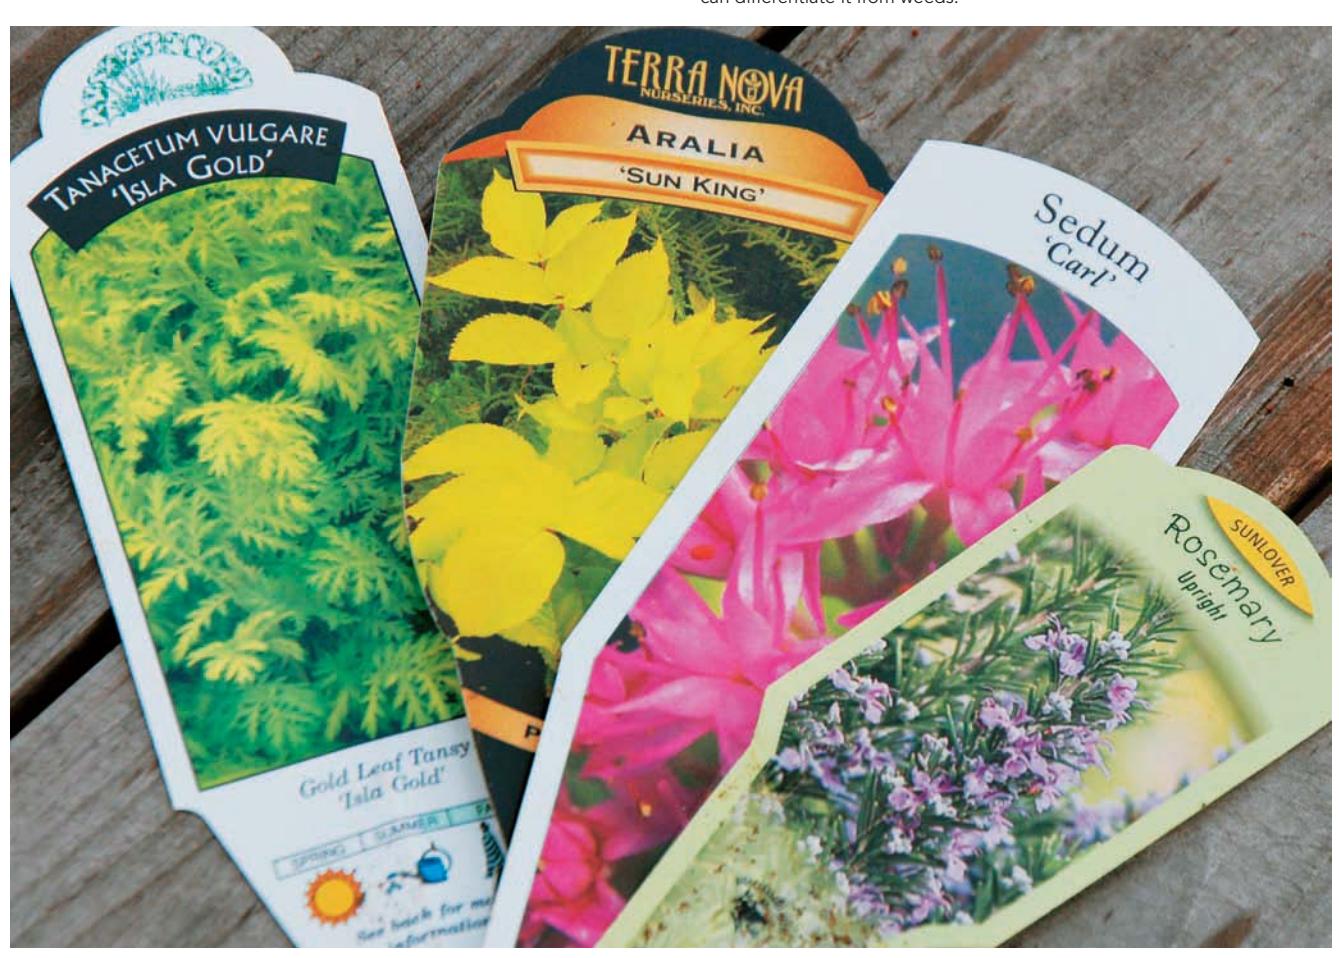
Plant tag with cultivation information
#### STARTING SEEDS INDOORS
1 **FILL CONTAINERS** to within about a half-inch of the top with soilless mix and place in a tray of water to saturate the soil. You want to be sure to use a purchased lightweight, soilless mix that is sterilized and free of disease organisms rather than garden soil, which is usually too heavy, poorly drained, and can contain harmful fungi or bacteria.
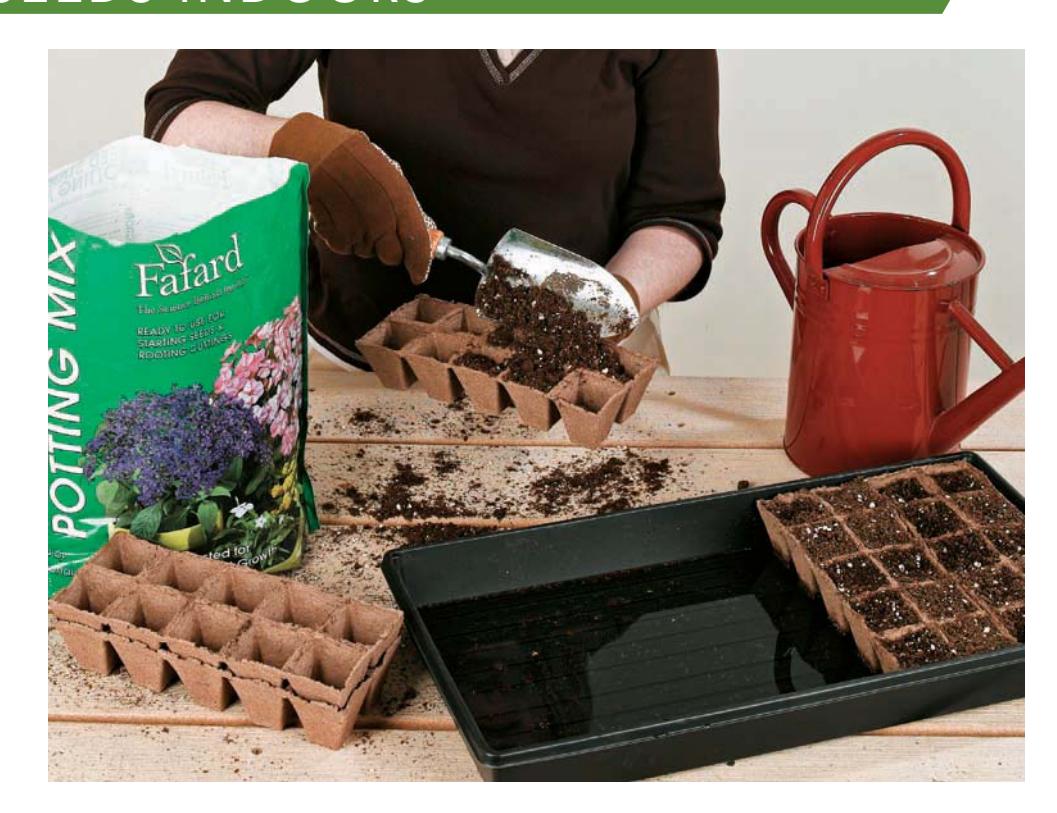
Filling seed-starting containers with soilless mix
2 **CAREFULLY SOW THE SEEDS** on the surface and cover with the appropriate amount of medium.
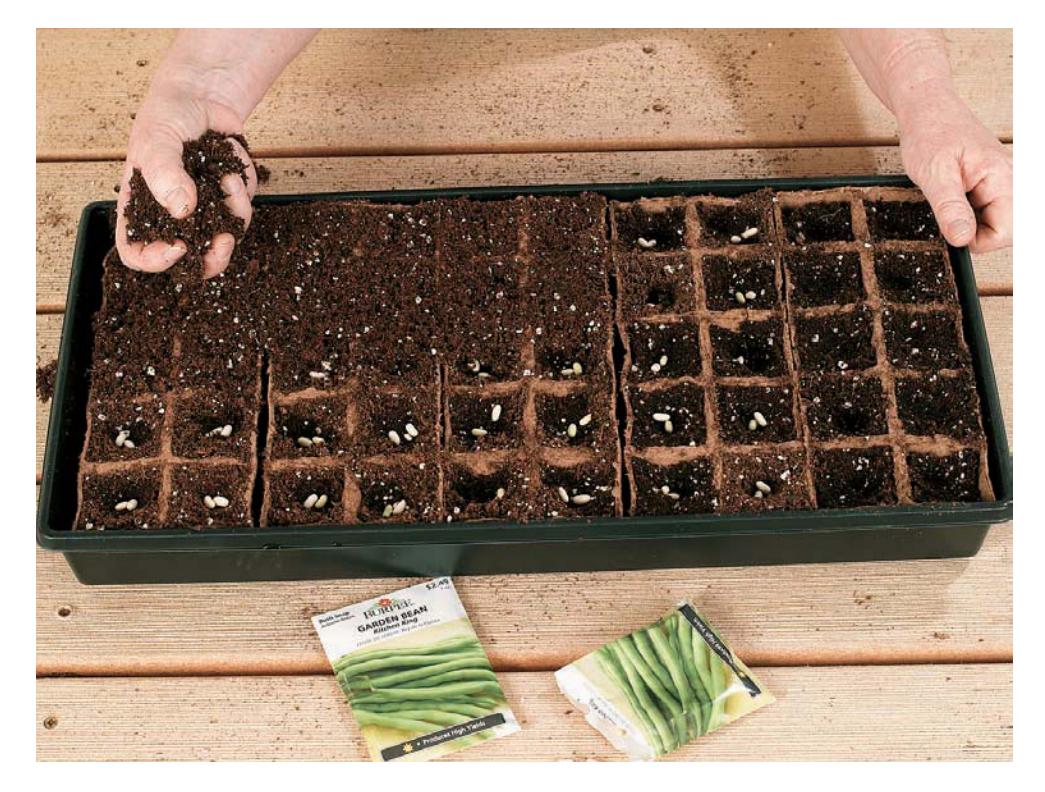
3 **PUT THE CONTAINER IN A PLASTIC BAG** and seal it to maintain humidity. Place the containers in a warm spot out of direct sunlight. The top of a refrigerator or freezer works well. Check daily for germination. You may need to open the bag for a little while to prevent excessive moisture buildup, which can lead to damping off.
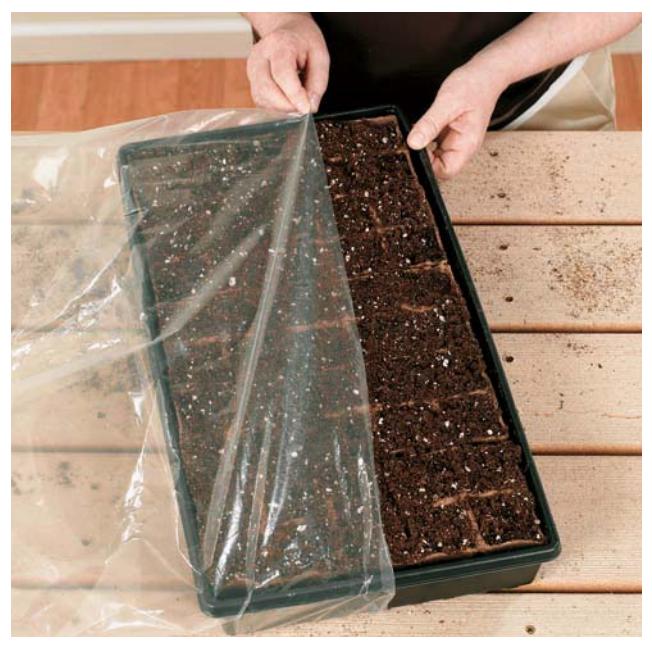
4 **REMOVE THE PLASTIC BAG** when the seedlings first start showing up and place the container under fluorescent lights, leaving about 1 inch between the tops of the plants and the light. Adjust the light as needed to keep it 1 to 3 inches above the seedlings as they grow.
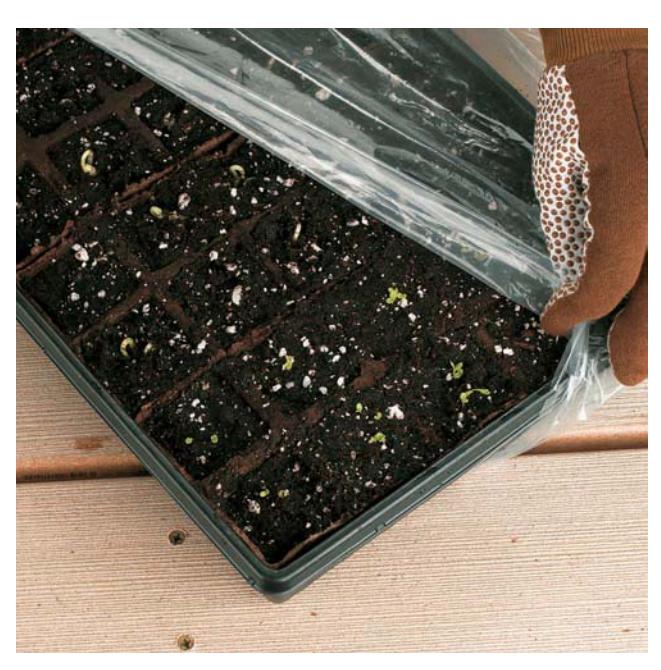
5 **WHEN SEEDLINGS HAVE ONE OR TWO SETS OF LEAVES**, use a small, pointed scissors to thin out excess seedlings. Avoid pulling the unwanted seedlings because it can uproot nearby seedlings.
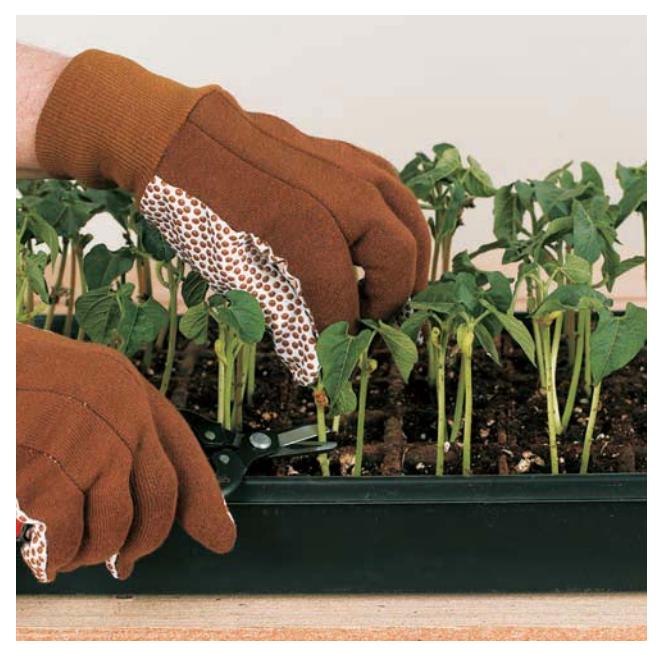
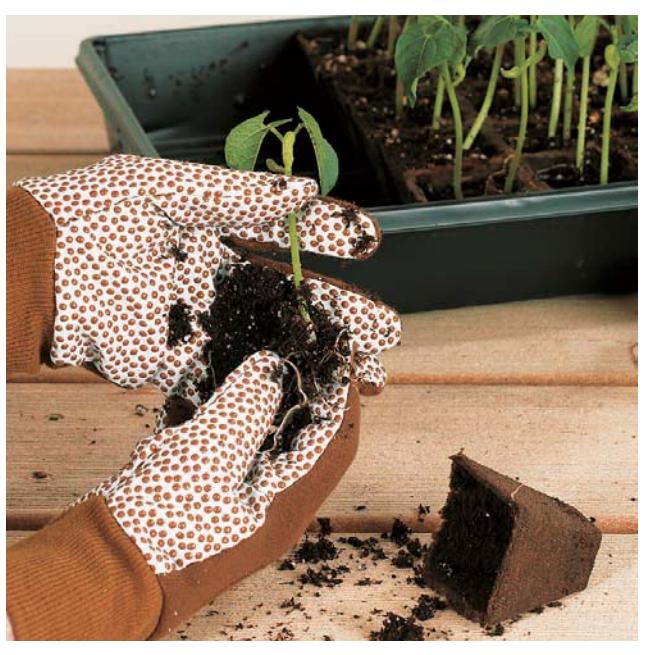
6 **TRANSPLANT SEEDLINGS** into individual pots when they have two sets of leaves, gently prying seedlings out of the soil and separating the roots, if necessary. Place pots back under lights.
### GETTING PLANTS IN THE GROUND
In most areas of the country, the best time to put plants in the ground is spring. This gives them ample time to become established before they have to endure their first winter in the ground. Container-grown summer- and fall-blooming flowers and most woody plants can be planted in spring or fall—actually all season long if you are diligent about watering when needed. You may also need to provide shelter from the sun for a few weeks.
Before putting plants in the ground, place container plants in your prepared garden to see the big picture. You may find that you didn't quite buy enough plants to cover your allotted gardening area, in which case you may want to space them farther apart. You may find that you have too many of some plants and need to divide them into other areas of your garden. Some plants have extensive root systems and don't like to be moved once they are established. Careful thought should be given to placing these plants since they don't respond well to transplanting. And always consider the mature height and spread size of trees or shrubs when planting and make sure they won't grow too close to a building, sidewalk, other plants, or up into overhead wires. The new planting may look a bit sparse at first, but it is better than having to uproot mature plants that have overgrown their spots.
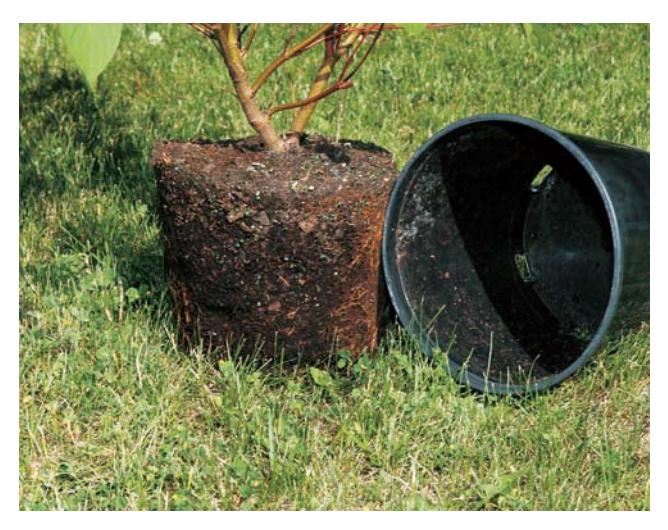
Potted plants need to be carefully removed from their containers. If grown in a loose soilless mix, shake off the excess and plant them like bare-root plants. If roots are circling, disentangle them to encourage outward growth. If the root ball is dense, use a sharp knife to cut through some of the roots. Cutting may sound harsh, but the roots must be free to move into the surrounding soil.
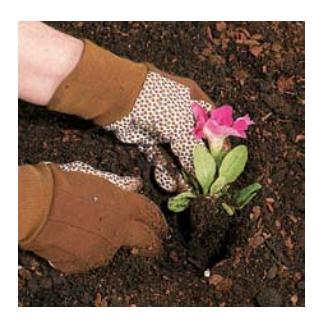
Make sure the plants are well-watered in their containers right up until the time they go into the ground. Try to avoid stepping in your garden as much as possible when planting. Start planting in the middle and work outwards. Pull away the mulch and dig a planting hole as deep as the plant's nursery container.
Give your newly planted garden a good soaking right after installation, regardless of the soil moisture levels. You may also want to stick the plant tags next to the plants to help you remember what you planted and differentiate them from weeds.
Your new transplants will require plenty of sprinkling in their first growing season if rainfall is inadequate. Keep soil adequately moist until new perennial plants have a full year of growth. One to two inches of water every three days for the first month is a good measure. If autumn is dry, continue watering until the first hard frost. Once fully established—after three to four years—most woody plants and herbaceous perennials should only require supplemental watering during dry spells.
If you've prepared your soil properly and amended it as needed, newly planted gardens don't need fertilizer. You run the risk of burning the roots and you will also encourage weeds. And there is a very good chance a granular fertilizer will wash away before the tiny plant roots have a chance to take it up.
### PLANTS TO AVOID
A walk through the nursery or a look through a nursery catalog may leave you feeling overwhelmed by the list of plants you can include in your gardens. Here are a few tips on how to whittle the list down and avoid planting things that will only cause you more grief down the road.
Avoid including prolific seeders and/or aggressive spreaders, especially in small gardens. While these traits may be appealing when you are just starting out and want to cover a lot of ground quickly, these plants can turn into weeds you'll fight for years to come. It's better to cover bare ground with mulch and add plants as you can afford to or as your existing plants become large enough to divide.
If you really want to raise more aggressive plants, there are some maintenance techniques you can use to keep these plants under control. With a little education you can learn the seedling stages of these plants and be ready to weed some of them out or transplant them as soon as they reach a suitable size. You may also want to deadhead (cut off the mature blossoms) some of the more prolific seeders before they get a chance to set seed. Aggressive plants can be kept in check by digging out some of the encroaching stems and roots each spring or by planting them in large nursery containers sunk into the ground.
Most importantly, avoid any invasive plants that can escape to nearby areas and become pests by crowding out native species, destroying their indigent ecosystems. After land clearing, the invasion of exotic plants is the second greatest threat to our natural areas. This list of potentially invasive exotic plants includes such familiar landscape plants as bugleweed (*Ajuga reptans*), baby's breath (*Gypsophila paniculata*), spotted deadnettle (*Lamium maculatum*), Amur maple (*Acer ginnala)*, Norway maple (*Acer platanoides*), tree of heaven (*Ailanthus altissima*), barberries (*Berberis* species), Siberian peashrub (*Caragana arborescens*), burning bush (*Euonymus alatus)*, common privet (*Ligustrum vulgare*), and European mountain ash (*Sorbus aucuparia*). For an up-to-date list of invasive plants in your region, refer to the Invasive Plant Atlas of the Unites States at [www.](www.invasiveplantatlas.org) [invasiveplantatlas.org.](www.invasiveplantatlas.org)
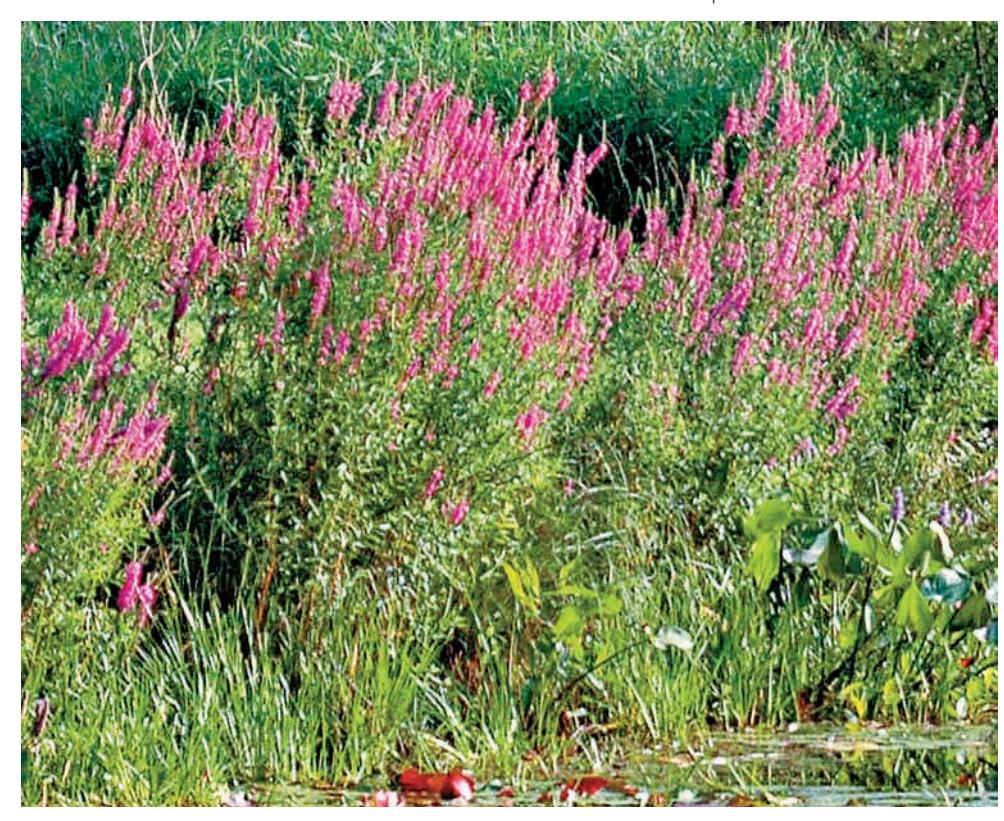
Even though they are pretty, some landscape plants such as purple loosestrife can escape from gardens and establish themselves in natural habitats, causing great harm to native plants and animals.
### THE PLANNING STAGE
#### CREATING YOUR IDEAL GARDEN
*For most new gardeners, it is best to start small with an eye on the future. In this chapter you'll learn how to prioritize your needs and how to make the best of your existing site conditions. You'll get some ideas on how to personalize your garden as well as make it attractive and welcoming to anyone else who may visit it.*
*Start by asking yourself a few questions. Do you want a colorful garden full of flowers? Is growing your own food a priority? Are you looking for a place to relax and enjoy the outdoors? Are you interested in making gardening a hobby, or do you want the lowest possible maintenance? There is no such thing as a no-maintenance garden, but there are many things you can do to greatly reduce the amount of time you have to spend tending your garden.*
*Are you ready to take the plunge into an exciting new hobby with a goal of planting an exquisite garden filled with year-round beauty? Or do you prefer gardening with minimal care? Whichever it is, gardening is a versatile endeavor and there is a practice of gardening to fit the demands of everyone.*
No matter where you live, you can surround yourself with a beautiful garden. Giving a little thought to what you want before you start choosing plants will help bring you down the path to success.
#### MAKE IT YOUR OWN
Before you get too far along in your planning process, give some thought to a style for your garden. Are you looking for a neat, trim, formal garden or do you prefer a more relaxed, natural-looking garden? Is it important to you that your garden blends into the rest of the neighborhood or do you want to create a spot solely for your own enjoyment? As tempting as it is to go out and start buying plants that appeal to you, the results will be much more pleasing if you think about the overall character of your garden beforehand.
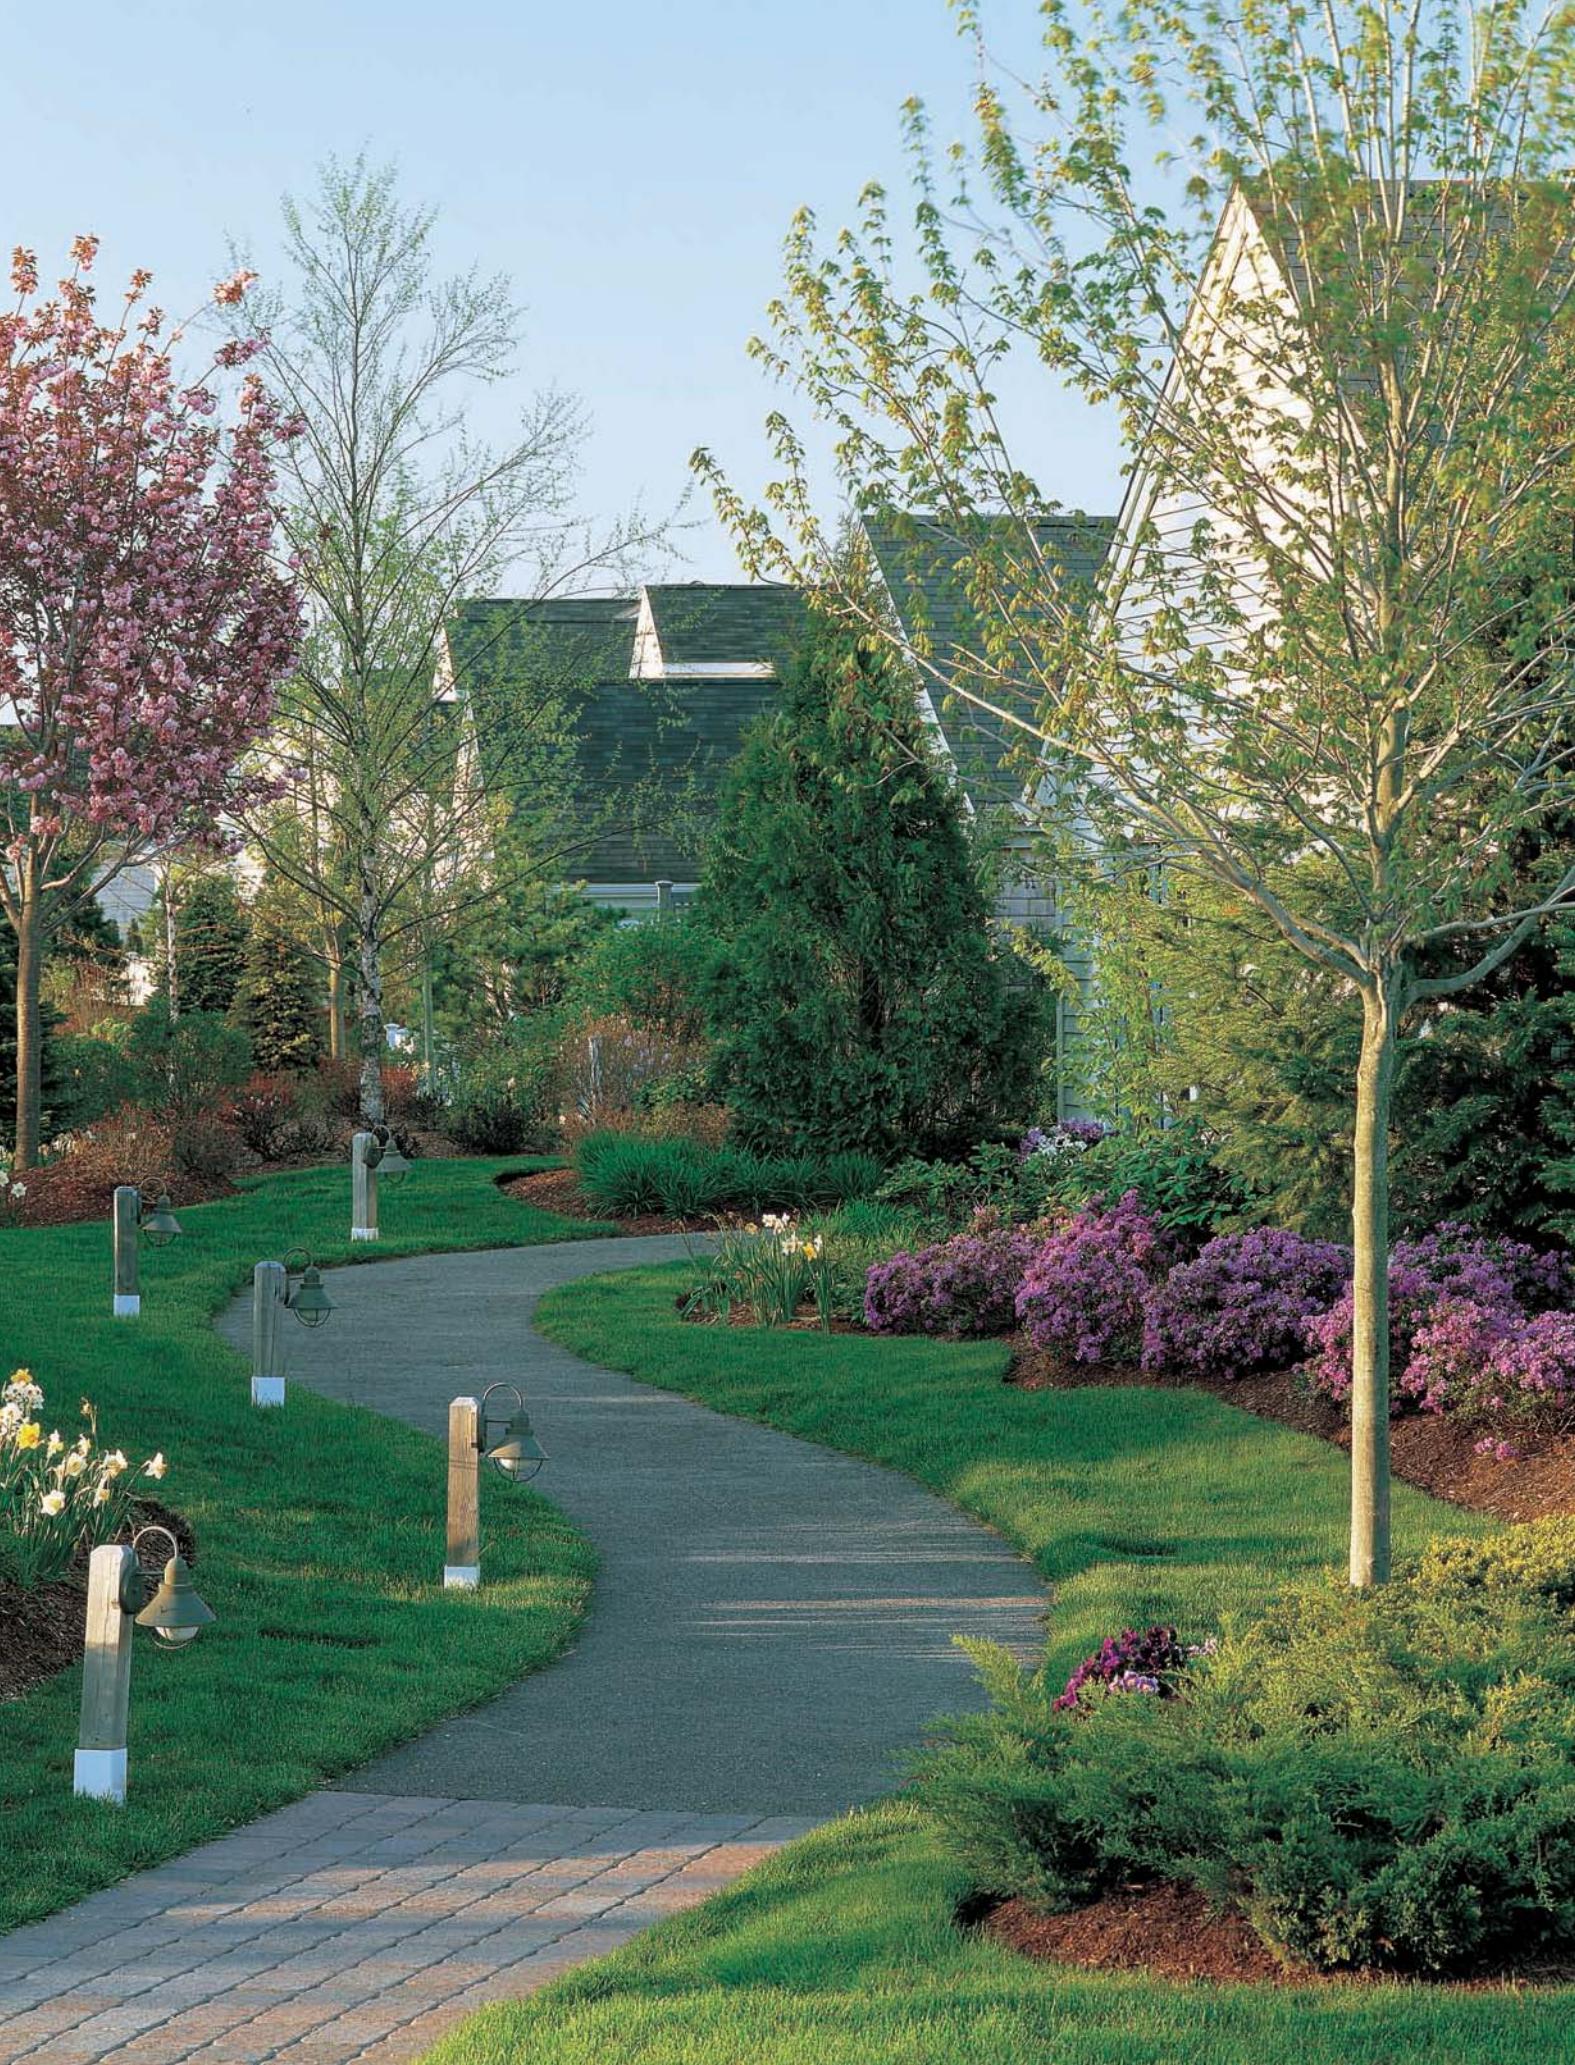
Garden design is a series of choices. Start by understanding your site and what you have to work with and knowing the basic intention of the garden, and work from there to create your own little piece of paradise. Remember that gardening is not just about the end result. It's also about the process, which should be enjoyable as well as provide you with fresh air and exercise.
Get ideas from magazines, books, and websites, as well as from public gardens in your area and gardens down the street. Keep in mind the style of your house, but don't be afraid. Any style will work if done correctly and the right plants are chosen. More important is to keep plants in scale with the home, especially trees. Smaller homes call for smaller plants and larger homes need larger plants to balance them.
Give regional consideration to your garden style. It is usually best to stick with plants and a style that is suitable for your area. Not only will it look better, it will also be easier to maintain. A sure way to give your garden a true sense of place and make it look like it belongs in your area is to use plants that are native to your region.
#### USING NATIVE PLANTS
Native plants are those species that grew naturally in an area before the greatest influx of European settlement, about the mid-1800s in most areas of North America. Native plants tend to lend themselves to less formal gardens, but many of them can also be used in formal settings as well.
There are many benefits to using native plants. For many gardeners, the initial attraction comes from native plants' reputation of being lower maintenance than a manicured lawn and exotic shrubs. For the most part this is true provided native plants are given landscape situations that match their cultural requirements. Because they have evolved and adapted to their surroundings, native plants tend to be tolerant of tough conditions such as drought and poor soil and are better adapted to local climatic conditions and better able to resist any negative effects of insects and diseases.
The less tangible but possibly more important—side of using native plants, is the connection you make with nature. Gardening with natives instills an understanding of our natural world its cycles, changes, and history. By observing native plants throughout the year, a gardener gains insight into seasonal rhythms and life cycles. You will see an increase in birds, butterflies, and pollinating insects, making your garden a livelier place.
To find out what plants were native in your area, check out your state's Department of Natural Resources website, which often includes a list of native plants or links where you can find them. Your Agricultural Extension office can be helpful as well.
Native plants and natural gardens tend to be more informal and loosely structured, but they can also work fine in smaller, more formal settings with the right plant selection and planting techniques.
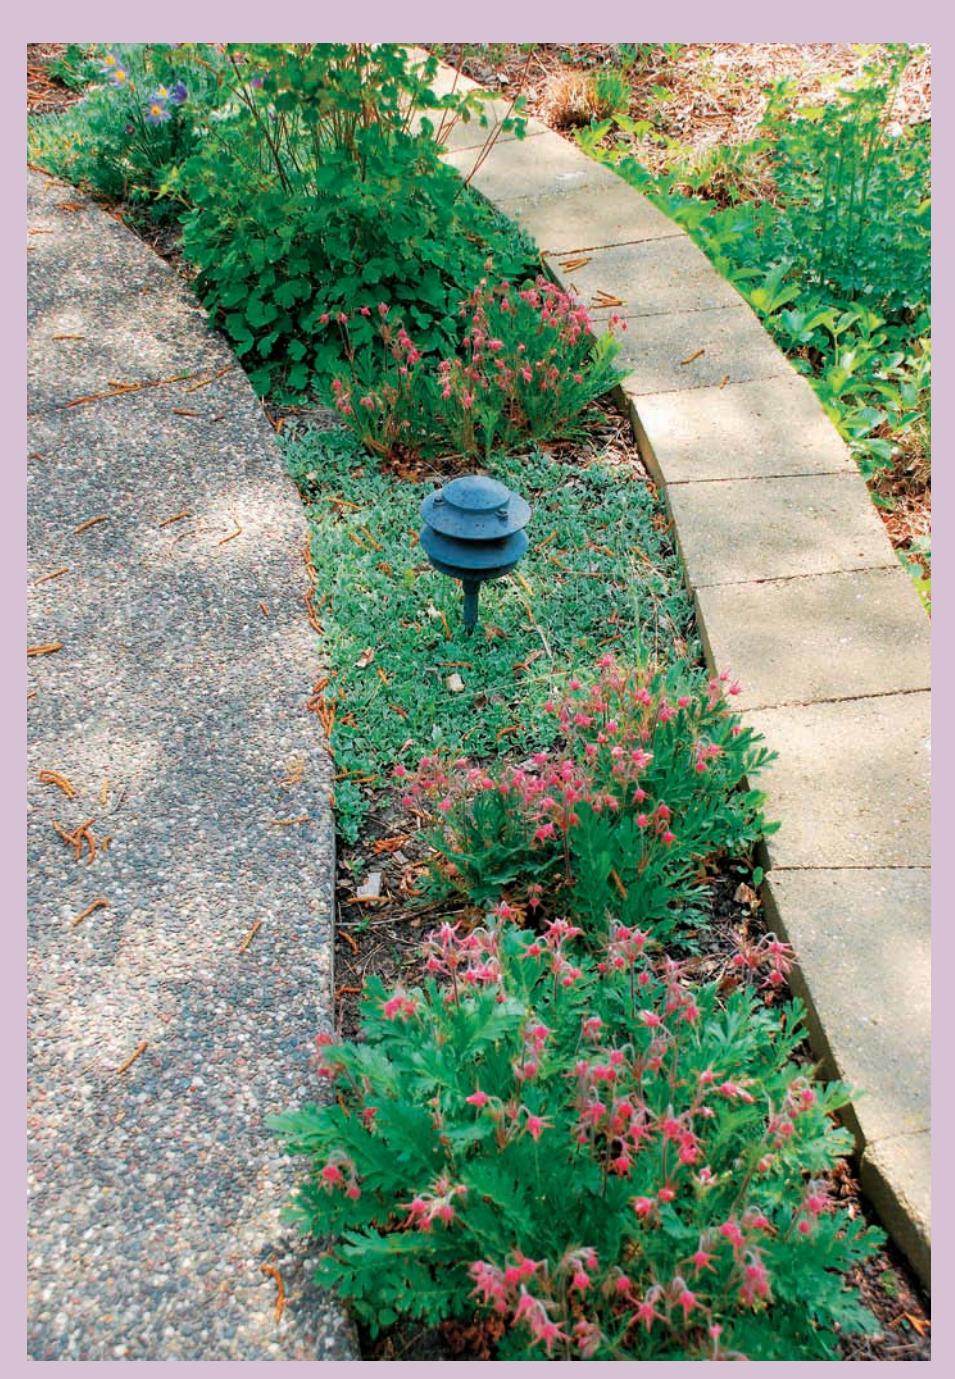
### TAKING STOCK
Even if you're the type of person who doesn't like to plan everything on paper, you should have some organized approach to your garden. Start with a rough sketch of your property. Identify everything that is on the site, including your home and garage, existing trees and shrubs, driveways, sidewalks, outbuildings, doors, windows, faucets, downspouts, air conditioners, and existing plants and gardens. Pay special attention to overhead wires that can get in the way of trees. And keep in mind city maintenance of roads and sidewalks, especially if they will be salted in winter.
Give thought to where the natural traffic patterns are or will be. No matter how beautiful it is, if a garden is placed where the kids' shortcut to the playground is, it will be doomed. And make sure you know where your property lines are. You don't want to invest hundreds of dollars in a large shade tree only to find you planted it on your neighbor's property. Locate above and below-ground utilities. Here again, you don't want to invest in a large tree or shrub that's going to grow into telephone or electric wires only to have to be pruned drastically or even cut down in its prime. And don't forget to look beyond your own property. Most city and suburban gardeners inherit views from their neighbors, and they aren't always pretty and require some sort of screening. All of these things will help you decide where to place your gardens and what type of gardens you should plant.
#### STARTING FROM SCRATCH
If you are building a new home, you have the luxury of starting with a clean slate. You can decide where you want your large shade trees and just how much lawn you need. Instead of getting rid of lawn to create a garden, you can simply edge your garden areas and cover them with mulch until you can get around to planting.
Unfortunately, budget constrictions are often a major consideration and all too often the landscape gets put low on the priority list after house details are met. Try to at least give some thought to what you would like to see on your property so you have a working plan that you can develop as time and finances allow. And as tempting as it is, try to avoid planting fast-growing, weak-wooded trees that will often outgrow their space and become a storm hazard after a few years. It is much better to invest in fewer, slower-growing trees that will last several lifetimes and not become major maintenance issues.
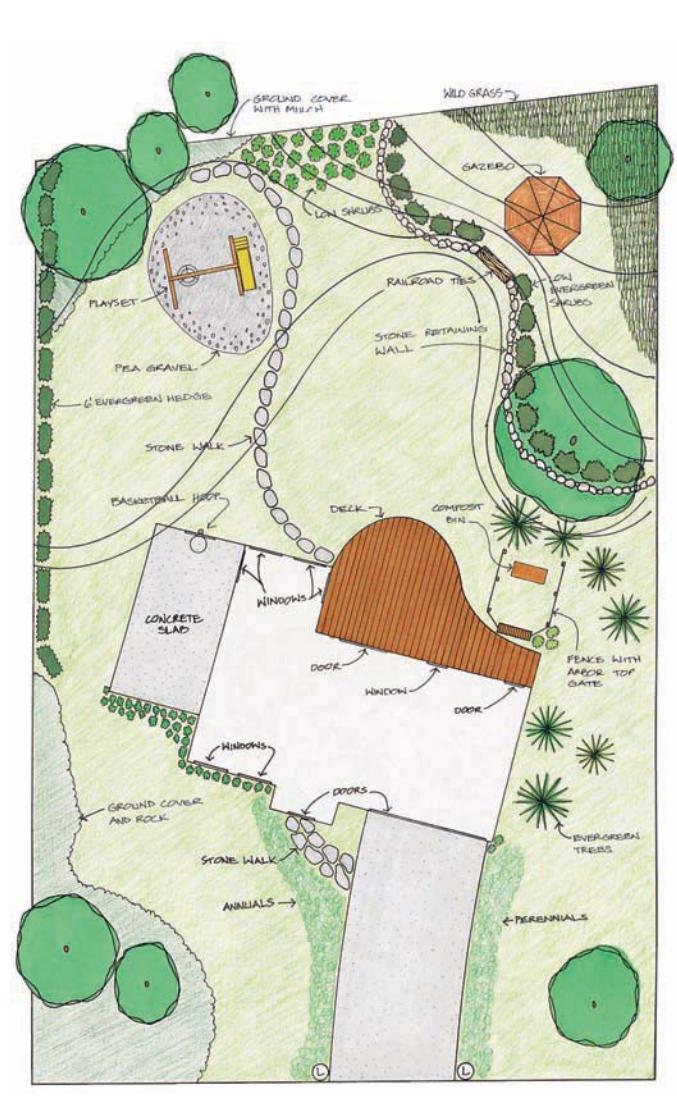
You may want to develop a site map, sort of a "bird's eye view" of your property to help you get a better perspective of what you have to work with. Start by focusing on the broad picture, and then narrow things down into specific areas, or "rooms," in your landscape. Think about the purpose of each room and how best to garden it so you can achieve your goals.
#### UPDATING AN EXISTING GARDEN
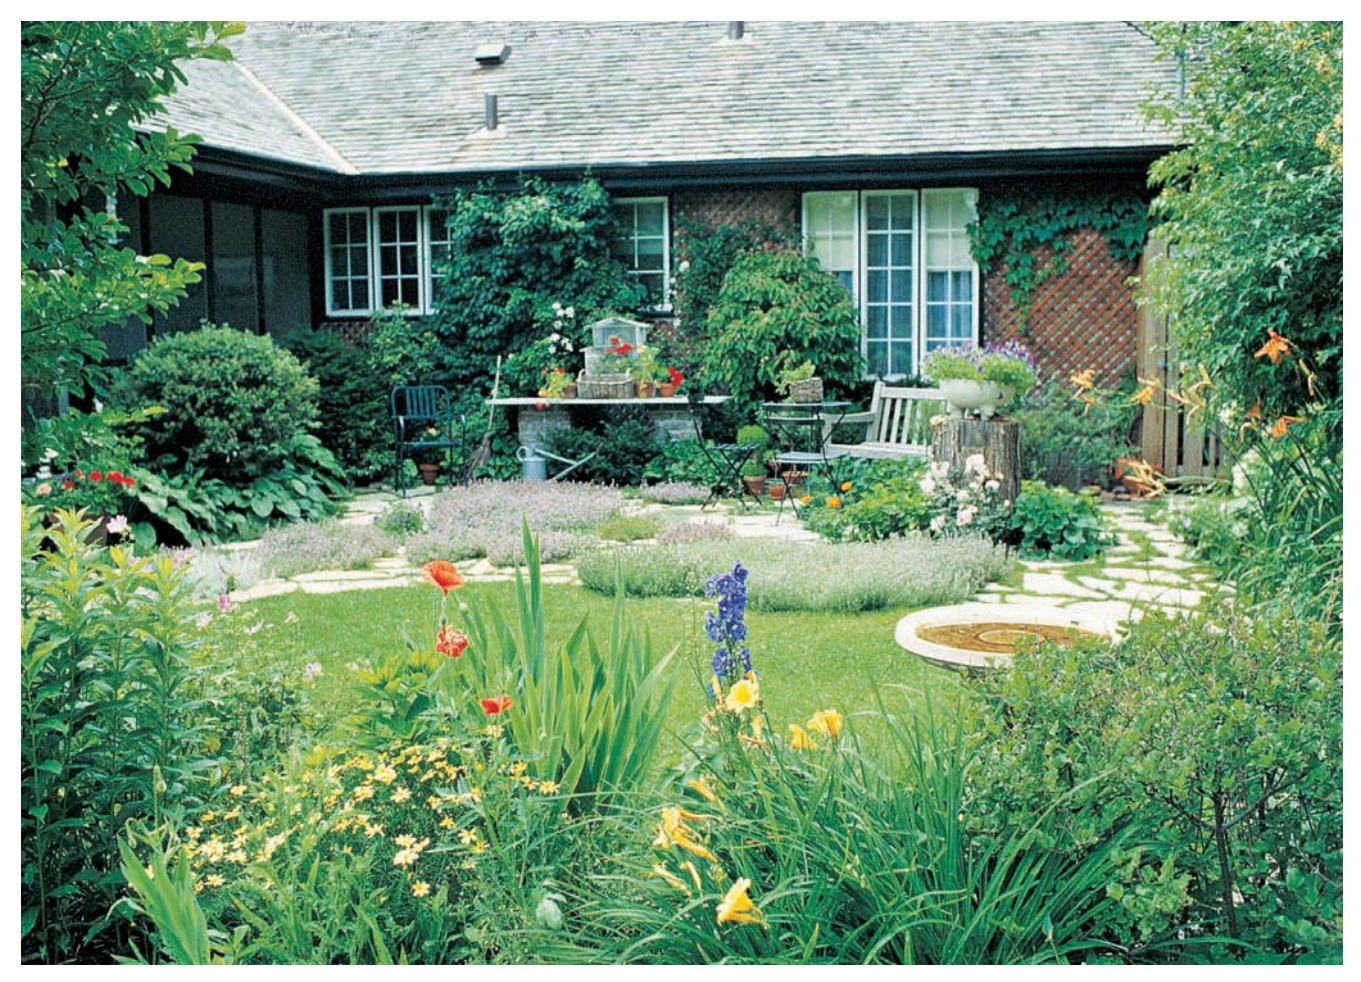
Many people move into an established landscape and have to work within certain parameters already established by the previous homeowner, such as large shade trees, hedges, patios, and fences. If you share their taste and have similar needs, you can pick up where they left off. If you have different goals, you'll need to decide what to keep and what to eventually change.
Trees and shrubs can be valuable assets or formidable obstacles. If they are quality, healthy specimens, you'll probably want to do what you can to incorporate them into your garden plans. However, if they are fast-growing, weak-wooded species, it may be better to have them removed before they get any bigger or come crashing down on your home in a wind storm.
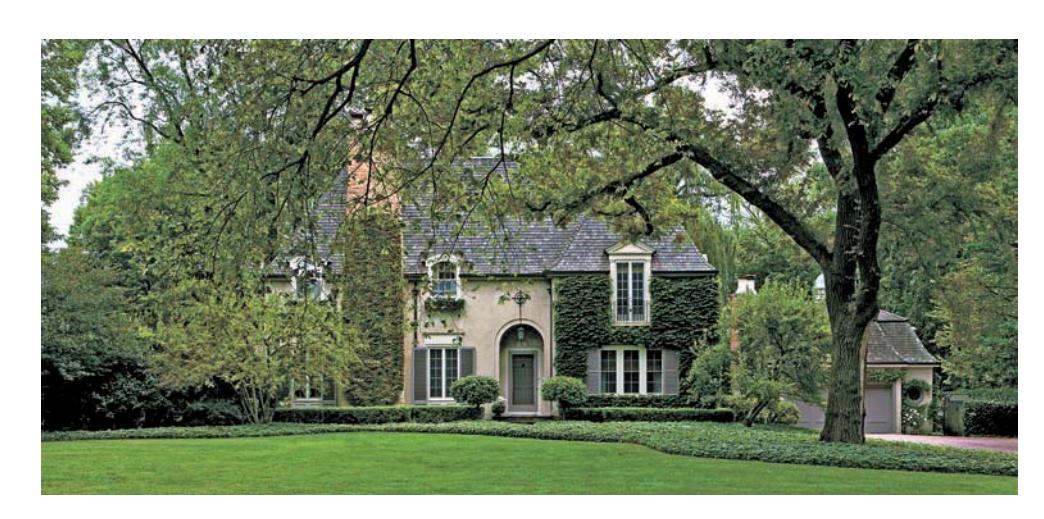
The best gardens look as if they belong on the site and evolved there naturally. Keep this in mind as you look at the overall size of your property and the contours of the land. Think of your garden as part of an outdoor room and keep the purpose of that room in mind. Use trees and shrubs to provide structure and "walls" and groundcovers and paving materials for the "flooring." Fill in with showy perennials and annuals and accent the setting with benches, birdbaths, and other adornments.
##### DEALING WITH ROAD SALT
Road salt damages plants by interfering with water uptake, which can leads to browning and even death of some plants. If your soil is heavy and your garden is near a road that is salted in winter, you will want to look for plants that can tolerate the conditions. It may also be a good idea to stick with herbaceous plants that go dormant in winter rather than shrubs which are more easily damaged. If your soil is sandy and drains well, the road salt should flush through your soil before your plants start growing in spring.
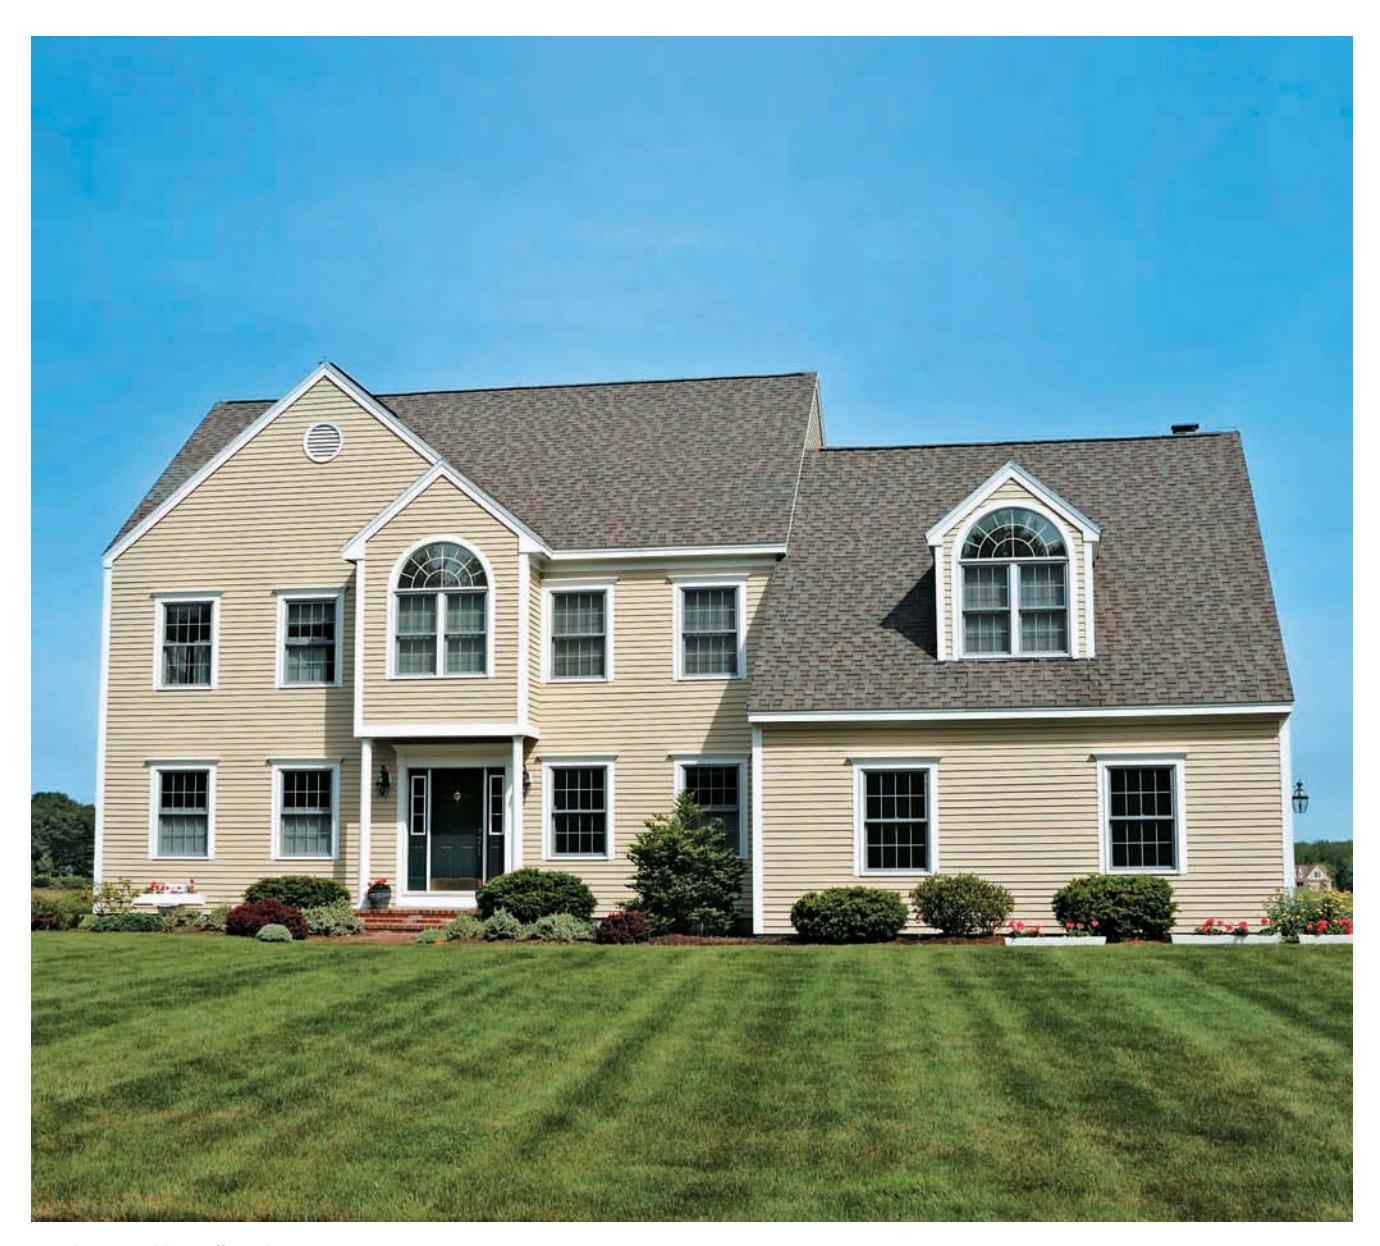
New homes seldom offer rich, blossoming gardens, prompting contractors to install basic shrubbery and plant life. Here, transplanted shrubs sit on a bed of surrounding mulch, while rosebuds add a splash of color to an expansive lawn and lot. This lawn is ideal for front yard customization with duel rows of garden beds, or the beginning of what will someday be a beautiful wooded lot.
Herbaceous plants are usually a welcome sight, unless they are an aggressive or invasive species. Here again, it's better to remove these problem plants completely before you start any new gardens. If possible, remove these undesirable plants by gently digging them out and covering the bare areas with mulch or planting inexpensive annual plants. Allow nearby plants to fill in, or begin incorporating perennials, grasses, and bulbs that match what you want from your garden. If you have a large area covered with "bad" plants, you'll want to consider one of the techniques for removing existing vegetation described in chapter 1 in the section on creating a new garden.
## GARDEN NEEDS CHECKLIST
Gardens can serve a multitude of purposes and solve problems. Here are some things to consider as you plan where to garden and what kind of garden you want. Do you want your garden to:
- Add interest to the front yard
- Provide a place to grow beautiful flowers
- Attract butterflies, birds, and pollinating insects
- Create a boundary
- Hide an unsightly building or foundation
- Provide an accent for a patio or deck
- Create an outdoor room for family activities or entertaining
- Provide fresh vegetables for your family
- Reduce the amount of lawn you have to take care of
- Soften a fence or side of a building
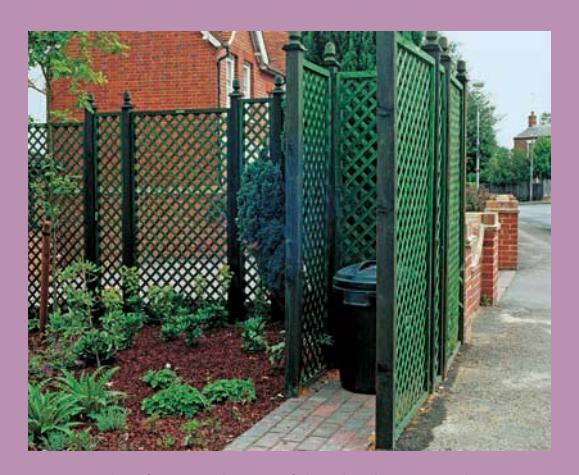
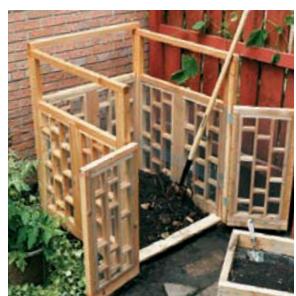
Everyone has functional parts of their landscape, such as garbage bins and alleys, to deal with. A well-designed garden against an attractive screening material goes a long way in making functional areas more attractive.
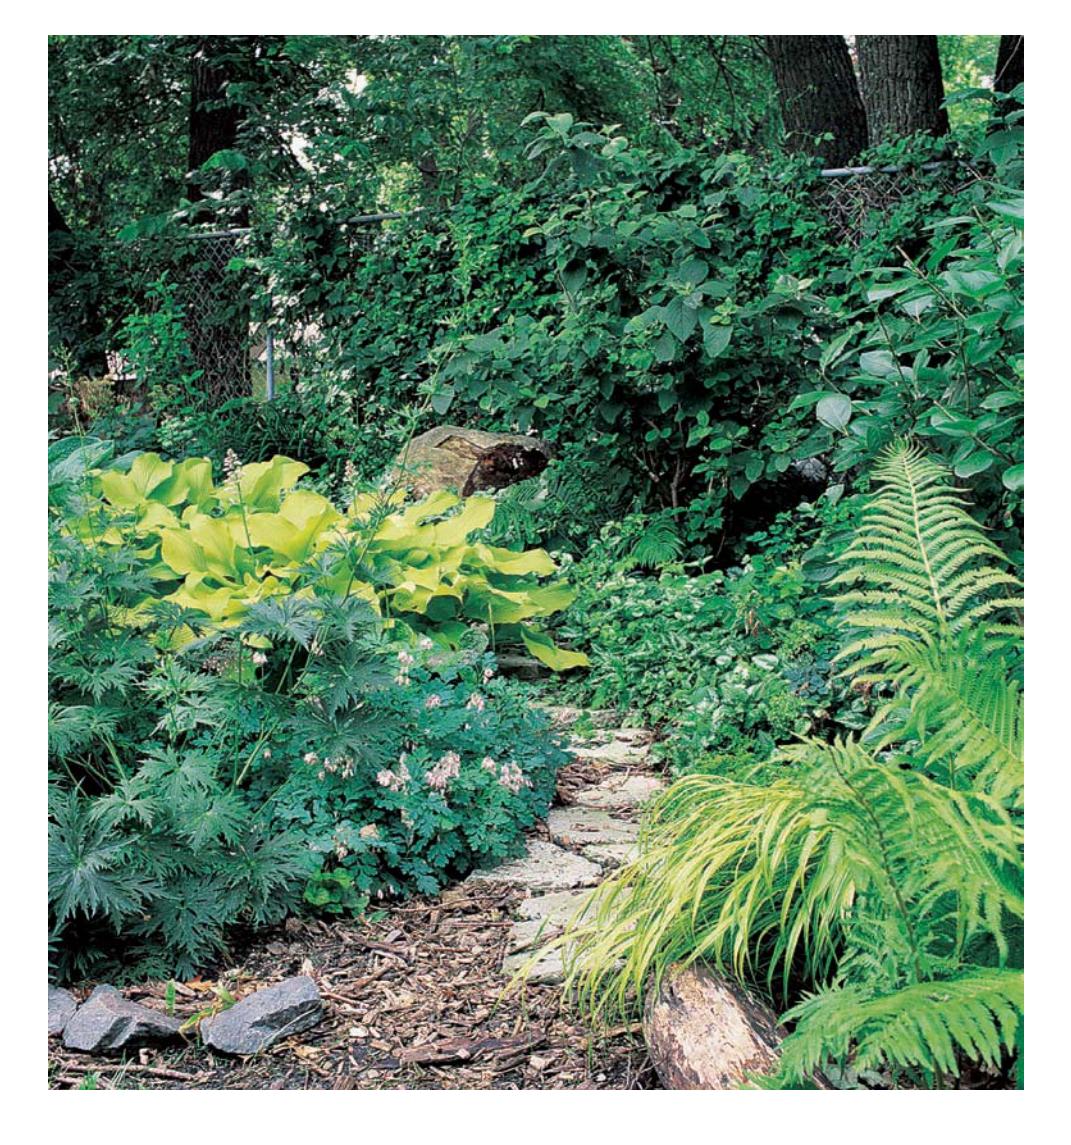
If you are working with a developed landscape, take note of existing plants and decide what you want to save and what you want to discard. Note which plants seem to be doing well and note their growing conditions. Since many plants are particular about their growing requirements, you'll get clues as to what existing soil and light conditions you have.
## ESTABLISHING STRUCTURE
A garden is more than just plants. Most well-designed gardens are complemented by the surrounding hardscape, which consists of elements in your landscape that aren't living. It includes paths, fences, outdoor kitchens, decks, irrigation systems, lighting, patios, fire pits, driveways, arbors, compost bins, and stairways. These structures should be given as much thought as the plants you choose—perhaps even more, since they are permanent and expensive.
Since building hardscapes involves hard work and expense, it is important to get them right. Some things are relatively easy to install and you may want to do them on your own to save money. Outdoor lighting kits make installation a relatively easy task for gardeners with all levels of DIY ability. Drip irrigation systems are within the reach of most do-it-yourselfers. But there are some things it is usually worth paying for to get them done professionally. Brick walkways are very effective in garden design and for getting around, but if incorrectly laid, they can be a detraction and a hazard. Unless you have plumbing experience, have a pro install your underground sprinkler system.
### PATHS AND WALKWAYS
Paths and walkways allow access to the inner areas of a garden while reducing the chances for plants to be trampled. Some paths are meant to whisper the way to go; others are meant to shout it. Making a path obvious doesn't mean it has to be boring, however. Bend it around a corner so it disappears for a while, and place plants and stones to break up the sight line of the path edges. Avoid edging the path with rigid rows of plants, stones, or logs, and vary the materials that form the path. The hardscape includes functional items such as pathways and benches, as well as accent features such as sculptures and water gardens.
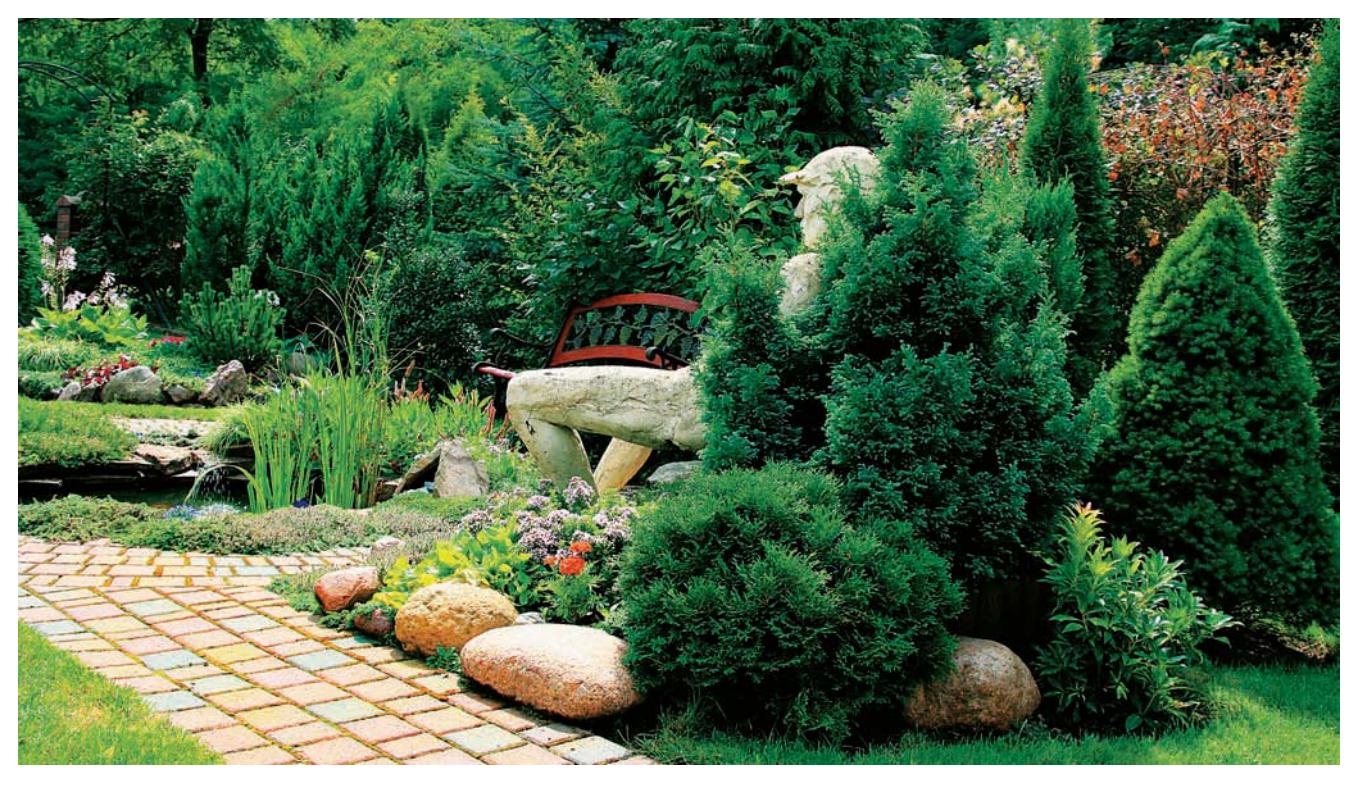
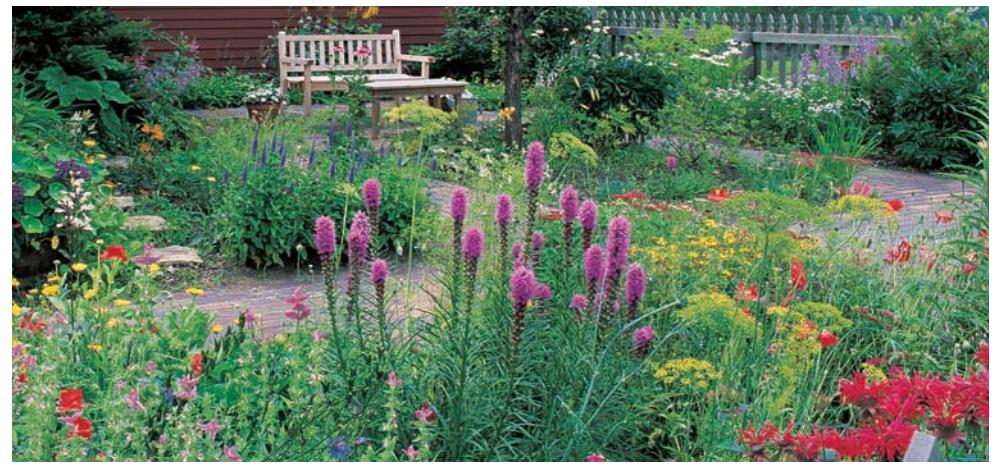
Meandering paths look more natural than straight ones. Plant your smaller, more delicate flowers next to paths where they can be seen and enjoyed.
### CREATING BOUNDARIES
A good fence or hedge can make a good neighbor if it is in scale with your garden and tall and dense enough to serve its purpose. Evergreen trees or shrubs planted close together will provide you with year-round privacy as well as an attractive backdrop for your garden. You can also use tall perennials and/or grasses if you only need screening during the growing season.
Fences can be made of wood, vinyl, metal, or stone. If you are looking solely for privacy, the first three should work just fine. You can plant vines to soften a metal fence or a row of shrubs in front to screen it. If you are looking for something more decorative, consider a stone wall. They are almost maintenance-free and they give the garden a look of permanence and set off plants nicely.
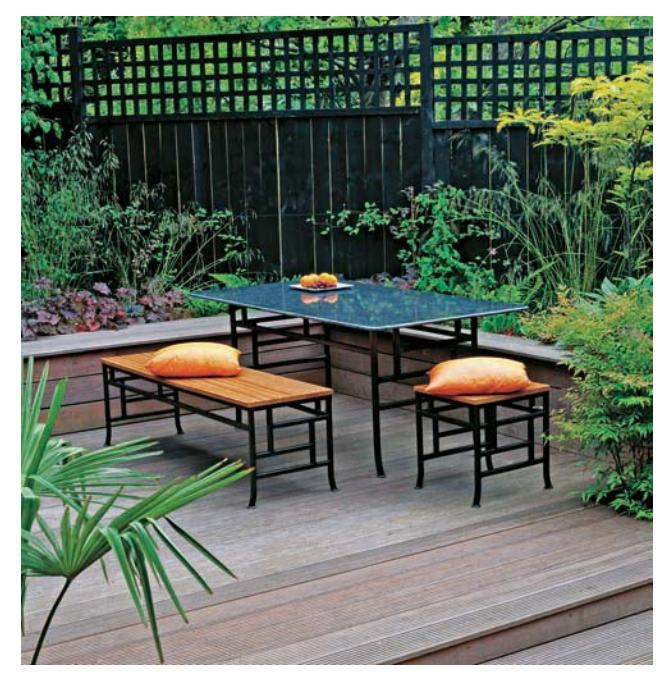
Decking, fencing, and planter walls are all part of the hardscape of a garden.
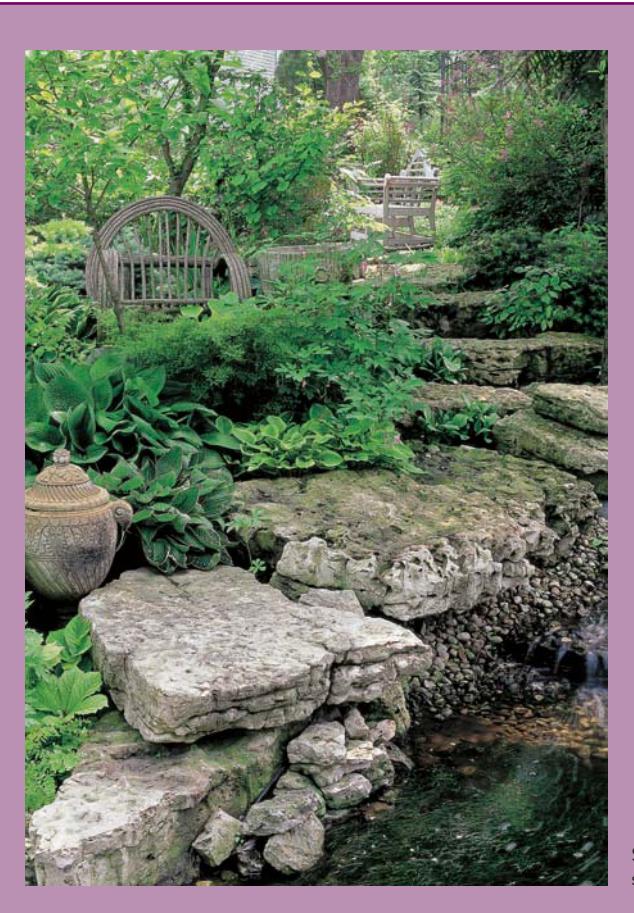
### INSTALLING HARDSCAPES
#### BEGINNER
- Drip irrigation system
- Stepping stone pathway
- Small garden pond
- Wooden deck
- Simple solar outdoor lighting systems
- Black plastic garden edging
- Building a simple trellis
- Installing a metal fence
- Installing a wood retaining wall
- Creating spot for your grill
#### ADVANCED DIYer OR PRO
- Underground sprinkler system
- Brick walkway
- Waterfall and large pond
- Stone patio
- Elaborate outdoor lighting systems
- Metal garden edging
- Building and installing a large arbor or pergola
- Building a rock wall
- Retaining a hillside with rocks
- Outdoor kitchens
Some hardscape projects are easily done by the homeowner. But others, such as rock retaining walls and large ponds, are best left to professionals.
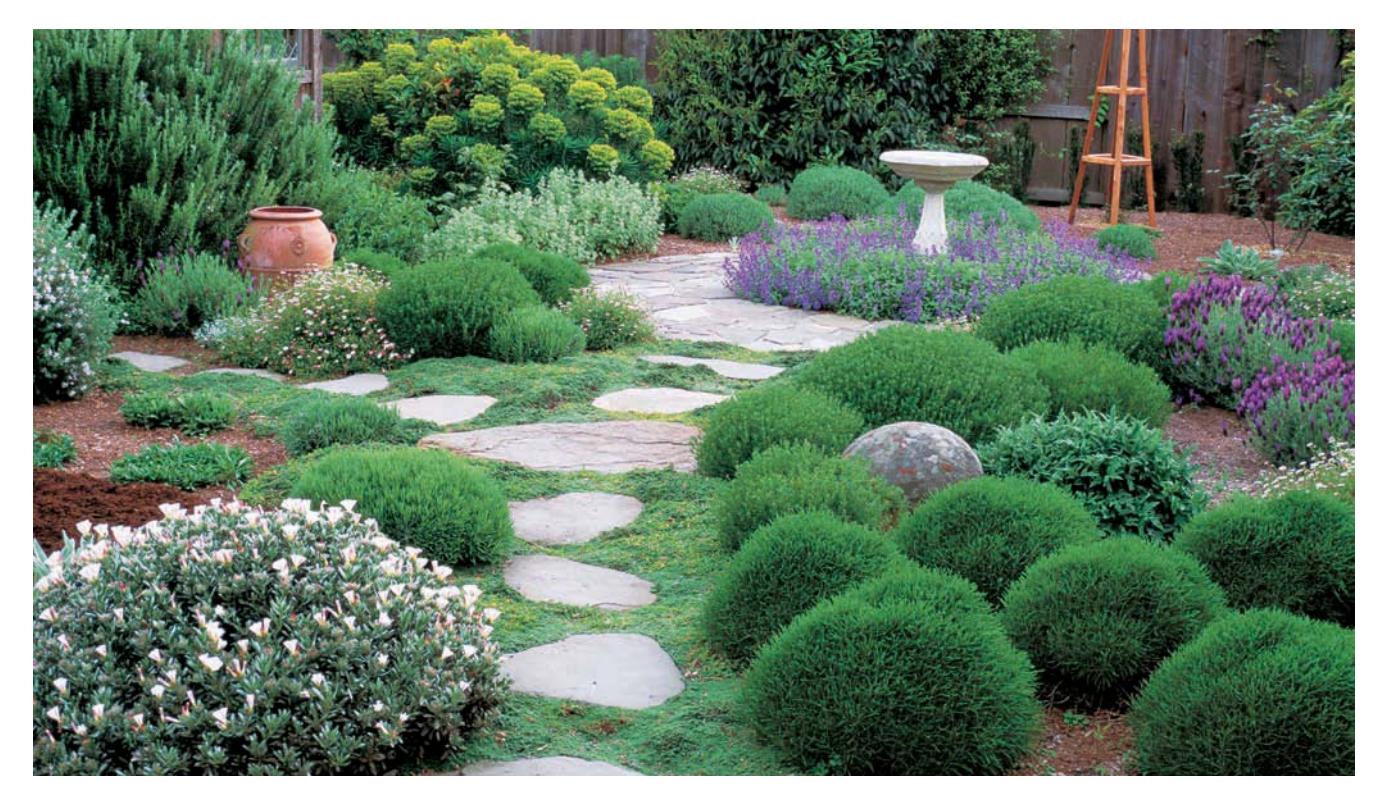
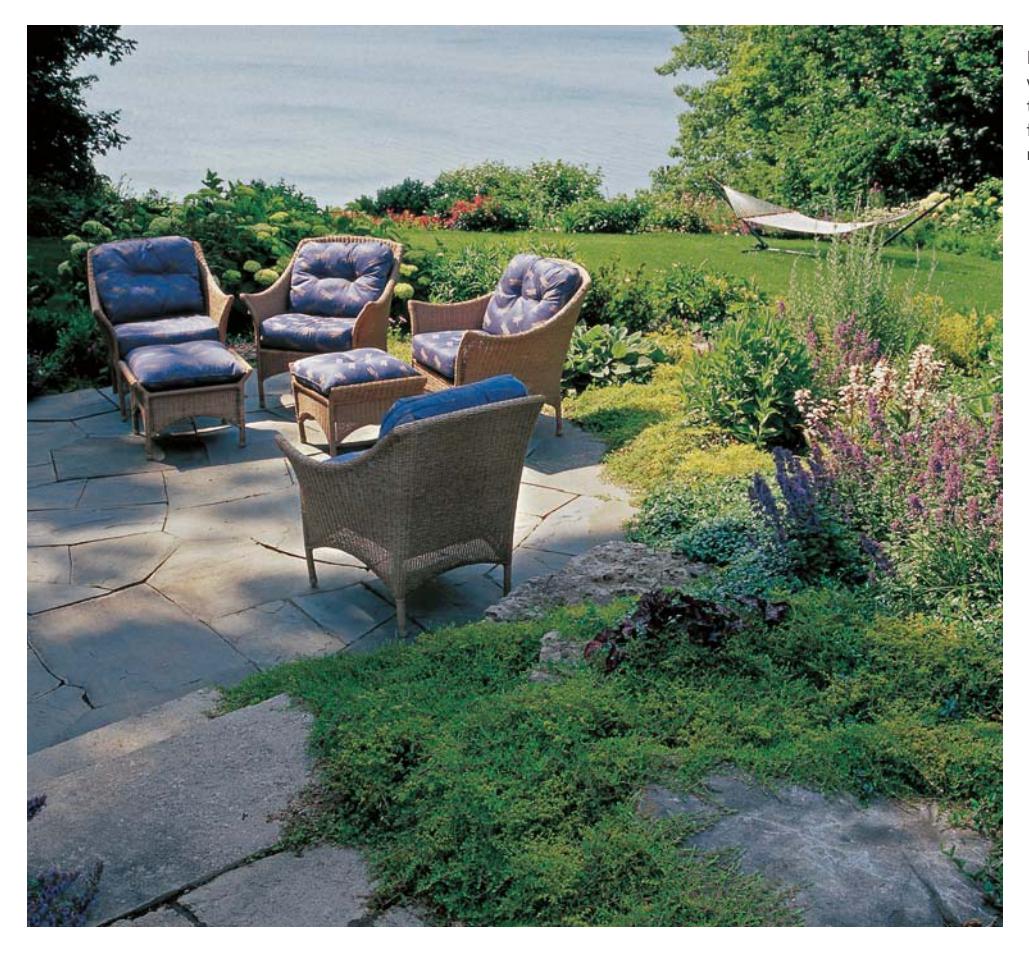
Paths should blend with their surroundings, but they should always be well-set and wide enough for safe use. In this photo, widely spaced stepping stones are interplanted with creeping thyme, a low-growing groundcover that tolerates quite a bit of foot traffic. Other good walkway materials include brick, gravel, wood chips, and even bare soil. Avoid using mulches on sloped pathways. It can easily wash away in heavy downpours.
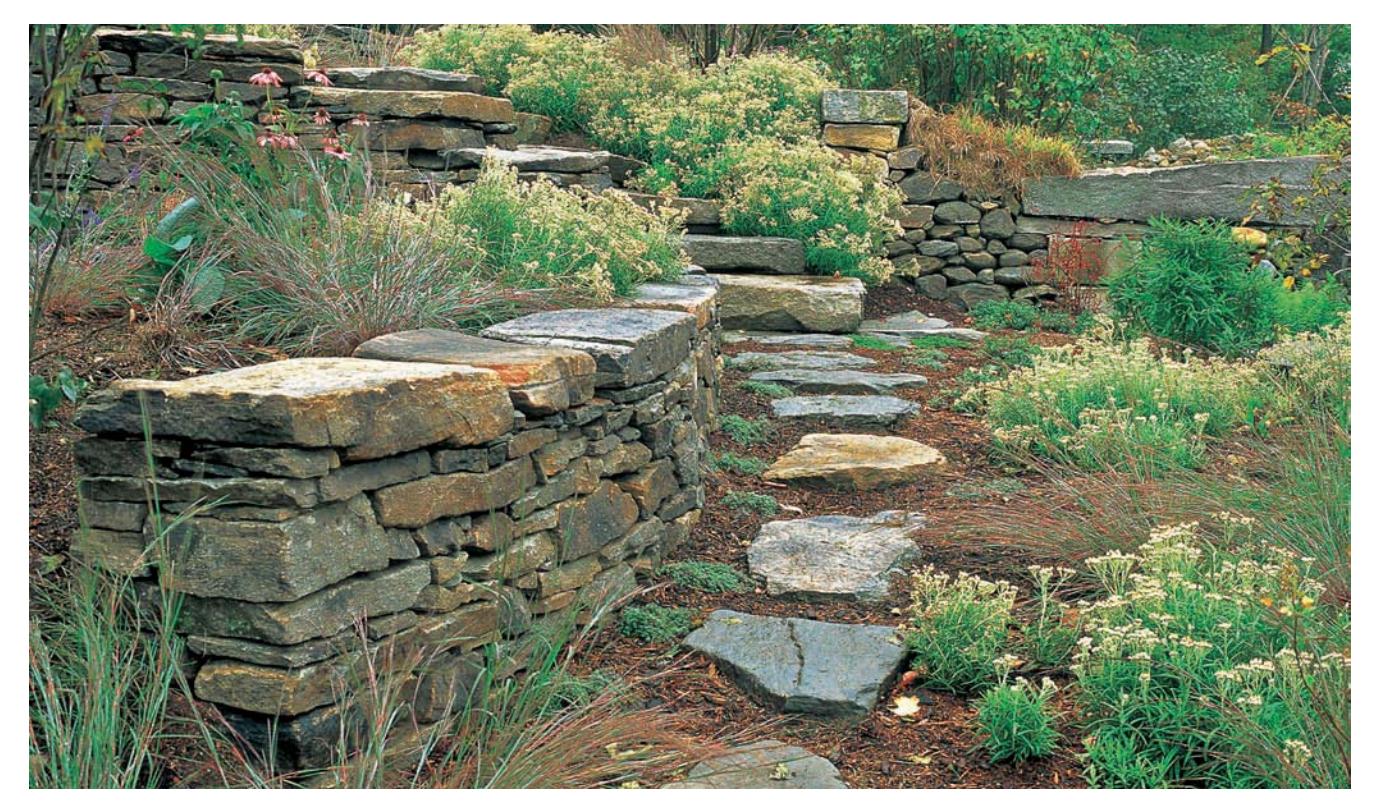
A dry-stacked stone wall should look like it almost rose right out of the ground. Choose a stone type that is typically found in your region for the most natural look.
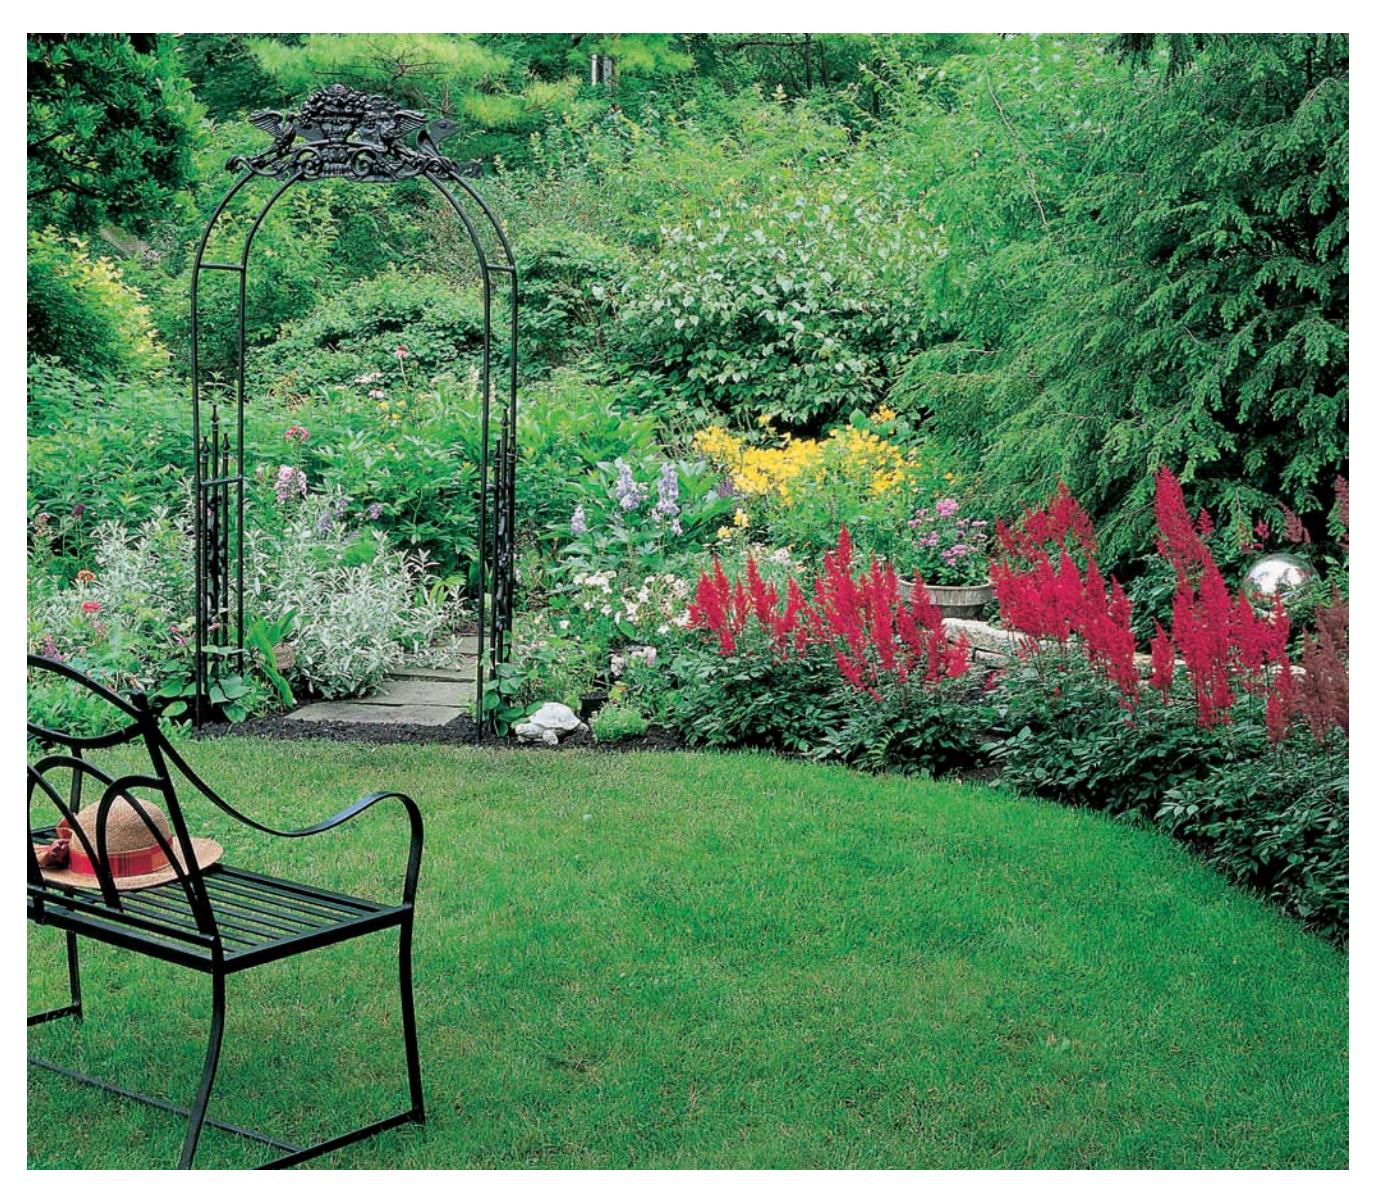
## ACCESSORIZING YOUR GARDEN
Not everything in your hardscape has to be functional. Most gardens benefit from a few accoutrements such as sculpture, fountains, containers, sundials, and gazing balls. Attractive birdhouses and birdbaths will serve double duty as garden ornaments and habitat for birds. Keep in mind, however, that in most cases these items are meant to be accents to the plants. They should complement the plants and blend in rather than look like they were simply plopped down in the middle of the garden.
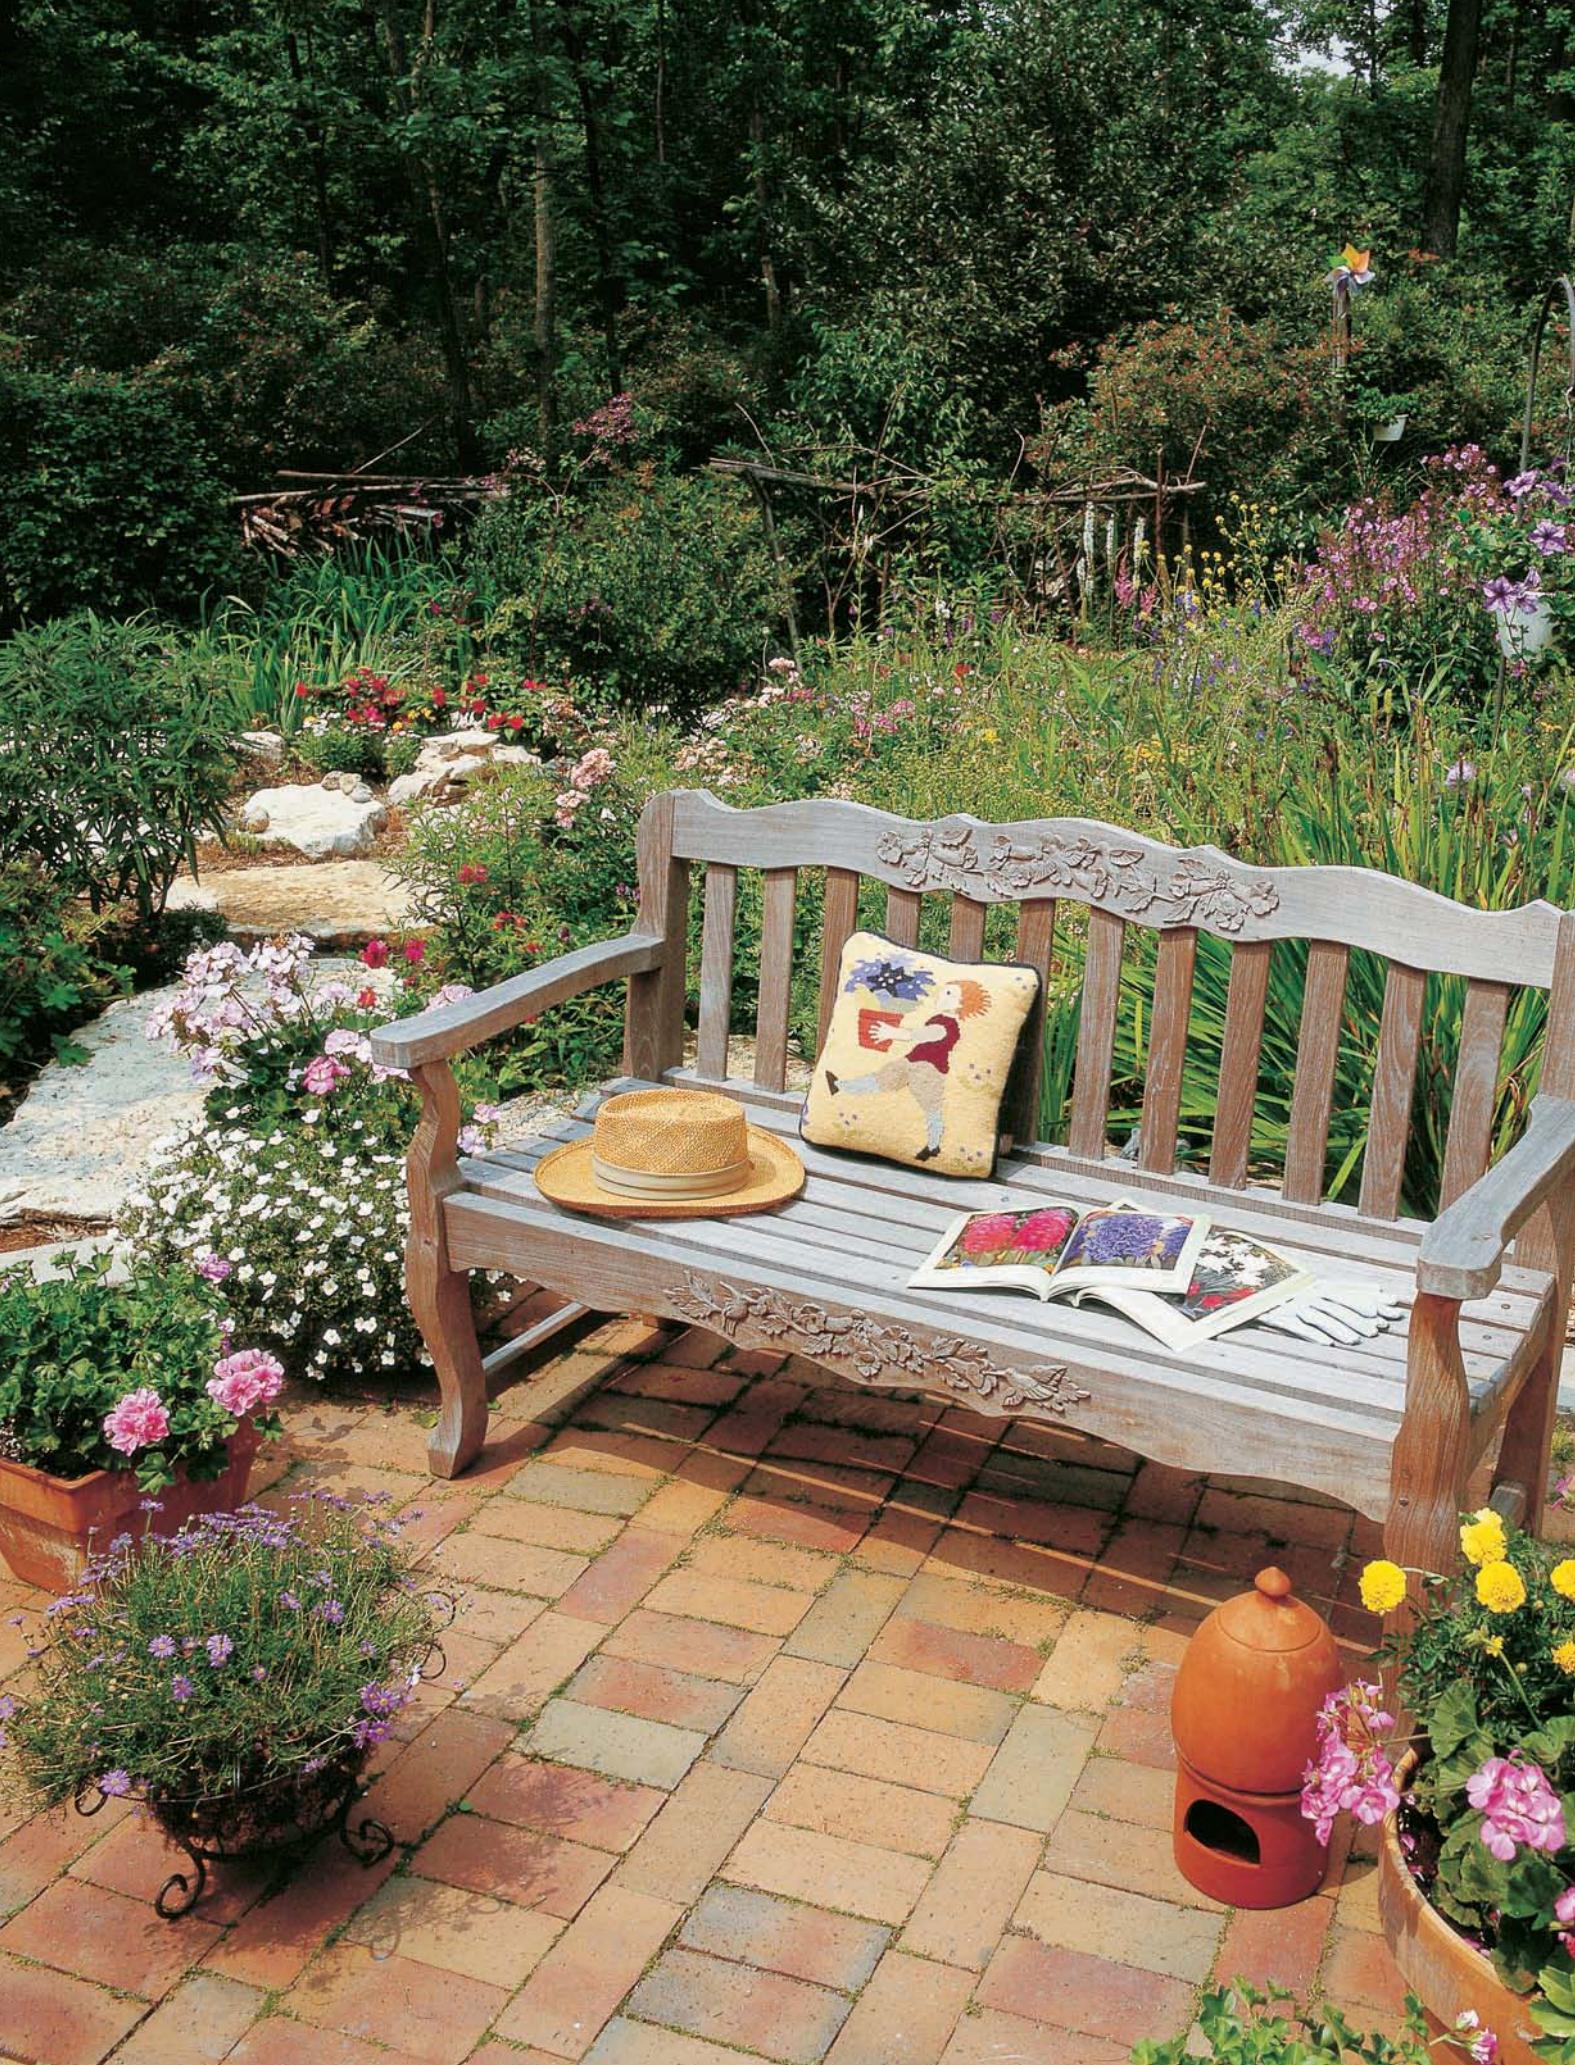
Garden ornaments such as pergolas, gazing balls, and benches are a good way for you to personalize your garden.
## LAYING A STEPPING STONE PATH
1 **PLACE STEPPING STONES** in a desired pathway. Rotating the stones for jaunty angles and asymmetrical lines is an easy way to liven up a backyard path. Stepping stones are available in a wide variety of textures, shapes, and sizes, so take the time to select what's right for your garden. Here, natural stones on turf provide a useful and decorative accent.
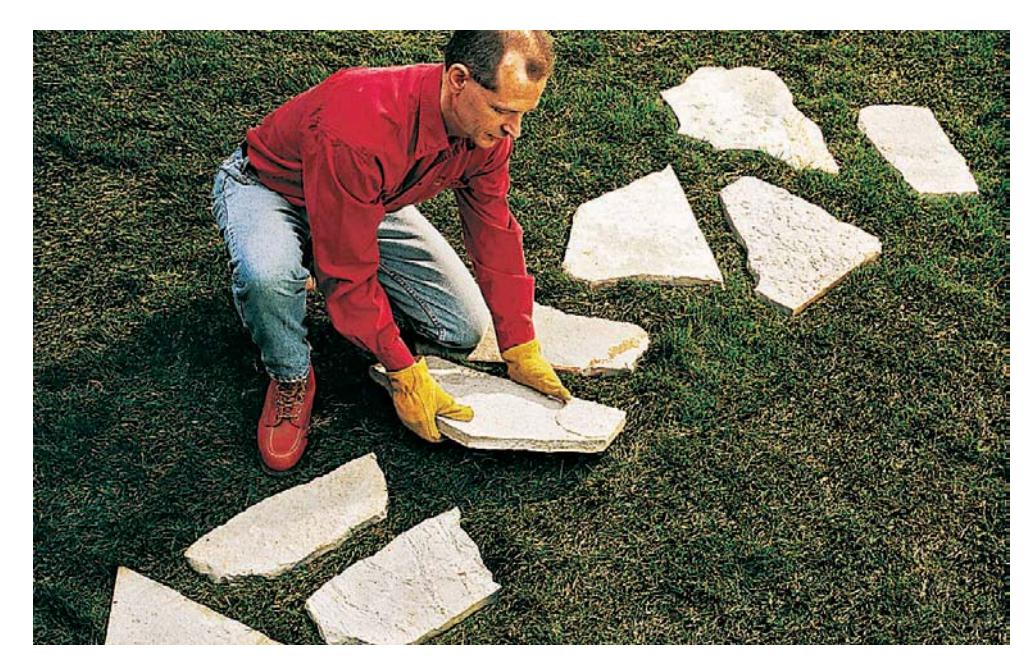
2 **ALLOW THE STEPPING STONES TO REMAIN** on the lawn for several days to kill the grass. This provides an outline for excavation and makes turf removal much easier.
## PATHWAY VARIETIES
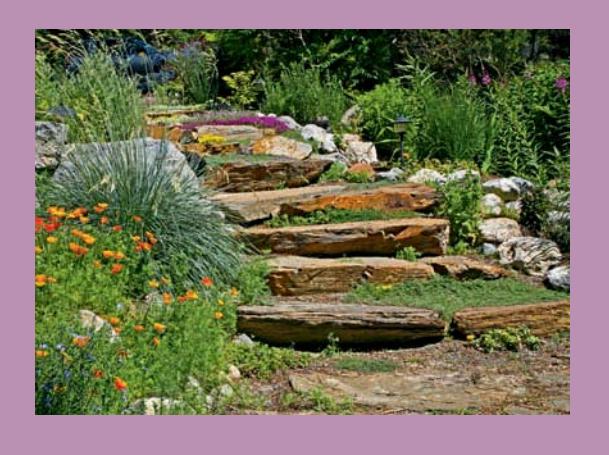
Not all pathways are flat or demand stone. This staircase is made of logs, and is a fine complement to the dense foliage all around. Take care, though—wood is slippery when it is wet. Consider installing a handrail alongside your steps. Use small plants and groundcovers to tie the steps into the path and the rest of the landscape.
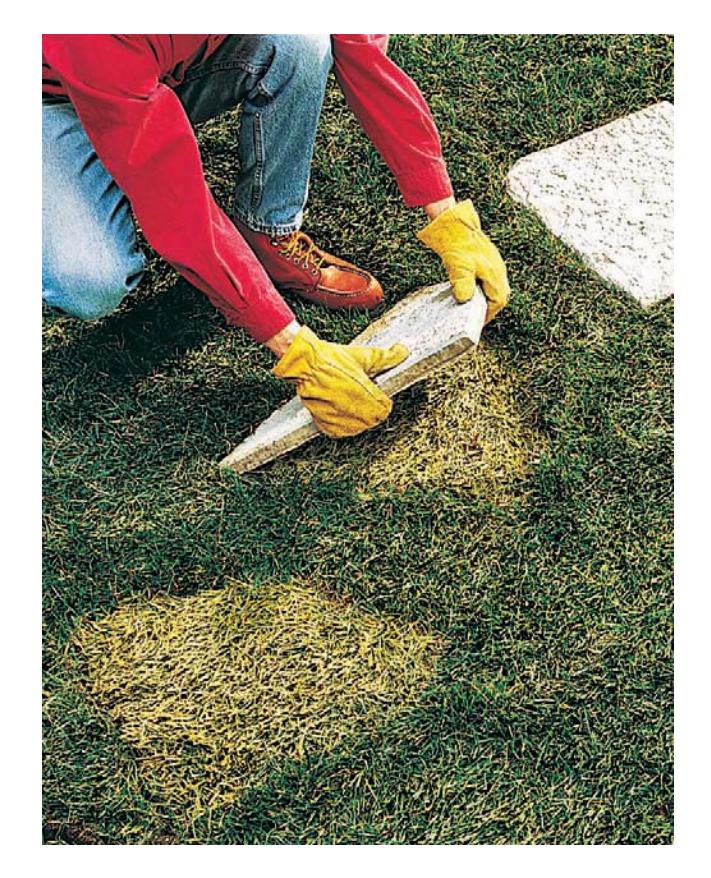
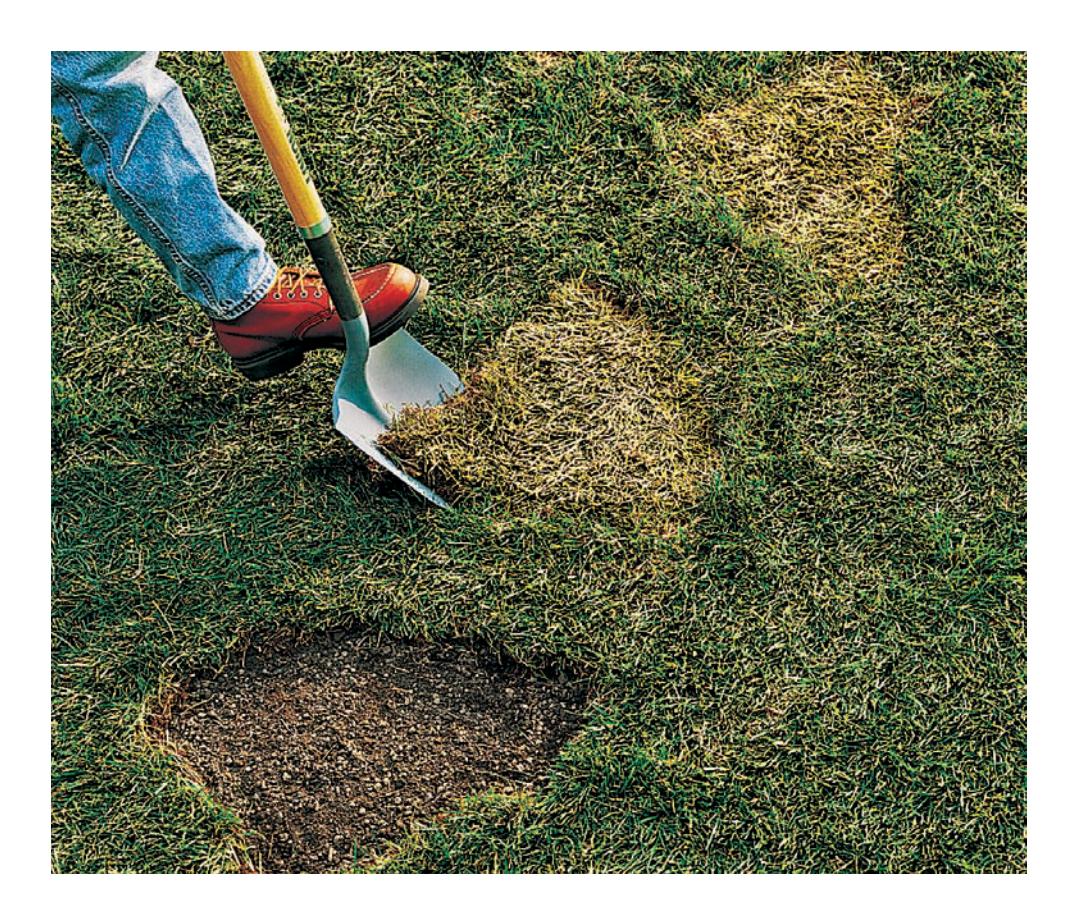
3 **DIG AROUND THE OUTLINE** for each stone and excavate the soil or turf. To allow room for a layer of sand to stabilize the stepping stone, dig each hole 2 inches deeper than the height of the stone. Spread sand in each hole.
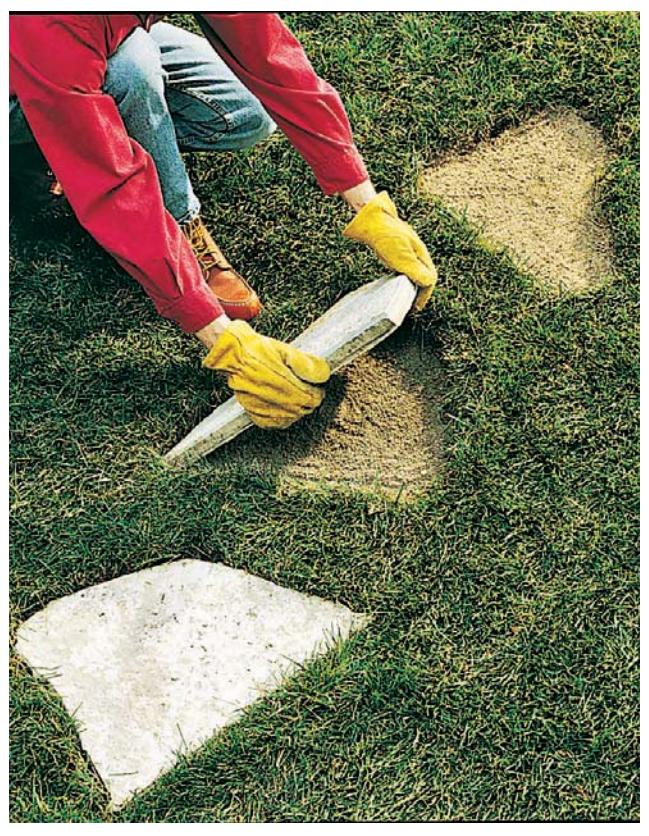
4 **PLACE STEPPING STONES** in sandfilled holes, adding or removing sand until each stepping stone is stable. Sand serves as grout, filling in the small gaps between the hole and the surrounding turf.
Urban gardeners often have to garden within the confines of courtyards, but they can still create a beautiful spot that serves a purpose as well as becomes a showplace for a variety of plants.
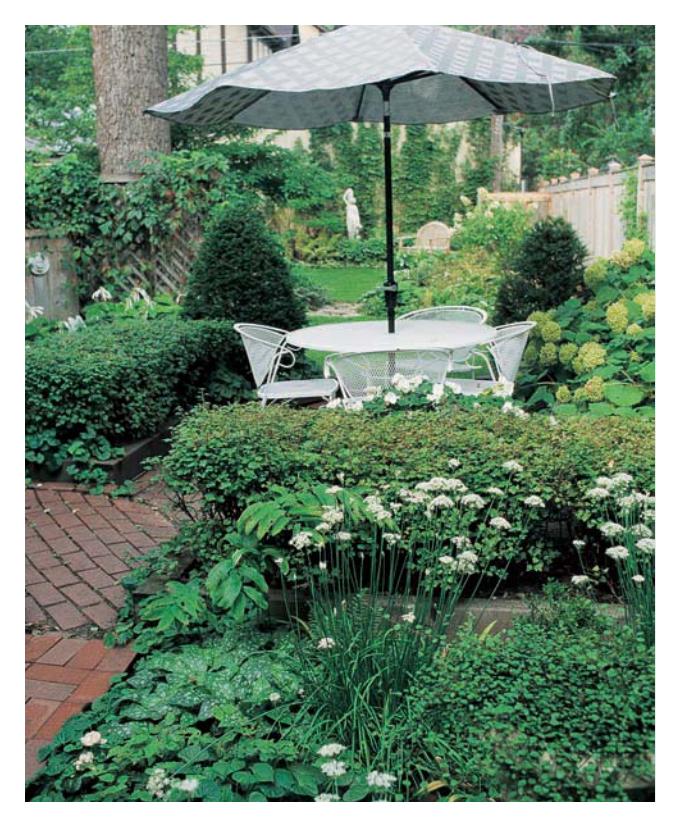
There are a few things to keep in mind when gardening in a small space. Dwarf cultivars of shrubs are good choices, as well as limiting your color palette. While this small city backyard garden includes a lot of plants, the color palette is limited to white flowers and plants with interesting foliage characteristics.
## MAKING THE MOST OF A SMALL SPACE
Gardening in a small space has its limits, but it need not be limiting. There are actually several advantages. It's much easier to keep up on maintenance, the initial cost is less, and you can pay attention to small details that get lost in larger spaces.
For the most part, small gardens are considered as a whole rather than part of a larger landscape. You can still have small rooms and areas, but everything should tie together and work as one composition. The principles laid out at the beginning of this chapter still apply. Decide what you want to be the main function of your small space (a place for entertaining, play, growing your own food, showcasing as many types of plants as possible) and work from there.
Obviously you won't be able to grow every plant you like, so it's important to start with a plant list and stick with it as much as possible. And also limit your color choices, maybe sticking with two or three main colors for more cohesion. Incorporate various textures within your color palette to increase interest and variety. With fewer plants, every plant will need to serve a purpose and ideally it will offer at least two seasons of interest.
You can use large shade trees, but make sure they are upright and vase-shaped rather than round. Prune them so they provide a nice ceiling but don't have lower branches creating heavy shade. A good alternative is to plant small trees that stay under 45 feet or so. You can also select large shrubs and prune them to small scale.
Since all of your plants will be viewed at close range, it is important they do well where they are planted. Sickly plants will really stand out. They should be removed and replaced with something better suited to the site. Keep up with maintenance and grooming for the same reasons.
## BALCONY GARDENING
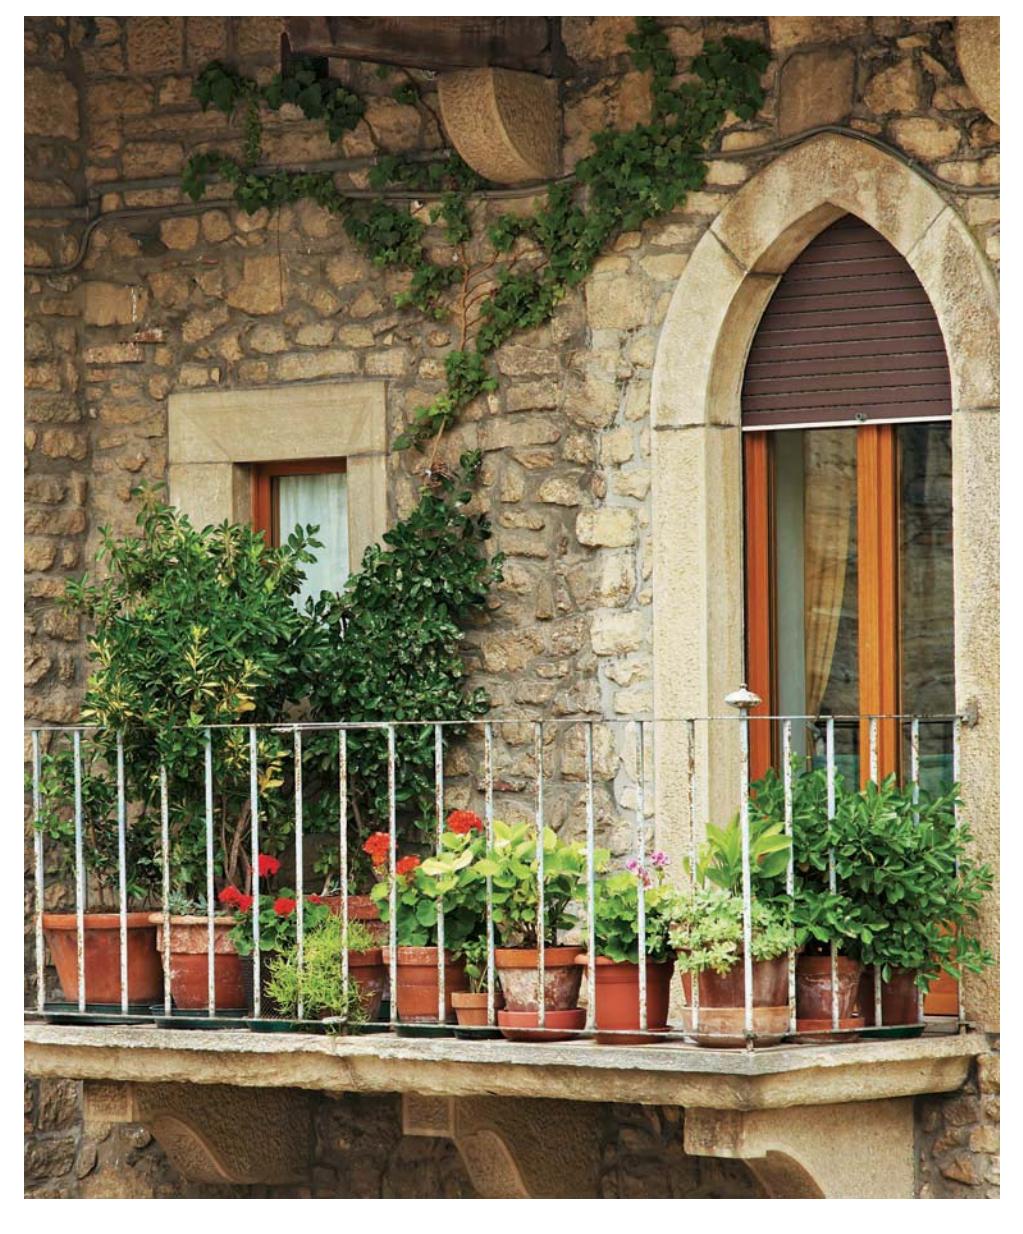
If you are an apartment dweller with only a balcony to garden outdoors, don't despair. With a few considerations you can turn your balcony into a very attractive and productive small-space garden.
First, you need to think vertically. Do everything you can to encourage plants to grow upward and downward rather than sideways. Install wall shelves and use trellises against a wall to train plants upward. Vining plants can grow down to cover your balcony edges.
Grow bags hang off the ground and have multiple holes in the front where you can plant annuals or small vegetables such as lettuces and herbs. These bags can be hung on the outside of your balcony railings to gain space. Another way to gain space is to raise your taller plants off the ground and place them on benches or plant stands and use the remaining space beneath them for smaller vegetables, herbs, salad greens, and flowers.
On the practical side, keep in mind the weight your balcony can bear. Large containers full of soil can be quite heavy so you may want to stick with lightweight container materials, such as plastic. Also consider container drainage. You don't want an angry neighbor below you because you've allowed water to drip down onto their balcony. Access to water is another consideration. Consider purchasing a hose that can connect to your kitchen sink and allow you to water plants on your balcony.
## THE UPSIDE OF SMALL GARDENS
- You are usually only dealing with one "room" rather than several, making design easier.
- It takes fewer plants to make a dramatic effect.
- Maintenance is easier.
- It's easy to create intimacy and define a space.
- Since you need less, you can afford more interesting plants and higher quality hardscape materials and ornaments.
- If your tastes change as your gardening evolves, it's much easier to rework the space.
As with all small-space gardening, be sure to keep your balcony garden plants healthy and well-groomed. This will not only make them better, but reduce your chances of insect or disease infestations, which can be devastating to a balcony garden and very difficult to control.
## GARDENING UP FRONT
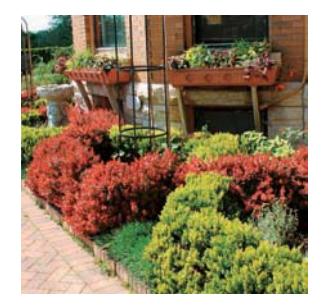
When thinking about a place for your garden, don't overlook the front yard. There's no law that says your front yard has to be planted in turfgrasses and look like every other front yard on the block. This is a great way for space-starved gardeners to find room for all the plants they want to grow. On many properties it is the area best suited to gardening. And it's a great gift to your neighbors and passersby.
However, there are a few things to consider before tearing up your front yard. The front yard probably isn't the best place for your vegetable garden, but you can certainly feel free to integrate a few edibles into any garden. Proper plant selection and good maintenance are vital. Nothing will set your neighbors off faster than if you dig up the front yard one day and let it be taken over by weeds while you wait for plants to fill in.
## BOULEVARD GARDENING
There are many reasons to garden on boulevards. From a gardening standpoint, they offer extended opportunities for space-starved urban gardeners. From an
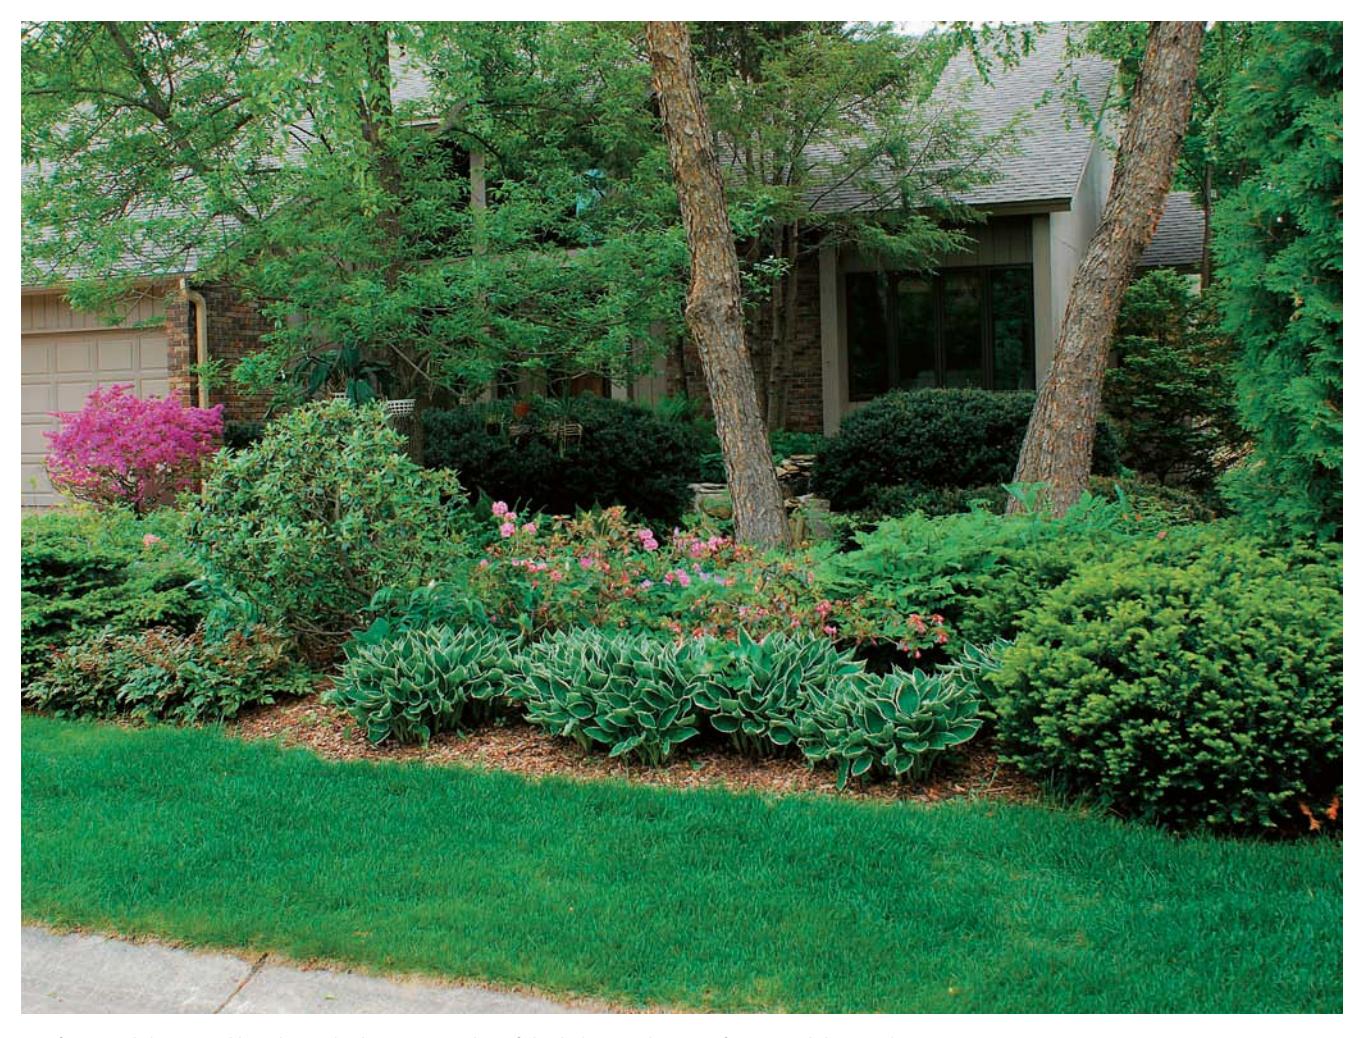
In a front yard dominated by a large shade tree, a garden of shade-loving plants is often a much better alternative to the struggle of trying to grow traditional turfgrasses.
environmental standpoint, they can be very effective at keeping grass clippings out of the street and storm sewers. But boulevards are among the most challenging spots to grow and maintain plants. The soil is usually compacted and low in fertility and often gets bombarded with road salt in winter. They are usually hot, dry and sunny unpleasant conditions for tending, and often the garden hose doesn't reach that far, creating maintenance issues. Consequently, most boulevards remain covered with poorly grown turfgrasses or weeds.
## TIPS FOR BOULEVARD GARDENING
- Good soil drainage is key since you need the water to percolate down rather than run off.
- Keep your soil line slightly below the sidewalk and curb heights to make sure no soil washes away.
- It's usually best to stick with low-growing clumping plants, but wider boulevards can handle shrubs and even small trees.
- Make sure your plants don't block people's ability to see at intersections.
- Stay away from prolific self seeders; even a couple extra plants can make this small space look weedy.
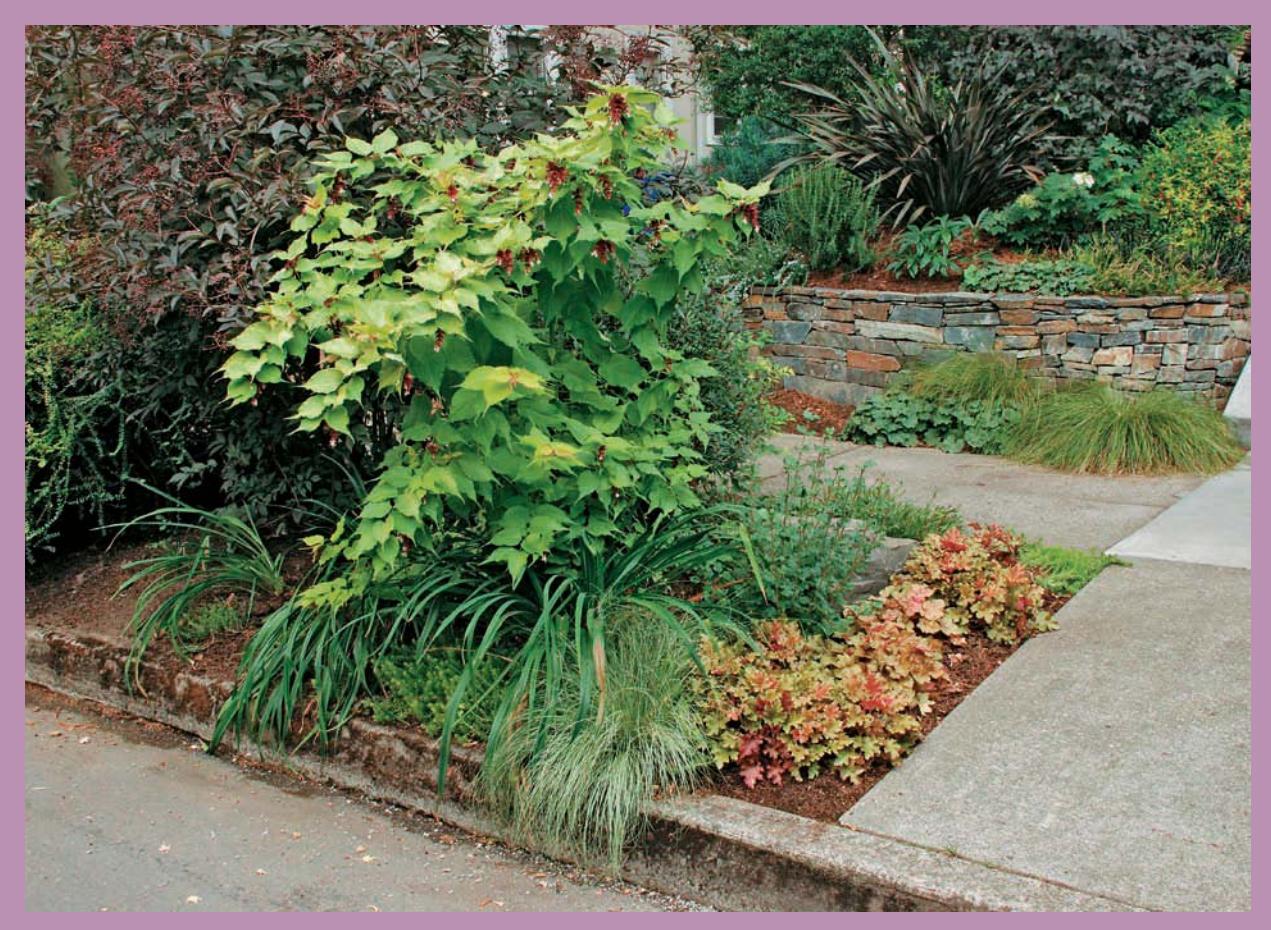
Boulevard strips, or tree lawns as they are sometimes called, are the narrow areas between the sidewalk and the street. As prevalent as they are in urban landscapes, boulevards are often neglected when it comes to gardening. This is unfortunate since they are in plain view of anyone who visits or passes by on the sidewalk.
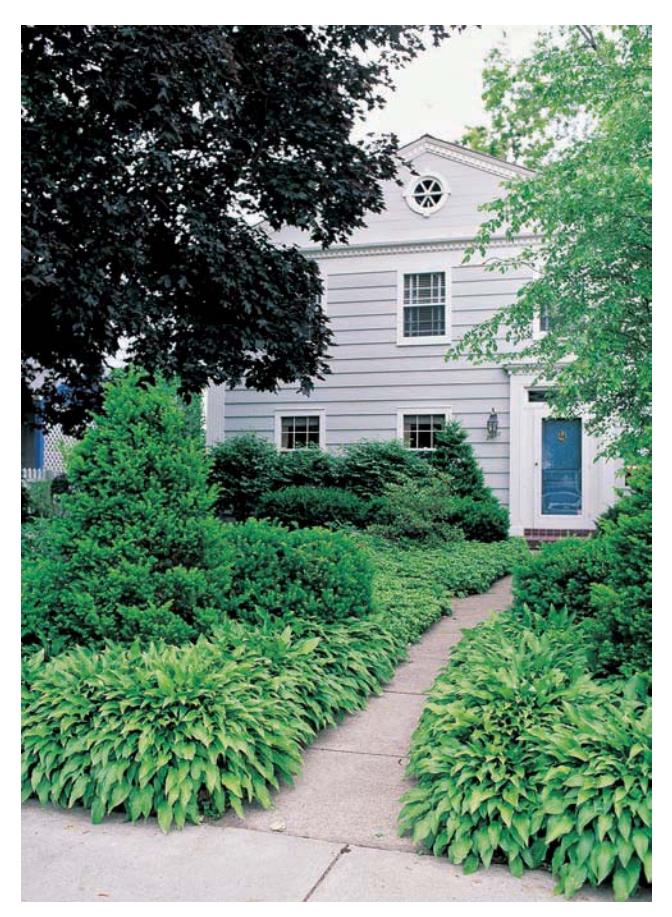
There's no rule that says a front yard has to be planted in lawn grasses. A neat, well-maintained planting of groundcovers, shrubs, and perennials can be just as effective and usually requires much less maintenance.
A few other things to keep in mind: Any plant growing over a foot in height will probably need to be cut back in fall, and plan on cutting back any remaining plants in spring and raking off the debris. Be aware of any city ordinances that govern boulevards. In most communities, homeowners own the space between the sidewalk and the street but the city has the legal right to enter this utility-filled area. Be aware that the city may need to dig up the boulevard or sidewalk to repair and upgrade utilities and you will be responsible for repairing any damage. Some cities also put height restrictions on boulevard plants.
## GOING TO POTS
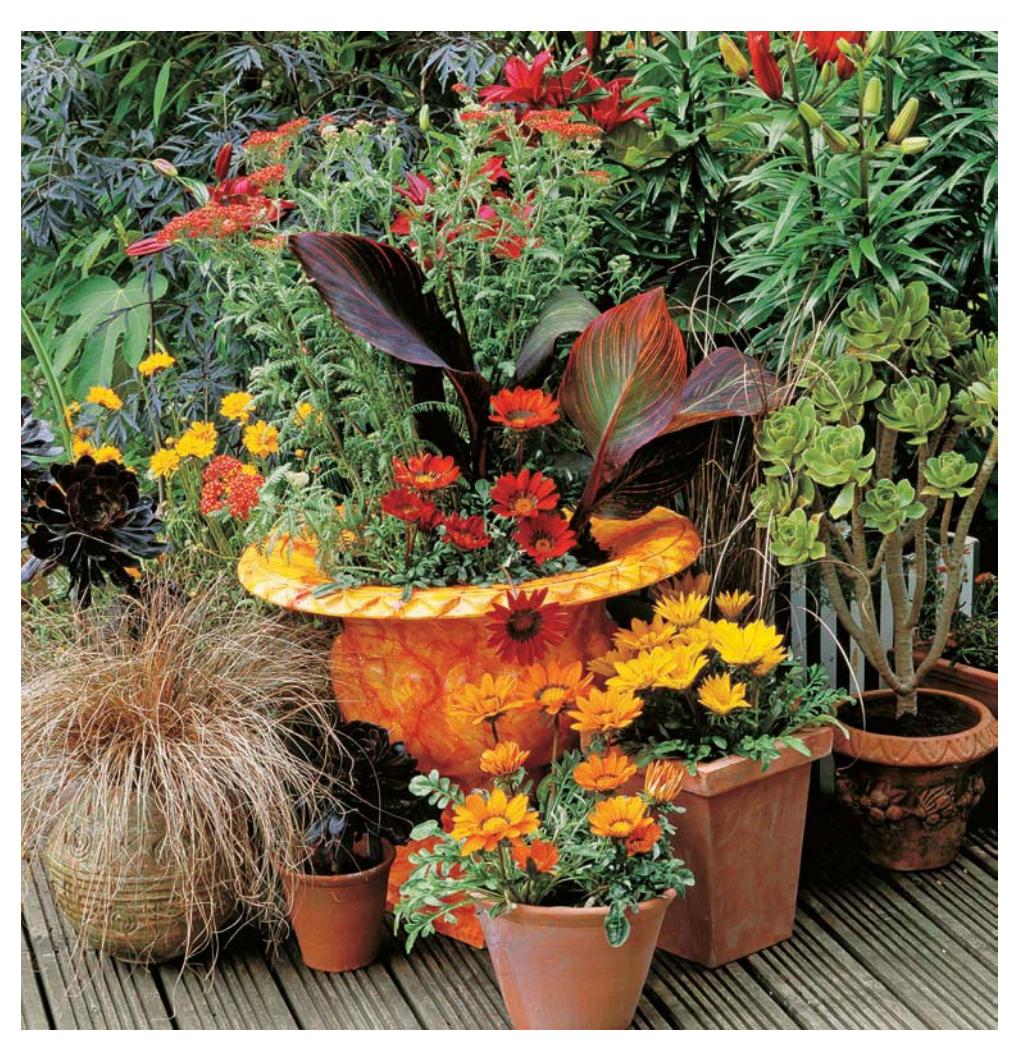
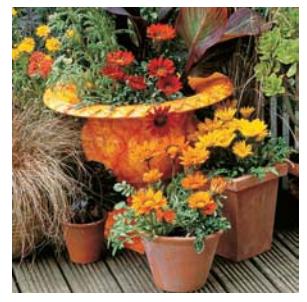
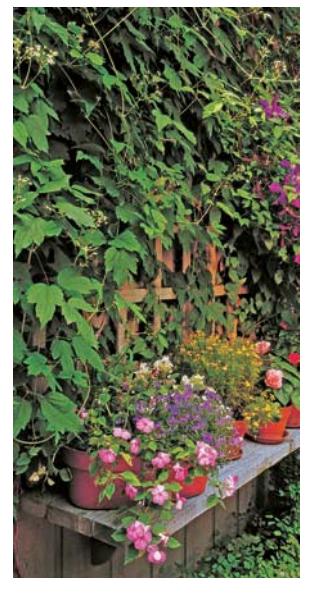
Whether you do it out of necessity or as an additional way to grow plants, container gardening is limited only by your imagination. It is an option open to anyone who wants an enjoyable and creative way to exercise a green thumb. It can range from a patio surrounded by large terra cotta pots filled with a mixture of perennials, annuals, and even shrubs to a simple pot of herbs on the deck. For space-starved gardeners or those with limited sunlight, it can provide a way to grow several different types of vegetables. And container gardens don't just have to sit on the deck or patio. Hanging baskets and wall planters are also options.
## Entry Gardens
The entrance to your home should be easy to spot, welcoming, and safe for arriving guests. Here are some tips for a successful entry garden:
- Keep it clean of debris; avoid plants that produce fruits or nuts that fall and can become slipping hazards.
- Edge the walkway with low-growing plants to make the path feel wider.
- Install outdoor lighting.
- If you have room, add a bench or small table where people can rest or set packages.
- Use brightly colored plants to draw attention to the entry. Guests shouldn't have to wonder where it is.
- Make sure your paving material is safe to walk on, even when wet.
- Do not use mulch on paths near entryways. It is too easily tracked indoors on shoes.
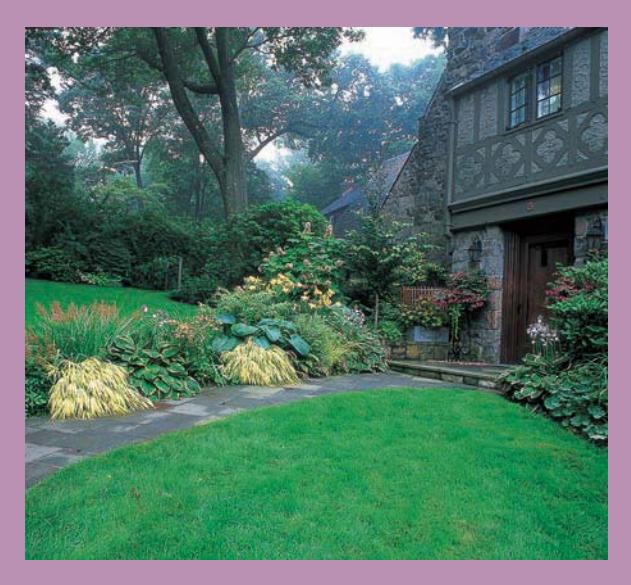
Plants along a front walkway should be low and mounding so they do not tower over visitors using the front door.
One often-overlooked benefit of container gardens is the portability. You can grow showy annuals in a container in the sunlight and then move them into a shady patio or deck garden when you entertain, just as you would move a bouquet of flowers onto your dining room table indoors. The container can be moved back into the sunlight after a few days to continue growing. Along the same lines, a few containers can be used in a perennial border to perk up areas going through a "dry spell" in terms of color. When other things come into bloom the containers can be moved to brighten up other areas.
Container gardens are easy to change out with the seasons. You can start with a pot of spring bulbs, move on to a show of annuals, get through the fall with mums, ornamental kale, and pansies, and then go through the winter with evergreens and showy seedpods and dried flowers.
Remember that houseplants make good container plants as well. Many enjoy "vacationing" outside for the summer where they can soak up the extra humidity. Just make sure to acclimate them gradually and don't put them out until after all danger of spring frost is past and temperatures are consistently in the 50s at night.
Even if you don't have room to plant a full-sized garden, you can get the same effect by grouping containers. This deck grouping includes hot-colored gazania flowers, the bold, tropical leaves of a dark purple canna, and an ornamental grass for textural contrast.
## CONTAINER TYPES
**Plastic pots** are inexpensive and easy to move, but they usually only last one or two gardening seasons.
Plants grow well in **terra cotta pots** but they dry out rapidly and may need daily water checks.
**Glazed ceramic pots** are good choices if they have several drainage holes.
**Wooden containers** are inclined to rot. Redwood and cedar are more rot-resistant and can be used without staining or painting. Avoid wood treated with creosote, penta, or other toxic compounds.
**TIP:** Be sure the container is large enough. Small pots restrict the root area and dry out very quickly. The size and number of plants to be grown will determine the size of the container used.